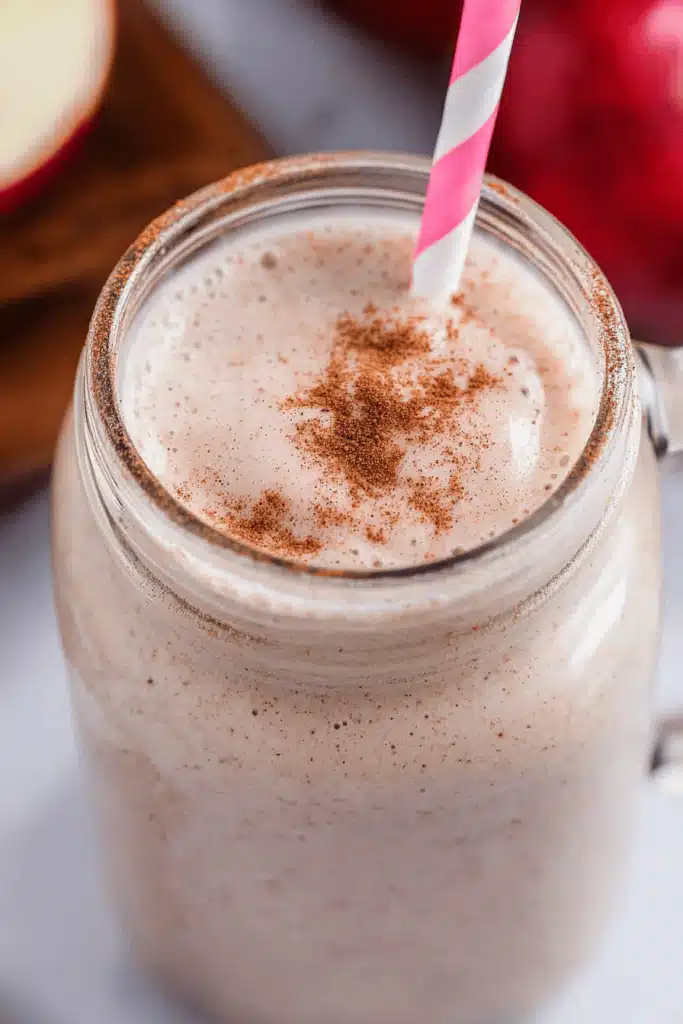
There’s something about childhood summer afternoons that instantly come flooding back when I sip on a perfectly chilled Orange Creamsicle. Maybe it’s the bright, citrusy burst paired with creamy vanilla that makes my taste buds dance, or how this simple treat takes me straight back to those lazy days filled with laughter and sun. Over the years, I’ve discovered that you can capture that nostalgic magic not just in freezing form, but also in a glass. My orange creamsicle smoothie is a favorite in my house—smooth, sweet, and just enough citrus zing to wake you up. It’s the kind of recipe I turn to when I want a treat that feels indulgent, but is actually good for you. Plus, it’s surprisingly easy to whip up—no fuss, no bake, just all the flavors of summer in every sip. Trust me on this one: once you make it, it’ll become your go-to post-workout refreshment or quick breakfast. Honestly, I make this almost every week—my kids ask for it all the time—and I love how versatile and satisfying it is. It’s a lifesaver on busy nights when I need something quick but tastes like a special dessert. And the best part? It disappears in minutes at my house—they can’t get enough of that creamy, citrus cloud!
Thank you for reading this post, don't forget to subscribe!What is orange creamsicle smoothie?
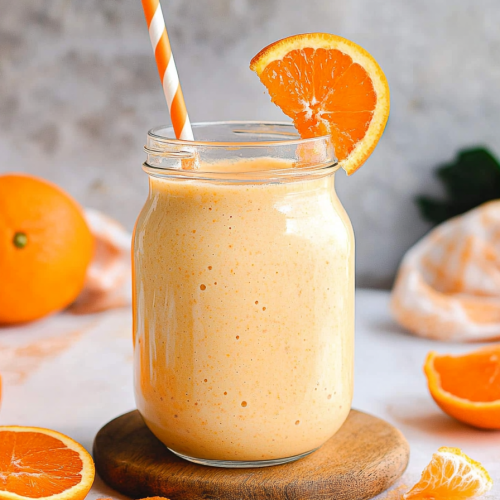
Think of the Orange Creamsicle smoothie as a grown-up, healthier cousin of that classic summer treat. It’s essentially a blend of fresh oranges—sometimes with a splash of juice—a generous dollop of vanilla yogurt or ice cream, and a touch of sweetness. The magic happens when you whirl everything together until it’s smooth and frothy, mimicking the creamy, citrusy delight you remember from ice cream trucks. The name “orange creamsicle” comes from the iconic popsicle—bright orange exterior with a creamy vanilla inside—so that’s exactly what this smoothie captures. It’s a fun, vibrant drink that’s perfect for mornings, post-gym refueling, or even as a satisfying snack on a hot day. I personally love how it feels like a treat but is packed with vitamins and goodness. Whether you’re a citrus lover or just craving something chilly and sweet, this smoothie hits all the right notes. Plus, you can customize it—add a little honey if you want more sweetness or toss in some banana for extra creaminess. It’s simple, delicious, and just the right size for a quick refreshment any time of day.
Why you’ll love this recipe?
What I love most about this Orange Creamsicle smoothie is how it combines all those childhood flavors into one gorgeous glass—bright, tangy, and velvety smooth. It’s honestly what I reach for when I need a pick-me-up, especially on sweltering summer afternoons. The flavor profile alone is enough to make you smile—fresh oranges paired with that warm vanilla undertone. But beyond taste, the simplicity is unbeatable. With just a handful of ingredients and a blender, you’ve got a drink that looks as pretty as it tastes. And let’s be honest: this smoothie is so budget-friendly that I almost feel guilty about how good it is. No fancy ingredients or complicated steps—just wholesome, fresh, vibrant flavors that come together in minutes. It’s also incredibly versatile. I’ve tested this with all sorts of substitutions—like almond milk instead of yogurt or adding a splash of coconut extract for a tropical twist—and honestly, it’s always a win. I especially love that it’s adaptable for different dietary needs, whether you want it dairy-free or need to cut back on sugar. My kids ask for this all the time, especially when they want something sweet and creamy without the guilt. It’s become our family’s go-to weeknight treat, and I swear, once you try it, you’ll see why!
How do I make orange creamsicle smoothie?
Quick Overview
This smoothie is a breeze to make—just blend fresh oranges, creamy yogurt or Ice Cream, and a touch of honey or maple syrup until everything is silky smooth. I usually start by peeling my oranges, juicing one or two for a brighter flavor, and then combining it with thick vanilla yogurt. A quick blitz in the blender, and boom—you’ve got a frosty, flavorful drink that’s perfect for mornings or after a jog. The best part? It’s totally customizable—add banana for extra creaminess, toss in some frozen pineapple for a tropical twist, or even sprinkle in some chia seeds for extra nutrition. It’s honestly foolproof, and once you get the hang of it, you’ll have a batch ready in under five minutes. That’s why I love making this as a quick breakfast or a refreshing afternoon treat. Plus, it looks so pretty in a glass—bright orange with that fluffy cream swirl. It’s basically summer in a glass, and honestly, I can’t get enough!
Ingredients
For the Main Batter:
– 2 medium oranges (preferably in season and sweet! I like Valencia or navel oranges for a juicy burst)
– 1 cup vanilla Greek yogurt or vanilla Ice Cream (for that creamy flavor)
– 1-2 tablespoons honey or maple syrup (optional, for extra sweetness)
– ½ cup milk (dairy or plant-based—almond, oat, coconut, whatever you prefer)
For the Filling:
– Extra orange segments or a splash of orange juice for a fresher taste
– Optional: a frozen banana for creaminess
– Additional vanilla or citrus zest for an extra punch
For the Glaze:
– If you want to turn this into a fun layered dessert or smoothie bowl, a drizzle of honey or a dollop of whipped cream works great as a topping—just keep it simple so it doesn’t overpower the smoothie’s bright flavor.
Step-by-Step Instructions
Step 1: Preheat & Prep Pan
No baking here, but I do suggest rinsing your oranges and peeling them carefully. If you’re using fresh oranges, I peel them mostly because that tricky white pith can make the smoothie a bit bitter. No heat involved, so skip the oven—just grab your blender and get ready to whirl! If you’re making a smoothie bowl, prep your toppings now (granola, coconut flakes, whatever you like). Easy peasy.
“The Bright Citrus Smoothie Recipe turned out amazing. My kids asked for seconds. Saving this one!”
Step 2: Mix Dry Ingredients
Honestly, with this recipe, the “dry ingredients” are basically the oranges and any zest you want to add—no flour or baking powders here! So, think of this as preparing your fruit and flavor enhancers. If you’re adding a frozen banana or other fruits, peel and freeze them ahead. I always do this when I want an extra creamy texture—frozen banana is a game-changer.
Step 3: Mix Wet Ingredients
In your blender, squeeze the juice from your oranges, then add the peeled segments. Pour in the yogurt, honey, and milk. I like to measure everything directly into the blender to keep things quick. Sometimes, I pop in a teaspoon of vanilla extract or a little orange zest—makes it extra flavorful. Blend until everything is fully combined—I usually give it about 30-45 seconds. Watch for the frothy, smooth consistency—if it’s too thick, a splash more milk will loosen it right up.
Step 4: Combine
Once your ingredients are in the blender, blend on high until silky and smooth. If it’s too runny, just toss in another piece of frozen fruit or a little more yogurt. Overmixing isn’t a big deal here—just go until you get that perfect, pudding-like texture. If you notice bits of unblended fruit, pulse a few times, but don’t overdo it. The goal is velvety and luscious in every sip.
Step 5: Prepare Filling
If you want a layered look or extra flavor, prepare some orange segments or a few frozen pineapple chunks. You could also stir in a teaspoon of vanilla bean paste for a more intense vanilla flavor. Or, for a fun twist, swirl in a spoonful of honey or a little orange marmalade before pouring into glasses for a pretty layered effect.
Step 6: Layer & Swirl
Pour the base mixture into glasses. For a marbled effect, add dollops of more orange pulp or a different flavor (like a splash of raspberry or strawberry puree) and swirl gently with a straw or spoon. This technique looks pretty and adds a burst of flavor in every sip. I love making this look like a sunrise—bright, inviting, and totally Instagram-worthy!
Step 7: Bake
Again, no baking here—just the blending magic. But if you’re turning this into a frozen treat, pour into popsicle molds and freeze for at least 4 hours. That way, you get a homemade creamsicle pop that’s pretty much irresistible.
Step 8: Cool & Glaze
Serve immediately or chill in the fridge for 15-20 minutes if you prefer a colder drink. I love adding a drizzle of honey or a sprinkle of toasted coconut on top just before serving—it makes the presentation extra special. If making a smoothie bowl, spread it thick in a bowl, then decorate with fresh fruit, granola, and maybe a tiny drizzle of honey for that dazzling finish.
Step 9: Slice & Serve
Pour into your favorite glasses or bowls, top with your favorite toppings, and enjoy! If you’re making popsicles, just insert sticks and wait patiently for the freezer to do its magic. When ready, run the molds under warm water for a few seconds to loosen, then slide them out for a perfect, frozen creamsicle treat. Your family will thank you!
What to Serve It With
This smoothie is a fantastic standalone, but I love pairing it with light breakfast bites or a brunch spread. Think tangy lemon scones, a basket of freshly baked muffins, or even a cheesy quiche for a brunch vibe. It’s also perfect as a refreshing post-workout recovery drink—whey or plant-based protein powders blend in well if you want a little extra boost. For family dessert, serve it in pretty glasses with sprigs of mint or a colorful straw—instant party! On hot days, I sometimes pour it into popsicle molds and freeze—my kids go crazy over the homemade creamsicle pops. This drink also pairs beautifully with grilled fruit or a simple green salad drizzled with citrus vinaigrette. Basically, it’s a versatile crowd-pleaser that can take you from breakfast to dessert in no time, all while bringing those sunny summer feelings right into your kitchen.
“Packed with flavor and so simple. Exactly what I wanted from this Bright Citrus Smoothie Recipe!”
Top Tips for Perfecting Your Orange Creamsicle Smoothie
I’ve tested this recipe more times than I can count, and here are a few tips I swear by:
- Zucchini, you ask? Well, I haven’t added zucchini to this, but I’ve tried similar smoothies with it chopped very finely—mainly to sneak in extra veggies. If you do, make sure to squeeze out excess moisture so it doesn’t water down your drink.
- Mixing tip: Be cautious not to overblend once you add extra ingredients like bananas—they can turn the smoothie too runny if you go crazy. Just pulse until combined.
- Swirling magic: Layer your fruit purees and swirl gently with a toothpick or small skewer. Fun for kids and looks gorgeous!
- Ingredient swaps: Coconut yogurt makes it more tropical, cashew milk adds creaminess, and honey can be replaced with agave or maple syrup. I’ve even experimented with sunflower seed butter for a nut-free version—delicious!
- Baking or freezing tips: If you plan to make it into popsicles, be sure to leave a little space at the top of the molds—they expand during freezing. I learned this the hard way!
Also, try to use ripe oranges—they yield more juice and flavor. When in doubt, taste your mixture before pouring it out—adjust sweetness or acidity with more honey or a splash of lemon juice. That little tests helps prevent any blandness or overpowering citrus. The secret is balancing brightness with creaminess, and with just a few tweaks, yours will be perfect every time.
Storing and Reheating Tips
This smoothie is best enjoyed fresh, but if you have leftovers, here’s how to keep it that way:
- Room temperature: It’s generally best to avoid leaving smoothies out for more than an hour, especially in warm weather, because they can separate quickly. If you’re serving at a gathering, pour just before everyone sits down.
- Refrigerator: Store in an airtight bottle or jar for up to 24 hours. Shake or stir before drinking—separation is normal, and just a quick blend or stir will restore the creaminess.
- Freezing: Pour leftovers into freezer-safe containers, leaving room at the top for expansion. Thaw in the fridge or run under warm water for a few seconds when you’re ready to enjoy again. Keep in mind that freezing can slightly alter the texture, making it a bit icier, but still delicious!
- Glaze & toppings: If you’ve added a glaze or toppings, add those just before serving to keep their texture fresh. If you freeze a smoothie with toppings, expect some sogginess upon thawing, so it’s better to add toppings fresh.
This way, your creamy, citrusy treat stays good in your fridge or freezer without losing its charm. I’ve kept leftovers for a day or two without fuss, and they still taste amazing—just give it a quick stir or shake, and you’re good to go.
Frequently Asked Questions
Final Thoughts
If you’re anything like me, summer tastes like bright oranges and that creamy nostalgia of childhood treats. This orange creamsicle smoothie captures that sunshine in a glass—refreshing, sweet, and so easy to throw together. It’s become my personal comfort drink, whether I need a quick breakfast, a post-workout boost, or just a moment of joy during the day. Plus, it’s packed with wholesome ingredients and customizable to your taste. I love experimenting with different fruits, dairy or plant-based milks, and toppings. The best part? My kids get just as excited about this as I do—they call it “the orange magic,” which I think is pretty adorable. It’s a simple way to add a splash of sunshine to any day, and I hope you fall in love with it as much as I have. Don’t forget to share your creations and tweaks—I’d love to hear how yours turns out. Happy blending, friends!
orange creamsicle smoothie
Ingredients
Main Ingredients
- 1.5 cups fresh orange juice
- 0.5 cups vanilla ice cream
- 2 tablespoons honey
- 0.5 cups milk
- 1 teaspoon orange zest
Instructions
Preparation Steps
- Add orange juice, vanilla ice cream, honey, milk, and orange zest into a blender.
- Blend on high until smooth and creamy.
- Pour into glasses and serve immediately.


