You know those moments? The ones where a craving hits, a deep, undeniable urge for something sweet, something decadent, something that just *feels* like a hug in edible form? That’s when I reach for this Boston cream fudge recipe. It’s not just fudge; it’s an experience. My grandma used to make a Chocolate Cake with a creamy custard filling and a shiny glaze, and this Boston cream fudge is like her legendary cake, but condensed into little squares of pure bliss. Seriously, if you’ve ever loved a classic Boston cream pie or even a good Boston cream doughnut, prepare yourself, because this fudge takes all those amazing flavors and elevates them. It’s rich, it’s creamy, it has that perfect chocolatey-vanilla swirl, and it’s surprisingly simple to whip up. I’ve made this for countless potlucks, family gatherings, and even just for a Tuesday night treat when the day felt a little too long. It always, *always* disappears faster than you can say “more, please!”
Thank you for reading this post, don't forget to subscribe!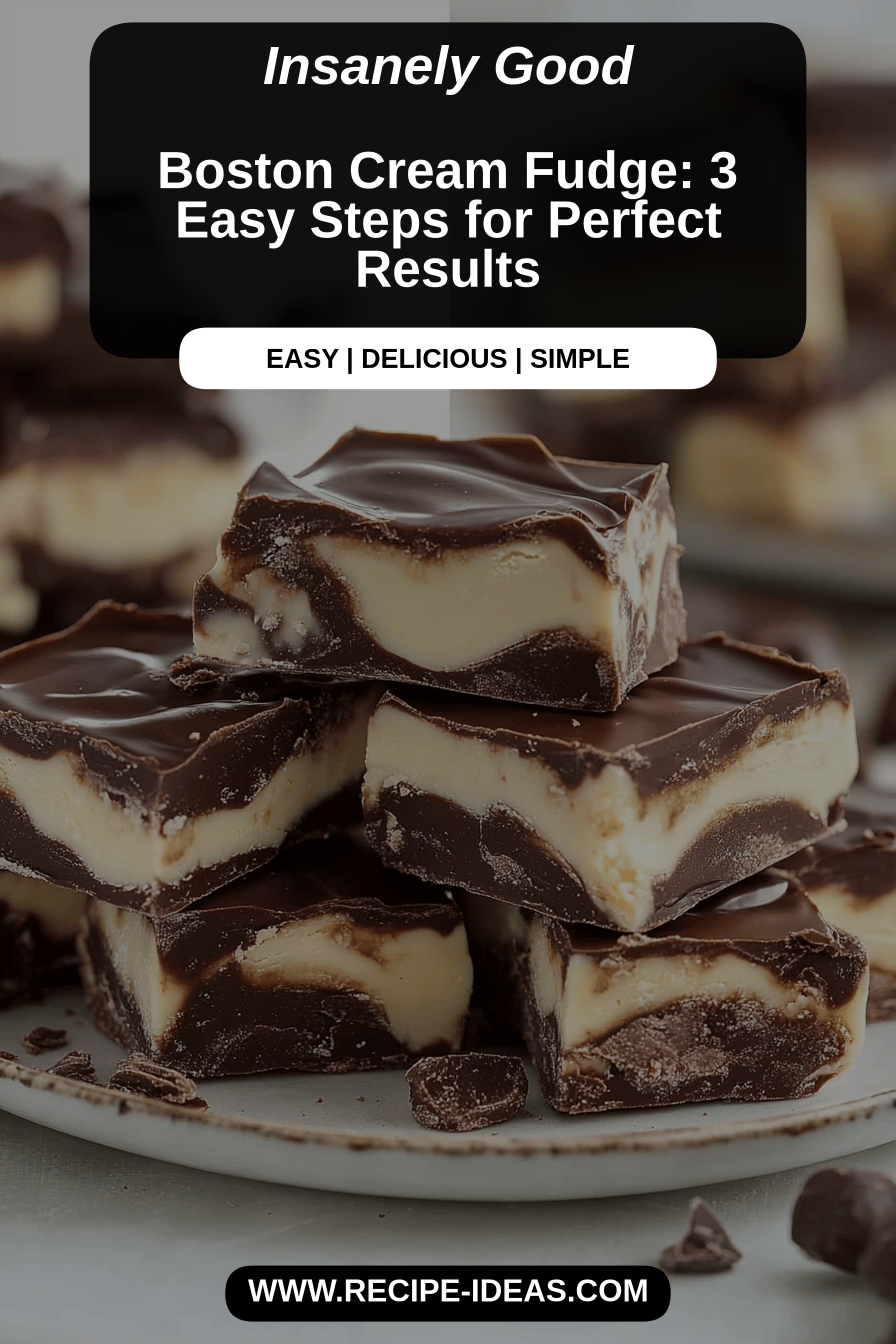
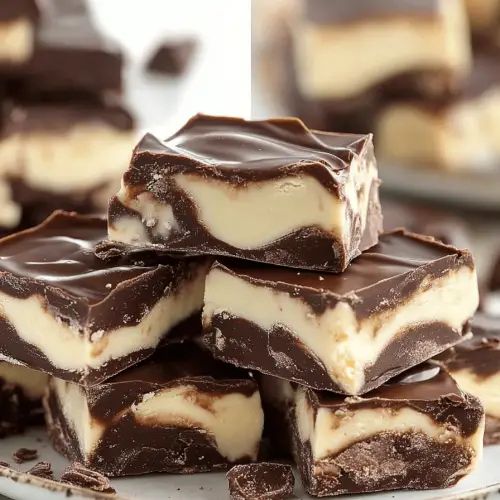
What is Boston Cream Fudge?
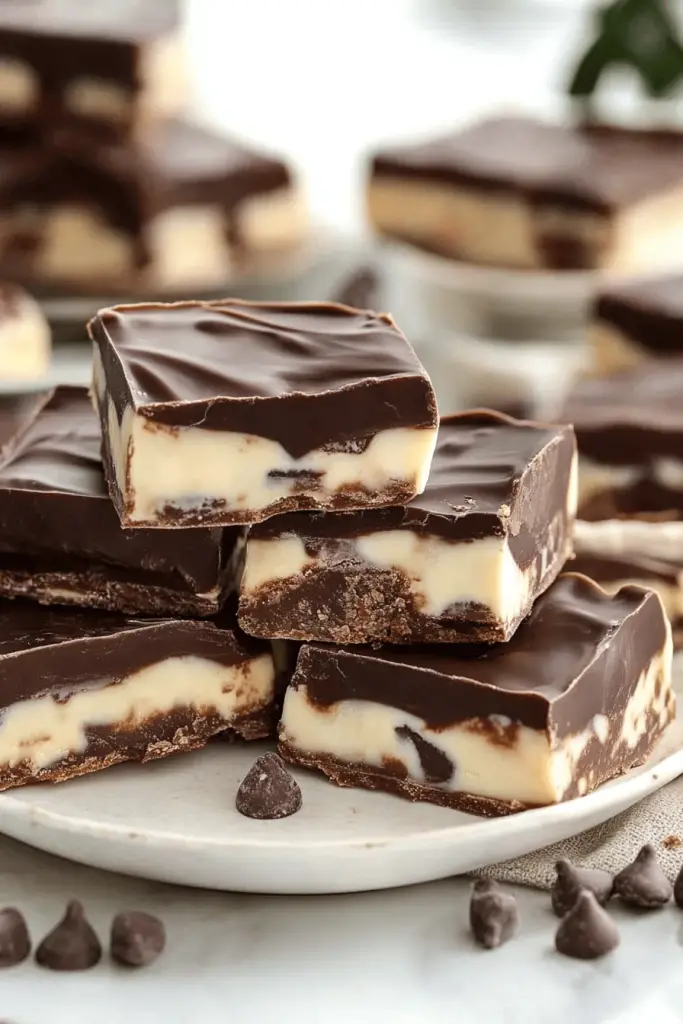
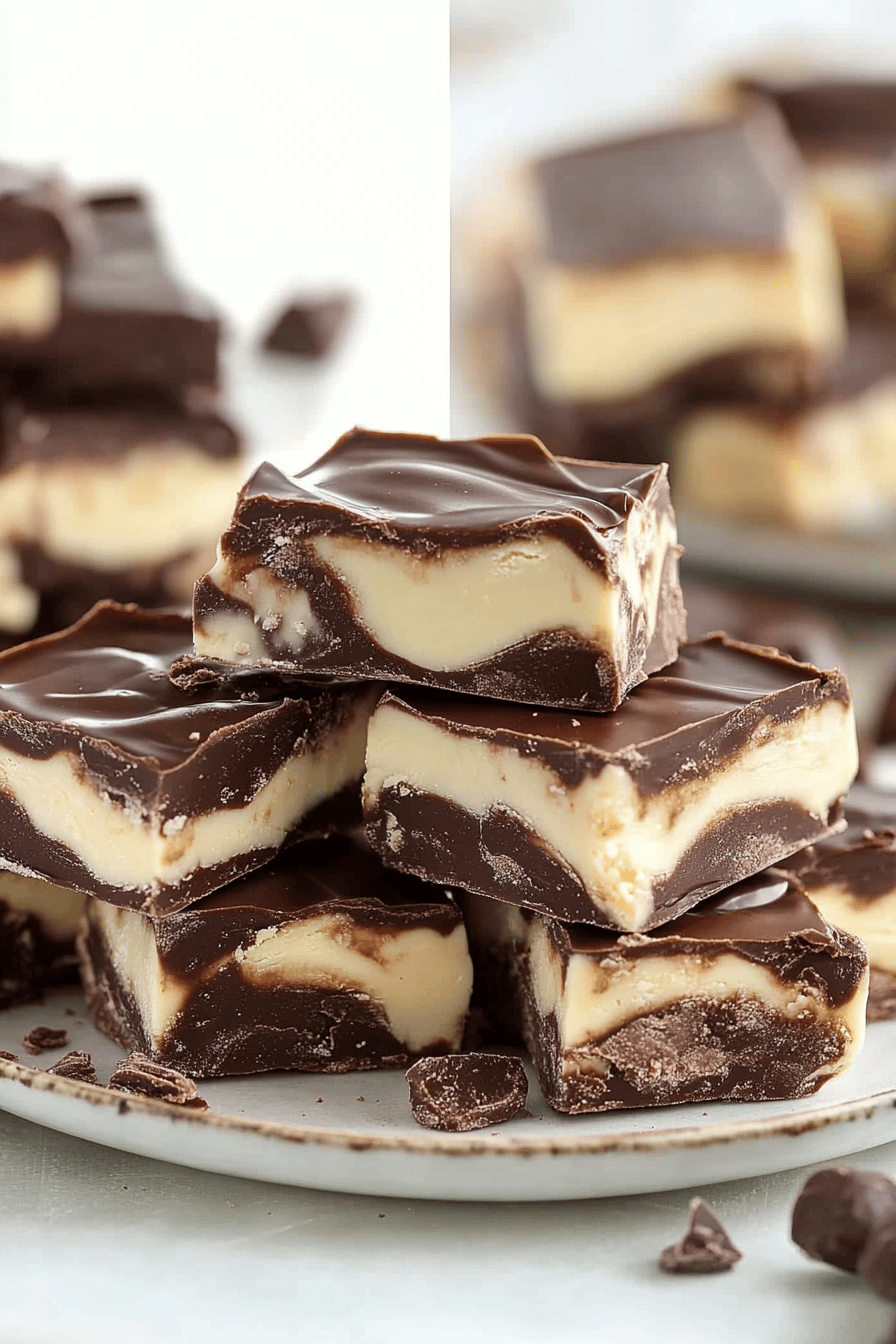
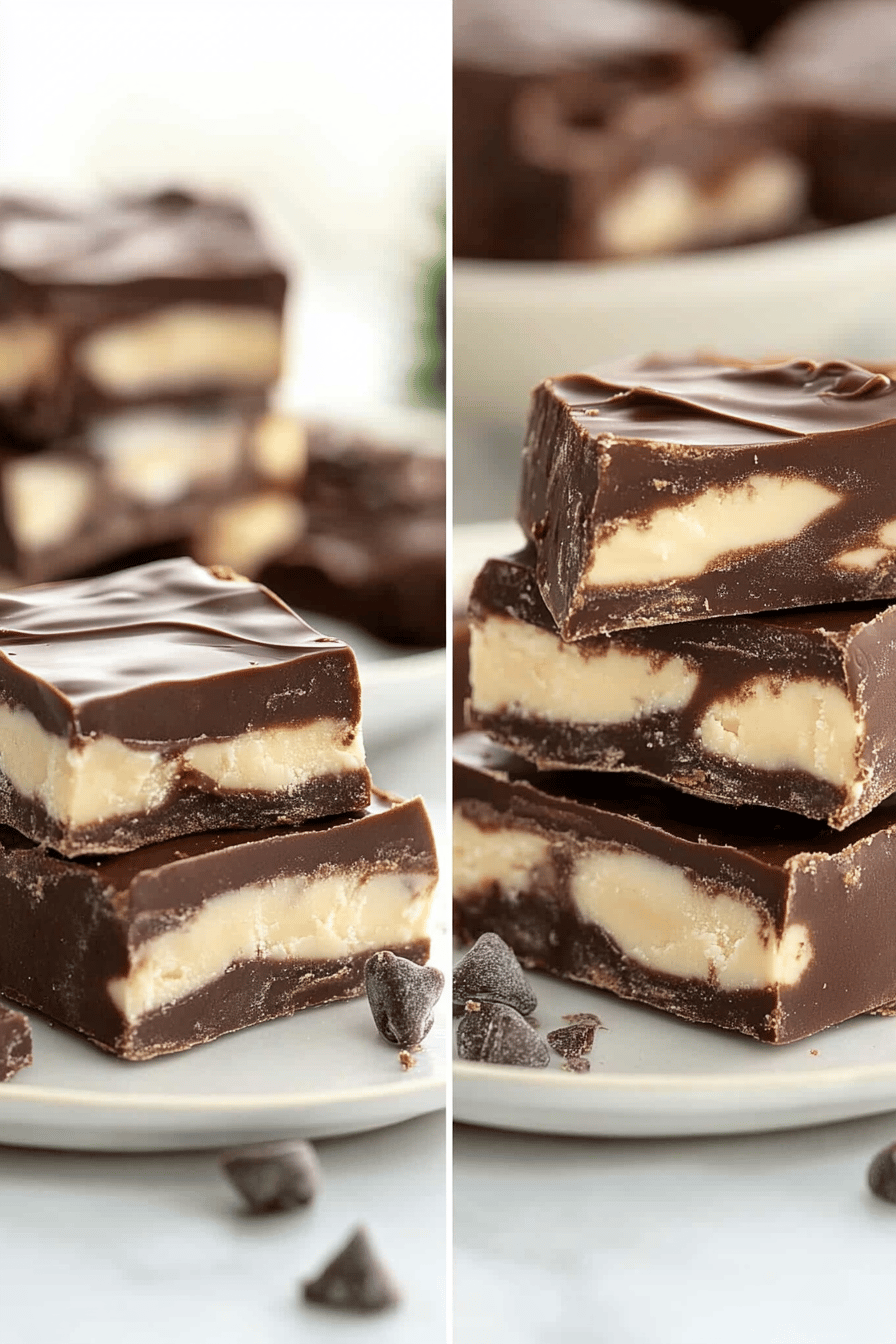
So, what exactly is this magical creation? Think of it as the best of both worlds: the intensely satisfying, melt-in-your-mouth texture of classic fudge, infused with the beloved flavors of a Boston Cream pie. We’re talking a rich, creamy vanilla custard layer, swirled with a decadent chocolate ribbon, and topped with a smooth, shiny chocolate glaze. It’s essentially a deconstructed, super-concentrated, intensely delicious version of that iconic dessert. It’s not your average grainy fudge; this is smooth, almost silken. The name comes from its inspiration, of course, and it perfectly captures the essence of what you’re getting: the comforting familiarity of chocolate and cream, in a convenient, bite-sized package. It’s the perfect answer when you want that classic flavor combination without the fuss of baking a whole pie or cake.
Why you’ll love this recipe?
Honestly, where do I even begin? First off, the flavor. It’s just out of this world. You get that deep, Dark Chocolate that’s not too bitter, perfectly balanced by the sweet, smooth vanilla bean custard layer. And the glaze on top? It’s that glossy, slightly firm shell that cracks just a bit when you bite into it, giving you another hit of chocolatey goodness. But it’s not just about the taste; this recipe is a lifesaver for busy cooks. I’ve made it when I’ve had unexpected guests drop by, and it always feels like I’ve pulled out all the stops. The ingredients are pretty standard pantry staples, which is always a win in my book. No need to hunt down obscure items! And unlike some fudges that require constant stirring over a candy thermometer and precise temperature control, this one is much more forgiving. It’s more of a no-bake situation, which I am a HUGE fan of, especially during the warmer months. Plus, it’s incredibly versatile. You can cut it into small squares for a party, larger chunks for a decadent treat, or even little mini-squares for a sweet bite with your coffee. It’s also surprisingly cost-effective compared to buying fancy candies. My family, especially my kids, goes absolutely bonkers for this fudge. They’ll ask for it constantly, and it’s one of those recipes that makes me feel like a kitchen superhero, even when I’m just throwing things together. It truly stands out because it captures the essence of a beloved dessert in a format that’s perfect for sharing (or not sharing, I won’t judge!).
How do you make Boston Cream Fudge?
Quick Overview
Making this Boston Cream fudge is surprisingly straightforward. You’ll basically be creating a rich chocolate base, swirling in a creamy vanilla mixture, and then topping it all off with a simple chocolate glaze. The magic really happens as these layers meld together. It’s mostly about careful mixing and letting the flavors develop as it sets. Don’t worry if you’re not a seasoned candy maker; this recipe is designed to be accessible and deliver fantastic results without requiring advanced techniques. It’s pretty much a foolproof way to get that incredible Boston cream flavor in fudge form.
Ingredients
For the Main Batter:
You’ll need good quality semi-sweet chocolate chips – about 2 cups. I always opt for brands I know melt well, it makes a huge difference in the final texture. You’ll also need Sweetened Condensed Milk (one 14-ounce can is perfect), a couple of tablespoons of unsalted butter for that extra richness, and a teaspoon of vanilla extract to enhance the flavors. For the chocolate swirl, we’ll use some unsweetened cocoa powder, about a quarter cup, mixed with a little bit of hot water or coffee to make it smooth and deepen its chocolatey punch.
For the Filling:
This is where the “cream” part comes in! We’ll use another can of Sweetened Condensed Milk (yes, another one!), a good amount of butter (about half a cup, unsalted, of course), and a generous amount of granulated sugar (about 1.5 cups). To get that authentic Boston cream flavor, we’ll need cornstarch (about 3 tablespoons) to thicken it beautifully, and the star of the show: vanilla bean paste or a couple of teaspoons of pure vanilla extract. Using vanilla bean paste gives those lovely little flecks and an even more intense vanilla aroma, which I just adore.
For the Glaze:
Keep it simple! We’ll use more semi-sweet chocolate chips (about a cup) and a tablespoon or two of vegetable oil or coconut oil. This helps the glaze become smooth and shiny, making your fudge look absolutely professional. You can also add a tiny pinch of salt to balance the sweetness if you like.
“Made the Boston cream fudge tonight and wow — perfect weeknight dinner. Will definitely make again!”
Step-by-Step Instructions
Step 1: Preheat & Prep Pan
First things first, grab an 8×8 inch baking pan. It’s the perfect size for this recipe, giving you nice thick squares. Line it with parchment paper, leaving an overhang on the sides. This little trick is a game-changer because it makes lifting the whole slab of fudge out so much easier later. You don’t want to be struggling to get it out of the pan, trust me! Give the parchment a little spray with cooking spray or a light brush of oil so the fudge doesn’t stick to it. Set this prepared pan aside.
Step 2: Mix Dry Ingredients
In a medium bowl, whisk together your unsweetened cocoa powder with about 2 tablespoons of hot water or hot brewed coffee. You want to create a smooth, thick paste. This step is important because it blooms the cocoa, intensifying its flavor and ensuring there are no powdery lumps in your chocolate swirl. Make sure it’s really smooth; this paste will be folded into the Chocolate Fudge base later.
Step 3: Mix Wet Ingredients
In a saucepan over medium heat, combine the 2 cups of chocolate chips, one can of sweetened condensed milk, and the 2 tablespoons of butter. Stir constantly until everything is melted and smooth. Once it’s all combined and looks glossy, remove it from the heat. Stir in the teaspoon of vanilla extract.
Step 4: Combine
Now, gently fold your cocoa paste into the melted chocolate mixture. Don’t overmix it! You want to create lovely streaks and swirls of chocolate, not a uniform brown color just yet. It’s okay if there are some lighter ribbons of the condensed milk mixture showing through. This is where the visual appeal starts!
Step 5: Prepare Filling
In a separate medium saucepan, whisk together the granulated sugar, cornstarch, and the second can of sweetened condensed milk. Cook this mixture over medium heat, stirring constantly, until it thickens up nicely. It should be thick enough to coat the back of a spoon. This usually takes about 5-8 minutes. Once thickened, remove it from the heat and stir in the butter and vanilla bean paste (or vanilla extract). Keep stirring until the butter is fully melted and incorporated. You’ll have a beautiful, creamy vanilla filling.
Step 6: Layer & Swirl
Now for the fun part! Pour about half of the Chocolate Fudge mixture into your prepared pan. Then, dollop spoonfuls of the vanilla filling over the chocolate layer. Spoon the remaining chocolate mixture over the vanilla. Now, grab a butter knife or a skewer and gently swirl the layers together. Don’t go crazy; you want distinct ribbons of chocolate and vanilla, not a muddy mess. Aim for figure-eight motions or gentle zig-zags. The more you swirl, the less defined the layers will be, so be mindful of that!
Step 7: Bake
Pop your pan into a preheated oven at 350°F (175°C). Bake for about 20-25 minutes. You’re not looking for it to be completely set like a cake; it should still have a little wobble in the center, almost like a very thick brownie. The edges will look set, but the middle should still be a bit soft. This is key for that fudgy, creamy texture.
Step 8: Cool & Glaze
Once it’s out of the oven, let it cool in the pan on a wire rack for about 15-20 minutes. While it’s cooling slightly, prepare your glaze. In a microwave-safe bowl, combine the 1 cup of chocolate chips and the tablespoon or two of oil. Microwave in 30-second intervals, stirring in between, until smooth and melted. Once the fudge has cooled a bit, pour the glaze evenly over the top, spreading it with an offset spatula if needed. Let the fudge cool completely in the pan – this is crucial for it to set properly. I usually leave it on the counter for a few hours, or pop it in the fridge for an hour or two to speed things up.
Step 9: Slice & Serve
Once the fudge is completely firm and set, use the parchment paper overhang to lift the entire slab out of the pan. Place it on a cutting board. For the cleanest slices, use a large, sharp knife. You can warm the knife under hot water and wipe it dry between cuts if you’re having trouble. Cut into small, bite-sized squares. These are incredibly rich, so a little goes a long way! Serve them at room temperature for the best texture and flavor.
“Packed with flavor and so simple. Exactly what I wanted from this Boston cream fudge!”
What to Serve It With
This Boston Cream fudge is pretty much a star on its own, but I love pairing it with a few things to really make an occasion out of it. For a relaxed breakfast or brunch, a strong cup of coffee or a creamy latte is just perfect. The slight bitterness of the coffee cuts through the sweetness beautifully. If I’m serving it as a dessert after a meal, especially after a rich dinner, a small scoop of vanilla bean ice cream on the side or a dusting of cocoa powder makes it feel extra fancy. My kids love it alongside a glass of cold milk – it’s their ultimate after-school treat. For cozy evenings, I often serve it with a mug of hot chocolate. It’s a double dose of chocolatey comfort! Sometimes, if I’m feeling adventurous, I’ll serve a square with a few fresh raspberries; the tartness from the berries is a lovely contrast to the rich fudge. It’s one of those treats that feels special no matter how you serve it, but these pairings just take it to the next level of deliciousness.
Top Tips for Perfecting Your Boston Cream Fudge
I’ve made this Boston Cream fudge more times than I can count, and over the years, I’ve picked up a few tricks that really make a difference. First, when you’re making the chocolate base, don’t rush the melting process. Gentle heat and constant stirring are key to a smooth, glossy finish. Overheating can make chocolate seize up, and nobody wants that! For the vanilla filling, make sure you cook it until it’s properly thickened. It should be noticeably thicker than pudding. If it’s too thin, your fudge won’t set up correctly. And when you’re swirling, remember that less is often more. You want distinct ribbons of flavor and color, not a blended mess. I learned that the hard way when I was first starting out and over-swirled one batch – it was still tasty, but the visual appeal was definitely lost. For ingredient swaps, if you’re out of semi-sweet chocolate chips, milk chocolate can work in a pinch, but it will make the fudge sweeter and less rich. You can also try using dark chocolate for a more intense flavor. If you can’t find vanilla bean paste, use good quality pure vanilla extract, but I highly recommend the paste for that extra je ne sais quoi. When it comes to baking, ovens can be fickle. Keep an eye on your fudge; it should be set around the edges but still slightly soft in the middle. If it seems too firm, you might have overbaked it, and it could turn out crumbly. Conversely, if it’s too soft after cooling, it might have been underbaked. The glaze is pretty forgiving, but make sure your chocolate is completely melted and smooth before spreading it. Using oil helps achieve that beautiful shine, so don’t skip it! And for slicing, a warm, dry knife is your best friend. It prevents the fudge from sticking and ensures you get those clean, beautiful squares.
Storing and Reheating Tips
Storing this Boston cream fudge is pretty simple, thankfully! Once it’s completely set, you can store it at room temperature in an airtight container for up to 3-4 days. I usually cut it into squares and layer them between sheets of parchment paper to prevent them from sticking together. If your kitchen is particularly warm or humid, or if you want it to last a bit longer, you can store it in the refrigerator. In the fridge, it will stay fresh for about a week, though the texture might become a little firmer. If you prefer it softer, just let it sit at room temperature for about 20-30 minutes before serving. Now, reheating isn’t really necessary for fudge, as it’s best enjoyed at room temperature or slightly chilled. However, if you’ve kept it in the fridge and find it too hard, a few minutes on the counter should do the trick. I’ve never had luck freezing fudge; it tends to change the texture quite a bit, making it grainy when thawed. But for short-term storage, room temperature or the fridge are your best bets. If you’ve glazed it, make sure the glaze is fully set before covering the container. I also wouldn’t recommend trying to freeze it with the glaze on, as it can sometimes crack or become a bit sticky upon thawing.
Frequently Asked Questions
Final Thoughts
So there you have it – my absolute favorite Boston cream fudge! It’s a recipe that brings me so much joy, and I really hope it does the same for you. It’s that perfect balance of rich chocolate and creamy vanilla, all packed into one unbelievably satisfying bite. Whether you’re making it for a special occasion, a holiday treat, or just because you deserve something delicious, this fudge never disappoints. It’s proof that you can create something truly spectacular right in your own kitchen, with just a little bit of love and some fantastic ingredients. If you try this recipe, please let me know how it turns out! I’d love to hear your thoughts, see your photos, and read about any little twists you put on it in the comments below. And if you’re a fan of classic flavors with a twist, you might also want to check out my recipe for creamy no-bake cheesecake bars or my decadent chocolate lava cakes for more delightful treats. Happy baking, and enjoy every single bite of this glorious Boston cream fudge!
Boston cream fudge
Ingredients
Main Ingredients
- 0.5 cup unsalted butter
- 1 cup granulated sugar
- 0.5 cup evaporated milk
- 6 oz white chocolate chips
- 1 teaspoon vanilla extract
- 0.5 cup custard powder
- 0.5 cup milk
- 0.25 cup semi-sweet chocolate chips for topping
Instructions
Preparation Steps
- Line an 8x8 inch baking pan with parchment paper, leaving an overhang on the sides.
- In a medium saucepan, combine butter, granulated sugar, and evaporated milk. Cook over medium heat, stirring constantly, until the sugar dissolves and the mixture comes to a boil. Boil for 5 minutes, stirring occasionally.
- Remove from heat. Stir in the white chocolate chips until melted and smooth. Stir in the vanilla extract.
- In a separate bowl, whisk together the custard powder and milk until smooth. Gradually add this mixture to the white chocolate mixture, whisking constantly.
- Pour the fudge mixture into the prepared pan and spread evenly.
- Sprinkle the semi-sweet chocolate chips evenly over the top. Let sit for 5 minutes to soften.
- Gently swirl the melted semi-sweet chocolate chips into the fudge with a toothpick or knife.
- Chill in the refrigerator for at least 2 hours, or until firm. Cut into squares and serve.


