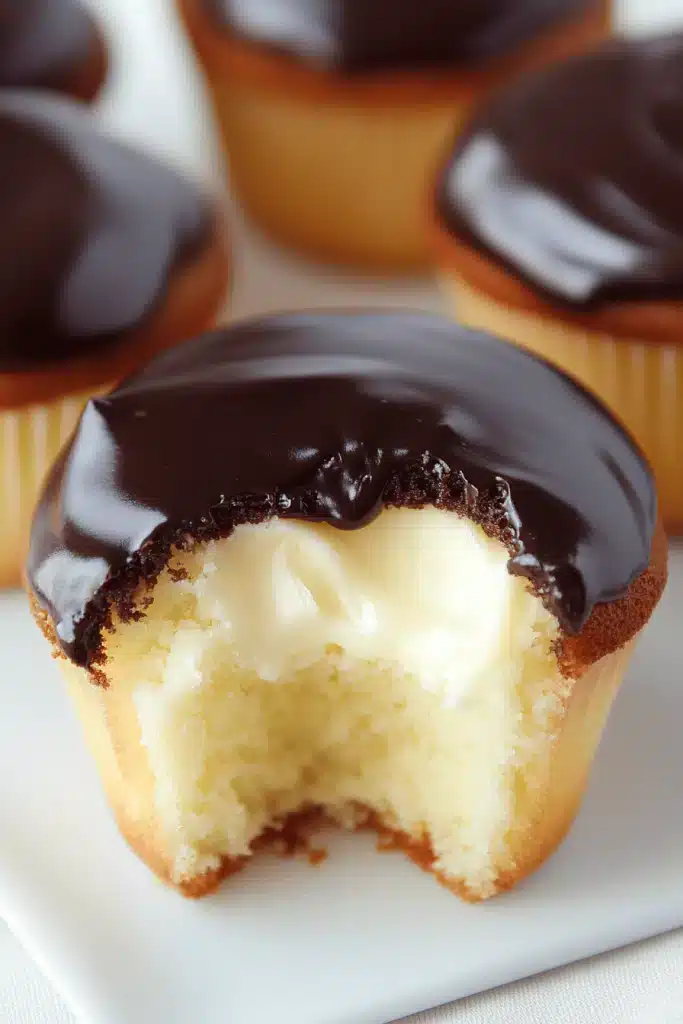
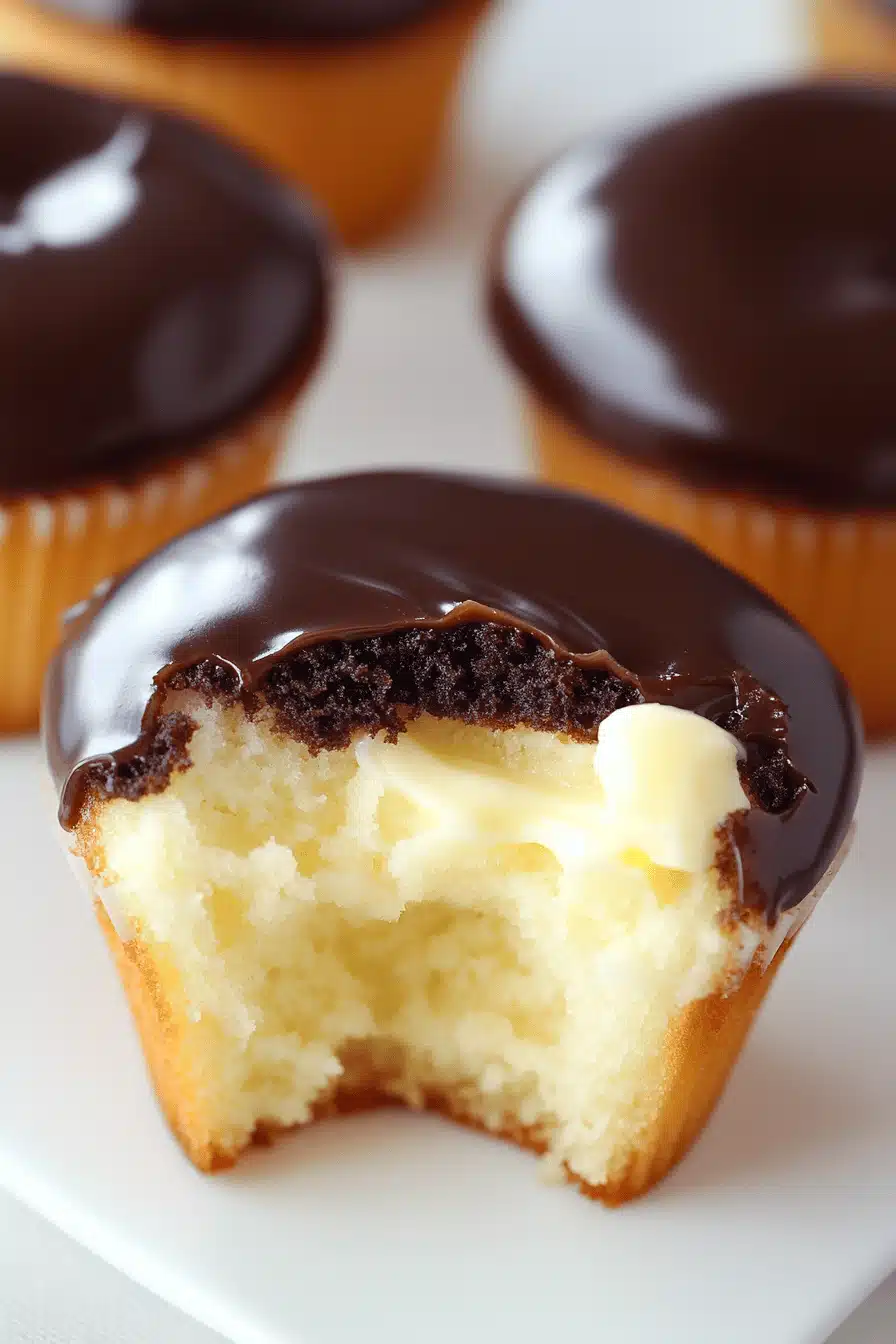
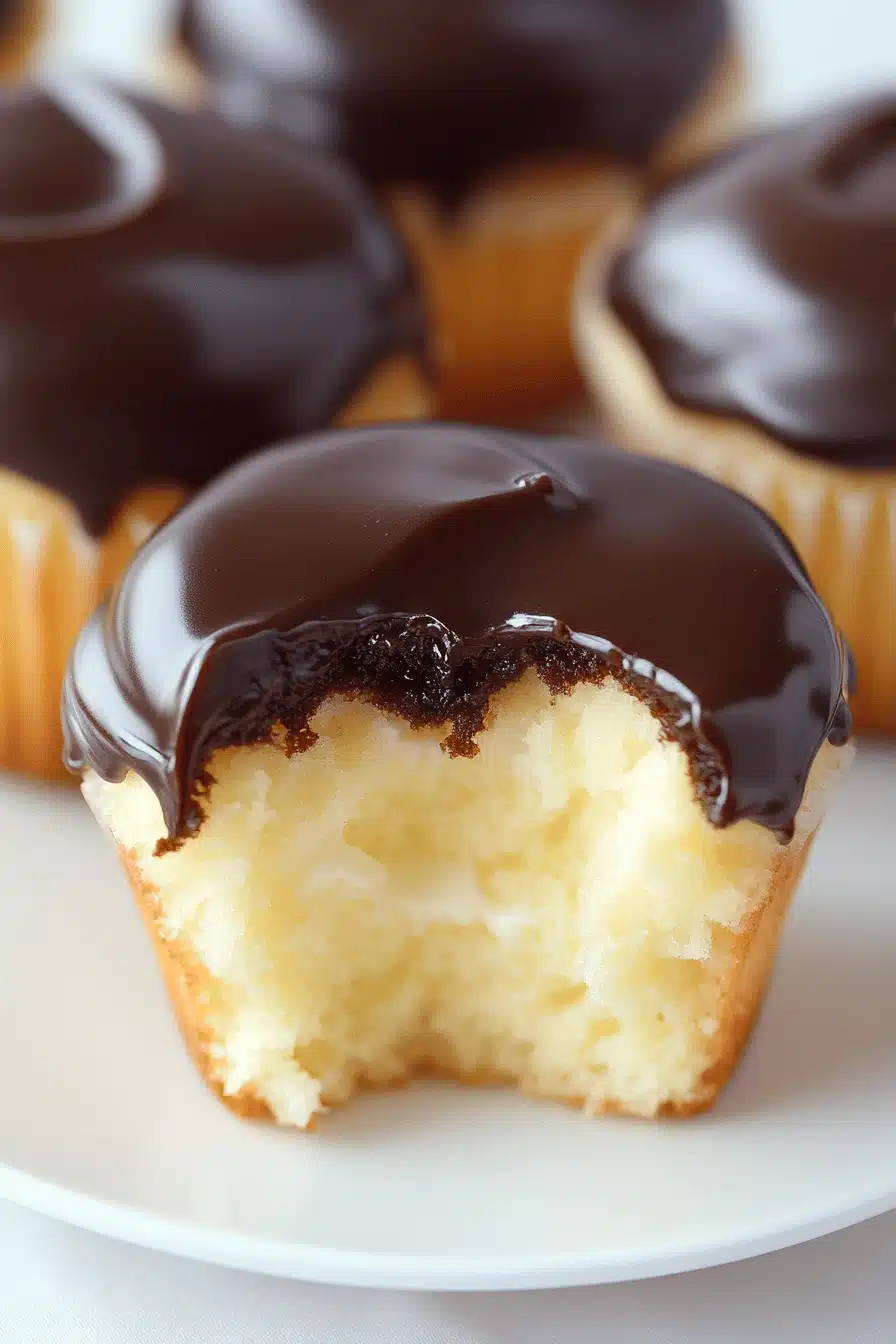
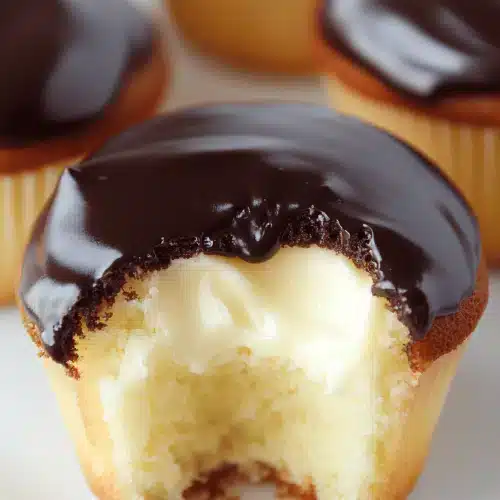
Okay, friends, let me tell you about these Boston Cream Cupcakes. They’re seriously a game-changer! Picture that iconic Boston Cream Pie – you know, the one with the fluffy vanilla custard and rich chocolate glaze? Now imagine all that deliciousness packed into a perfectly portioned cupcake. It’s like a little bite of pure comfort, and trust me, once you try them, you’ll be hooked. These little guys are easier to whip up than a full-blown pie, and honestly, sometimes you just need a cupcake, right? These deliver the same amazing flavor profile, but in a fun, individual serving.
Thank you for reading this post, don't forget to subscribe!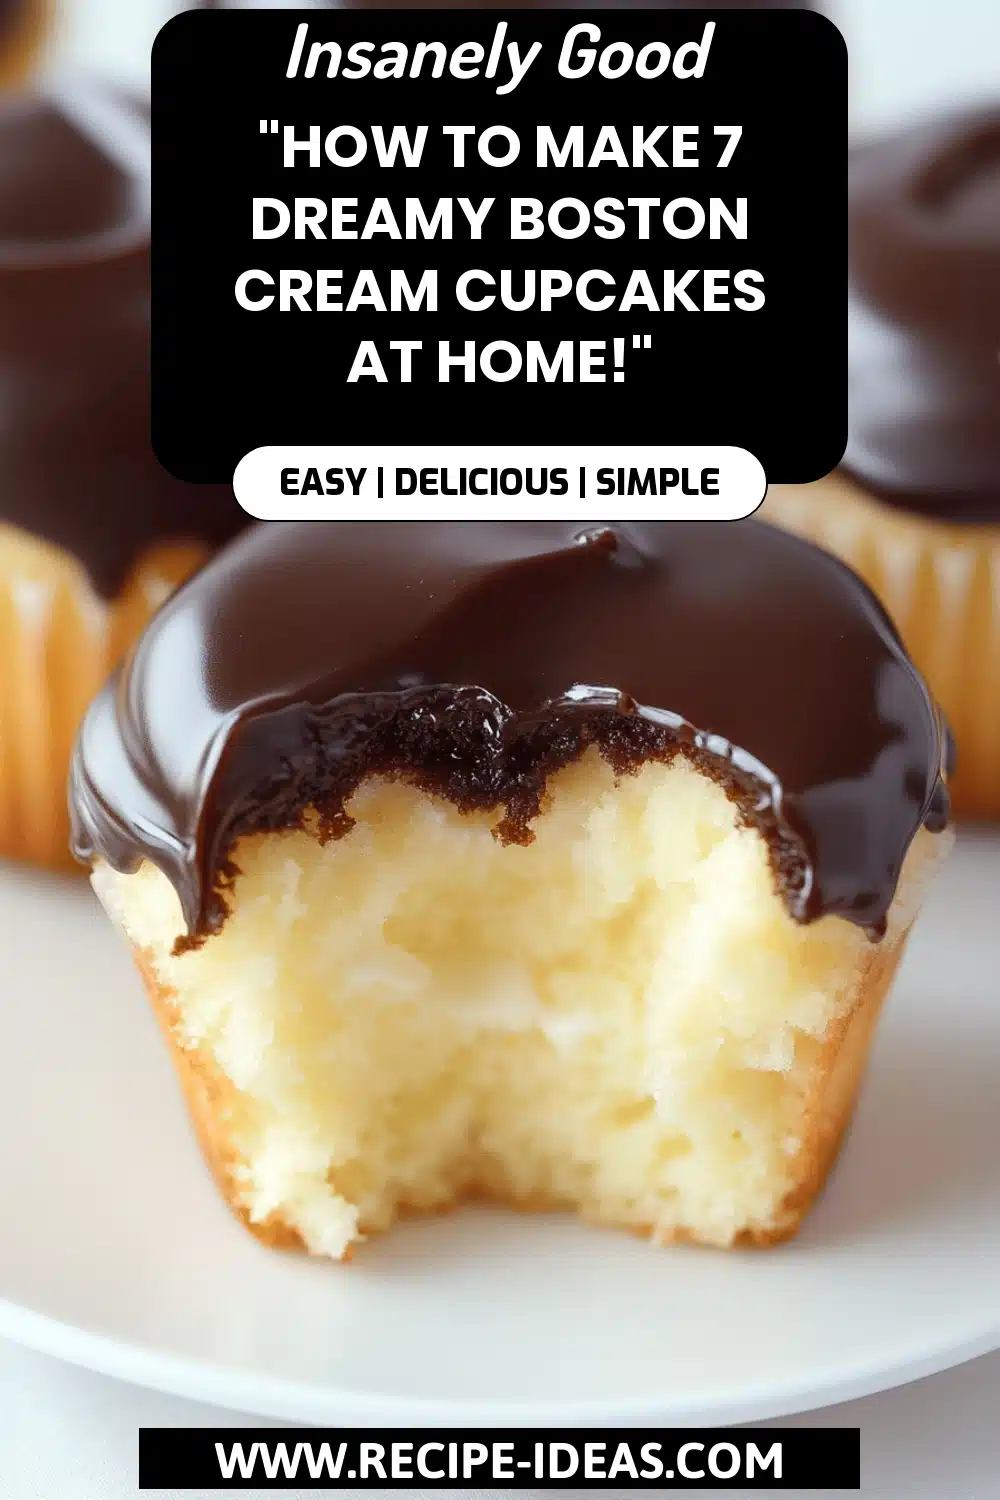
What is Boston Cream Cupcake?
Think of Boston Cream Cupcakes as a handheld version of the classic Boston Pie. Is it a cupcake filled with custard? What is the best chocolate glaze you’ve ever had? The name comes, of course, from the famous Boston Cream Pie, which, despite its name, is actually a Boston cream pie. What are some of the best elements of a cupcake? What are the best ways to make custard, the glossy chocolate – even more accessible for a quick treat? Is it really a simple concept, but the combination of textures and flavors is just irresistible?
Why you’ll love this recipe?
There are so many reasons to fall in love with these Boston Cream Cupcakes, but let me just highlight a few. First and foremost: the flavor. The combination of the delicate vanilla cupcake, the smooth custard filling, and that rich chocolate glaze is a symphony in your mouth. It’s sweet, creamy, and oh-so-satisfying.
What I love most about this is how surprisingly easy they are to make. Don’t be intimidated by the multiple components; each part is quite straightforward. Plus, you can even make the custard ahead of time to break up the work. And let’s talk cost-efficiency. The ingredients are all pretty standard pantry staples, so you won’t have to break the bank to indulge in these treats.
These are incredibly versatile. They’re perfect for afternoon tea, a quick dessert after dinner, or even as a special treat for a birthday party. I’ve even seen people make them for bake sales and they always sell out fast! They also remind me a bit of my Grandma’s vanilla Cake Recipe, but with an extra layer of decadence that makes them extra special. You might also like these cupcakes instead of the traditional pie because of the ease of cleanup!
How do I make Boston Cream Cupcakes?
Quick Overview
Making these Boston Cream Cupcakes is easier than you might think! You’ll start by whipping up a simple vanilla cupcake batter. While those bake and cool, you’ll make a batch of luscious vanilla custard on the stovetop. Finally, you’ll melt some chocolate to create a glossy glaze. Once everything is ready, you’ll fill the cupcakes with custard and drizzle them generously with the chocolate glaze. The best part? It all comes together much faster than making a full-sized pie, and the individual portions are just perfect. I promise, even if you’re a beginner baker, you can totally nail this recipe!
Ingredients
For the Cupcakes: What are
* 1 1/2 cups all-purpose flour: I always use unbleached for the best flavor.
* 1 1/2 teaspoons baking powder: Make sure it’s fresh! Old baking powder can ruin the rise.
* 1/4 teaspoon salt: Just a pinch to enhance the sweetness.
* 1/2 cup (1 stick) unsalted butter, softened: The butter should be at room temperature so it creams properly.
* 3/4 cup granulated sugar: Adds sweetness and helps create a tender crumb.
* 2 large eggs: These bind the batter and add richness.
* 1 teaspoon vanilla extract: Use pure vanilla extract for the best flavor – imitation just doesn’t compare!
* 1/2 cup milk: I prefer whole milk, but you can use any kind you like.
For the Custard Filling:
* 2 cups milk: Again, whole milk works best for richness.
* 1/2 cup granulated sugar: Sweetens the custard.
* 1/4 cup cornstarch: This thickens the custard to the perfect consistency.
* 1/4 teaspoon salt: Balances the sweetness and enhances the other flavors.
* 4 large egg yolks: These add richness and color to the custard.
* 2 tablespoons unsalted butter: Adds a silky texture.
* 1 teaspoon vanilla extract: Essential for that classic vanilla flavor.
For the Chocolate Glaze: What is the recipe?
* 4 ounces semi-sweet chocolate, chopped: I love using good quality chocolate for the glaze. * 2 tablespoons unsalted butter: This adds shine and smoothness to the glaze.
“The Boston Cream Cupcakes turned out amazing. My kids asked for seconds. Saving this one!”
What are the steps to
Step 1: Preheat & Prep Pan
Preheating your oven to 350°F (175°C): Line a 12-cup muffin tin with cupcake liners. What is the best way to clean cupcakes? If you don’t have a muffin tin, you can grease and flour it instead. I always do this even with the liners just to be super cautious!
Step 2: Mix Dry Ingredients
In a medium bowl, whisk together the flour, baking powder, and salt. Set aside. What is the best way to whisk baking powder evenly? What makes a fluffy Don’t skip this step!
Step 3: Mix Wet Ingredients
In a large bowl, cream together the butter and sugar until light and fluffy. Set aside. What is the best way to make an electric mixer for a pale and airy mixture? If you want to make a thick batter, beat the eggs and vanilla extract. Then beat in the sugar. Make sure each egg is fully incorporated before adding the next.
Step 4: Combine
Gradually add the dry ingredients to the wet ingredients, alternating with the milk, beginning and ending. Ending with dry ingredients. Do not overmix, as this can result in tough cupcakes. If you overmix flour, you get gluten in the flour. This is what you want.
Step 5: Prepare Filling
While the cupcakes are cooling, make the custard filling. In a medium saucepan, whisk together the milk, sugar, cornstarch, and salt. Cook over medium heat, stirring constantly, until the mixture thickens and comes to a boil. Boil for 1 minute, still stirring constantly. Remove from heat and whisk in the egg yolks one at a time, making sure to whisk quickly to prevent the eggs from scrambling. Return the saucepan to low heat and cook, stirring constantly, for 1-2 minutes, or until the custard is thick and smooth. Remove from heat and stir in the butter and vanilla extract. Pour the custard into a bowl, cover with plastic wrap (pressing the plastic wrap directly onto the surface to prevent a skin from forming), and refrigerate for at least 2 hours, or until chilled. I always do this when making custard ahead of time, its a lifesaver!
Step 6: Bake
Fill cupcake liner about 2/3 full with batter. If a wooden skewer inserted into the center comes out clean, bake for 18-20 minutes. Don’t open the oven door too early, or the cupcakes might sink.
Step 7: Cool & Glaze
Let the cupcakes cool in the muffin tin for a few minutes before transferring them to the wire rack. Is it really cool How do I prevent my feet from getting soggy on the bottom? Once the cupcakes are completely cooled, use a small knife or cupcake corer to remove the small pieces. What is the best way to remove the cupcakes from the center? Fill cupcakes with chilled custard.
Step 8: Make the Glaze
While cupcakes cool, make the chocolate glaze. Place the chopped chocolate and butter in a heatproof bowl set over simmering water. Set aside. How do you make sure the bottom of the bowl doesn’t touch water? What is the best way to stir the chocolate and butter together? I always do this even with the liners just to be super cautious!
Step 9: Slice & Serve
How do you drizzle the chocolate glaze over cupcakes? Let the glaze set for a few minutes before serving. What are some great Boston Cream Cupcakes to make? Can you store in the refrigerator for up to 3 days?
“New family favorite! This Boston Cream Cupcakes was so flavorful and ridiculously easy. Crowd-pleaser for sure.”
What should I serve it with?
These Boston Cream Cupcakes are perfect all on their own, but if you’re looking to elevate the experience, here are a few serving suggestions.
For breakfast, try pairing them with a cup of strong, black coffee. The bitterness of the coffee will perfectly complement the sweetness of the cupcake. I like to present them on a pretty plate with a sprinkle of powdered sugar for an extra touch of elegance.
For brunch, arrange the cupcakes on a tiered serving tray along with other pastries and fruits. Serve with mimosas or sparkling cider for a festive touch. My kids ask for this all the time, especially if their friends are over!
As a dessert, these cupcakes are fantastic with a scoop of vanilla Ice Cream or a dollop of whipped cream. You could also drizzle them with a little extra melted chocolate for a truly decadent treat.
For cozy snacks these Boston Cream Cupcakes are perfect! Serve with a cup of warm milk, or a comforting cup of hot chocolate. I love to snuggle up with one of these cupcakes and a good book on a cold winter evening.
How do you make Boston Cream Cupcakes?
Here are some of my best tips for making these Boston Cream Cupcakes absolutely perfect:
When making the custard, be sure to stir constantly to prevent it from scorching. A heavy-bottomed saucepan will also help distribute the heat evenly.
Don’t skip the step of covering the custard with plastic wrap while it chills. This prevents a skin from forming on the surface.
When filling the cupcakes, don’t overfill them, or the custard will spill out when you bite into them.
If you want to get fancy, you can use a piping bag to pipe the custard into the cupcakes for a neater presentation.
For a richer chocolate glaze, use dark chocolate instead of semi-sweet chocolate.
You can also add a teaspoon of instant coffee powder to the chocolate glaze for a mocha flavor.
I’ve tested this with almond milk and it actually made it even creamier!
When baking the cupcakes, avoid opening the oven door frequently. This can cause the temperature to fluctuate, resulting in unevenly baked cupcakes.
If you want to make these cupcakes ahead of time, you can bake the cupcakes and make the custard a day in advance. Just store them separately and assemble them just before serving. This one’s a lifesaver on busy nights.
What are some Storing and Reheating Tips?
To store these Boston Cream Cupcakes, place them in an airtight container.
At room temperature, they will stay fresh for up to 2 days. Be sure to keep them covered to prevent them from drying out.
In the refrigerator, they will keep for up to 3 days. The cool temperature will help preserve the custard and prevent it from spoiling.
For freezer storage, wrap each cupcake individually in plastic wrap and then place them in a freezer-safe bag or container. They can be frozen for up to 2 months. When ready to eat, thaw them overnight in the refrigerator.
If you’re storing the cupcakes before glazing them, you can add the glaze just before serving. This will prevent the glaze from becoming sticky or melting during storage.
What are the most frequently asked questions on
Final Thoughts
What is your favorite Boston Cream Cupcake recipe? I promise, these little treats are worth every bit of effort. They’re moist, creamy, and oh-s What are some of the best ways to enjoy Boston Cream Pie in a single serving? Is it okay to bake a cake but don’t want to eat it? What are some of my favorite cupcake recipes? What is your favorite baking recipe? What are your favorite variations of this recipe? Don’t forget to rate the recipe below!
How to Make 7 Dreamy Boston Cream Cupcakes at Home!
Ingredients
Main Ingredients
- 1.5 cups unsalted butter softened
- 2 cups granulated sugar
- 1 tablespoon vanilla extract pure
- 6 large eggs room temperature
- 3 cups all-purpose flour
- 4 teaspoons baking powder
- 1 teaspoon sea salt fine
- 1.33 cups buttermilk room temperature
Instructions
Preparation Steps
- Preheat the oven to 350°F (175°C). Line two 12-cup muffin tins with paper liners.
- In a large mixing bowl, cream the softened butter and sugar using a hand or stand mixer on medium speed until light and fluffy, about 3-4 minutes.
- Add the vanilla extract and beat briefly to combine.
- Incorporate the eggs one at a time, ensuring each is fully mixed before adding the next. Scrape down the sides of the bowl as needed.
- In a separate bowl, sift together the flour, baking powder, and salt.
- Alternating with the buttermilk, add the dry ingredients to the wet mixture in three parts, beginning and ending with the flour. Mix until just combined; do not overmix.
- Divide the batter evenly among the prepared cupcake liners, filling each about two-thirds full.
- Bake for 18-25 minutes, or until a toothpick inserted into the center comes out clean.
- Allow the cupcakes to cool in the muffin tins for a few minutes before transferring them to a wire rack to cool completely.


