Beef Tenderloin with Red Wine Reduction: The Recipe I’ve Made for My Family Since 2003
If there’s one dish that has consistently earned me a standing ovation at every family dinner, it’s this Beef Tenderloin with Red Wine Reduction. I first made it for my parents’ anniversary in 2003, and since then—over two decades later—it’s still the centerpiece of every special occasion. There’s just something magical about the way the tender beef melts in your mouth, complemented by that rich, velvety red wine sauce that feels both decadent and deeply comforting. It’s not just a meal; it’s an experience.
Thank you for reading this post, don't forget to subscribe!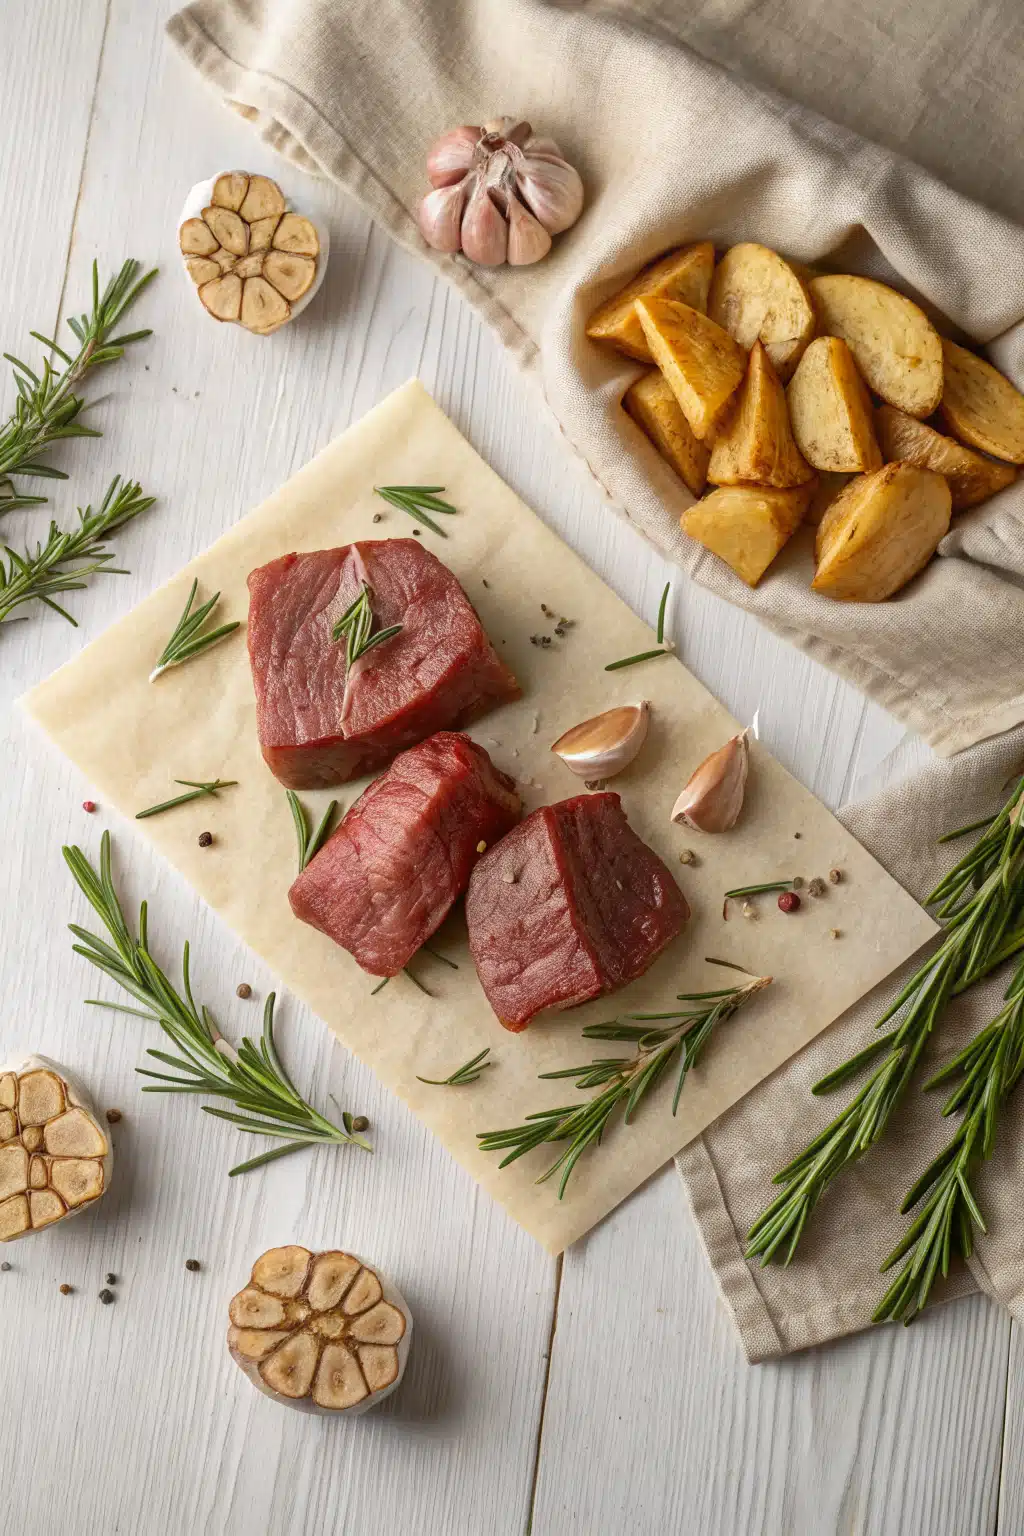
What Is Beef Tenderloin?
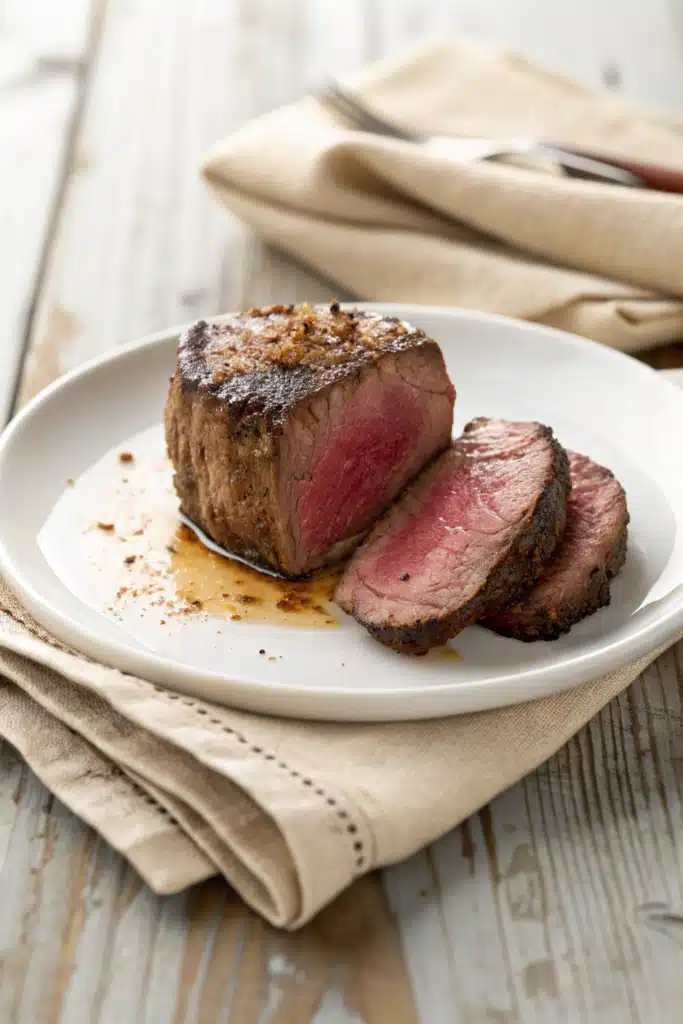
Beef tenderloin, also known as filet mignon, is the most prized cut of beef—located along the spine, it’s naturally lean, incredibly tender, and cooks quickly. Because of its buttery texture and mild flavor, it’s perfect for showcasing with bold sauces like our homemade red wine reduction. Unlike tougher cuts that need slow braising, tenderloin should be seared quickly over high heat to lock in juices while keeping the inside rare or medium-rare.
Why You’ll Love This Recipe
This recipe isn’t just about technique—it’s about creating moments. Every time I sear the tenderloin, I remember my dad’s laugh when he took his first bite back in 2003. What makes this version truly unforgettable is the balance between simplicity and sophistication. We use basic pantry staples—garlic, thyme, rosemary, shallots, and a bottle of good red wine—but the result tastes like something you’d order at a five-star restaurant.
The secret lies in the pan-to-pan transfer method: after searing the tenderloin on the stovetop, we finish it in a preheated oven at 425°F (220°C), ensuring even cooking without drying out the meat. Then comes the star of the show—the reduction. Simmering the fond (that delicious browned crust stuck to the pan) with wine, broth, and herbs builds layers of flavor that simply can’t be replicated with store-bought gravy.
I’ve tested countless variations over the years, but this version always wins. My kids now beg me to make it for their birthdays, and my husband says it’s “the only steak he wants anymore.” If you’re looking to impress someone—or treat yourself—this dish delivers on every front: elegance, ease, and heartfelt satisfaction.
How to Make Beef Tenderloin
Quick Overview
Here’s how we do it: First, we sear the tenderloin in a blazing-hot cast-iron skillet to develop a golden crust. Then, we baste it with butter, garlic, and fresh herbs before finishing it in the oven. Meanwhile, we deglaze the same pan with red wine to create a luxurious sauce. Total active time is under 30 minutes, but plan for about 90 minutes including prep and resting.
Ingredients
- 1 (2–3 pound) beef tenderloin, trimmed of excess fat and silver skin
- Kosher salt and freshly ground black pepper
- 3 tablespoons olive oil
- 3 tablespoons unsalted butter
- 4 cloves garlic, smashed
- 2 sprigs fresh thyme
- 1 sprig fresh rosemary
- ½ cup dry red wine (like Cabernet Sauvignon or Merlot)
- 1 cup low-sodium beef broth
- 1 small shallot, finely chopped
- 1 tablespoon Dijon mustard (optional, for depth)
- Chopped parsley, for garnish
“Packed with flavor and so simple. Exactly what I wanted from this Beef tenderloin!”
Step-by-Step Instructions
Step 1: Preheat & Prep Pan
Preheat your oven to 425°F (220°C). Pat the tenderloin completely dry with paper towels—this ensures a proper sear. Season generously with salt and pepper on all sides. Heat a heavy oven-proof skillet (cast iron works best) over medium-high heat until smoking slightly. Add 1 tablespoon of Olive oil and swirl to coat.
Step 2: Sear the Tenderloin
Place the tenderloin in the hot pan and sear undisturbed for 2–3 minutes per side, rotating occasionally, until deeply golden brown. Reduce heat to medium and add 2 more tablespoons of olive oil, plus the butter, garlic, thyme, and rosemary. As the butter foams, tilt the pan slightly and spoon melted butter over the tenderloin continuously for another minute.
Step 3: Finish in the Oven
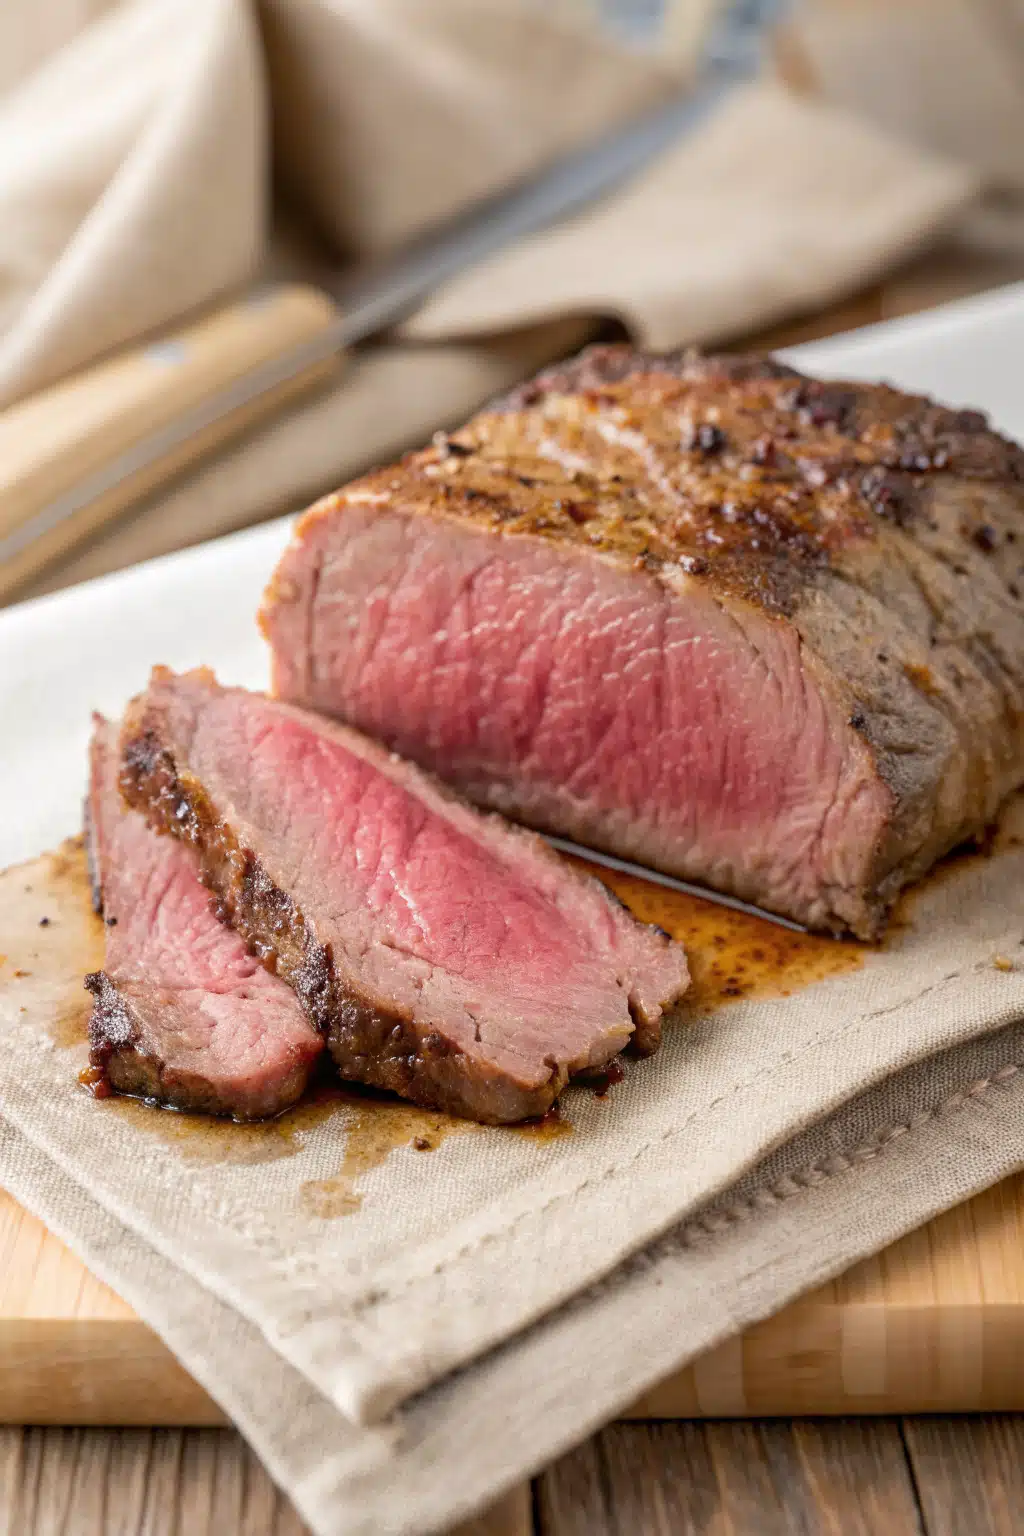
Transfer the skillet to the preheated oven. Roast for 12–18 minutes, depending on desired doneness (use a meat thermometer: 125°F for rare, 135°F for medium-rare). Remove from oven when internal temp is 5–10°F below target—it will rise as it rests.
Step 4: Make the Reduction
Immediately remove the herb stems and garlic. Place the skillet back on medium heat. Add the chopped shallot and cook until soft, about 1 minute. Pour in the red wine, scraping up all the browned bits from the bottom—this is where the magic happens! Let it simmer for 3–4 minutes until reduced by half. Stir in the beef broth and Dijon mustard (if using). Simmer another 5 minutes until slightly thickened. Taste and adjust seasoning with salt and pepper.
Step 5: Rest & Slice
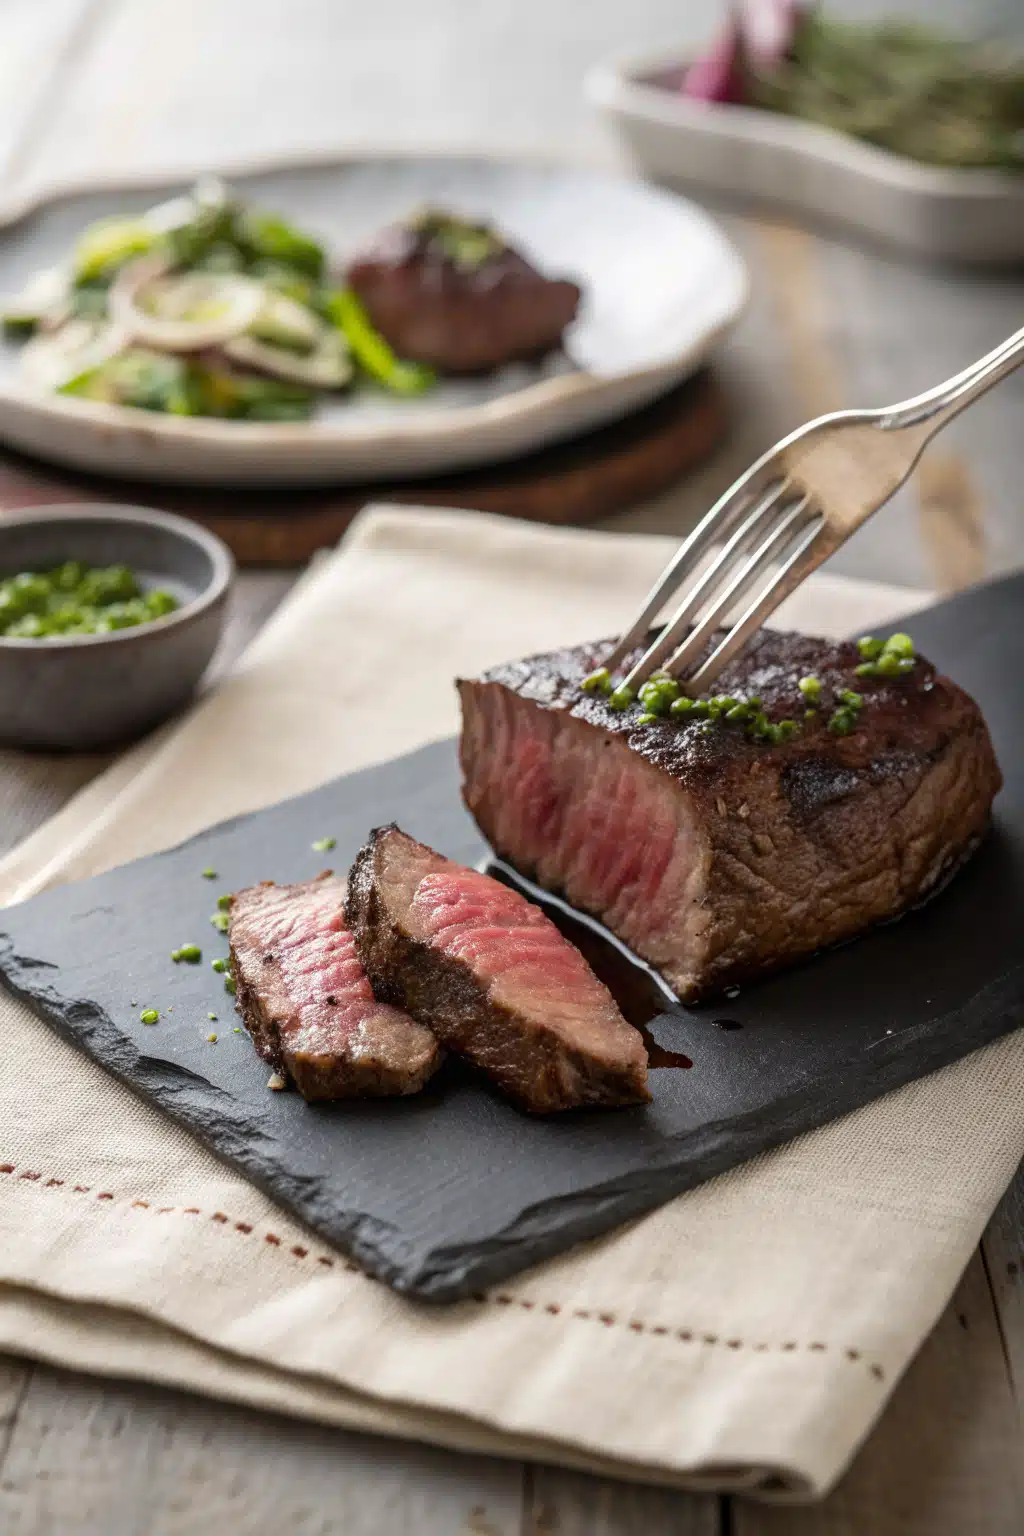
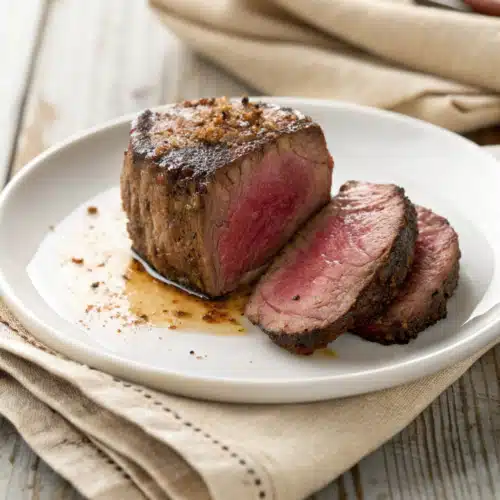
Transfer the tenderloin to a cutting board and tent loosely with foil. Let rest for 10–15 minutes—this allows juices to redistribute. Slice into ½-inch medallions. Serve immediately with the warm red wine reduction spooned over the top. Garnish with fresh parsley.
What to Serve It With
This dish pairs beautifully with creamy mashed potatoes, roasted Garlic Parmesan asparagus, or a simple arugula salad with lemon vinaigrette to cut through the richness. A baked potato loaded with sour cream and chives is another classic favorite. And if you’re feeling fancy, serve with a glass of the same red wine you used in the reduction—it ties everything together perfectly.
Top Tips for Perfecting Your Beef Tenderloin
Buy whole tenderloins—they’re cheaper and allow you to trim and portion yourself, ensuring no waste.
Don’t skip drying the meat—moisture prevents proper browning.
Use a meat thermometer—overcooking is easy with tenderloin, and it dries out fast.
Deglaze promptly—once the meat goes into the oven, start making the sauce so flavors develop together.
Rest is non-negotiable—rushing this step means serving sad, dry slices.
Storing and Reheating Tips
Store leftover tenderloin and sauce separately in airtight containers in the fridge for up to 4 days. To reheat, place sliced beef in a skillet over low heat with a splash of water or broth, warming gently until heated through. Avoid microwaving—it ruins the texture. The sauce can also be frozen for up to 3 months; thaw overnight and reheat on the stove.
Frequently Asked Questions
“New family favorite! This Beef tenderloin was so flavorful and ridiculously easy. Crowd-pleaser for sure.”
Final Thoughts
Cooking this Beef Tenderloin hasn’t just given me delicious meals—it’s given me memories. From my parents’ joyful reactions to now seeing my own children light up at the table, each serving connects us across time. It’s simple enough for a weeknight but elegant enough for holidays. And honestly? After all these years, it still makes me smile every single time.
So go ahead—gather your loved ones, pour a glass of wine, and treat them to something extraordinary. Your table will thank you, and your taste buds? Well, they’ll never forget.
Beef Tenderloin with Red Wine Reduction
Ingredients
Main Ingredients
- 3.375 lb beef tenderloin steaks trimmed of silver skin
- 2 tablespoon olive oil
- 1 tsp kosher salt
- 1 tsp freshly ground black pepper
- 2 clove garlic minced
- 1 piece shallot finely chopped
- 1 cup dry red wine such as Cabernet Sauvignon
- 1 cup beef stock
- 2 tablespoon unsalted butter
- 2 sprig fresh thyme
- 1 leaf bay leaf
Instructions
Preparation Steps
- Preheat the oven to 425°F (220°C). Pat the beef tenderloin steaks dry with paper towels.
- Season both sides generously with kosher salt and freshly ground black pepper.
- Heat olive oil in an oven-safe skillet over medium-high heat. Sear the tenderloin steaks for 2–3 minutes per side until golden brown.
- Transfer the skillet to the preheated oven and roast for 8–10 minutes for medium-rare, or until an internal temperature reaches 130–135°F (54–57°C).
- Remove from oven, transfer steaks to a cutting board, tent loosely with foil, and let rest for 10 minutes.
- While resting, return the same skillet to medium heat. Add shallot and garlic; sauté until fragrant, about 1 minute.
- Pour in red wine, scraping up any browned bits. Simmer until reduced by half, about 3–4 minutes.
- Add beef stock, thyme, and bay leaf. Continue simmering until sauce thickens slightly, about 5 minutes.
- Stir in butter until melted and emulsified. Remove from heat and discard thyme and bay leaf.
- Slice the rested beef tenderloin against the grain and serve with the red wine reduction sauce.


