Oh, where do I even begin with this apple bread? It’s one of those recipes that feels like a warm hug on a chilly afternoon. I remember the first time I made it; it was years ago, and I was trying to use up a mountain of apples from a farmer’s market haul. My kids, who can be a little picky, took one bite and their eyes just lit up. Now, they ask for this apple bread all the time, especially around the holidays or on lazy weekend mornings. It’s kind of like a more sophisticated cousin to Banana Bread, but with that wonderful tartness and sweetness of apples, all nestled into a tender, moist crumb. It’s seriously one of my go-to comfort bakes when I just need something truly delicious without a fuss. If you love the idea of a simple cake but want something a bit more substantial, this is your answer. It’s definitely become a staple in my kitchen, and I have a feeling it might just become one in yours too!
Thank you for reading this post, don't forget to subscribe!
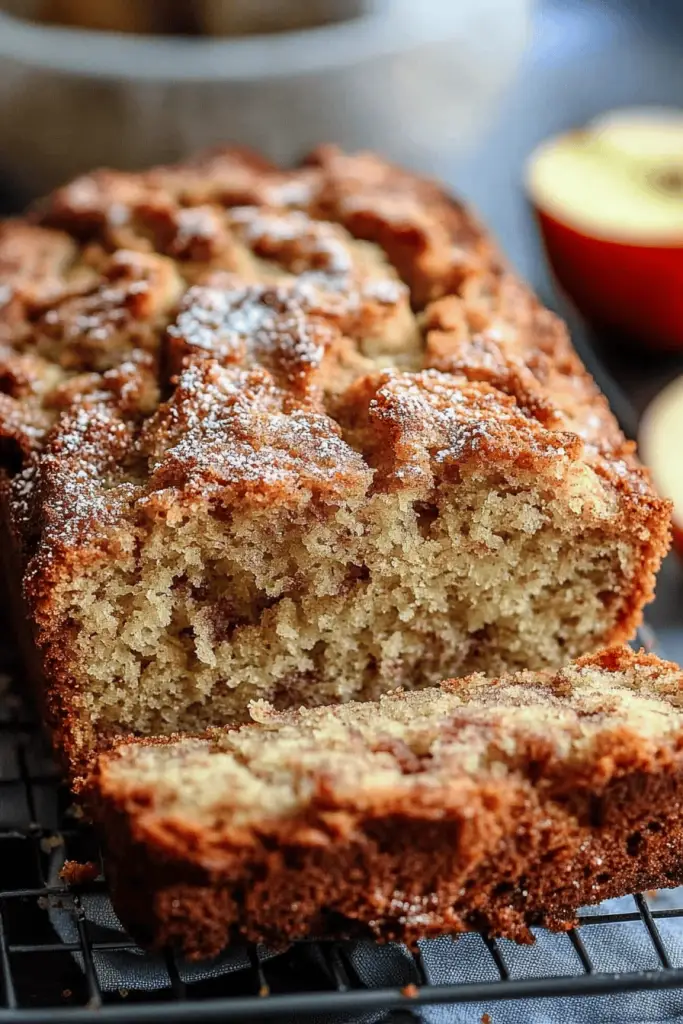
What is this amazing apple bread?
So, what exactly is this Apple Bread I keep going on about? Think of it as your favorite spiced cake, but with generous chunks of fresh apple baked right in, creating little pockets of juicy goodness. It’s not a quick bread in the super-fast sense, but it’s also not a complicated cake that requires multiple bowls and tricky techniques. It’s essentially a simple, one-bowl (mostly!) wonder that’s packed with flavor. The “bread” in its name is a little misleading because it’s definitely on the sweeter, cake-like side. I love that it uses everyday ingredients you probably already have in your pantry, which makes it a lifesaver when a craving strikes. It’s the kind of bake that fills your kitchen with the most incredible aroma, a mix of warm spices and sweet apples, and honestly, that alone is worth making it!
Why you’ll love this recipe?
There are so many reasons why this apple bread has earned a permanent spot in my recipe binder, and I’m willing to bet you’ll fall in love with it for all the same reasons. First off, the flavor is just out of this world. It’s perfectly spiced – not too much, not too little – with that delightful sweetness from the apples that’s not overpowering. The texture is something else entirely: it’s incredibly moist and tender, thanks to a couple of little tricks I’ll share with you. And honestly, for something that tastes so decadent, it’s surprisingly easy to whip up. You can honestly have it in the oven in under 20 minutes. What I love most about this recipe is its versatility. It’s perfect for a special occasion, but it’s also wonderful for a casual weeknight treat. It’s also pretty cost-effective; you don’t need any fancy ingredients. If you’re a fan of my Spiced Pear Muffins or my Cinnamon Swirl Coffee Cake, you’re going to adore this apple bread. It hits all those cozy, comforting notes but feels special enough to serve to guests. It’s the kind of bake that makes everyone feel a little bit happier.
How do I make this delicious apple bread?
Quick Overview
This apple bread is all about simple, straightforward steps that lead to an incredibly satisfying result. You’ll basically mix your wet and dry ingredients, then gently fold in the star of the show: fresh apples! A swirl of spiced apple filling takes it to the next level, and a simple glaze finishes it off beautifully. It’s foolproof, even for beginners, and the payoff in terms of flavor and aroma is huge. Seriously, get ready for your kitchen to smell like pure happiness.
Ingredients
For the Main Batter:
You’ll need about 2 cups of all-purpose flour. Make sure it’s spooned and leveled, not scooped, to avoid a dense bread. I always use unsalted butter, about 1/2 cup, softened but not melted. For sweetness, we’re using 1 cup of granulated sugar, but you can slightly reduce this if your apples are super sweet. Then, two large eggs, at room temperature if you can manage it; it helps them incorporate better. For moisture and a tender crumb, we’ll add 1/2 cup of milk – whole milk gives the best richness, but I’ve tested it with almond milk and it actually made it even creamier! A teaspoon of vanilla extract is non-negotiable for that warm flavor base. And for that lift and lightness, 1 teaspoon of baking soda and 1/2 teaspoon of baking powder. Don’t forget the spices: 1 teaspoon of ground cinnamon and a pinch of nutmeg or allspice. A quarter teaspoon of salt balances all the sweetness.
For the Filling:
This is where we pack in extra apple goodness. You’ll want about 1 cup of chopped apples, about 1-2 medium apples. I prefer a mix of tart and sweet, like Granny Smith and Fuji, but any firm apple will work. You’ll also need 2 tablespoons of Brown Sugar, 1 teaspoon of cinnamon, and a tiny squeeze of lemon juice to keep them from browning and add a little zing.
For the Glaze:
Keep it simple! 1 cup of powdered sugar, whisked with 2-3 tablespoons of milk until it reaches your desired drizzling consistency. A tiny splash of vanilla or even some lemon zest can be nice here too if you want to get fancy.
“Made the Apple bread tonight and wow — perfect weeknight dinner. Will definitely make again!”
Step-by-Step Instructions
Step 1: Preheat & Prep Pan
First things first, let’s get your oven preheated to 350°F (175°C). This ensures it’s nice and hot when your batter is ready. Grab a standard Loaf Pan, about 9×5 inches. Grease it really well with butter or cooking spray, and then lightly dust it with flour. Tap out any excess flour. This step is crucial for preventing your beautiful apple bread from sticking. I sometimes even line the bottom with parchment paper for extra insurance – never hurts!
Step 2: Mix Dry Ingredients
In a large bowl, whisk together your flour, baking soda, baking powder, cinnamon, nutmeg (if using), and salt. Whisking these together thoroughly ensures that your leavening agents and spices are evenly distributed throughout the batter. You don’t want any surprise pockets of baking soda or bland spots! Give it a good whisk until it all looks uniformly combined. This is your foundation for a perfectly risen and Spiced Loaf.
Step 3: Mix Wet Ingredients
In a separate medium bowl, cream together the softened butter and granulated sugar until it’s light and fluffy. You can use a hand mixer for this, or just a good old whisk and some elbow grease! Then, beat in your eggs one at a time, mixing well after each addition. Stir in the vanilla extract and the milk. It might look a little curdled at this point, and that’s totally fine. Don’t overmix here; we just want everything combined.
Step 4: Combine
Now for the magic! Pour the wet ingredients into the bowl with the dry ingredients. Using a spatula or a wooden spoon, gently fold the two together until just combined. It’s really important not to overmix the batter. A few streaks of flour are okay; they’ll disappear as you gently fold in the apples. Overmixing develops the gluten too much, which can lead to a tough, dense bread. We want tender and moist!
Step 5: Prepare Filling
While the batter is chilling for a moment, quickly prepare your apple filling. In a small bowl, toss your chopped apples with the Brown Sugar, cinnamon, and that tiny bit of lemon juice. This isn’t meant to be a cooked filling, just a little boost of spiced apple flavor to layer into the batter. Make sure the apples are coated evenly.
Step 6: Layer & Swirl
Pour about half of the batter into your prepared Loaf Pan. Sprinkle about half of the spiced apple filling over the batter. Then, dollop the remaining batter on top, followed by the rest of the apple filling. If you want that beautiful swirl effect, you can gently run a knife or a skewer through the batter a couple of times to create marbling. Don’t go crazy, though; we don’t want to overwork it and make it muddy. Aim for pretty ribbons of apple goodness.
Step 7: Bake
Pop that beautiful loaf into your preheated oven. Bake for about 50-65 minutes. The exact time will depend on your oven, of course. You’ll know it’s done when a wooden skewer or toothpick inserted into the center comes out clean, or with just a few moist crumbs attached. If the top starts to get too brown before the center is cooked, you can loosely tent it with aluminum foil. Resist the urge to open the oven door too early!
Step 8: Cool & Glaze
Once it’s baked to perfection, take the loaf pan out of the oven and let it cool in the pan for about 10-15 minutes. This allows it to set up a bit. Then, carefully invert the loaf onto a wire rack to cool completely. Once it’s fully cooled, whisk together your powdered sugar, milk, and vanilla (if using) to create your glaze. Drizzle it generously over the top of the cooled apple bread. Let the glaze set for a few minutes before slicing.
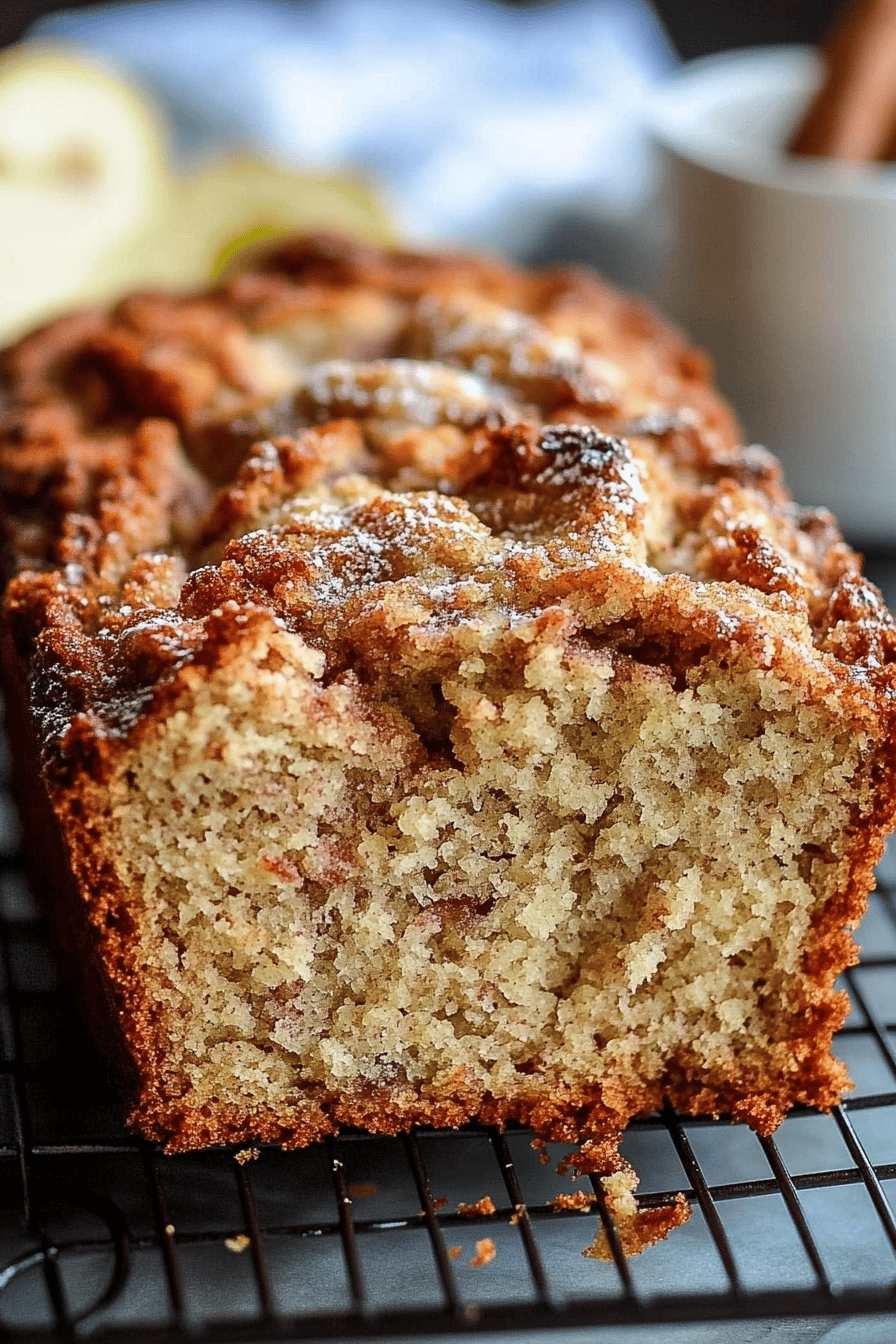
Step 9: Slice & Serve
The hardest part is waiting for it to cool enough to slice without falling apart! Once the glaze has set, use a sharp serrated knife to slice the apple bread. I like to serve it slightly warm, but it’s also delicious at room temperature. The aroma alone is enough to make your mouth water.
“I don’t know if I’ve ever eaten a better Apple bread. The rub alone is wonderful, but the sauce??? Over the top!”
What to Serve It With
This apple bread is a true chameleon; it fits in beautifully with so many different meals and occasions. For breakfast, it’s simply divine with a hot cup of coffee or a steaming mug of tea. A little slice warmed up is pure comfort. For a more leisurely brunch, I love serving it alongside some fresh fruit salad, maybe a light yogurt parfait, or even some crispy bacon. It adds a lovely touch of sweetness and spice to the spread. As a dessert, it’s absolutely fantastic. Imagine serving a warm slice with a scoop of vanilla bean Ice Cream or a dollop of freshly whipped cream – pure bliss! It’s also wonderful with a drizzle of caramel sauce. And for those cozy snack times, when you just need something sweet and satisfying, this apple bread is the ultimate treat. It’s perfect with a glass of milk or even a warm cider. My family often requests this for after-school snacks, and it always disappears in minutes!
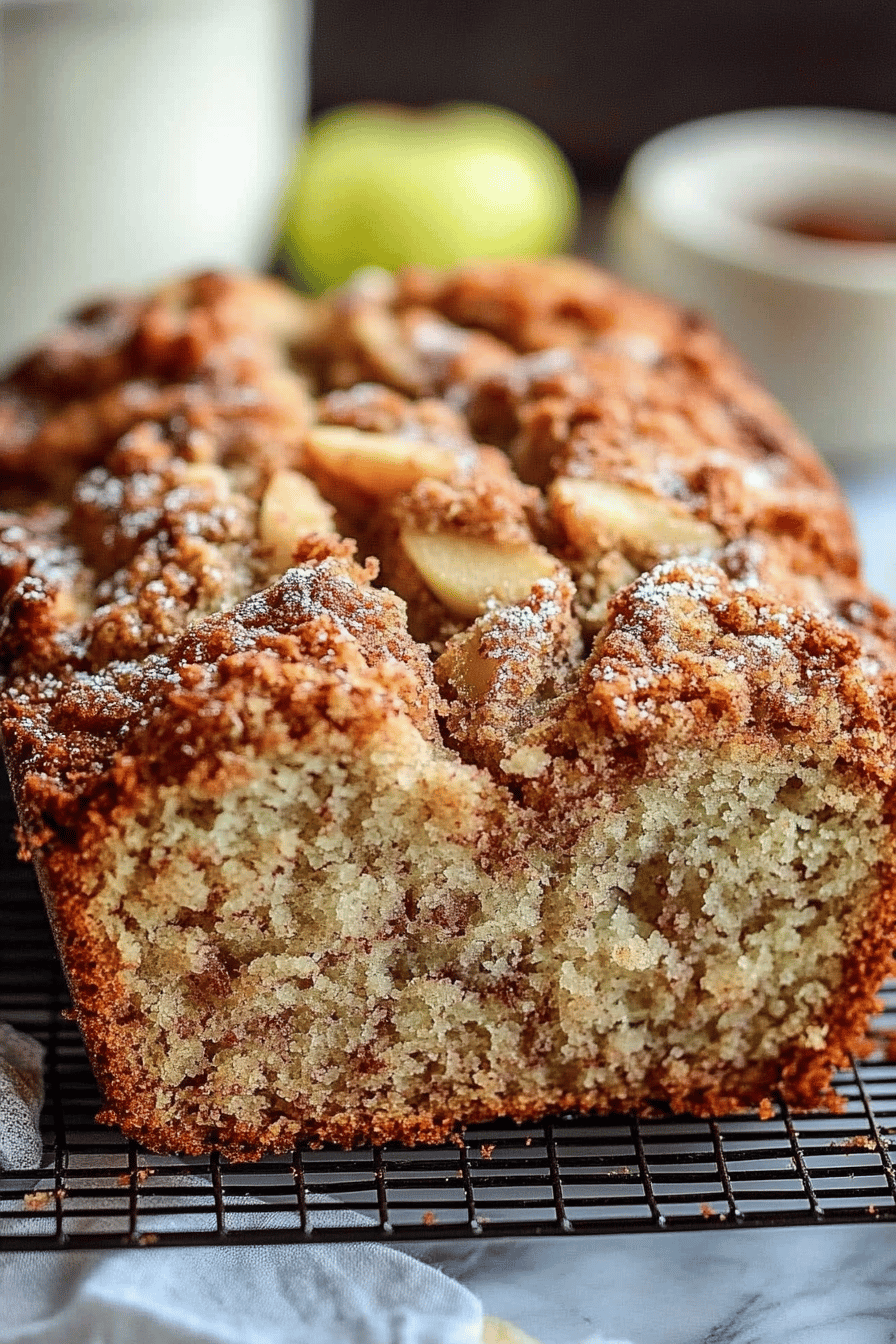
Top Tips for Perfecting Your Apple Bread
I’ve made this apple bread more times than I can count, and over the years, I’ve picked up a few tricks that really make a difference. Let’s talk about the apples first. I always recommend using firm apples that hold their shape well when baked, like Honeycrisp, Fuji, Gala, or even Granny Smith for a bit of tartness. Avoid mealy apples, as they can turn mushy. When you chop them, aim for about a 1/2-inch dice. Too small and they’ll practically disappear; too big and you might get giant apple chunks that could make the bread difficult to slice. When you’re mixing the batter, remember my mantra: do NOT overmix! Seriously, as soon as you don’t see any more dry flour streaks, stop mixing. A few lumps are better than a tough loaf. For that beautiful swirl, don’t overdo it. A gentle swirl is all you need to create lovely patterns without turning the batter into a muddy mess. If you want to get fancy with the swirl, you can mix a tiny bit of extra cinnamon and Brown Sugar directly into the apple chunks before layering them. When it comes to baking, ovens can be quirky. My best advice is to start checking for doneness around the 50-minute mark. Use the toothpick test – it’s your best friend! If your loaf is browning too quickly on top, just loosely tent it with aluminum foil. This protects the crust while allowing the inside to cook through. For ingredient swaps, I’ve experimented quite a bit! If you’re out of milk, you can use buttermilk or even plain yogurt thinned with a little water. For a dairy-free version, unsweetened almond milk or oat milk works wonderfully, and you can use melted coconut oil or vegetable oil instead of butter in a pinch, though butter adds a lovely richness. And don’t be afraid to play with the spices! A pinch of ground ginger or cardamom can add a lovely complexity.
Storing and Reheating Tips
This apple bread is fantastic for making ahead, which is always a win in my book! Once it’s completely cooled, you can store it at room temperature, well-wrapped in plastic wrap or in an airtight container, for up to 3 days. It stays wonderfully moist. If you think you’ll need it for longer than that, or if your kitchen is particularly warm, the refrigerator is your friend. Wrapped tightly, it will keep well in the fridge for up to a week. Just be aware that refrigeration can sometimes dry out baked goods slightly. When you’re ready to enjoy a slice from the fridge, you can either let it come to room temperature on its own, or give it a quick 15-20 second zap in the microwave to bring back some of that lovely warmth and moisture. For longer storage, freezing is the absolute best way to preserve its freshness. Once it’s completely cooled and the glaze is set, wrap the entire loaf tightly in a double layer of plastic wrap, then in a layer of aluminum foil or a freezer-safe bag. It will keep beautifully in the freezer for up to 3 months. When you’re ready to thaw it, unwrap it and let it come to room temperature on the counter, or thaw it overnight in the refrigerator. If you want to reheat a slice, a few seconds in the microwave or a brief stint in a warm oven (around 300°F or 150°C for 5-10 minutes) works wonders. Personally, I like to add the glaze *after* reheating if I’m reheating a previously frozen loaf, just to ensure it stays nice and pretty!
Frequently Asked Questions
Final Thoughts
Honestly, making this apple bread is such a joy. It’s one of those recipes that feels both comforting and a little bit special, and it always brings a smile to people’s faces. The way the apples soften and mingle with the warm spices is just magical. It’s the perfect way to use up those apples from the produce stand and the scent that fills your home while it bakes is pure bliss. If you’re someone who loves a good cozy bake, something that’s not too fussy but delivers big on flavor, then you absolutely have to give this apple bread a try. I promise, it’s a recipe you’ll come back to again and again. It’s a true crowd-pleaser, whether you’re serving it for breakfast, as a dessert, or just a simple afternoon pick-me-up. I’m already planning my next batch! I’d love to hear how yours turns out, or if you have any fun variations you’ve tried, so please share in the comments below! Happy baking, everyone!
Apple bread
Ingredients
Main Ingredients
- 2.5 cup all-purpose flour
- 1.5 teaspoon baking soda
- 0.5 teaspoon salt
- 1 teaspoon ground cinnamon
- 0.5 teaspoon ground nutmeg
- 2 cup granulated sugar
- 2 large eggs
- 0.5 cup vegetable oil
- 0.5 cup milk
- 1 teaspoon vanilla extract
- 3 cup peeled and diced apples e.g. Gala or Fuji
Instructions
Preparation Steps
- Preheat oven to 350°F (175°C). Grease and flour a 9x5 inch loaf pan.
- In a large bowl, whisk together flour, baking soda, salt, cinnamon, and nutmeg.
- In a separate bowl, beat together sugar and eggs until light and fluffy. Gradually beat in vegetable oil and milk until well combined.
- Stir in the vanilla extract.
- Gradually add the dry ingredients to the wet ingredients, mixing until just combined. Do not overmix.
- Gently fold in the diced apples.
- Pour the batter into the prepared loaf pan and spread evenly.
- Bake for 55-65 minutes, or until a wooden skewer inserted into the center comes out clean.
- Let the bread cool in the pan for 10 minutes before transferring it to a wire rack to cool completely.


