Oh, this Amish pumpkin bread! It’s one of those recipes that just feels like a warm hug on a crisp autumn day. You know, the kind of baking that fills your home with the most comforting aroma, making everyone peek into the kitchen to see what deliciousness is brewing? That’s exactly what happens every single time I pull this beauty out of the oven. It’s not overly complicated, which is a huge plus in my book, especially when life gets a little hectic. But don’t let its simplicity fool you; the flavor is just out of this world. It’s moist, perfectly spiced, and has this wonderful, subtle sweetness that makes it a total crowd-pleaser. Honestly, it rivals any fancy bakery loaf, but it comes with that special touch of home that only homemade baking can provide. If you’ve ever tried other pumpkin bread recipes that turned out dry or bland, prepare to be amazed. This one’s a game-changer, truly.
Thank you for reading this post, don't forget to subscribe!What is Amish Pumpkin Bread?
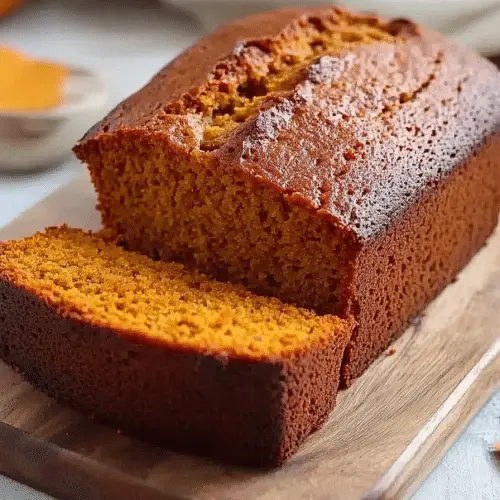
So, what exactly makes this Amish pumpkin bread so special, you ask? Well, the “Amish” in the name often refers to recipes that are passed down through generations, known for their wholesome ingredients and straightforward preparation. Think of it as baking from the heart, without a lot of fuss. This recipe is essentially a tender, moist quick bread packed with the cozy flavors of pumpkin and warm spices. It’s not a dense cake, nor is it a light, airy muffin. It sits in that delightful middle ground, offering a substantial yet tender crumb. The genius of it lies in how the ingredients come together to create something incredibly satisfying. It’s the kind of bread that feels both comforting and a little bit special, perfect for sharing with loved ones or just enjoying yourself with a big mug of something warm. It’s honest, delicious baking.
Why you’ll love this recipe?
What are some of the best reasons to make Amish pumpkin bread?flavor is just spectacular. We’re talking pure autumn bliss in every bite – the earthy sweetness of pumpkin, the warm hug of cinnamon, nutmeg, and cloves. It’s not too sweet, which I really appreciate; you can really taste the pumpkin and spices. Then there’s the simplicity. Seriously, this recipe is a lifesaver on busy weeknights or lazy weekend mornings. You probably have most of the ingredients in your pantry already, and it comes together in under 15 minutes of active prep time. No fancy techniques or equipment needed whatsoever. It’s also incredibly cost-efficientWhat are some of the best canned pumpkin recipes without the expense of the actual recipe?versatility! This bread is fantastic on its own, of course, but it’s also amazing toasted with a smear of butter, or even better, with a dollop of Cream Cheese Frosting. What I love most about this recipe is how forgiving it is. Even if you’re not a seasoned baker, you can whip this up and have it turn out perfectly. It’s that reliable. It’s so much better than those box mixes, and trust me, the smell that fills your kitchen while it bakes is worth the effort alone.
How to Make Amish Pumpkin Bread
Quick Overview
Making this Amish pumpkin bread is wonderfully straightforward. You’ll whisk together your dry ingredients, then combine your wet ingredients, fold them together gently, and bake until golden and fragrant. The key is not to overmix, which keeps the bread incredibly tender and moist. The whole process, from mixing bowl to oven, takes less than 20 minutes. It’s a real testament to simple, delicious home baking that delivers big on flavor with minimal effort. You’ll end up with a loaf that’s perfect for breakfast, a snack, or even dessert!
Ingredients
For the Main Batter:
Here’s what you’ll need for the star of the show. I always try to use canned pumpkin puree, NOT Pumpkin Pie filling – it makes a world of difference in texture and flavor. Make sure it’s pure pumpkin! Using unsalted butter, softened, gives you the best control over the final saltiness.
* 2 cups all-purpose flour
* 1 ½ teaspoons baking soda
* ½ teaspoon salt
* 1 teaspoon ground cinnamon
* ½ teaspoon ground nutmeg
* ¼ teaspoon ground cloves
* 1 ½ cups granulated sugar (you can reduce this slightly if you prefer it less sweet, but I find this is perfect!)
* ½ cup unsalted butter, softened
* 2 large eggs
* 1 cup pumpkin puree (from a 15-oz can, not pie filling)
* ¼ cup milk (whole milk is best for richness, but any kind works)
* 1 teaspoon vanilla extract
For the Filling:
This isn’t a traditional “filling” in the sense of a separate layer, but rather a swirl that adds extra depth and a touch of indulgence. It’s optional but highly recommended for that extra special something!
* ½ cup packed Brown Sugar
* 1 tablespoon ground cinnamon
* 1 teaspoon ground nutmeg
* A pinch of salt
For the Glaze:
This glaze is super simple and just adds a lovely finishing touch. It sets up just enough to be a delicate coating, not too thick or syrupy.
* 1 cup powdered sugar
* 2-3 tablespoons milk (or half-and-half for extra richness)
* ½ teaspoon vanilla extract
Step-by-Step Instructions
Step 1: Preheat & Prep Pan
First things first, get your oven preheating to 350°F (175°C). This ensures it’s nice and hot when your batter is ready. Grease and flour a standard 9×5 inch Loaf Pan. I like to use a bit of butter or cooking spray and then dust it with flour, tapping out any excess. This step is crucial to prevent your beautiful loaf from sticking. Make sure to get into all the corners!
Step 2: Mix Dry Ingredients
In a medium bowl, whisk together the all-purpose flour, baking soda, salt, cinnamon, nutmeg, and cloves. Whisking them together thoroughly ensures that the leavening agents and spices are evenly distributed throughout the batter, which means you won’t get any surprise pockets of spice or flat spots. You want every bite to be perfectly spiced.
Step 3: Mix Wet Ingredients
In a larger bowl, cream together the granulated sugar and softened butter until light and fluffy. This is where you build a lot of the bread’s tender texture. Beat in the eggs one at a time, mixing well after each addition. Then, stir in the pumpkin puree, milk, and vanilla extract until everything is just combined. Don’t worry if it looks a little rustic at this stage; it all comes together.
Step 4: Combine
Now, here’s the important part: add the dry ingredients to the wet ingredients and mix on low speed (or by hand with a spatula) until *just* combined. I mean it – stop mixing as soon as you no longer see streaks of dry flour. Overmixing develops the gluten too much, which can lead to a tough bread. A few small lumps are perfectly fine and actually preferable!
Step 5: Prepare Filling
If you’re adding the swirl, mix the Brown Sugar, cinnamon, nutmeg, and pinch of salt in a small bowl. This creates a delicious, spiced sugar mixture that will add an extra layer of flavor and visual appeal.
“New family favorite! This Amish pumpkin bread was so flavorful and ridiculously easy. Crowd-pleaser for sure.”
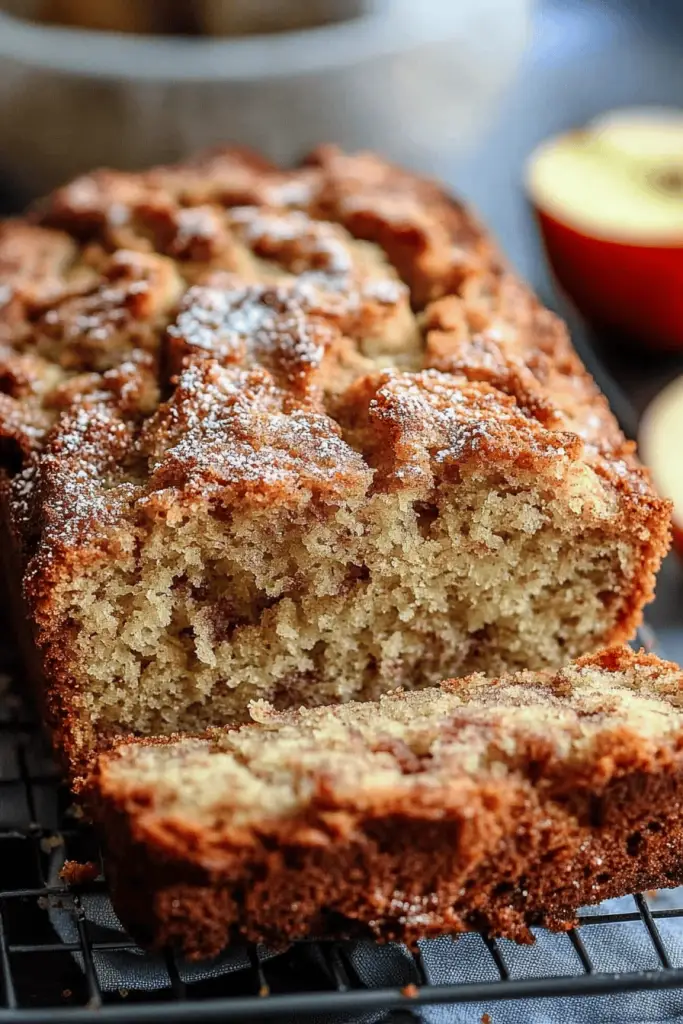
Step 6: Layer & Swirl
Pour about half of the batter into your prepared loaf pan. Sprinkle about half of the Brown Sugar filling mixture evenly over the batter. Then, pour the remaining batter over the top. Sprinkle the rest of the brown sugar mixture over this second layer of batter. Now, take a butter knife or a skewer and gently swirl it through the batter a few times to create a marbled effect. Don’t over-swirl, or you’ll just mix it all in; you want distinct ribbons of flavor.
Step 7: Bake
Bake for 55-65 minutes, or until a wooden skewer or toothpick inserted into the center of the loaf comes out clean. Ovens can be quirky, so start checking around the 50-minute mark. If the top is browning too quickly before the inside is cooked, you can loosely tent it with foil for the remainder of the baking time.
Step 8: Cool & Glaze
Once baked, let the bread cool in the pan for about 10-15 minutes. This allows it to set up properly. Then, carefully invert it onto a wire rack to cool completely. It’s really important to let it cool completely before glazing, otherwise, the glaze will just melt off. Once it’s fully cooled, whisk together the powdered sugar, 2 tablespoons of milk, and vanilla extract for the glaze. Add more milk, a teaspoon at a time, until you reach your desired drizzling consistency. Drizzle it over the top of the cooled bread. It’s okay if it’s not perfect; a rustic drizzle is charming!
Step 9: Slice & Serve
Once the glaze has set a bit, slice your beautiful Amish pumpkin bread and enjoy! It’s wonderful warm or at room temperature. I like to use a serrated knife for the cleanest slices.
What to Serve It With
This Amish pumpkin bread is so versatile, it fits into almost any meal or occasion! It’s a recipe I pull out time and time again because it just works for so many things.
For Breakfast: It’s fantastic on its own with a hot cup of coffee or tea. I sometimes toast a slice and add a thin layer of butter – pure simplicity and pure deliciousness to start the day. It’s a much nicer alternative to sugary cereals.
For Brunch: Elevate it by serving slightly warmed slices with a dollop of Whipped Cream or a side of fresh fruit salad. It pairs beautifully with a mimosa or a festive punch. It adds a lovely autumnal touch to any brunch spread.
As Dessert: This bread makes a surprisingly elegant dessert. Serve a slice with a scoop of vanilla bean Ice Cream, a drizzle of caramel sauce, or even a light dusting of powdered sugar. It’s cozy, comforting, and just sweet enough to satisfy a dessert craving without being overly heavy.
For Cozy Snacks: This is my go-to for afternoon tea or a late-night treat. A single slice with a mug of hot apple cider or a glass of cold milk is pure comfort. My kids practically beg for this when they get home from school.
My family has a tradition of having this with hot cocoa on the first truly chilly evening of fall. It just signals the start of cozy season for us. I’ve also found it’s incredible with a sharp cheddar cheese – the sweet and savory combination is unexpected but delightful!
Top Tips for Perfecting Your Amish Pumpkin Bread
I’ve made this Amish pumpkin bread more times than I can count, and over the years, I’ve picked up a few little tricks that I think really make a difference. These aren’t complicated steps, just little things that help ensure perfect results every time.
Zucchini Prep: If you’re thinking about zucchini, this recipe actually uses pumpkin puree, not zucchini! For pumpkin, the key is using pure pumpkin puree, not pie filling. Make sure you’re using 100% pumpkin. If you’re using homemade pumpkin puree, make sure it’s well-drained to avoid excess moisture, which can make your bread gummy. Canned is generally very consistent and works like a charm here.
Mixing Advice: The most common mistake people make with quick breads is overmixing. Once the dry ingredients meet the wet, mix *only* until the flour streaks disappear. A few small lumps are your friend! Overmixing develops the gluten too much, which results in a tough, dense bread. You want a tender crumb, so gentle mixing is key.
Swirl Customization: For the swirl, don’t go overboard. You want ribbons of the spiced sugar, not a muddy mix. A few gentle passes with a knife or skewer are all you need to create that beautiful marbling. If you want more intense spice, you can add a pinch of pumpkin pie spice to the brown sugar swirl mixture.
Ingredient Swaps: If you don’t have milk, water or even unsweetened non-dairy milk (like almond or soy) can work in a pinch, though whole milk will give the best richness. For the spices, feel free to adjust them to your preference! Some people like a stronger clove flavor, others prefer more cinnamon. This recipe is quite forgiving. If you’re out of brown sugar for the swirl, you can use granulated sugar mixed with a touch of molasses, but the brown sugar gives a lovely caramel note.
“The Amish pumpkin bread turned out amazing. My kids asked for seconds. Saving this one!”
Baking Tips: Make sure your oven is fully preheated. Using an oven thermometer can be helpful, as oven temperatures can vary. If your loaf is browning too quickly on top before the center is cooked, tent it loosely with aluminum foil. This traps steam and allows the center to cook through without burning the crust. A dark metal loaf pan will bake faster than a lighter one, so keep an eye on it.
Glaze Variations: The glaze is simple, but you can play with it. For a thicker, creamier glaze, use less liquid. For a thinner drizzle, add more. You can also add a tiny bit of orange zest for a citrusy note, or even a drop of orange extract. If you’re not a fan of sweet glazes, a simple dusting of powdered sugar through a sieve is also lovely.
Storing and Reheating Tips
Properly storing this Amish pumpkin bread ensures it stays delicious for days. I’ve tested these methods myself, and they work wonders!
Room Temperature: Once completely cooled (and this is important!), you can store the bread, tightly wrapped in plastic wrap or in an airtight container, at room temperature for up to 3 days. I find it’s best enjoyed within the first two days. If you live in a very humid climate, you might want to refrigerate it after day one to prevent it from getting soggy.
Refrigerator Storage: If you’ve glazed it, and plan to store it for longer than 3 days, or if your kitchen is warm, refrigerate it in an airtight container. It will keep well in the fridge for up to a week. The texture might firm up slightly, but it will still be delicious. Make sure it’s well-wrapped so it doesn’t dry out.
Freezer Instructions: This bread freezes beautifully! Once it’s completely cooled and the glaze is set (or if you’re not glazing it), wrap it very tightly in plastic wrap, then in aluminum foil, or place it in a freezer-safe bag. It can be frozen for up to 3 months. To thaw, unwrap it and let it come to room temperature on the counter. If it was glazed, the glaze might soften a bit upon thawing, which is usually just fine. You can also reheat slices gently in a toaster oven or microwave.
Glaze Timing Advice: For best results, especially if freezing, it’s often better to add the glaze *after* the bread has been thawed and is ready to be served. If you want to glaze it before storing at room temperature or in the fridge, make sure the bread is completely cool and the glaze is mostly set. If you plan to freeze it with glaze, the glaze might become a bit sticky or uneven upon thawing, so consider glazing after thawing for the prettiest finish.
Frequently Asked Questions
Final Thoughts
I truly hope you give this Amish pumpkin bread recipe a try. It’s one of those baked goods that just brings a little extra joy into your day, whether it’s for a special occasion or just a simple Tuesday afternoon treat. The combination of moist, tender crumb and those warm, comforting spices is simply divine. It’s a recipe that feels like a secret passed down, but one that’s too good not to share. The aroma alone is worth it, and the taste? Well, it’s pure comfort in every slice. If you love the flavors of fall, or just appreciate a really well-made, delicious loaf of bread, you’re going to adore this. It’s so satisfying to bake something that tastes this good and is relatively easy to whip up. I can’t wait to hear what you think, and I’d love to know if you add your own special touches! Please leave a comment below with your thoughts, or share your baking adventures – happy baking, everyone!
Amish Pumpkin Bread
Ingredients
Main Ingredients
- 0.5 cup vegetable oil
- 2 large eggs
- 0.33 cup water
- 1 cup pumpkin puree not pumpkin pie filling
- 1.5 cup all-purpose flour
- 1 cup granulated sugar
- 0.5 teaspoon baking soda
- 0.5 teaspoon salt
- 0.5 teaspoon ground cinnamon
- 0.25 teaspoon ground nutmeg
- 0.25 teaspoon ground cloves
Instructions
Preparation Steps
- Preheat oven to 350 degrees F (175 degrees C). Grease and flour a 9x5 inch loaf pan.
- In a large bowl, cream together the vegetable oil and sugar. Beat in the eggs one at a time, then stir in the water and pumpkin puree.
- In a separate bowl, whisk together the flour, baking soda, salt, cinnamon, nutmeg, and cloves.
- Gradually add the dry ingredients to the wet ingredients, mixing until just combined. Do not overmix.
- Pour batter into the prepared loaf pan.
- Bake for 55 to 65 minutes, or until a wooden skewer inserted into the center comes out clean.
- Let the bread cool in the pan for 10 minutes before removing it to a wire rack to cool completely.


