
Some evenings, the house smells like a memory you’re chasing—the way grandma’s kitchen used to smell when she’d crack open a jar of garlic and the butter sizzled in the pan. That nostalgic promise is what drew me to this airfryer chicken leg recipe in the first place. I wanted something simpler, cleaner, and still deeply comforting, and this method delivers. The Air Fryer turns a humble chicken leg into something that feels special—skin that crackles, meat that stays juicy, and a kiss of garlic butter that makes every bite feel indulgent. It’s not a deep-fry, it’s not a long bake, and yet the result is a crisp-skinned champion that can stand up to mainstream fried favorites. I’ve served it to friends as a weeknight hero, and a noon-perfect meal when I’m feeding kids who come home starving. If you’re comparing it to classic roasted chicken, this version is quicker, a touch lighter, and the clean aroma of garlic and herbs fills your kitchen the moment you pull the basket out. The best part? It’s incredibly forgiving—you’ll get that picture-perfect crisp skin with minimal effort, every single time, and your kitchen will smell like a cozy Sunday all week long.
Thank you for reading this post, don't forget to subscribe!What is Crispy Airfryer Chicken Leg?
Think of Crispy Airfryer Chicken Leg as the best of both worlds—juicy meat with a skin that bites back with a satisfying crackle, produced without the need for a vat of hot oil. It’s essentially bone-in chicken legs treated to a quick dry rub (or a light garlic-herb butter under the skin) and then blitzed in the Air Fryer until the exterior blushes into a crisp, golden-brown finish. The name is simple on purpose: we’re using the air fryer to mimic the texture you’d expect from a fried finish, but in a much cleaner, faster, and more weeknight-friendly way. It’s the kind of dish that makes you feel like a culinary wizard even though you only pressed a couple of buttons. And if you’re new to air frying, this recipe is a terrific entry point—no fancy equipment required, just a well-seasoned surface, a careful pat-dry of the skin, and a little patience for the final turn halfway through cooking. It’s essentially chicken leg perfection, amplified by the air fryer magic that keeps everything lean, juicy, and irresistibly crispy.
Why you’ll love this recipe?
What I love most about this airfryer chicken leg is how forgiving and dependable it is. It’s a recipe you can depend on when life gets loud and busy—no last-minute panic, just reliable crisp skin and tender meat. Here are the core reasons this one sticks around in my kitchen:
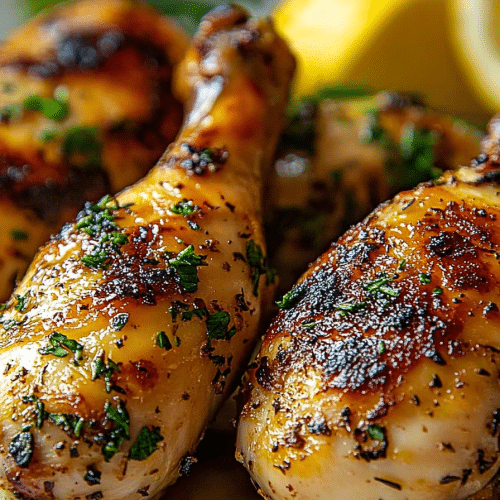
- Flavor: The garlic, olive oil, and herb notes create a savory punch that you can sense in every bite. The skin picks up a toasty, almost nutty aroma from the dry rub and light glaze, which is my favorite moment at the table.
- Simplicity:What is the best way to air fry a chicken?
- Cost-efficiency: What is the best way to measure cost-efficiency? Bone-in chicken legs are budget-friendly, forgiving of small variations in size, and you’ll still end up with a restaurant-like finish without the price tag.
- Versatility: The same technique works with different rubs and glazes, so you can tailor it to your mood—garlic-parmesan, honey-thyme, or a smoky paprika kick. It’s a canvas you can paint with what you’ve got in the pantry.
- Kid-friendly appeal: The meat stays tender, and the crisp skin isn’t just a grown-up treat. My kids actually beg for seconds, which is basically the highest praise in our house.
What’s more, the method scales up or down with ease. I’ve done this for a quick solo dinner, and I’ve also cooked a full tray for a family night without losing the crispness or the juicy bite inside. It’s sticky-sweet in the way a Sunday Dinner should be, but with a modern twist that makes weeknights feel celebratory.
How to Make Crispy Airfryer Chicken Leg
Quick Overview
In a nutshell: pat the chicken dry, rub with a light garlic-herb mixture, and give it a quick preheat in the Air Fryer. Place the legs in a single layer, skin-side up, and cook at 400°F (200°C) for about 18–22 minutes. Halfway through, flip for even color and crispness, then rest for 5 minutes before applying a quick glaze if you like. The result is airfryer chicken leg glory: lean, juicy meat beneath a lacquered, crackly skin that makes a satisfying sound when you bite into it. It’s fast, reliable, and deeply satisfying—a total confidence booster for any home cook who wants a crowd-pleasing meal without the drama.
Ingredients
For the Marinade / Dry Rub:
- 4–6 bone-in chicken legs, skin on (about 2–2.5 lb total)
- 1 tablespoon olive oil or extra-virgin olive oil (optional, helps the rub stick)
- 1 teaspoon paprika (smoked or sweet, depending on what you love)
- 1 teaspoon garlic powder
- 1/2 teaspoon onion powder
- 1/2 teaspoon dried thyme or dried rosemary
- 1/2 teaspoon salt, 1/4 teaspoon black pepper (adjust to taste)
- Optional pinch of chili flakes for a gentle kick
For the Garlic-Butter Filling (under the skin, optional):
- 2–3 tablespoons unsalted butter, softened
- 1 clove garlic, finely minced
- 1 teaspoon chopped fresh parsley or chives
- Pinch of lemon zest
For the Glaze (optional, adds a shine and a touch of sweetness):
- 1 tablespoon honey or maple syrup
- 1 teaspoon fresh lemon juice or apple cider vinegar
- 1 teaspoon soy sauce or tamari
- Pinch of chili flakes (optional)
Step-by-Step Instructions
Step 1: Preheat & Prep Pan
Preheat your Air Fryer to 400°F (200°C). While it’s warming, pat the chicken legs dry with a clean towel. This is the difference between a crisp skin and a soggy one, so don’t skip the towel-dry—this is where a lot of the magic starts. If your air fryer basket is removable, give it a quick wipe so the skin can crisp without sticking. I’ve learned the hard way that extra moisture is the enemy of crisp.
Step 2: Mix Dry Ingredients
In a small bowl, whisk together the paprika, garlic powder, onion powder, thyme, salt, pepper, and a whisper of chili flakes if you like heat. This is your flavor map—each spice plays off the other to create a balanced, punchy profile that doesn’t overwhelm the chicken’s natural goodness.
Step 3: Mix Wet Ingredients
If you’re using olive oil, whisk it with a touch of lemon juice and a pinch of salt to help the rub cling. The oil isn’t strictly necessary, but it does help the spices adhere and contributes to a more even browning. If you’re skipping the oil, you’ll still get crisp skin; the key is patting dry and not overcrowding the basket.
Step 4: Combine
Pat the chicken dry again if needed, then rub the spice mixture all over the legs. If you’re using the garlic-butter filling, gently lift the skin of each leg and tuck a small amount of the garlic-herb butter beneath, then press the skin back into place. This step gives you a juicy interior with a more complex, garlicky aroma that travels through every bite.
Step 5: Prepare Filling
If you’re opting for the under-skin butter, mix the softened butter with minced garlic, parsley, and lemon zest until it’s well combined. Slide a small amount under the skin of each leg, being careful not to tear the skin. This is the trick that keeps the meat indulgently juicy and adds a layer of richness you’ll notice in the first bite.
“Packed with flavor and so simple. Exactly what I wanted from this airfryer chicken leg!”
Step 6: Layer & Swirl
Place the seasoned legs in a single layer in the air fryer basket. Give them a gentle space so air can circulate around each piece. If you like, you can brush a quick glaze on the skin at this point for extra gloss and flavor. The goal is even coverage—think of it as a light varnish that doesn’t weigh down the crisp skin you’re chasing.
Step 7: Bake
Air fry for 18–22 minutes, flipping once around the 9–11 minute mark to ensure even browning and crackling on both sides. The actual time depends on the size of your legs and your air fryer’s performance; you’re aiming for an internal temp of about 165–170°F (74–77°C). If your legs are extra thick, give them a couple of extra minutes, but watch closely for scorching at the edges. When the skin looks deeply bronzed and the juices run clear, you’re close to ready.
Step 8: Cool & Glaze
Let the chicken rest for about 5 minutes after removing from the air fryer. This makes the juices redistribute; you’ll notice the meat becomes even more tender. If you’re using glaze, whisk together the glaze ingredients and brush a light coat on the skin. Return to the air fryer for an additional 1–2 minutes if you want a quick, shiny finish. You’ll hear the glaze set with a subtle, delicious gloss.
Step 9: Slice & Serve
Transfer to a warm plate, give the legs a final sprinkle of flaky salt or a squeeze of lemon, and slice into the meaty part to check the doneness. The meat should be moist and tender, with a crisp, crackly surface that sings against your teeth. This is the moment where you’ll reach for the serving spoon and start passing it around the table—because yes, this airfryer chicken leg is that good. Serve with a simple wedge of lemon and a handful of herbs for brightness, and you’re done.
What to Serve It With
There’s something about crispy chicken that begs for bright greens, light starches, and a little tang to cut through the richness. Here are ideas you can rely on, organized by occasion:
For Breakfast: Leftover airfryer chicken leg makes a fantastic addition to a hearty breakfast plate. Slice and tuck it into a warm tortilla with avocado, a fried egg, and a drizzle of hot sauce. Or crumble the cooled meat over a sunny-side-up egg, pair with tomato and arugula on toast, and call it an early, satisfying start to the day. The aroma alone will wake up the house.
For Brunch: Create a bright, casual board: shredded chicken on a baguette, lemon-dressed greens, marinated mozzarella, and a bowl of cherry tomatoes. Add a small ramekin of chimichurri or garlic yogurt dip for dipping. The crisp skin in every bite makes it feel special without needing a formal sit-down meal.
As Dessert: If you’re feeling playful, pair a lightly honey-glazed version with apple slices sautéed in a touch of butter and cinnamon. It’s not dessert in the traditional sense, but a warm, cinnamon-scented glaze on crispy chicken can feel like a cheeky end to a lighter meal. I’m not saying this is a “sweet course,” but the warm fall flavors can be a comforting finish when you want something cozy and satisfying without baking a whole cake.
For Cozy Snacks: Turn the leftovers into bite-sized snacks by shredding the meat and tossing with a whisper of BBQ sauce. Serve with celery sticks and a lemony yogurt dip for dipping. It’s a fantastic, approachable party platter or movie-night snack that stays light enough to enjoy without guilt, but still feels like a treat.
Top Tips for Perfecting Your Crispy Airfryer Chicken Leg
These little refinements are what turn good into great in my kitchen. They’re the tweaks I’ve learned after countless meals, and they’ll help you nail that perfect balance of crisp skin and juicy meat.
Chicken Leg Prep: Always pat the skin dry, and give the legs a quick light coat of oil if your rub is dry. Extra moisture is the enemy of crispness, so the drier the surface, the better the bite.
Rub Mixing: Combine spices thoroughly and rub under the skin where possible. A well-distributed rub gives you even flavor from bone to skin, and a little bit of salt inside the cavity goes a long way.
Swirl Customization: If you love color and pattern, try a slightly different spacing or rotate the legs halfway through to ensure consistent browning. A tiny amount of glaze can yield a glossy finish without pooling.
Ingredient Swaps: This is forgiving. Swap smoked paprika for regular paprika if you want a milder smoke note. Use garlic powder instead of fresh garlic if you’re avoiding the extra squeaky garlic aroma, or try a touch of brown sugar in the rub for a subtle caramelization.
Baking Tips: If you’re using a smaller air fryer or cooking for a crowd, work in batches to avoid overcrowding. Overcrowding will steam the skin, preventing it from crisping. Flip halfway and check at the 18-minute mark to adjust time as needed.
“New family favorite! This airfryer chicken leg was so flavorful and ridiculously easy. Crowd-pleaser for sure.”
Glaze Variations: For a shinier finish, brush glaze on during the last 2–3 minutes of cooking rather than after. If you want a more savory profile, swap honey for soy-based glaze or balsamic reduction and add a pinch of pepper.
Over the years I’ve learned to trust the process: dry surface, even space, and a well-balanced rub. It’s a small recipe with a big return, and that balance—of crisp skin and juicy meat—reminds me of why I love cooking so much. If you’re ever tempted to skip the rest period, do not. Resting is where the juices settle and the texture becomes truly succulent. This little pause makes all the difference, especially when you’re feeding a hungry family in the evening rush. Trust me on this one—give it that extra moment, and you’ll hear the chorus of satisfied sighs around the table.
Storing and Reheating Tips
Storing and reheating can keep leftovers tasting surprisingly fresh, which is a gift when you’re cooking for one or for a few days. Here’s how I handle it so the airfryer chicken leg remains flavorful and crisp.
Room Temperature: If you’re eating it within a couple of hours, you can leave it out in a warm spot for a short time, but I recommend storing leftovers within two hours to keep the texture at its best.
Refrigerator Storage: Place cooled legs in an airtight container or wrap them tightly in foil or plastic wrap. They’ll stay good for 3–4 days in the fridge. If you’ve stuffed the skin or the under-skin butter, it’s still fine—just ensure the edges stay sealed to prevent moisture loss.
Freezer Instructions: For longer storage, you can freeze cooked legs for up to 2 months. Wrap individually or seal in a freezer-safe bag. Thaw in the fridge overnight, then reheat in the air fryer at 350°F (175°C) for 5–8 minutes or until warmed through and the skin re-crisps nicely. The meat stays juicy and the skin regains a good snap with a short reheat.
Glaze Timing Advice: If you plan to freeze or refrigerate, consider adding the glaze after reheating rather than before. A glaze applied during reheat can transform textures slightly, but you’ll still love the glossy finish and flavor.
In my kitchen, I keep a small stash of reheated leftovers handy for quick lunches, and I’ve found the best way to reclaim crispness is to reheat in a hot air fryer basket for a few minutes with a light glaze or a squeeze of lemon. The result is a second-day version that still feels vibrant and fresh.
Frequently Asked Questions
Final Thoughts
This Crispy Airfryer Chicken Leg recipe has become my go-to for weeknights and casual gatherings alike. It’s a dish that respects your time and your palate, delivering a crisp skin that crackles with a buttery, garlicky aroma and a juicy interior that’s impossible to resist. It’s a small triumph that happens in a hot, buzzing air fryer, and the moment you plate it, you’ll hear the chorus of happy sighs around your table. If you’re craving more of that comforting, homey flavor without spending hours in the kitchen, you’ve found a kindred dish here. I’d love to hear how you customize it—whether you swap in different spice blends, test out a maple glaze, or stuff the skin with an extra herb butter twist. Please drop a comment below with your tweaks, rate the recipe, and share your own family spin. Happy cooking—and can’t wait to hear how yours turns out!
Air Fryer Chicken Legs
Ingredients
Main Ingredients
- 2 lbs Chicken Drumsticks skin-on, bone-in
- 1 tbsp Olive Oil
- 1 tsp Smoked Paprika
- 0.5 tsp Garlic Powder
- 0.5 tsp Onion Powder
- 0.75 tsp Salt or to taste
- 0.25 tsp Black Pepper freshly ground
Instructions
Preparation Steps
- Pat the chicken legs thoroughly dry with paper towels. This helps achieve crispy skin.
- In a medium bowl, drizzle the chicken legs with olive oil. Sprinkle with smoked paprika, garlic powder, onion powder, salt, and black pepper. Rub the seasoning evenly over all sides of the chicken.
- Preheat your air fryer to 375°F (190°C) for 5 minutes.
- Place the seasoned chicken legs in a single layer in the air fryer basket, ensuring not to overcrowd it. Cook in batches if necessary.
- Cook for 18-22 minutes, flipping the chicken legs halfway through, until the internal temperature reaches 165°F (74°C) with a meat thermometer and the skin is golden brown and crispy.
- Remove the chicken legs from the air fryer and let them rest for 5 minutes before serving.