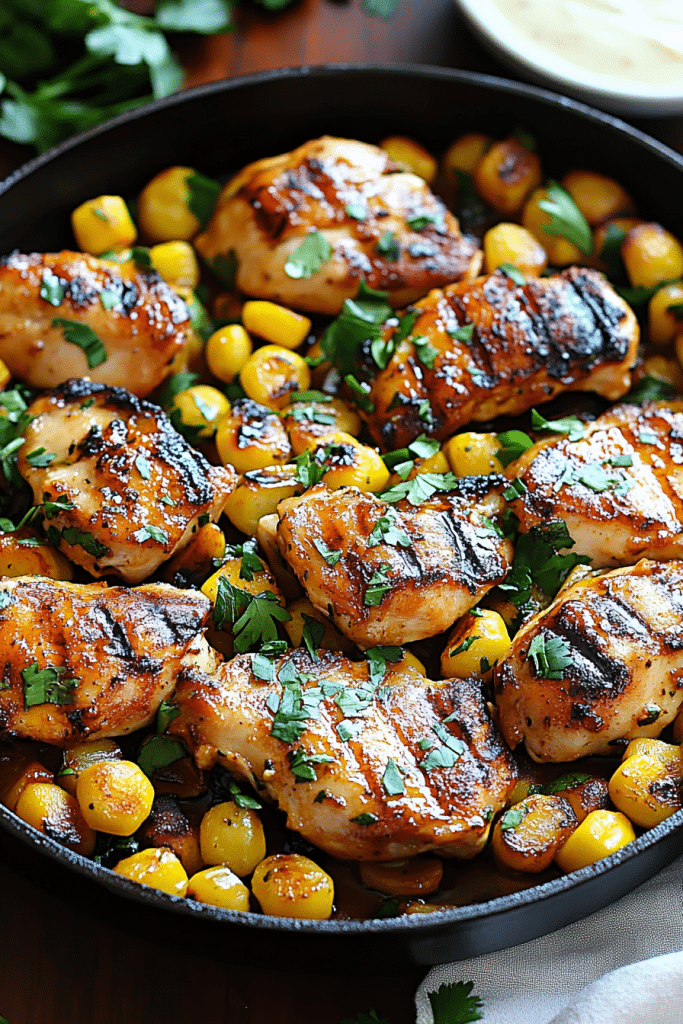
Oh, you guys. I’ve been waiting to share this one with you for ages! It’s one of those recipes that, once you make it, you’ll wonder how you ever lived without it. Imagine this: tender, juicy chicken thighs bathed in a rich, fragrant garlic butter sauce that’s practically begging to be mopped up with crusty bread. It’s the kind of meal that makes your whole house smell incredible and instantly feels like a hug in a bowl. I’ve made this garlic butter chicken more times than I can count, and every single time, it’s a winner. It’s ridiculously simple, perfect for those nights when you want something truly special without spending hours in the kitchen, and let me tell you, my family devours it. If you thought chicken was boring, prepare to have your mind changed. This isn’t just chicken; it’s an experience. It’s my go-to when I want to impress without the stress, and it always delivers.
Thank you for reading this post, don't forget to subscribe!What is garlic butter chicken?
So, what exactly is this magical dish I’m raving about? At its heart, Garlic Butter Chicken is precisely what it sounds like: chicken cooked and coated in a luscious sauce made primarily from garlic and butter. But oh, it’s so much more than the sum of its parts! Think of it as a super-elevated weeknight dinner that feels like it came from a fancy restaurant, but you made it yourself in your own kitchen. It’s essentially pan-seared chicken that’s then simmered in a fragrant, bubbling concoction of melted butter, tons of garlic (because, well, it’s garlic butter chicken!), and usually a splash of something to brighten it up like lemon juice or white wine. The chicken becomes unbelievably tender, and the sauce… let’s just say it’s the star of the show. It’s warm, savory, a little decadent, and just utterly comforting. It’s not overly complicated, but the flavor payoff is HUGE.
Why you’ll love this recipe?
I could write a novel about why this Garlic Butter Chicken is a kitchen superhero, but I’ll try to keep it concise!flavor is out of this world. That combination of browned chicken, sautéed garlic, and melted butter creates a symphony in your mouth. It’s savory, rich, and incredibly satisfying. You get those lovely crispy bits from searing the chicken, and then it’s enveloped in this velvety, garlicky goodness. It’s pure comfort food at its finest. Second, the simplicity is a lifesaver. I mean, we’re talking about one pan and a handful of common ingredients. You can have this on the table in about 30-40 minutes from start to finish, which is a miracle on busy weeknights when the “what’s for dinner?” question hits hard. And let’s talk about Cost-efficiency: What is the best way to measure cost-efficiency?. Chicken thighs are usually super affordable, and the other ingredients – butter, garlic, pantry staples – are things you likely already have on hand. It’s a way to create a restaurant-quality meal without breaking the bank. Finally, its versatility is fantastic. You can serve this over pasta, rice, mashed potatoes, or even just with a big salad and some crusty bread for dipping. It’s hearty enough for a main course but elegant enough to serve to guests. What I love most about this is the sheer satisfaction of making something so delicious and impressive with such ease. It’s a recipe that truly builds confidence in the kitchen and always brings smiles to the table.
How to Make Garlic Butter Chicken
Quick Overview
This Garlic Butter Chicken recipe is a straightforward pan-sear and simmer affair. We’ll start by getting a beautiful golden-brown crust on our chicken thighs, then build the glorious garlic butter sauce right in the same pan. It’s all about building layers of flavor. The key is to not overcrowd the pan when searing and to let the butter and garlic do their magic. It’s the kind of dish that looks and tastes like you spent hours on it, but in reality, it’s surprisingly quick and easy. Perfect for a weeknight indulgence or a casual weekend meal.
Ingredients
For the Chicken:
You’ll want about 1.5 to 2 pounds of boneless, skinless chicken thighs. I always go for thighs because they stay so incredibly juicy and tender, even if you accidentally overcook them a tiny bit – a lifesaver for busy cooks! Make sure they’re relatively uniform in size so they cook evenly. If they’re really large, you can always trim them down a bit. Pat them completely dry with paper towels before seasoning; this is crucial for getting a good sear and that lovely golden-brown color. For seasoning, simple salt and freshly ground black pepper are all you need. Don’t be shy with the salt and pepper!
For the Garlic Butter Sauce:
This is where the magic happens! You’ll need about 4-6 tablespoons of unsalted butter. I prefer unsalted so I can control the saltiness better. For the garlic, get ready for a serious dose: 6-8 cloves, minced. Yes, really! You can mince it yourself, or if you’re like me and love a shortcut, good quality pre-minced garlic works in a pinch, though fresh is always best for that vibrant flavor. A tablespoon or two of olive oil is also good to add to the pan to help the butter not burn too quickly. For brightness, we’ll add the juice of about half a lemon at the end. Optional, but highly recommended for that little zing: a splash of dry white wine or chicken broth (about 1/4 cup) to deglaze the pan after searing the chicken. Some fresh parsley, chopped, for garnish at the very end is also a must for color and freshness.
“The Garlic Butter Chicken turned out amazing. My kids asked for seconds. Saving this one!”
Step-by-Step Instructions
Step 1: Preheat & Prep Pan
Grab a large skillet – a cast-iron skillet is my absolute favorite for this because it holds heat so beautifully and gives the best sear. Place it over medium-high heat. While the pan is heating up, make sure your chicken thighs are patted completely dry with paper towels and seasoned generously on both sides with salt and pepper. Getting them dry is your secret weapon for a beautiful golden crust!
Step 2: Sear the Chicken
Once your skillet is nice and hot (you should feel the heat radiating off it), add about a tablespoon of olive oil. Carefully lay the seasoned chicken thighs into the hot pan. Don’t overcrowd the pan! If you have too many, they’ll steam instead of sear. Cook in batches if necessary. Let them cook undisturbed for about 5-7 minutes per side, until they’re deeply golden brown and have a lovely crust. They don’t need to be cooked all the way through at this stage, as they’ll finish cooking in the sauce. Once seared, remove the chicken from the skillet and set them aside on a plate.
Step 3: Sauté the Garlic
Reduce the heat to medium. Add the butter to the same skillet. Once it’s melted and starts to foam a little, add your minced garlic. Stir it constantly for about 30-60 seconds, just until it’s fragrant. Be really careful here – burnt garlic is bitter, and nobody wants that! You just want to lightly toast it to release its amazing aroma.
Step 4: Deglaze (Optional but Recommended)
If you’re using white wine or chicken broth, pour it into the pan now. Scrape up any browned bits stuck to the bottom of the pan with a wooden spoon. Let it bubble and reduce for about a minute. These browned bits are pure flavor gold!
Step 5: Simmer the Chicken in Sauce
Return the seared chicken thighs (and any juices that have accumulated on the plate) back into the skillet with the garlic butter sauce. Spoon some of the sauce over the chicken. Reduce the heat to low, cover the skillet, and let the chicken simmer gently for about 10-15 minutes, or until the chicken is cooked through and tender. The exact time will depend on the thickness of your chicken.
Step 6: Finish with Lemon and Parsley
Once the chicken is cooked, stir in the fresh lemon juice. This really brightens up the rich, buttery sauce. Taste the sauce and adjust seasoning if needed – maybe a pinch more salt or pepper. Stir in the chopped fresh parsley just before serving. The fresh green flecks are beautiful and add a burst of freshness.
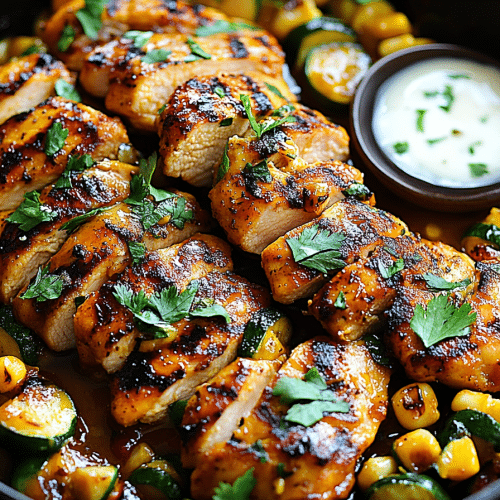
Step 7: Slice and Serve
You can serve the chicken thighs whole, or if you prefer, slice them before plating. Spoon that incredible garlic butter sauce generously over the top. It’s utterly divine!
“I don’t know if I’ve ever eaten a better Garlic Butter Chicken. The rub alone is wonderful, but the sauce??? Over the top!”
What to Serve It With
This Garlic Butter Chicken is so versatile, it works for almost any meal occasion! For a lovely breakfast or brunch, I love serving it alongside some fluffy scrambled eggs or a simple omelet. The savory chicken and rich sauce pair surprisingly well with the eggs, and a side of toasted sourdough makes it a complete meal. When I’m feeling a bit fancier and making it for brunch with friends, I’ll plate it with some roasted asparagus or a light, lemony arugula salad. The freshness cuts through the richness beautifully. And for dessert? Well, that’s a different story, but for dinner, this chicken is the main event! It’s also absolutely perfect for cozy snacks or a light lunch. A big scoop of creamy mashed potatoes or fluffy white rice is practically mandatory for soaking up every last drop of that glorious garlic butter sauce. My kids also love it piled high on toasted baguette slices – it’s like an open-faced chicken sandwich, and they gobbles it up! My personal family tradition is serving it over a bed of angel hair pasta; it cooks so quickly and the sauce clings to it perfectly. Another favorite is with roasted broccoli or green beans for a simple, healthy, and satisfying meal that always gets rave reviews.
Top Tips for Perfecting Your Garlic Butter Chicken
Okay, let’s dive into some of my best-kept secrets and lessons learned over the years of making this fantastic Garlic Butter Chicken. First, when it comes to the chicken prep, really focus on patting it dry. I can’t stress this enough! Moisture is the enemy of a good sear. Use paper towels and be thorough. If you have time, letting the seasoned chicken sit out at room temperature for about 15-20 minutes before cooking also helps it cook more evenly. For mixing advice, remember that the sauce is built in the pan *after* the chicken is seared. Don’t add all the ingredients at once. Sautéing the garlic properly is key; watch it like a hawk, and when it’s fragrant but not brown, move on. If you’re worried about burning the garlic, you can add it in the last minute of sautéing the chicken, then remove the chicken and proceed with the sauce. For sauce customization, don’t be afraid to play with the garlic. If you love it super garlicky, add a few more cloves! If you’re less keen, start with four. The lemon juice is vital for balance, so don’t skip it unless absolutely necessary. For ingredient swaps, while chicken thighs are my go-to for juiciness, you could use boneless, skinless chicken breasts. Just be extra careful not to overcook them – they cook faster than thighs, and can dry out quickly. Adjust your cooking time accordingly. If you don’t have fresh parsley, a pinch of dried Italian seasoning can work in a pinch, but fresh is truly best for that vibrant finish. For baking tips (though this is pan-cooked, the principle of even cooking applies!), make sure your heat isn’t too high when simmering. A gentle simmer is what keeps the chicken tender and allows the flavors to meld. If your sauce looks like it’s reducing too quickly, you can always add a splash more broth or water. And for glaze variations, if you want to thicken the sauce slightly without cornstarch (which I find unnecessary here), you can let it reduce uncovered for a few extra minutes at the end, but be careful not to let it get too oily. A sprinkle of red pepper flakes at the garlic-sautéing stage adds a lovely subtle heat that I absolutely adore on a crisp autumn evening.
Storing and Reheating Tips
One of the best things about this Garlic Butter Chicken is how well it stores and reheats, making it a fantastic candidate for meal prep. For room temperature storage, it’s best to refrigerate leftovers as soon as they’ve cooled down to a safe temperature, usually within two hours. Don’t leave it out for too long, especially with the dairy in the sauce. When storing in the refrigerator, I like to put any leftover chicken and sauce into an airtight container. It usually keeps well for about 3-4 days. The flavors actually tend to meld even more, which is a nice bonus! For freezer instructions, this dish freezes reasonably well, although the texture of the sauce might change slightly upon thawing. I recommend freezing the chicken and sauce separately if possible, or making sure the container is very well-sealed to prevent freezer burn. It can typically be kept in the freezer for up to 2-3 months. To thaw, it’s best to transfer it to the refrigerator overnight. When it comes to glaze timing advice, I always add the fresh lemon juice and parsley right before serving. If you’re reheating, you can add a fresh squeeze of lemon and some fresh parsley to liven it up again. If you’re planning on freezing, I’d skip the fresh parsley until after reheating. For reheating, gently warming it on the stovetop over low heat is usually best. You can add a splash of chicken broth or water if the sauce seems a bit thick. If you’re short on time, microwaving works too, just make sure to stir it halfway through to ensure even heating.
Frequently Asked Questions
Final Thoughts
So there you have it, my absolute favorite Garlic Butter Chicken recipe! I really hope you give this one a try because it’s just one of those dishes that brings so much joy to my kitchen and to our dinner table. It’s proof that you don’t need a million fancy ingredients or hours of your time to create something truly spectacular. The way the garlic and butter meld with the tender chicken is just pure culinary magic. If you loved this recipe, you might also want to check out my [Creamy Tuscan Chicken](link to another recipe) or my [Lemon Herb Roasted Chicken](link to another recipe) for more simple yet incredibly flavorful chicken dinners. I can’t wait to hear how yours turns out! Please, please leave a comment below and tell me what you think, or share any variations you tried. And if you snap a picture, tag me on social media – I love seeing your creations! Happy cooking!
Garlic Butter Chicken
Ingredients
Main Ingredients
- 1.5 pounds boneless, skinless chicken breasts cut into 1-inch pieces
- 4 cloves garlic minced
- 0.5 cup unsalted butter
- 0.5 cup heavy cream
- 0.25 cup chicken broth
- 0.5 cup grated Parmesan cheese
- 2 tablespoons fresh parsley chopped
- 0.5 teaspoon salt
- 0.25 teaspoon black pepper
Instructions
Preparation Steps
- In a large skillet, melt butter over medium heat. Add minced garlic and cook until fragrant, about 1 minute.
- Add chicken pieces to the skillet and season with salt and pepper. Cook until chicken is browned and cooked through.
- Pour in chicken broth and heavy cream. Bring to a simmer and cook for 5-7 minutes, or until the sauce has thickened.
- Stir in grated Parmesan cheese until melted and the sauce is creamy.
- Garnish with fresh parsley before serving.