There are some recipes that just scream holiday spirit, aren’t there? This one, my friends, is definitely at the top of that list for me. Every year, as soon as the first crisp autumn air hits, my mind drifts to these incredible Chocolate Peanut Butter Christmas trees. They’re not just a treat; they’re a little slice of pure joy that brings back so many memories. I remember my grandma making something similar when I was just a little tyke, and the smell of cocoa and peanut butter wafting from her kitchen was like magic. These trees are my modern take on that nostalgic bliss, and honestly, they’ve become a non-negotiable part of our holiday baking marathon. If you love a good chocolate and peanut butter combo, and who doesn’t, then you’re going to adore these. They’re almost like a rich brownie crossed with a soft, fudgy cookie, all swirled together and shaped into adorable little trees. They’re surprisingly easy to whip up, which is a lifesaver during the busy holiday season, and they look so darn festive on a cookie platter. Forget complicated cookie cutters or fussy decorating; these come together with a simple swirl and a drizzle!
Thank you for reading this post, don't forget to subscribe!
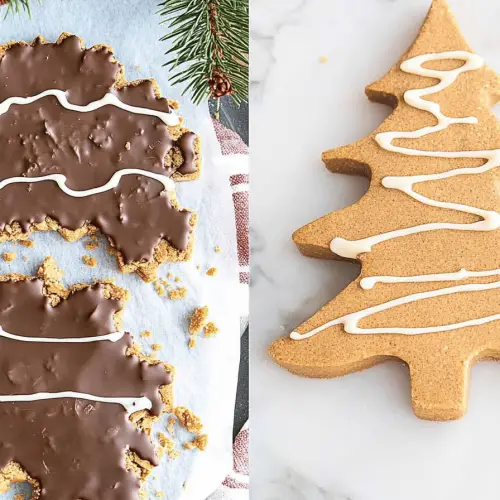
What are chocolate peanut butter Christmas trees?
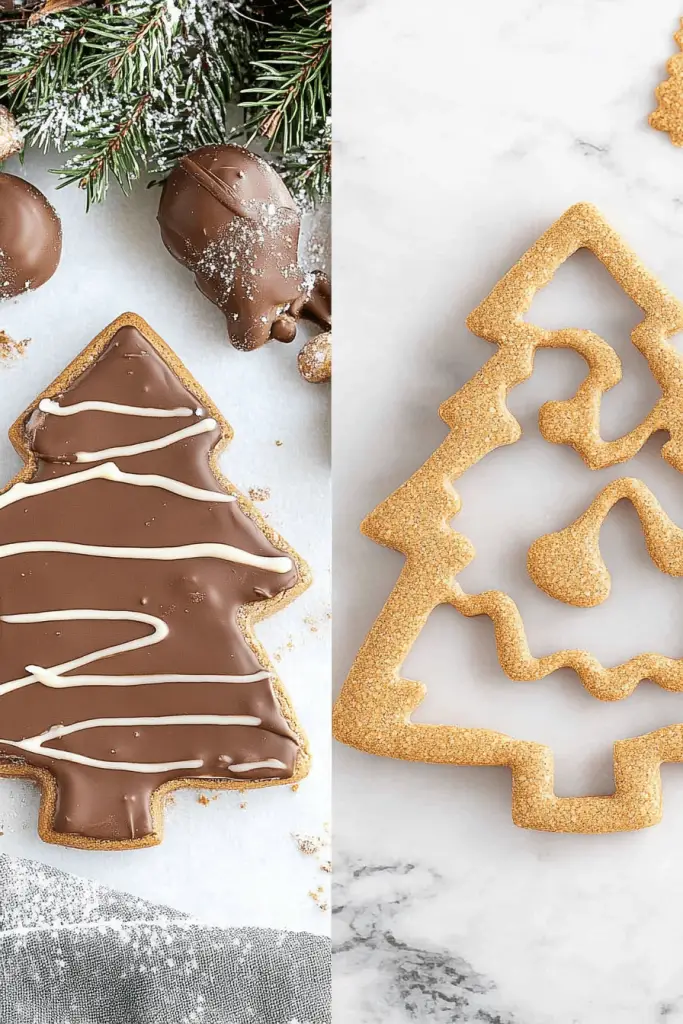
So, what exactly are these delightful little guys? Think of them as a playful, festive twist on your favorite chocolate and peanut butter treats. They’re essentially a rich, moist chocolate base, swirled with a Creamy Peanut Butter mixture, and baked in a way that creates beautiful, marble-like patterns. Then, they’re cut into festive tree shapes and often drizzled with a simple glaze or more chocolate for an extra pop of flavor and visual appeal. The name “Christmas trees” comes from how we slice them and arrange them – you can totally get creative with it, but the marbling naturally lends itself to a festive, almost abstract tree-like design. It’s like a hug in edible form, a perfect balance of deep chocolatey richness and the comforting, nutty sweetness of peanut butter. They’re not overly sweet, which I really appreciate, allowing the quality of the chocolate and the natural saltiness of the peanut butter to really shine through.
Why you’ll love this recipe?
Honestly, where do I even begin with why you’ll adore these Chocolate Peanut Butter Christmas trees? First off, the flavor combination is just unbeatable. It’s that classic duo that’s been winning hearts for generations, elevated with a rich cocoa base and smooth peanut butter swirl. It’s decadent without being too heavy, and the balance is just spot-on. Then there’s the sheer simplicity of it all. You might look at them and think they’re complicated with their beautiful swirls, but trust me, they are SO easy. We’re talking minimal fuss, maximum flavor. This recipe is a real winner on busy nights when you want something special but don’t have hours to spend in the kitchen. Plus, they’re incredibly cost-effective! Most of the ingredients are pantry staples, making them a budget-friendly way to bring some holiday cheer to your table. What I love most, though, is their versatility. While they’re obviously perfect for Christmas, they’re so good, you’ll find yourself craving them year-round. They’re fantastic for bake sales, potlucks, or just when you need a little pick-me-up. They’re a bit like a fudgy brownie meets a soft cookie, and that texture is just divine. I’ve even had people ask me if they’re similar to a specific, very popular chocolate-almond bar, and while they have that satisfying richness, these have their own unique charm. They truly are a crowd-pleaser!
How do I make chocolate peanut butter Christmas tree?
Quick Overview
Making these festive beauties is surprisingly straightforward! We’ll start by whipping up a simple, luscious chocolate batter, then create a creamy Peanut Butter swirl that gets folded in. The magic happens when we swirl it all together for that gorgeous marbling. After a short bake, these fudgy delights are cooled and then transformed into charming Christmas trees. It’s a process that’s both fun and incredibly rewarding, even for beginner bakers. You’ll be amazed at how quickly these come together, making them perfect for last-minute holiday baking!
Ingredients
For the Main Batter:
You’ll need unsalted butter, softened to room temperature – this is key for a smooth batter. For the chocolate flavor, we’re using unsweetened cocoa powder; the better quality you use, the richer the flavor. Granulated sugar and Brown Sugar are essential for sweetness and that perfect soft texture. Eggs, preferably at room temperature, will bind everything together beautifully. A good splash of vanilla extract is a must for rounding out those flavors. All-purpose flour is our base, and a pinch of salt enhances all the other tastes. For a little lift and tenderness, we’ll add baking soda. And for that moistness and depth, a bit of hot water or hot brewed coffee – coffee really amps up the chocolate flavor without making it taste like coffee, trust me on this!
For the Filling:
This is where the peanut butter magic happens. You’ll need creamy peanut butter – I always go for a good quality one that’s not too oily. A little bit of powdered sugar helps sweeten it and gives it a lovely, smooth consistency. A touch more melted butter makes it extra luscious. And again, a hint of vanilla extract just ties it all together perfectly.
For the Glaze (Optional, but recommended!):
For a simple glaze, we’ll use powdered sugar, a tablespoon or two of milk (or even a little cream for extra richness), and a tiny splash of vanilla extract. You can also melt some chocolate chips for a double chocolate drizzle if you’re feeling extra indulgent. Make sure your glaze is the right consistency – not too thick, not too thin, just perfect for drizzling!
“I don’t know if I’ve ever eaten a better chocolate peanut butter christmas trees. The rub alone is wonderful, but the sauce??? Over the top!”
Step-by-Step Instructions
Step 1: Preheat & Prep Pan
First things first, let’s get our oven preheating to 350 degrees Fahrenheit (175 degrees Celsius). This is a pretty standard baking temperature, but it’s always good to know your own oven, as they can be a bit quirky! Next, grab a 9×13 inch baking pan. You’ll want to grease it really well and then line it with parchment paper, leaving some overhang on the sides. This overhang is your best friend when it comes to lifting the baked treat out of the pan later on. I always make sure the parchment goes up the sides a bit too; it makes lifting it out and cooling it so much easier. No more struggling to get those stubborn baked goods out!
Step 2: Mix Dry Ingredients
In a medium-sized bowl, whisk together your all-purpose flour, unsweetened cocoa powder, baking soda, and salt. Whisking them together thoroughly before adding them to the wet ingredients ensures that everything is evenly distributed. This is a small step, but it really makes a difference in the final texture, preventing any pockets of baking soda or dry cocoa. You want a nice, uniform blend.
Step 3: Mix Wet Ingredients
In a larger bowl, cream together the softened unsalted butter with the granulated sugar and brown sugar. Beat this mixture until it’s light and fluffy – you’ll see it become pale and airy. This process incorporates air, which helps with the texture. Next, beat in the eggs one at a time, making sure each one is fully incorporated before adding the next. Stir in the vanilla extract. This creates the rich, flavorful base for our chocolate batter.
Step 4: Combine
Now, we’re going to gradually add the dry ingredients to the wet ingredients, alternating with the hot water or coffee. Start by adding about a third of the dry ingredients and mix until just combined. Then, add half of the hot liquid and mix. Repeat this process, ending with the dry ingredients. Be careful not to overmix! Overmixing can develop the gluten in the flour too much, leading to a tougher texture. You just want to mix until there are no dry streaks of flour visible. The batter will be quite thick at this point, which is exactly what we want.
Step 5: Prepare Filling
While your batter is resting, let’s get the peanut butter filling ready. In a separate bowl, combine the creamy peanut butter, melted butter, powdered sugar, and vanilla extract. Stir or whisk this until it’s smooth and well combined. It should be a thick but spreadable consistency. If it seems too stiff, you can add another teaspoon of melted butter or a tiny splash of milk. The goal is a luscious, creamy peanut butter mixture that will swirl beautifully into the chocolate batter.
Step 6: Layer & Swirl
Pour about half of the chocolate batter into your prepared baking pan and spread it evenly. Now, dollop spoonfuls of the peanut butter filling over the chocolate batter. Don’t worry about making it perfect; we want those pockets of peanut butter goodness. Then, spoon the remaining chocolate batter over the peanut butter layer. Grab a knife or a skewer and gently swirl the peanut butter and chocolate together. You can do this by making figure-eights or just dragging the knife through the layers. The goal is to create beautiful marbling without fully mixing the two batters together. You want distinct swirls and pockets of flavor!
Step 7: Bake
Place the pan in your preheated oven and bake for about 25-30 minutes. You’ll know they’re done when a toothpick inserted into the center comes out with moist crumbs attached, but no wet batter. Be careful not to overbake, as this will result in a dry texture. The edges should look set, and the center might still be slightly fudgy.
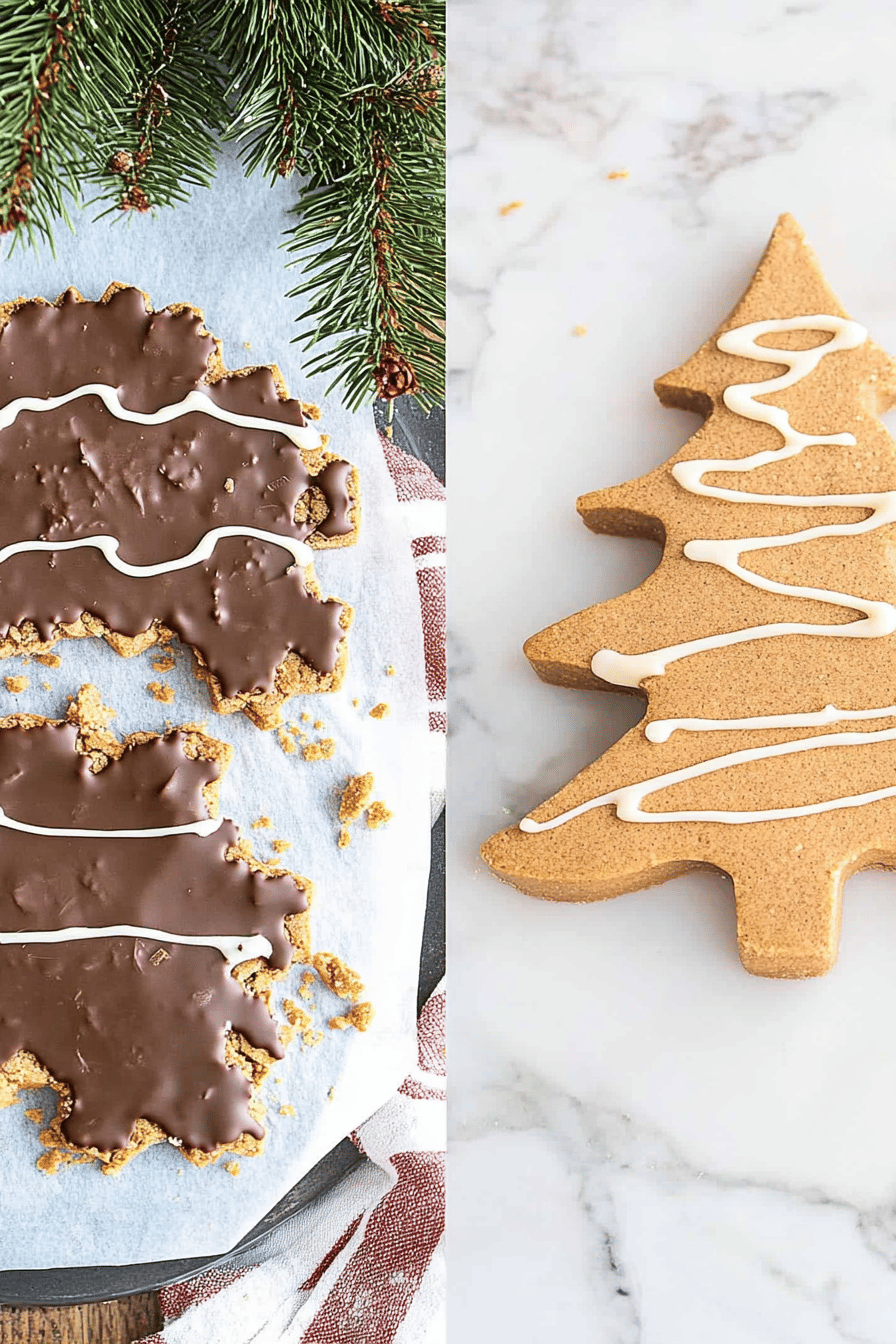
Step 8: Cool & Glaze
Once baked, carefully lift the parchment paper with the treat out of the pan and let it cool completely on a wire rack. This is super important! Trying to cut or glaze it while it’s warm will just make a mess. Once it’s completely cool, you can prepare your glaze if you’re using one. Whisk together powdered sugar, a little milk, and vanilla until smooth. Drizzle this over the cooled chocolate peanut butter base. If you’re using melted chocolate, drizzle that on instead. Let the glaze set up a bit before slicing.
Step 9: Slice & Serve
Once the glaze is set, it’s time for the fun part: making them into trees! You can slice the entire rectangle into smaller rectangular bars first, about 2 inches wide. Then, take each bar and slice it diagonally from one corner to create a triangle. You can then trim the tip to make it more tree-like or leave it as is. Arrange them on a platter, and you’ve got yourself a festive display! They’re delicious served at room temperature.
“New family favorite! This chocolate peanut butter christmas trees was so flavorful and ridiculously easy. Crowd-pleaser for sure.”
What to Serve It With
These chocolate peanut butter Christmas trees are so versatile, they truly fit into any holiday gathering. For a cozy breakfast, I love serving a smaller, thicker cut alongside a steaming mug of coffee or a warm glass of milk. The rich chocolate and peanut butter flavors are such a comforting way to start a chilly morning. If you’re planning a holiday brunch, these make a stunning addition to a sweet spread. I like to plate them a bit more elegantly, perhaps with a dusting of powdered sugar or a tiny sprig of rosemary to mimic pine needles. They pair beautifully with a mimosa or a festive cranberry spritzer. As a dessert, they’re absolutely divine after a hearty holiday meal. Serve a larger piece with a scoop of vanilla bean ice cream or a dollop of whipped cream for an extra indulgent treat. A small glass of port or even a rich hot chocolate is the perfect companion. And for those spontaneous cozy snack moments when you just need a bit of sweetness? These are your answer. They’re perfect on their own with a cup of tea or a glass of cold milk, just like they were when I was a kid. My family tradition is to have them after our Christmas Eve dinner, and it just wouldn’t be the same without them.
Top Tips for Perfecting Your Chocolate Peanut Butter Christmas Trees
Over the years, I’ve learned a few tricks that make these chocolate peanut butter Christmas trees even better. For the main batter, using hot coffee instead of hot water truly deepens the chocolate flavor without making it taste like coffee. It’s a game-changer! When you’re mixing the dry and wet ingredients, resist the urge to overmix. A few streaks of flour remaining are better than developing too much gluten, which can make them tough. For the peanut butter filling, make sure your peanut butter is at room temperature so it incorporates smoothly. If it’s too stiff, it’s harder to swirl evenly. I’ve found that using a good quality creamy peanut butter really makes a difference in the texture and flavor of the swirl. When you’re swirling the batter, don’t overdo it! You want those beautiful ribbons of peanut butter and chocolate, not a muddy brown mess. Think gentle figure-eights or just a few random drags with a knife. For baking, always keep an eye on them in the last few minutes. Ovens vary, and overbaking is the enemy of that perfect fudgy texture. A toothpick with moist crumbs is your signal they’re ready. If you’re making the glaze, start with less liquid and add more a tiny bit at a time until you reach your desired drizzling consistency. You can always thin it out, but it’s hard to thicken it up again without adding more powdered sugar. A little tip for extra festive flair: sprinkle some festive colored sprinkles on the glaze while it’s still wet, or even some crushed peanuts for added texture!
Storing and Reheating Tips
These chocolate peanut butter Christmas trees are pretty resilient, which is great during the holidays! If you’ve got leftovers (which I highly doubt, but just in case!), you can store them at room temperature in an airtight container for about 2-3 days. Make sure they’re completely cooled before you seal the container. If you want them to last a bit longer, or if your kitchen is particularly warm, your refrigerator is your friend. Store them in an airtight container in the fridge for up to a week. They’ll stay moist and delicious, though they might firm up a bit. If you’re craving that fudge-like texture, just let them sit out at room temperature for about 15-20 minutes before serving. For really long-term storage, these beauties freeze wonderfully. Wrap individual bars or stacks of bars tightly in plastic wrap, then place them in a freezer-safe bag or container. They can stay frozen for up to 2-3 months. To thaw, simply transfer them from the freezer to the refrigerator overnight. If you’ve glazed them, the glaze usually holds up well to freezing and thawing. If you added them to a cookie platter and they’ve lost some of their moisture, you can sometimes refresh them by gently warming them for a few seconds in the microwave (just a few seconds, I can’t stress that enough!).
Frequently Asked Questions
Final Thoughts
I truly hope you get a chance to make these chocolate peanut butter Christmas trees this holiday season, or any time you need a little burst of happiness. They’re more than just a recipe; they’re a way to create special memories and share a bit of warmth and sweetness with the people you love. The blend of rich chocolate and creamy peanut butter is just pure bliss, and seeing those beautiful swirls come to life is incredibly satisfying. Plus, knowing how easy they are makes them a stress-free addition to any festive gathering. If you end up giving them a try, please come back and let me know how they turned out! I love hearing your stories and seeing your creations. And if you loved these, you might also enjoy my recipe for [link to another delicious chocolate or holiday recipe on your blog, e.g., “Chewy Gingerbread Cookies”] or my [link to a peanut butter focused recipe, e.g., “No-Bake Peanut Butter Fudge”]. Happy baking, and Merry Christmas!
Chocolate Peanut Butter Christmas Trees
Ingredients
Main Ingredients
- 0.5 cup Peanut Butter
- 0.25 cup Butter, softened
- 1 cup Powdered Sugar
- 0.5 teaspoon Vanilla Extract
- 0.5 cup Chocolate Chips for melting
- 1 tablespoon Vegetable Oil optional, for thinning chocolate
Instructions
Preparation Steps
- In a medium bowl, cream together the peanut butter and softened butter until smooth.
- Gradually add the powdered sugar and vanilla extract, mixing until well combined and a dough forms.
- Roll the dough into a log and cut into 12 equal pieces.
- Shape each piece into a small triangle to resemble a Christmas tree.
- Melt the chocolate chips in a microwave-safe bowl, stirring every 30 seconds, or in a double boiler. Stir in the vegetable oil if using to thin the chocolate.
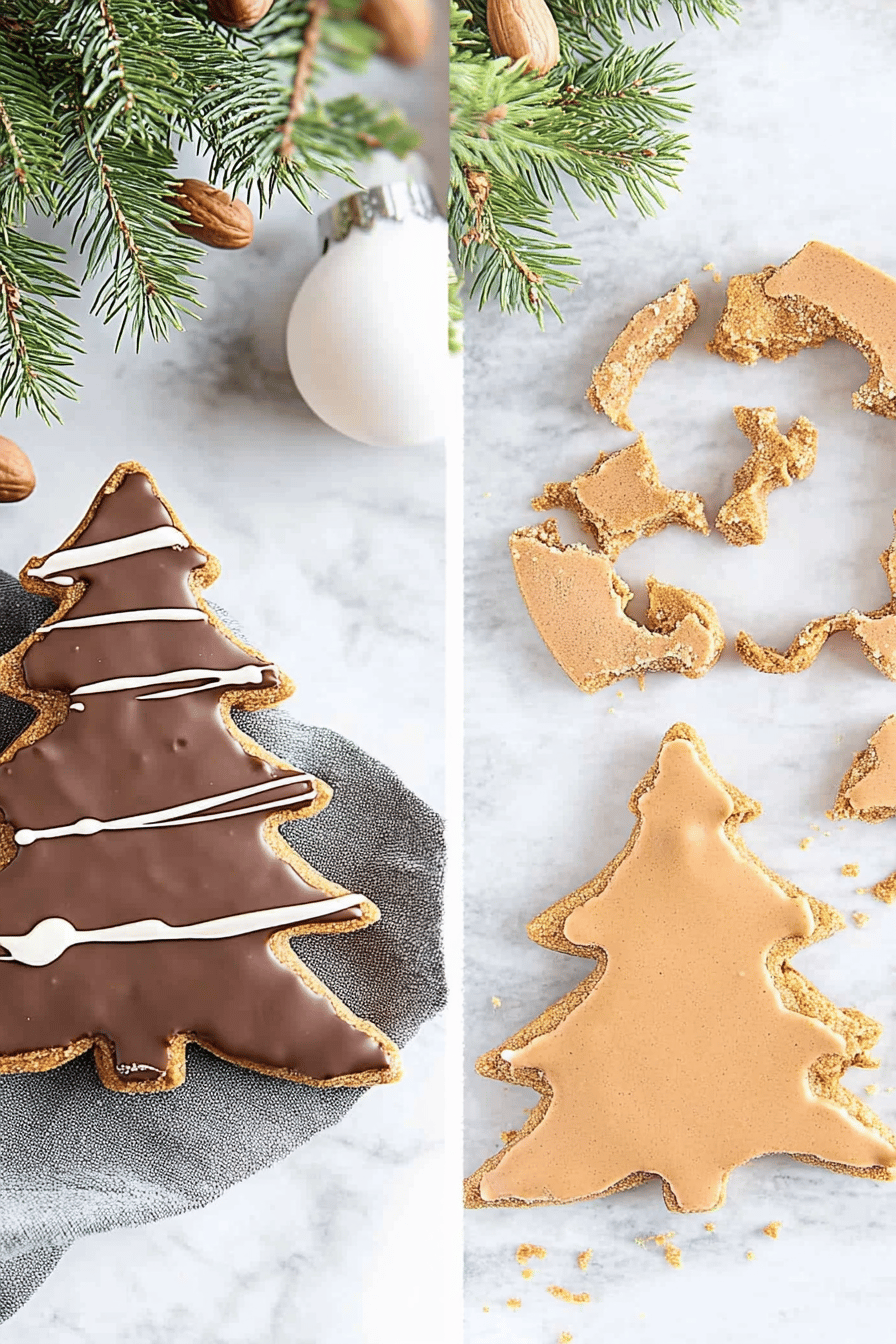
- Dip each peanut butter tree into the melted chocolate, ensuring it's fully coated. Let excess chocolate drip off.
- Place the coated trees on a baking sheet lined with parchment paper.
- Refrigerate for at least 15-20 minutes, or until the chocolate is set.
- Optional: Decorate with sprinkles before the chocolate sets.