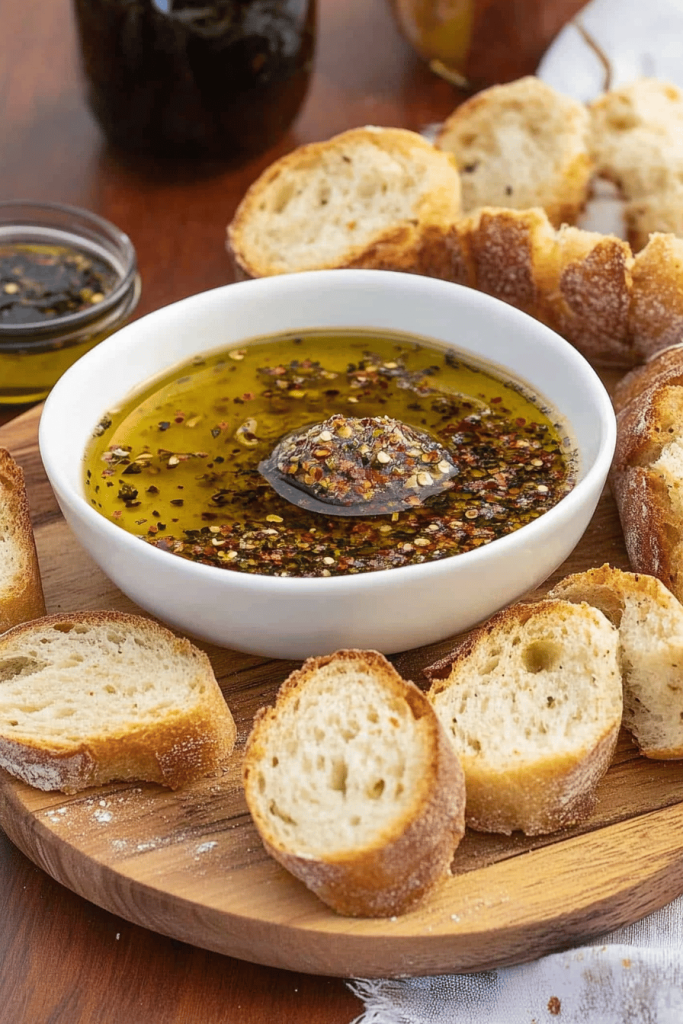
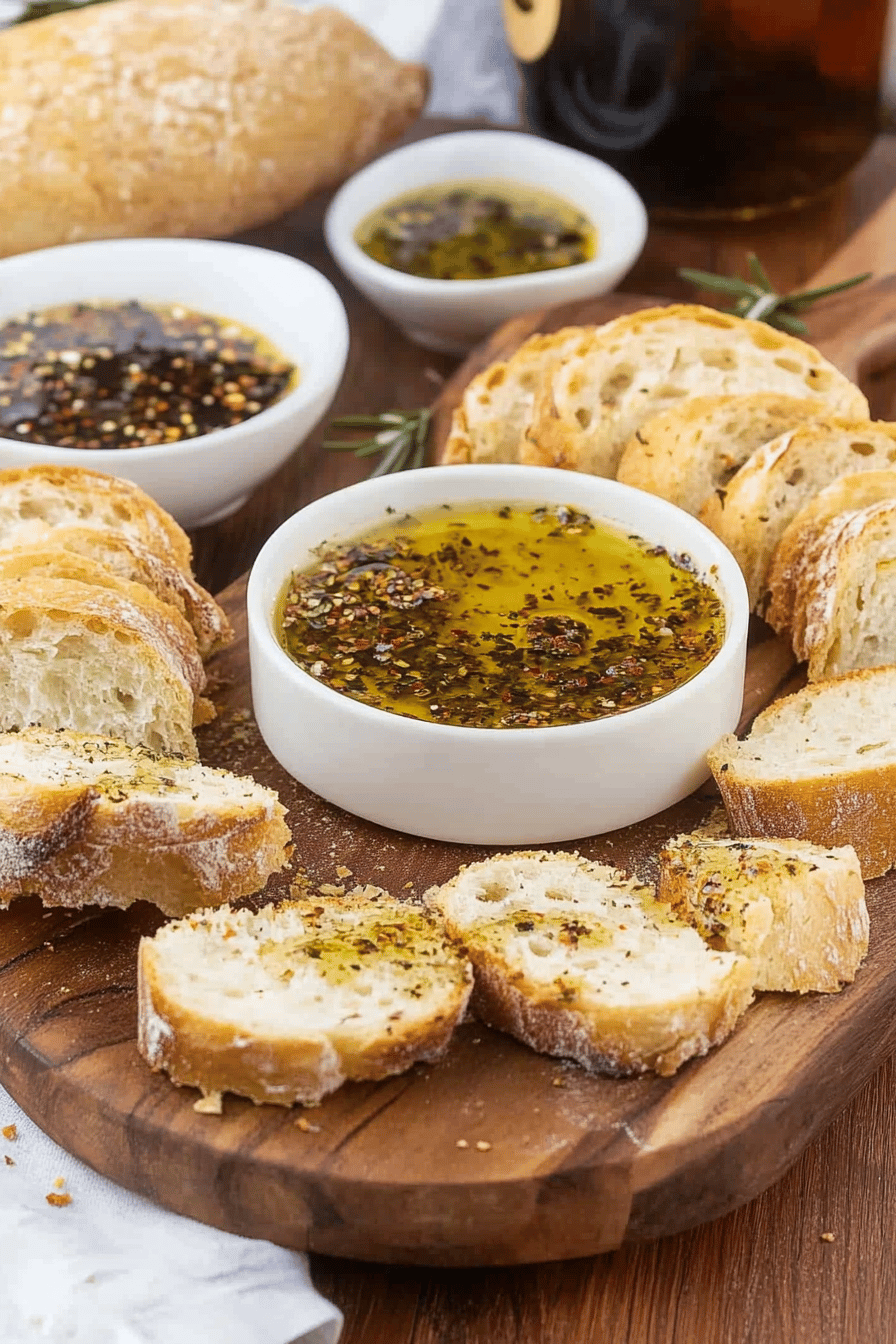
You know those nights? The ones where you’re staring into the fridge, totally uninspired, and the thought of making a full meal feels like climbing Everest? Yeah, I have those too. And on those nights, my absolute savior is this Olive oil bread dip. It’s not really a dip in the traditional sense, more like an incredibly flavorful, comforting bowl of goodness that’s perfect for dunking crusty bread into. Honestly, it’s so good, it’s almost a meal in itself. I remember the first time I stumbled upon a similar idea in a little trattoria in Italy; it was so simple yet so profoundly delicious, and it’s been a staple in my kitchen ever since. This olive oil bread dip is that kind of magic – easy enough for a weeknight but special enough for guests. It’s what I make when friends drop by unexpectedly or when I just need a little culinary comfort without a lot of fuss. It’s way beyond just oil and herbs; it’s a whole experience that’ll make you feel like you’ve traveled to the Mediterranean, no passport required!
Thank you for reading this post, don't forget to subscribe!
What is olive oil bread dip?
So, what exactly *is* this magical concoction? Think of it as the most flavorful, herb-infused, garlicky olive oil you’ve ever had, usually served warm, and just begging for a piece of bread. It’s essentially a really rich, aromatic olive oil base, often infused with garlic, fresh herbs, and sometimes a little hint of chili for a gentle warmth. The name itself, “olive oil bread dip,” is pretty straightforward, but it doesn’t quite capture the depth of flavor and the sheer comfort it brings. It’s not a complicated sauce or a heavy spread; it’s about celebrating the pure, beautiful essence of good quality olive oil, elevated with a few simple, potent aromatics. It’s the kind of dish that makes you close your eyes and just savor the moment. It’s rustic, it’s elegant, and it’s incredibly approachable for anyone who loves good food. It’s basically a warm, liquid hug for your taste buds, and who wouldn’t want that?
Why you’ll love this recipe?
Oh, where do I even begin with why you’ll absolutely adore this olive oil bread dip? First off, the FLAVOR! It’s an explosion of savory goodness. The garlic mellows beautifully as it infuses into the oil, the fresh herbs add brightness, and depending on how you season it, you can get a lovely little kick. It’s the kind of taste that lingers, making you want just one more dip. Then there’s the SIMPLICITY. Seriously, this is my kind of cooking. You probably have most of the ingredients already, and it comes together in minutes. No fancy techniques, no weird gadgets required. It’s a lifesaver on those evenings when you’re tired but still want something delicious and homemade. It’s also incredibly COST-EFFECTIVE. Good olive oil is the star, and the supporting cast of garlic and herbs are pantry staples. You’re getting restaurant-quality flavor without the restaurant price tag. And let’s talk VERSATILITY. While it’s amazing with crusty bread, I also love drizzling this over roasted vegetables, grilled chicken, or even using it as a base for a quick pasta sauce. It’s a true kitchen workhorse. What I love most about this olive oil bread dip is how it transforms simple ingredients into something truly special. It’s the kind of recipe that feels like a secret weapon in your culinary arsenal. Plus, the aroma that fills your kitchen while it’s warming up? Pure bliss. It’s a winner on all fronts, I promise you!
How do you make olive oil bread dip?
Quick Overview
Making this olive oil bread dip is wonderfully straightforward. We’re essentially infusing good quality olive oil with aromatics like garlic and fresh herbs, then warming it gently to release all those fantastic flavors. It’s less about cooking and more about coaxing the best out of simple ingredients. The key is using quality ingredients and giving them just enough time to meld together. You’ll be amazed at how something so simple can taste so complex and satisfying. It’s the perfect appetizer, a comforting snack, or even a delicious accompaniment to a larger meal.
Ingredients
For the Main Base:
4 cups of good quality Extra Virgin Olive Oil – This is non-negotiable, friends! Use the best you can afford. It’s the backbone of this dip, so a flavorful, fruity oil really shines. I tend to gravitate towards oils from Italy or Spain, but honestly, any good quality EVOO will work wonders.
8-10 cloves of Garlic, thinly sliced – Don’t be shy with the garlic! Thinly sliced is key here so it infuses nicely without burning too quickly. I usually buy a whole head or two and keep them on hand because I use garlic in everything.
1 teaspoon Red Pepper Flakes (optional, for a little warmth) – If you like a gentle heat, these are a must. They add a subtle background warmth that complements the other flavors beautifully. You can always add more or less to suit your spice preference.
For the Freshness:
“New family favorite! This Olive oil bread dip was so flavorful and ridiculously easy. Crowd-pleaser for sure.”
1/4 cup fresh Rosemary, finely chopped – The piney, fragrant notes of rosemary are just divine here. Make sure it’s fresh; dried just won’t give you that vibrant aroma and flavor.
1/4 cup fresh Parsley, finely chopped – A classic herb that adds a lovely freshness and a bit of color. I like to use flat-leaf parsley for its robust flavor.
1 tablespoon fresh Thyme, leaves only – The subtle, earthy notes of thyme are a wonderful addition. Just pick the tiny leaves off the stems.
1 teaspoon flaky Sea Salt, plus more to taste – A good flaky salt like Maldon is perfect for that little pop of saltiness and texture. You’ll want to taste and adjust this at the end.
Freshly ground Black Pepper, to taste – Always fresh, always better!
Step-by-Step Instructions
Step 1: Preheat & Prep Pan
Grab a medium saucepan. You want something that’s not too wide, as we want the oil to heat evenly. We’re not looking for a deep fry here, just a gentle warming. Place it over low to medium-low heat. The key is *low and slow* to infuse the flavors without burning the garlic. Patience is your best friend here!
Step 2: Mix Dry Ingredients
While your pan is just getting started, get your dry aromatics ready. In a small bowl, combine the thinly sliced garlic and the red pepper flakes (if you’re using them). Having these ready to go makes the next step super smooth. I usually give them a little toss with my fingers to make sure the red pepper flakes are distributed evenly among the garlic slices.
Step 3: Mix Wet Ingredients
Now, pour that glorious extra virgin olive oil into the saucepan. Let it sit for just a minute to take the chill off, but don’t let it get hot. We want to gently warm the oil, not cook it. This gradual heating is crucial for infusing the oil without scorching anything.
Step 4: Combine
Carefully add the prepared garlic and red pepper flakes to the olive oil in the saucepan. We’re not looking for a sizzle; we want a gentle, happy bubble. Stir it gently with a wooden spoon. The goal is to infuse the oil with the garlic and chili flavors over a low heat. Keep the heat very low – you should see just a few tiny bubbles forming around the garlic slices, not a rolling boil. This might take about 10-15 minutes. You’re looking for the garlic to become fragrant and slightly softened, but definitely not browned or crispy. If it starts browning too quickly, pull the pan off the heat immediately!
Step 5: Prepare Filling
While the oil is infusing, let’s prep our fresh herbs. Finely chop your fresh rosemary, parsley, and thyme leaves. Measure them out into a small bowl. It’s important to chop them finely so they distribute evenly and don’t overpower any one bite. I usually do this while the oil is on the stove, so everything is ready to go when the infusion is done.
Step 6: Layer & Swirl
Once the garlic is fragrant and slightly softened (but still pale yellow, not brown!), remove the saucepan from the heat. Now, immediately stir in the chopped fresh herbs, flaky sea salt, and Black Pepper. The residual heat from the oil will gently wilt the herbs and release their amazing aromas. Give it a good stir to combine everything. You’ll see the herbs beautifully dispersed throughout the fragrant oil.
Step 7: Bake
Wait, bake? Nope, no baking involved here! This is a no-bake wonder. The “cooking” process is all done on the stovetop, gently infusing the oil. So, you can skip the oven preheating and baking steps entirely!
“Packed with flavor and so simple. Exactly what I wanted from this Olive oil bread dip!”
Step 8: Cool & Glaze
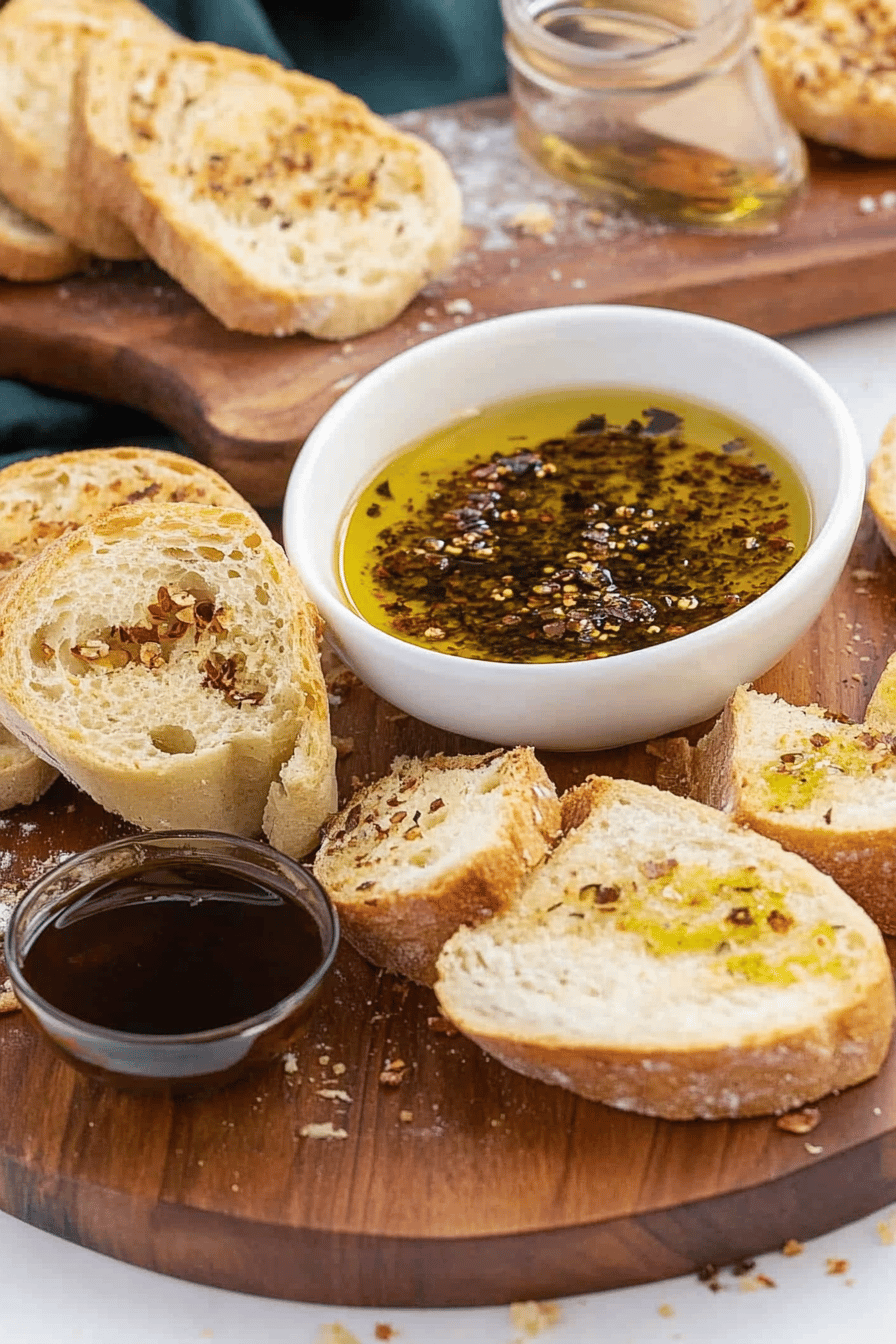
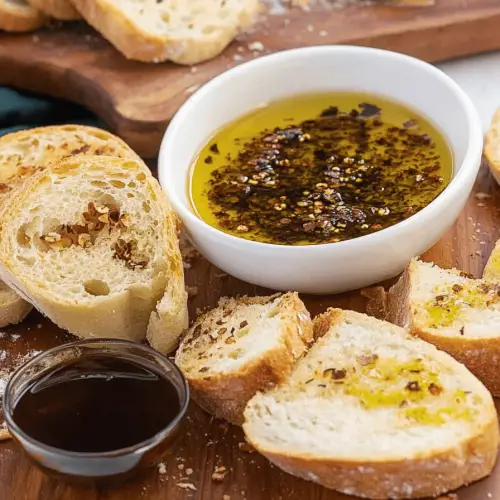
Let the olive oil bread dip sit for at least 10-15 minutes to allow the flavors to meld even further. You can serve it warm or at room temperature. For serving, I like to pour it into a shallow, attractive bowl. Some people like to strain out the garlic and herbs, but I prefer to leave them in for texture and visual appeal. If you do want to strain, you can pour the oil through a fine-mesh sieve, then return the oil and herbs/garlic back to the bowl. No glaze needed for this beauty!
Step 9: Slice & Serve
This is the best part! Slice up some crusty bread – a good baguette, ciabatta, or even a rustic sourdough is perfect. Arrange it around the bowl of warm, fragrant olive oil bread dip. Encourage your guests (or yourself!) to dip generously. It’s meant to be messy and delicious!
What to Serve It With
This olive oil bread dip is so wonderfully versatile, it’s practically a meal starter in itself, but here are some of my favorite ways to serve it up. For a relaxed BREAKFAST, I love pairing it with some toasted sourdough and a side of scrambled eggs. It’s a lovely change from butter and makes the bread taste extra special. For BRUNCH, it’s a fantastic addition to a spread. Imagine it alongside some fresh fruit, a cheese board, and maybe some smoked salmon. It adds a sophisticated, Mediterranean flair. It’s also amazing as a light DESSERT, especially if you serve it with a slightly sweeter bread like brioche or challah, maybe with a tiny sprinkle of sugar on top of the dip itself for a sweet-savory twist. And for those COZY SNACKS, which is honestly my most frequent use case, it’s perfect with any crusty bread, a glass of wine, and maybe a small bowl of olives. My family also loves using it as a dipping sauce for Roasted Potatoes or even grilled halloumi. The possibilities are truly endless, and it’s always a crowd-pleaser, no matter the occasion!
Top Tips for Perfecting Your Olive Oil Bread Dip
Over the years, I’ve tinkered with this recipe quite a bit, and I’ve learned a few tricks that make all the difference. First, **Garlic Prep is Key**. Don’t mince the garlic; slice it thinly. This allows it to infuse the oil beautifully without burning. If your garlic starts to turn golden brown, it’s already too far gone and can make the dip bitter. Keep the heat incredibly low – I’m talking gentle warmth, not active sizzling. If it starts to fry, pull it off the heat immediately. For **Herb Flavor**, use fresh herbs and chop them finely. Dried herbs just don’t have the same punch. I love a combination of rosemary, parsley, and thyme, but feel free to experiment with basil or oregano if you have them on hand. Just a little note: basil can turn dark quickly when heated, so if you use it, add it right at the end, or use it sparingly. **Olive Oil Quality Matters Immensely**. This is not the place for your cheapest grocery store oil. Invest in a good quality extra virgin olive oil; the flavor will shine through. A fruity, peppery oil is divine. When it comes to **Serving Temperature**, warm is traditional and wonderful, but room temperature is also fantastic, especially if you’re making it ahead. If serving warm, be careful not to overheat it, as that can make the garlic bitter. For **Storage**, this olive oil bread dip actually gets better as it sits, allowing the flavors to meld. Just keep it in an airtight container. If you decide to strain it, it’ll last a bit longer. I’ve learned that sometimes, less is more. Don’t overcrowd the pan with garlic; a little goes a long way, and you want the olive oil to remain the star. If you’re making this for a crowd, you can easily double or triple the recipe. Just use a wider pan to ensure even heating. My kids actually used this as a dip for their pizza crusts the other night, and they declared it better than the regular pizza sauce! It’s those little moments that make me love sharing recipes.
Storing and Reheating Tips
The great thing about this olive oil bread dip is that it keeps surprisingly well, and the flavor often deepens over time. For **Room Temperature Storage**, if you’ve made it and it’s not going to be consumed within a few hours, it’s best to let it cool down and then cover it tightly. It should be good for up to 24 hours at room temperature, especially if you’ve used fresh herbs. For **Refrigerator Storage**, this is where it really shines for longer keeping. Once it’s cooled, pour it into an airtight container – a glass jar is perfect. It will last for about 1 to 2 weeks in the fridge. You’ll notice the olive oil solidifies when cold, which is perfectly normal. When you’re ready to use it, just take it out of the fridge about 30-60 minutes before serving to let it come back to room temperature, or gently warm it. For **Freezer Instructions**, while not strictly necessary for this recipe as it keeps well in the fridge, you *can* freeze it if you made a massive batch. Pour it into freezer-safe containers, leaving some headspace for expansion. It should be good for up to 2-3 months. Thawing is best done in the refrigerator overnight. For the **Glaze Timing Advice**, since there’s no glaze in this recipe, you don’t need to worry about that! If you do decide to add a drizzle of balsamic glaze or something similar *after* it’s made, I’d recommend adding that fresh just before serving, as glazes can sometimes change texture with prolonged storage. For best quality, I always recommend using it within a week or two from the fridge. You’ll know it’s still good by its fresh aroma and the lack of any off-smells.
Frequently Asked Questions
Final Thoughts
So there you have it – my absolute favorite olive oil bread dip! It’s a recipe that truly embodies the beauty of simple, quality ingredients coming together to create something spectacular. It’s comforting, incredibly flavorful, and so easy to whip up, making it perfect for pretty much any occasion. Whether you’re looking for a quick appetizer, a cozy snack, or a way to elevate a simple meal, this dip is the answer. I hope you give it a try and fall in love with it as much as my family and I have. It’s a recipe that brings people together, sparking conversation and happy sighs with every dip. If you enjoy this, you might also love my recipes for Roasted Garlic Hummus or my Mediterranean Olive Tapenade – they share that same vibrant, fresh flavor profile! I can’t wait to hear how yours turns out. Please leave a comment below and let me know your favorite bread to dip, or any fun variations you try! Happy cooking!
Olive oil bread dip
Ingredients
Main Ingredients
- 0.5 cup Extra virgin olive oil
- 2 cloves Garlic minced
- 0.25 teaspoon Dried oregano
- 0.125 teaspoon Red pepper flakes optional
- 1 tablespoon Fresh parsley chopped
- 0.5 teaspoon Salt
- 0.25 teaspoon Black pepper
Instructions
Preparation Steps
- In a small bowl, combine the extra virgin olive oil, minced garlic, dried oregano, and red pepper flakes (if using).
- Stir well to combine.
- Add the chopped fresh parsley, salt, and black pepper. Stir again.
- Let the dip sit for at least 5 minutes to allow the flavors to meld.
- Serve with crusty bread for dipping.