There’s just something about biting into a citrus cookie that instantly lifts my spirits. Maybe it’s the burst of lemon or orange zest that wakes up your taste buds, or the way these cookies are chewy yet slightly crispy on the edges—kind of like a little piece of sunshine in cookie form. I always do this when I need a sweet pick-me-up or when friends come over unexpectedly; these citrus cookies disappear in minutes at my house! I remember the first time I made them—I was skeptical because, honestly, I wasn’t sure if citrus and cookies would work as a duo. But from the very first bite, I was hooked. They’re simple to whip up, even on busy weeknights, and my kids ask for these all the time. Trust me on this one—once you try these, they’ll become a staple in your cookie jar too. And the best part? You probably already have everything you need in your pantry. Let’s brighten up your baking day!
Thank you for reading this post, don't forget to subscribe!What are Citrus Cookies?
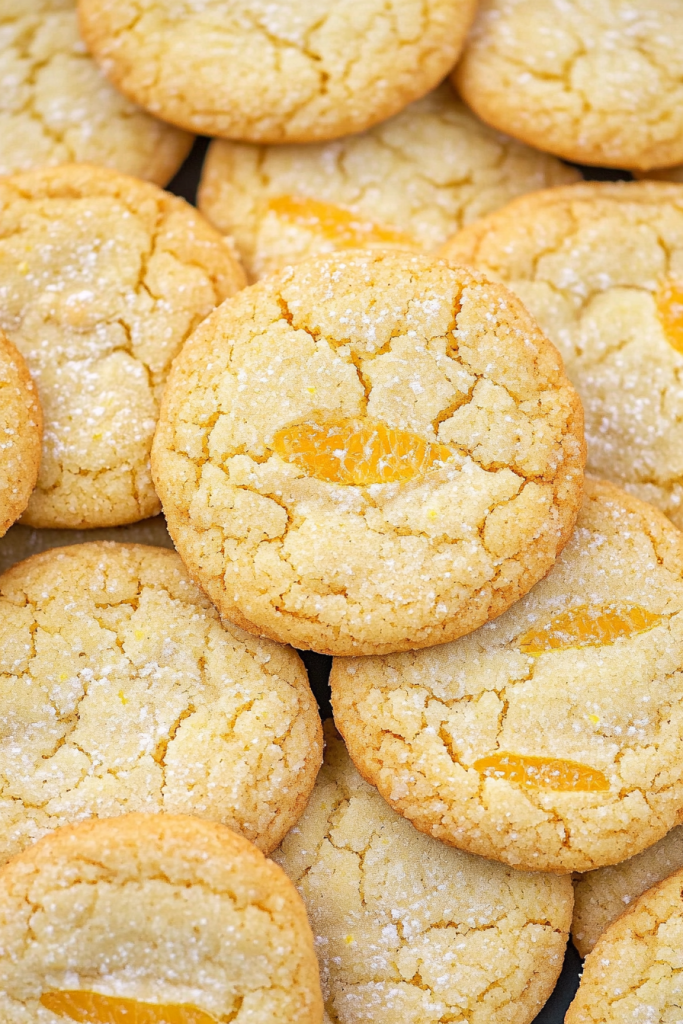
Think of citrus cookies as those cheerful, zesty little treats that combine the sweetness of cookie dough with the fresh tang of citrus peels and juice. It’s essentially a cookie that’s meant to evoke a little sunshine with every bite. The name says it all—they’re infused with bright lemon, orange, or even grapefruit zest, which gives them a vibrant flavor not usually found in your average chocolate chip or sugar cookie. These cookies are a sweet twist on classic lemon bars or orange-glazed pastries, but in a portable, handheld form. They’re perfect for when you want a bit of something special but don’t feel like fussing over complicated desserts. I love how versatile they are—dress them up with a glaze or keep them plain, they’re always a hit. Think of it as a cross between a buttery sugar cookie and a citrus fresca—you get that balanced, refreshing kick with every bite.
Why you’ll love this recipe?
What I love most about these citrus cookies is just how incredibly easy and forgiving they are. I’ve made these countless times, tweaking the citrus types and adjusting sweetness, and they turn out perfect every single time—no complicated techniques required. The smell alone is enough to make everyone in the house come running—imagine warm, buttery dough with a hint of lemon zest wafting through the air. The flavor is a lively dance of sweet and tangy; it’s bright enough to satisfy a citrus craving but balanced enough that you don’t feel overwhelmed by acidity. Plus, they’re budget-friendly—mostly pantry staples—and very customizable. Want more citrus punch? Add a splash of juice or zest. Prefer a softer, more chewy texture? A little extra brown sugar works wonders. These cookies are versatile enough for breakfast alongside your morning coffee, a sweet treat after lunch, or even a fancy dessert drizzled with honey or glaze. Honestly, I’ve even snacked on them plain while binge-watching my favorite show—they’re that good. What I love most is that they’re also kid-approved—my children ask for seconds almost every time! And for those of us trying to keep things simple but tasty, these are a total winner.
How do you make Citrus Cookies?
Quick Overview
This recipe comes together in just a few steps, starting with mixing up a buttery, citrus-infused dough, then shaping or layering it with a filling if you like. You’ll roll out or scoop the dough onto a baking sheet, bake until tender but lightly golden, and then finish with a glaze or just enjoy them plain. The best part? No chilling or complicated frosting—just fresh, flavorful cookies that come together quickly. I love how forgiving the dough is—whether you’re a novice baker or a seasoned pro, you’ll find these super easy to handle. Once they’re baked, they’re best enjoyed warm or at room temperature, and the citrus flavor actually deepens as they sit a little. So, whether you’re making a batch for a casual weekend treat or a gift for friends, I promise these cookies will brighten anyone’s day.
Ingredients
For the Main Batter:
– 1 cup unsalted butter, softened (trust me, real butter makes all the difference here)
– 1 cup organic cane sugar or regular granulated sugar
– 1 large egg
– 2 cups all-purpose flour (preferably unbleached)
– 1 teaspoon baking powder
– 1/2 teaspoon salt
– Zest of 1 large lemon and 1 orange (or just one if you prefer a stronger citrus punch)
– 2 tablespoons fresh lemon juice and 2 tablespoons orange juice (fresh is best!)
For the Filling (optional but so yummy):
– 1/4 cup fruit preserves or marmalade (lemon or orange work beautifully)
– 1 tablespoon softened butter
– 1/4 cup powdered sugar
For the Glaze:
– 1 cup powdered sugar
– 2-3 teaspoons lemon or orange juice
– Zest of additional citrus for garnish (if desired)
“Made the Zesty Citrus Cookies How to Bake Them tonight and wow — perfect weeknight dinner. Will definitely make again!”
Step-by-Step Instructions
Step 1: Preheat & Prep Pan
Set your oven to 350°F (175°C). Line baking sheets with parchment paper or silicone baking mats—trust me, cleanup is so much easier, and nothing sticks! If you’re making thicker cookies, smoothing the tops with a spoon or cookie scoop works well. For a more layered look, I like to use a small spatula or the back of a spoon to shape the dough. Keep your ingredients handy—you’ll want to move quickly once you start mixing to keep that butter nice and soft.
Step 2: Mix Dry Ingredients
In a small bowl, whisk together the flour, baking powder, and salt. This step ensures everything’s evenly distributed and your cookies turn out uniform—trust me, it’s the little things that make a big difference in baking!
Step 3: Mix Wet Ingredients
In a large bowl, beat the softened butter and sugar until creamy and light—this takes about 2-3 minutes with a hand or stand mixer. Add the egg and whisk until smooth, then stir in the citrus zest and juices. This is where your kitchen fills with that intoxicating citrus aroma—it’s like sunshine in a bowl!
Step 4: Combine
Gradually add the dry mixture to the wet ingredients, mixing just until everything is combined. Be careful not to overmix—this will keep your cookies tender and chewy. If you’re feeling adventurous, you can fold in small bits of orange or lemon zest for an extra punch. The dough will be slightly sticky but manageable.
Step 5: Prepare Filling
If you’re going the filling route, mix the preserves with softened butter and powdered sugar, creating a sweet, citrusy spread. This adds a lovely surprise inside—like a little jammy treasure. Alternatively, you can skip this step if you prefer your cookies plain or topped with glaze.
Step 6: Layer & Swirl
For a layered or marbled effect, roll out about half of your dough into a rectangle, spread a thin layer of your filling, then roll it up and slice into rounds. If you’re making simpler cookies, just scoop or shape the dough into balls or logs. For extra visual appeal, swirl a bit of extra citrus zest into the top before baking.
Step 7: Bake
Bake for 10-12 minutes, or until the edges are lightly golden. Keep an eye on them—the smell alone will make your kitchen smell like a citrus orchard! Feel free to adjust baking time if your oven runs hot or cool. The cookies are done when they look slightly firm but still soft in the center.
Step 8: Cool & Glaze
Transfer the cookies to a cooling rack and let them cool for about 5 minutes. If you’re glazing, whisk together powdered sugar and citrus juice, then drizzle over cooled cookies. Adding a little zest on top makes them look extra pretty—plus, it intensifies that vibrant citrus flavor.
“The Zesty Citrus Cookies How to Bake Them turned out amazing. My kids asked for seconds. Saving this one!”
Step 9: Slice & Serve
Once everything’s cooled and glazified, slice or serve directly from the tray. These are perfect with a cup of tea or coffee, and honestly, they last just a day or two before they’re gone—so try not to sneak too many when nobody’s looking!
What to Serve It With
This citrus cookie is a versatile little treat that adapts beautifully depending on the occasion. For breakfast, serve with a hot mug of coffee or tea—my kids love dunking them! They’re also fantastic as part of a brunch spread—pair with fresh fruit, cheese, or even a drizzle of honey. When it’s time to indulge after dinner, these cookies shine on their own or topped with whipped cream and extra citrus zest. For a cozy snack, I toss a few in a decorative jar and leave them on the counter, where they’re always the first to go. I even pack them up for picnics or gift baskets—they’re so charming and special without feeling fussy. One thing I’ve learned is that these cookies pair beautifully with a little sparkling wine or citrus-infused water for a more sophisticated twist. Whatever your setting, these cookies bring sunshine, cheer, and a hint of nostalgia—kind of like childhood in every bite.
Top Tips for Perfecting Your Citrus Cookies
Over the years, I’ve learned a few tricks that make these cookies truly stand out. First, don’t skip the citrus zest! Fresh zest really packs a punch, and I’ve tested adding extra zest in the dough for even more flavor—trust me, more zest is always better here. When mixing the dough, be gentle—overmixing can make the cookies tough, so fold just until the ingredients come together. The glaze can be adjusted to your liking—if you want a thinner drizzle, add more juice; for a thicker spread, add extra powdered sugar. I’ve also experimented with swapping out half the butter for Greek yogurt or a splash of almond milk, which still keeps the cookies moist and adds a subtle tang. If you’re making these ahead, store them in an airtight container—cookies with the glaze taste just as good the next day, and the citrus flavor deepens slightly over time. One mistake I’ve made is overbaking—I learned to peek at 10 minutes and remove them when edges are just set. Then, a quick cool-down keeps them chewy and perfect. Trust me, the more love and attention you put into layering in the flavors and presentation, the more special these cookies will feel.
Storing and Reheating Tips
These citrus cookies keep surprisingly well—if you hide a few, they last almost a week! Store them in an airtight container at room temperature, topped with a paper towel to absorb any excess moisture. They stay fresh and chewy for days, especially if covered well. If you want to keep them for longer, pop them in the fridge, where they’ll hold up for about 5 days. Just make sure they’re in a sealed container—no one likes dried-out cookies! For freezing, wrap the cookies tightly in plastic wrap and then put them in a zip-top bag. They can chill in the freezer for up to 3 months—perfect for when you want a quick treat anytime. To serve, let them thaw at room temp for about 20 minutes; the flavor and texture are just as fresh. If you glazed your cookies, I recommend adding the glaze just before serving or re-glazing once they’re defrosted for the best shine. Honestly, these cookies age beautifully—each day they sit, they develop an even more delightful citrus aroma. So, don’t be afraid to make a batch ahead of time!
Frequently Asked Questions
Final Thoughts
If you’re like me, these citrus cookies will quickly become a go-to. Their vibrant flavor instantly lifts your mood, and they’re so easy to make that I find myself grabbing ingredients from my pantry whenever I need a little happiness in cookie form. I love experimenting with different citrus combos—sometimes a splash of grapefruit juice or lime zest makes them even more interesting. These cookies aren’t just a treat; they’re a little piece of sunshine in your kitchen. And honestly, once you make them, it’s hard to go back to plain sugar cookies. I encourage you to play around with the flavors, adjust the sweetness, and maybe even add a pinch of vanilla or cardamom if you’re feeling fancy. I can’t wait to hear how yours turn out—please share your variations and stories! Happy baking, my friend—and embrace the bright, cheerful world of citrus cookies!
citrus cookies
Ingredients
Main Ingredients
- 0.75 cup unsalted butter (softened)
- 1.5 cups granulated sugar (divided)
- 1 large egg
- 2 cups all-purpose flour
- 1.5 teaspoons baking powder
- 0.5 teaspoon baking soda
- 1 orange orange (zested)
- 1 lemon lemon (zested)
- 1 lime lime (zested)
Instructions
Preparation Steps
- In a small bowl, zest all the citrus fruits. Remove about 2 teaspoons of zest and place in a separate bowl. Add 0.5 cup granulated sugar to the zest. Mix with a fork and set aside.
- In a mixing bowl, add butter and remaining 1 cup sugar. Beat for 1-2 minutes until creamy. Add egg and beat until combined. Gradually add flour, baking powder, and baking soda. Mix well. Incorporate the citrus zest mixture slowly into the batter.
- Preheat oven to 350°F. Line baking sheets with parchment paper. Roll cookie dough into 3/4 to 1-inch balls. Roll each ball in the citrus sugar mixture, coating generously.
- Place cookie balls on the prepared baking sheet. Using the bottom of a glass, slightly flatten each cookie into a disc. Optionally, sprinkle some extra sugar on top.
- Bake for 10-12 minutes until edges are golden. Remove from oven and allow to cool on wire racks.
- Store in an airtight container for up to a week. Enjoy!


