
You know, there are some recipes that just… stick with you. The ones you make when you need a little comfort, or when unexpected guests pop over, or even just when you’re having one of *those* mornings. For me, that’s where great waffle recipes come in. I’m not talking about those sad, floppy disks that barely hold syrup. I mean the golden, crispy, fluffy-on-the-inside kind that just sing with flavor. My family has this one waffle recipe that’s become a legend in our house, and I’m so excited to share it with you. It’s funny, because sometimes I think we overlook the simple joy of a perfectly made waffle, especially when there are so many complicated dessert recipes out there vying for our attention. But honestly, a batch of these warm, inviting waffles can be just as satisfying, if not more so. They’re a hug in food form, and I’ve been tweaking and perfecting them for years to get them just right. This isn’t just any waffle recipe; it’s the one that makes the whole house smell amazing and disappear faster than you can say “more syrup, please!”
Thank you for reading this post, don't forget to subscribe!What are waffles?
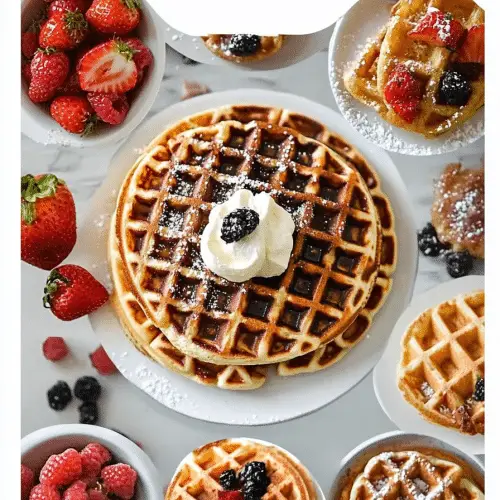
So, what exactly are we making here? Think of these as your ultimate, no-fuss, incredibly delicious classic waffles. They’re not overly sweet on their own, which is actually a huge plus because it means they’re the perfect canvas for whatever toppings your heart desires. The name “Golden Crispy Waffles” kind of says it all, right? They’re designed to be cooked to that perfect shade of golden brown, with edges that have just the right amount of crunch. It’s essentially a well-balanced batter that uses simple pantry staples to create something truly special. The magic happens with a specific ratio of ingredients and a simple technique that guarantees a light, airy interior and that coveted crisp exterior. It’s the kind of recipe that feels like it came straight from a cozy little diner, but you can whip it up right in your own kitchen. No fancy equipment, no obscure ingredients, just pure waffle goodness.
Why you’ll love this recipe?
I love waffles. There are so many reasons why I keep coming back to this recipe.flavor is just spot-on. They have a subtle hint of vanilla and a lovely richness from the butter, but they aren’t so intensely flavored that they clash with toppings. They’re just… perfectly balanced. And then there’s the simplicity. I know “waffle recipes” can sometimes sound intimidating, but trust me, this one is a lifesaver. The batter comes together in literally minutes, and the actual cooking part is almost meditative. My favorite part is the satisfying *hiss* the batter makes as it hits the hot iron. It’s incredibly cost-efficientWhat makes this recipe so good is that it can be made with ingredients that you already have in your pantry.versatility. These waffles are a blank slate. On a Sunday morning, we’ll load them up with fresh berries and whipped cream. For a quick weeknight treat, a drizzle of chocolate syrup is all it takes. They’re even surprisingly good with savory toppings like Fried Chicken, if you’re feeling adventurous! I’ve tried other waffle recipes that call for all sorts of things, but this one consistently delivers. It’s the kind of recipe that makes you feel like a kitchen wizard, even if you’re just starting out. Plus, the smell that fills your home while they’re cooking? Pure joy.
How to Make These Amazing Waffles
Alright, let’s get down to the delicious details! Making these waffles is really straightforward, and I promise, it’s easier than you might think. The goal is to get that perfect balance of fluffy interior and crispy exterior every single time.
Quick Overview
You’ll whisk together your dry ingredients, then your wet ingredients separately, before gently combining them into a smooth batter. A few minutes in a hot waffle iron, and voilà! Perfectly golden waffles ready to be devoured. The key is not to overmix, and to give them just enough time to crisp up. It’s a process that’s both simple and satisfying.
Ingredients
Here’s what you’ll need to create this waffle magic:
For the Main Batter:
2 cups all-purpose flour. I always use a good quality all-purpose flour, nothing too fancy. Make sure it’s sifted if you like a super light texture, though I often skip this step and they’re still great.
2 tablespoons granulated sugar. Just enough for a hint of sweetness, it also helps with browning.
2 teaspoons baking powder. This is crucial for that lovely fluffy lift! Don’t skimp on this.
1 teaspoon baking soda. This works with the acidic components to give you extra lift and a tender crumb.
1/2 teaspoon salt. It just balances all the flavors and brings out the best in the other ingredients.
2 large eggs. Make sure they’re at room temperature; they incorporate much better into the batter that way.
1 3/4 cups milk. Whole milk is my go-to for richness, but I’ve tested this with almond milk and it actually made it even creamier! You can use any milk you have on hand.
1/2 cup unsalted butter, melted and slightly cooled. Using butter really adds a lovely richness and flavor that oil just can’t replicate. Make sure it’s not piping hot when you add it, or it might cook your eggs!
1 teaspoon vanilla extract. This is non-negotiable for me; it adds that classic comforting aroma and taste.
For the Filling (Optional but Recommended!):
This is where you can really have fun! I often add a simple swirl of cinnamon sugar or a dollop of fruit compote right before closing the waffle iron.
1/4 cup Brown Sugar.
1 tablespoon cinnamon.
A few tablespoons of your favorite fruit jam or preserves. Think raspberry, strawberry, or even a nice apple butter!
For the Glaze (Optional, but oh-so-good!):
This is a simple powdered sugar glaze that takes them to the next level.
1 cup powdered sugar.
2-3 tablespoons milk or cream.
1/2 teaspoon vanilla extract.
A pinch of salt.
Step-by-Step Instructions
Step 1: Preheat & Prep Pan
First things first, get your waffle iron heating up. Most waffle irons have a light that tells you when they’re ready. While it’s heating, give your waffle iron a light brush with oil or cooking spray, especially if it’s not a non-stick model. This is super important for preventing sticking and ensuring those gorgeous crispy edges. Make sure the iron is nice and hot before you add any batter.
Step 2: Mix Dry Ingredients
In a large bowl, whisk together the flour, granulated sugar, baking powder, baking soda, and salt. Whisking them together ensures that the leavening agents and salt are evenly distributed, which means every bite will be Perfectly Fluffy and seasoned. You’re looking for a uniform color with no streaks of white baking powder.
Step 3: Mix Wet Ingredients
In a separate medium bowl, lightly beat the eggs. Then, whisk in the milk, melted butter, and vanilla extract until everything is well combined and smooth. The butter should be just slightly warm, not hot, so it doesn’t scramble the eggs. You’ll notice it’s a lovely pale yellow mixture.
Step 4: Combine
Now for the magic! Pour the wet ingredients into the bowl with the dry ingredients. Whisk them together *just* until they are combined. A few lumps are perfectly fine – actually, I prefer a few lumps! Overmixing develops the gluten in the flour, which can lead to tough, chewy waffles. We want tender and fluffy, so stop stirring as soon as you don’t see any more dry flour streaks. It should be a thick, but pourable batter.
“New family favorite! This waffle recipes was so flavorful and ridiculously easy. Crowd-pleaser for sure.”
Step 5: Prepare Filling (If Using)
If you’re adding a filling, now’s the time to get it ready. For a cinnamon swirl, just mix the Brown Sugar and cinnamon in a small bowl. If you’re using jam, have it ready in a small spoon or piping bag. This step is optional but it adds such a lovely surprise!
Step 6: Layer & Swirl
Ladle about 3/4 cup of batter onto your preheated waffle iron. If you’re adding a filling, spoon a dollop of jam or sprinkle a bit of Cinnamon Sugar on top of the batter *before* closing the iron. Then, gently close the lid. Don’t overfill, or you’ll have batter oozing out everywhere! The exact amount of batter will depend on the size and model of your waffle iron.
Step 7: Bake
Cook the waffle according to your waffle iron’s instructions, usually for about 3-5 minutes, or until golden brown and steamy. You want to see that beautiful color and hear that lovely sizzle. If you’re unsure, carefully lift the lid to check. It’s better to undercook slightly than overcook and have them dry out!
Step 8: Cool & Glaze
Carefully remove the waffle from the iron (a fork or spatula works well) and place it on a wire rack. This is crucial! Placing them directly on a plate can trap steam, making them soggy. If you’re using the glaze, whisk together the powdered sugar, milk, vanilla, and salt in a small bowl until smooth. Drizzle it over the warm waffles. You can also wait to glaze them until you’re ready to serve.
Step 9: Slice & Serve
Serve these beauties immediately! They are best enjoyed hot off the press, with all your favorite toppings. You can slice them into wedges if you like, making them easier to share (or not!).
What to Serve It With
These versatile waffles are a dream for any meal or snack occasion. Honestly, the possibilities are endless, and I love how they can be dressed up or down.
For Breakfast: This is the classic, right? Serve them hot off the iron with a generous pat of butter and your favorite syrup. A side of crispy bacon or some scrambled eggs makes it a complete, satisfying breakfast that’ll keep you going all morning. I also love topping them with fresh berries – blueberries, raspberries, or sliced strawberries are always a hit. A little dollop of Greek yogurt can add a nice tang!
For Brunch: Elevate these waffles for a lovely brunch spread. Serve them alongside a fruit salad, some smoked salmon, or even a mini quiche. A mimosa or a fancy coffee drink pairs perfectly. For a more elegant presentation, dust them with a little powdered sugar or serve them with a homemade fruit compote. They look so inviting arranged on a platter.
As Dessert: Oh yes, they can absolutely be dessert! Think of them as a warm, fluffy base for decadent toppings. A scoop of vanilla bean ice cream melting into the nooks and crannies? Heavenly. Drizzle with hot fudge sauce, caramel, or a berry coulis. Top with whipped cream and a sprinkle of chocolate shavings for an extra touch of indulgence. They are perfect when you’re craving something sweet at 10pm but don’t want to bake a whole cake.
For Cozy Snacks: Sometimes, you just need a little something sweet. These waffles are perfect for that. A simple sprinkle of cinnamon sugar, a drizzle of honey, or even just a bit of jam is enough to satisfy that craving. They’re also fantastic for a quick afternoon pick-me-up. My kids ask for these all the time when they get home from school!
Top Tips for Perfecting Your Waffles
I’ve made these waffles more times than I can count, and along the way, I’ve picked up a few tricks that I think will really help you nail them every single time. It’s all about those little nuances!
Batter Consistency: The batter should be thick but pourable. If it seems too thick, add a tablespoon of milk at a time until it reaches the right consistency. If it’s too thin, a tablespoon of flour can help. Remember, a few lumps are perfectly fine, and actually desirable!
Don’t Overmix: I can’t stress this enough! Overmixing is the enemy of tender waffles. Mix the wet and dry ingredients until *just* combined. Seriously, stop when you can’t see any more dry flour. A few small lumps are your friend here.
Hot Waffle Iron is Key: Make sure your waffle iron is fully preheated before you add the batter. A cold iron will result in pale, unevenly cooked waffles that might stick. Give it a good 5-10 minutes to heat up properly.
Grease Your Iron Well: Even with non-stick irons, a light coating of cooking spray or melted butter before each batch ensures the waffles release easily and get those beautiful crispy edges. Don’t be shy with it!
Don’t Peek Too Soon: Resist the urge to lift the lid and check your waffle every 30 seconds. Let it cook undisturbed for the recommended time. Peeking too early can disrupt the cooking process and lead to a less-than-perfect waffle.
“The waffle recipes turned out amazing. My kids asked for seconds. Saving this one!”
Wire Rack Cooling: As soon as the waffle is done, transfer it to a wire rack. This allows air to circulate around it, preventing steam from making the bottom soggy. You can keep cooked waffles warm in a single layer on the wire rack in a low oven (around 200°F or 95°C) while you cook the rest of the batch.
Ingredient Swaps: If you need to make these gluten-free, I’ve had success using a good quality all-purpose gluten-free flour blend. You might need to adjust the liquid slightly, adding a touch more milk if the batter seems too thick. For a dairy-free version, unsweetened almond milk or oat milk works beautifully, and you can use melted coconut oil or a vegan butter substitute instead of butter.
The Filling Trick: If you’re adding jam or a fruit puree, don’t spread it to the edges. Leave a small border so it doesn’t ooze out when you close the waffle iron. A thin layer is all you need!
Storing and Reheating Tips
Even though these waffles disappear in my house within minutes, sometimes you might end up with leftovers (a rare but happy occasion!). Here’s how to keep them tasting amazing:
Room Temperature: If you plan to eat them within a few hours, you can store them in a single layer on a wire rack with a clean kitchen towel draped over them. This helps maintain their crispness. They’ll typically stay good for 2-3 hours.
Refrigerator Storage: For longer storage, let the waffles cool completely on a wire rack. Then, place them in an airtight container or a resealable plastic bag. You can place parchment paper between layers to prevent them from sticking together. They should stay fresh in the refrigerator for 2-3 days. The crispiness might diminish slightly, but they’ll still be delicious.
Freezer Instructions: These waffles freeze wonderfully! Once completely cool, wrap individual waffles or stacks of waffles tightly in plastic wrap, then place them in a freezer-safe bag or container. You can freeze them for up to 2-3 months. They make for a super quick breakfast or snack straight from the freezer.
Glaze Timing Advice: If you’re storing waffles, it’s best to apply the glaze right before you’re about to eat them. If you glaze them before storing, the glaze can become sticky or gummy. For frozen waffles, you can reheat them and then add fresh glaze or your favorite toppings.
Frequently Asked Questions
Final Thoughts
There you have it – my go-to recipe for waffles that never fail to impress! I truly believe that great waffle recipes are the cornerstone of many happy mornings and cozy afternoons. This one strikes that perfect balance of simple ingredients, easy steps, and incredible results. It’s the kind of recipe you’ll want to make again and again, and it’s the one I reach for when I need a little taste of comfort or want to make someone’s day a bit brighter. I hope you give these a try and that they become a beloved staple in your kitchen too! If you enjoyed this recipe, you might also like my fluffy pancake recipe or my quick and easy cinnamon roll bites for more breakfast indulgence. I can’t wait to hear how yours turn out and what delicious toppings you choose! Please leave a comment below and share your waffle adventures, or rate this recipe if you loved it!
Classic Belgian Waffles
Ingredients
Main Ingredients
- 2 cups all-purpose flour
- 2 tablespoons granulated sugar
- 2 teaspoons baking powder
- 0.5 teaspoon salt
- 2 large eggs separated
- 1.5 cups milk
- 0.5 cup vegetable oil
- 1 teaspoon vanilla extract
Instructions
Preparation Steps
- In a large bowl, whisk together the flour, sugar, baking powder, and salt.
- In a separate bowl, whisk the egg yolks, milk, vegetable oil, and vanilla extract.
- Pour the wet ingredients into the dry ingredients and whisk until just combined. Do not overmix.
- In a clean bowl, beat the egg whites until stiff peaks form. Gently fold the egg whites into the waffle batter.
- Preheat your waffle iron according to the manufacturer's instructions. Lightly grease if necessary.
- Pour about 1/2 cup of batter onto the preheated waffle iron and cook until golden brown and crispy, about 3-5 minutes per waffle.
- Repeat with the remaining batter. Serve immediately with your favorite toppings.


