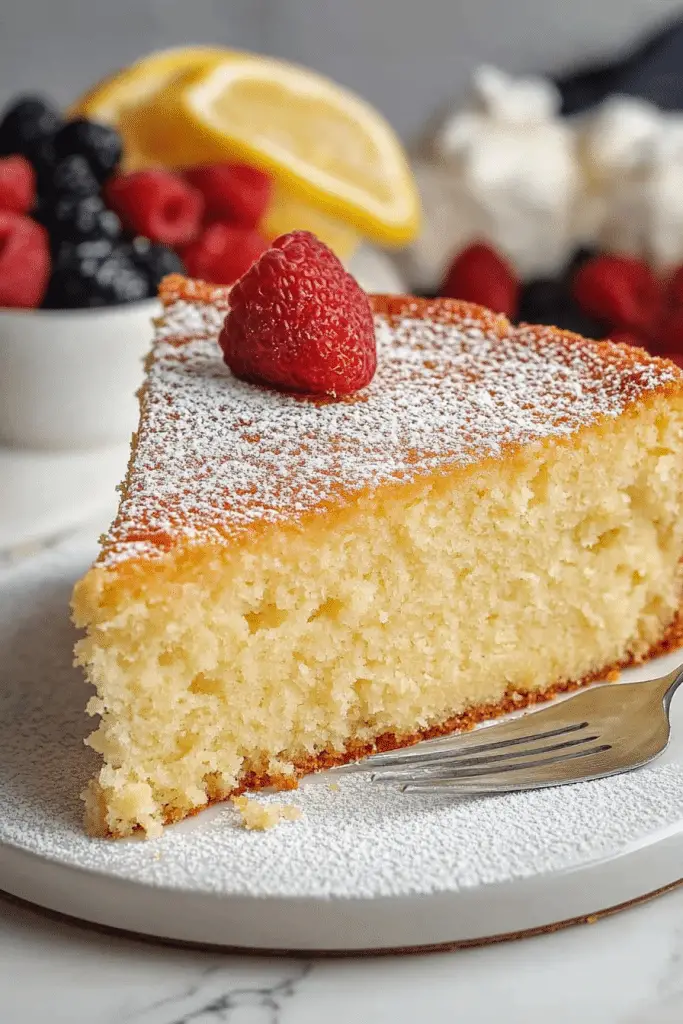
You know those days? The ones where you’re just *craving* something sweet, something a little bit decadent, but the thought of actually pulling out all the stops for a full-blown cake feels like climbing Mount Everest? Yeah, I have those days all the time. And for years, I’d either cave and grab something from the store (which is fine, but never quite hits the spot) or I’d talk myself out of it. Then, one glorious afternoon, I stumbled upon this absolute gem: the Vanilla Magic Custard Cake. Honestly, it’s more like a magical experience than a cake. It’s the kind of dessert that looks sophisticated, tastes out-of-this-world amazing, but is deceptively simple to whip up. It’s become my go-to when company’s coming, when I need a pick-me-up, or when my sweet tooth is staging a full-on rebellion. It’s got this incredible custardy center that melts in your mouth, all wrapped up in a tender cake. Think of it as the best parts of a cheesecake, a Pound Cake, and a creamy custard all rolled into one. My kids call it “cloud cake” because of its super light and airy texture, and honestly, they’re not wrong!
Thank you for reading this post, don't forget to subscribe!What is a magic custard cake?
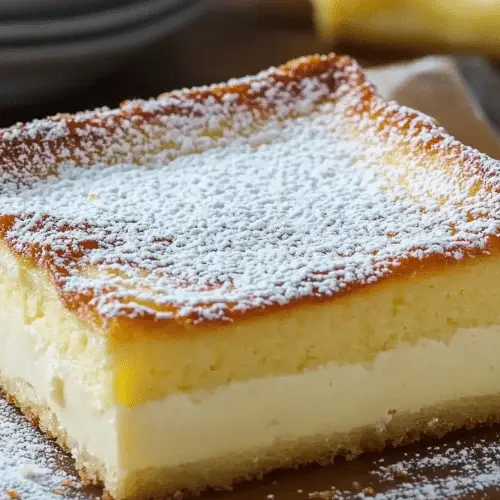
So, what exactly *is* this “Vanilla Magic custard cake“? It sounds fancy, right? But at its heart, it’s a wonderfully forgiving and surprisingly straightforward cake. The “magic” part comes from how the batter magically separates as it bakes, creating distinct layers: a dense, creamy custard base, a silky smooth middle, and a light, airy cake top. It’s not a complicated process at all; it’s more about the chemistry of the ingredients and the baking temperature. You get this incredible contrast in textures and flavors all in one bite. It’s essentially a one-bowl wonder for the batter, and then you just let the oven do its thing. It’s a bit like a lava cake’s more sophisticated cousin, but without the molten center that can sometimes be tricky to get just right. This Vanilla Magic Custard Cake is just… perfect. It’s like the universe decided we all needed a dessert that’s both comforting and impressive, and this is it. It’s honestly one of my absolute favorite recipes because it feels so special without demanding hours in the kitchen.
Why you’ll love this recipe?
There are so many reasons why this Vanilla Magic Custard Cake has become a staple in my kitchen, and I just know you’re going to fall head over heels for it too! First off, the **flavor** is just divine. The pure vanilla extract sings through, and the creamy custard layer is so rich and comforting. It’s not overly sweet, which I really appreciate; it’s just perfectly balanced. Then there’s the **simplicity**. Seriously, this is a lifesaver on busy nights. You can mix up the batter in under 15 minutes, and the rest is just hands-off baking time. It’s the kind of recipe that makes you feel like a baking pro, even if you’re just starting out. And let’s talk about **cost-efficiency**. All the ingredients are pantry staples – flour, sugar, eggs, milk, butter, vanilla. Nothing fancy, nothing expensive, but they combine to create something truly spectacular. This is a fantastic option when you want a showstopper dessert without breaking the bank. Beyond that, the **versatility** is amazing! While I adore the classic vanilla, I’ve found it’s a brilliant base for other flavors too. You can easily add a swirl of chocolate or a hint of lemon zest. It’s also wonderful served warm or chilled, making it adaptable for any craving or occasion. What I love most about this Vanilla Magic Custard Cake, though, is the sheer joy it brings. It’s a guaranteed crowd-pleaser, and the “wow” factor when people taste that custardy center is just priceless. It’s miles better than any store-bought cake, and it doesn’t require the stress of multiple bowls or delicate folding techniques that some other recipes do. If you’ve ever loved a good custard or a moist Vanilla Cake, this recipe is going to be your new best friend.
How do I make a vanilla custard cake?
Quick Overview
Making this Vanilla Magic Custard Cake is a breeze. You’ll basically whisk together some simple ingredients for the batter, pour it into a prepared pan, and let the oven work its magic. The batter will naturally separate as it bakes, forming those distinct, delightful layers of cake and custard. It’s a one-bowl process for the main batter, meaning less cleanup, which is always a win in my book! You don’t need any special equipment, just a mixing bowl, a whisk, and a baking pan. It’s truly one of the easiest yet most impressive desserts I’ve ever made.
Ingredients
For the Main Batter:
You’ll need 1 and 1/2 cups of all-purpose flour. Make sure it’s measured correctly – spoon it into your cup and level it off with a straight edge, don’t scoop directly from the bag. This prevents too much flour, which can make the cake dense. Then, 1 and 1/2 cups of granulated sugar. You can reduce this slightly if you prefer a less sweet cake, but it contributes to the custard texture. Add 1 teaspoon of baking powder to help give the cake a little lift. And of course, a pinch of salt to balance out the sweetness and enhance all the flavors. For the fat, 1/2 cup (1 stick) of unsalted butter, softened. Softened butter creams much better than melted butter, so make sure it’s not straight from the fridge. 3 large eggs, at room temperature. Room temperature eggs incorporate more easily into the batter, creating a smoother mixture. 1 teaspoon of pure vanilla extract. This is crucial for that beautiful vanilla flavor, so don’t skimp on quality here! And finally, 1 and 1/2 cups of whole milk. You can use 2% milk, but whole milk gives the richest, creamiest custard layer.
For the Filling:
This is where the “magic” really comes in. You’ll need 3 large egg yolks. These are important for richness and that custardy texture. Make sure you’ve separated them carefully from the whites! And another 1/2 cup of whole milk, which will combine with the egg yolks to form the base of our creamy layer.
For the Glaze:
This part is optional but highly recommended! You’ll need 1/4 cup of powdered sugar. This gives us a smooth, sweet glaze. Then, 1 to 2 tablespoons of milk or cream. Start with 1 tablespoon and add more until you reach your desired drizzling consistency. A tiny splash of pure vanilla extract (about 1/4 teaspoon) to tie in with the cake’s flavor.
Step-by-Step Instructions
Step 1: Preheat & Prep Pan
First things first, preheat your oven to 325 degrees Fahrenheit (160 degrees Celsius). This is a slightly lower temperature than many cakes, which helps the custard layer set properly without the cake layer over-baking. Now, grab an 8×8 inch baking pan or a similar-sized oven-safe dish. Grease it really well with butter or cooking spray, and then lightly dust it with flour. Tap out any excess flour. This step is super important to make sure your beautiful cake doesn’t stick and releases easily after all that baking.
Step 2: Mix Dry Ingredients
In a large mixing bowl, whisk together the 1 and 1/2 cups of all-purpose flour, 1 and 1/2 cups of granulated sugar, 1 teaspoon of baking powder, and the pinch of salt. Just give it a good whisk to make sure everything is evenly distributed. This ensures your leavening agent and salt are spread throughout the dry ingredients for a uniform cake.
Step 3: Mix Wet Ingredients
In a separate, smaller bowl, whisk together the 3 large eggs, 1/2 cup of softened unsalted butter, 1 teaspoon of pure vanilla extract, and 1 and 1/2 cups of whole milk. Whisk until everything is well combined and the butter is mostly broken down. Don’t worry if it’s not perfectly smooth; it will come together when you combine it with the dry ingredients.
“I don’t know if I’ve ever eaten a better Vanilla Magic Custard Cake. The rub alone is wonderful, but the sauce??? Over the top!”
Step 4: Combine
Now, pour the wet ingredients into the bowl with the dry ingredients. Use your whisk (or a spatula) to mix everything together until just combined. Be careful not to overmix! Overmixing can develop the gluten in the flour, leading to a tougher cake. Stop as soon as you don’t see any dry streaks of flour. The batter will be quite thick at this stage, and that’s perfectly normal.
Step 5: Prepare Filling
In another small bowl, whisk together the 3 large egg yolks and the additional 1/2 cup of whole milk. Whisk until the yolks are fully incorporated into the milk and the mixture is smooth. This creates that rich, creamy custard base that will form the bottom layer of your magic cake.
Step 6: Layer & Swirl
Pour the prepared batter into your greased and floured baking pan. Now, gently pour the egg yolk and milk mixture evenly over the top of the batter. You don’t need to do anything fancy here; the magic happens in the oven! You’ll notice the custard mixture might sit on top initially, but as it bakes, it will sink to the bottom, creating those wonderful layers.
Step 7: Bake
Place the pan in your preheated oven. Bake for about 45 to 55 minutes, or until the cake layer on top is golden brown and a toothpick inserted into the cake portion comes out clean. The custard layer will be set but might still have a slight jiggle in the very center, which is exactly what you want. Keep an eye on it towards the end of baking; oven temperatures can vary, so start checking around the 40-minute mark.
Step 8: Cool & Glaze
Once baked, carefully remove the pan from the oven and let it cool on a wire rack for at least 30 minutes. This is important for the layers to fully set. While the cake is cooling, you can prepare the glaze if you’re using it. In a small bowl, whisk together the powdered sugar and 1 tablespoon of milk and vanilla extract. Add more milk, a teaspoon at a time, until you get a pourable, but not too runny, consistency. Once the cake has cooled slightly, drizzle the glaze evenly over the top. Let it set for another 15 minutes or so before slicing.
Step 9: Slice & Serve
This is the best part! Once the glaze has set (or if you skipped the glaze), slice the Vanilla Magic Custard Cake into squares. Serve it warm for an especially comforting treat, or at room temperature. It’s absolutely delicious on its own, but it’s also fantastic with a dollop of whipped cream or a scoop of your favorite Ice Cream.
What to Serve It With
This Vanilla Magic Custard Cake is so wonderfully versatile, it fits into just about any meal or craving. **For Breakfast**, it’s a revelation! Imagine a slice of this warm with your morning coffee. It feels like a special treat but it’s so quick to grab and go. I love it with a simple dusting of powdered sugar instead of the glaze on those mornings when I’m really in a rush. For **Brunch**, it really shines. Plating it with a few fresh berries adds a pop of color and freshness that’s just lovely. A small sprig of mint on top makes it look restaurant-fancy! And don’t forget the beverages – a nice Earl Grey tea or a sparkling mimosa pairs beautifully. As a **Dessert**, it’s a true showstopper. Serving it warm with a scoop of vanilla bean ice cream is my absolute favorite way to go. The contrast of the warm cake and cold ice cream is heavenly. A drizzle of raspberry coulis or a few chocolate shavings can elevate it even further for a more formal dinner party. And for those **Cozy Snacks** moments, when you just need something sweet and comforting, this cake is your best friend. I often cut a small square and enjoy it with a glass of cold milk – it reminds me of childhood treats. My family also loves it with a spoonful of Salted Caramel sauce drizzled over the top. It’s the perfect end to a long day, or a delightful companion for an afternoon cup of tea.
Top Tips for Perfecting Your Vanilla Magic Custard Cake
I’ve made this Vanilla Magic Custard Cake more times than I can count, and over the years, I’ve picked up a few little tricks that make it even more foolproof and delicious. Let’s talk **Zucchini Prep**. Wait, did I say zucchini? Oh my goodness, I’m getting ahead of myself! That’s my *other* favorite magic cake. For *this* Vanilla Magic Custard Cake, the key is in the other ingredients, and there’s no zucchini involved! My apologies, I must have been thinking of a different recipe I adore. Let’s refocus on the vanilla goodness.
Okay, back to the real magic here. The **Mixing Advice** is crucial. Remember I said not to overmix? That’s because the gluten in the flour is what gives structure, but too much develops it, making the cake tough. Mix until *just* combined – a few little lumps are totally fine and actually preferable. You want that tender, melt-in-your-mouth texture.
When it comes to **Swirl Customization**, while this recipe is beautifully layered on its own, I’ve experimented a bit. If you wanted a hint of chocolate, you could whisk a tablespoon of cocoa powder into the egg yolk and milk mixture *before* pouring it over the batter. It won’t give you distinct swirls like a marble cake, but it will impart a subtle chocolatey depth to the custard layer. For a more pronounced swirl, you could make a separate chocolate batter and dollop it on top, then gently swirl with a knife, but that deviates from the magic simplicity!
For **Ingredient Swaps**, I’ve tried using almond milk or oat milk instead of whole milk in both the batter and the custard layer. It works, and the cake is still lovely, but it’s not quite as rich and creamy. The whole milk really contributes to that luxurious custard texture. If you’re dairy-free, it’s definitely worth a try with a good quality plant-based milk, but be aware the texture might change slightly. Also, I’ve tested this with a vegan egg substitute for the egg yolks in the custard layer, and it achieved a similar thickening effect, though the richness wasn’t quite the same.
**Baking Tips** are really important for achieving those distinct layers. The 325°F (160°C) temperature is key. Baking at a higher temperature too quickly can cause the cake to rise too much before the custard can set and sink. Use the middle rack in your oven for even heat distribution. And the toothpick test is your friend: if it comes out clean from the cake portion, it’s ready. The custard might still be slightly jiggly, which is fine – it will firm up as it cools.
“New family favorite! This Vanilla Magic Custard Cake was so flavorful and ridiculously easy. Crowd-pleaser for sure.”
Finally, **Glaze Variations**. While the simple powdered sugar glaze is classic, I sometimes like to add a tiny bit of lemon zest to it for a bright, zesty kick that cuts through the richness. You could also use a chocolate glaze, or simply dust it with more powdered sugar once cooled. For a really decadent finish, a warm caramel sauce drizzled over the top is divine. The key with the glaze is to let the cake cool slightly first, so the glaze doesn’t just melt off but sets beautifully on top.
Storing and Reheating Tips
Knowing how to store this Vanilla Magic Custard Cake properly will ensure you can enjoy its deliciousness for days. For **Room Temperature** storage, if you live in a cooler climate and the cake has been glazed, you can leave it on the counter, well-covered, for up to 2 days. Make sure it’s in an airtight container or well-wrapped to prevent it from drying out. If it’s a particularly warm day or you’ve added fresh fruit to the glaze, it’s best to refrigerate it sooner.
**Refrigerator Storage** is generally the safest bet to maintain freshness, especially if you’re not planning to eat it all within a day or two. Store it in an airtight container. It will keep well in the fridge for up to 4-5 days. The custard layer might firm up a bit more when chilled, but it will still be wonderfully creamy. If you prefer it at room temperature, just let a slice sit out for about 15-20 minutes before serving.
I’ve also had success with **Freezer Instructions**, though I find it’s best enjoyed fresh. If you do want to freeze it, I recommend freezing individual slices. Wrap each slice tightly in plastic wrap, then in a layer of aluminum foil, and place them in a freezer-safe bag or container. It can stay frozen for up to 2-3 months. To thaw, remove the slices from the freezer and let them thaw overnight in the refrigerator, then bring to room temperature before serving. The texture is usually quite good, though the custard might be a touch softer.
Regarding **Glaze Timing Advice**, if you plan to store the cake for more than a day, I recommend glazing it just before serving or after it’s been brought back to room temperature from the fridge. If you glaze it and then refrigerate it for an extended period, the glaze can sometimes become a bit sticky or absorb moisture. For the best appearance, glaze it closer to when you’ll be eating it.
Frequently Asked Questions
Final Thoughts
Honestly, this Vanilla Magic Custard Cake is one of those recipes that makes me feel so good about being in the kitchen. It’s proof that you don’t need a million fancy ingredients or complicated techniques to create something truly spectacular. It’s got that perfect balance of comforting flavors and delightful textures, and the fact that it looks so impressive while being relatively simple to make is just the cherry on top. It’s the kind of cake that brings smiles to faces, whether it’s for a special occasion or just a regular Tuesday night. If you enjoy simple, elegant desserts that deliver on flavor and are forgiving to make, you absolutely have to give this Vanilla Magic Custard Cake a try. It’s a recipe that I know I’ll be making for years to come, and I hope it becomes a favorite in your home too!
If you enjoyed this recipe, you might also love my [Link to another custard-based recipe, e.g., Creamy Rice Pudding] or my [Link to a simple vanilla cake recipe, e.g., Easy Vanilla Bean Bundt Cake] for more comforting baked goods. Happy baking, and I can’t wait to hear how your Vanilla Magic Custard Cake turns out! Let me know in the comments below if you tried it, or if you have any delicious variations to share!
Vanilla Magic Custard Cake
Ingredients
Main Ingredients
- 4 large eggs Eggs separated
- 2 cups Milk
- 0.5 cup Granulated Sugar
- 0.25 cup All-Purpose Flour
- 0.5 cup Butter melted
- 1 teaspoon Vanilla Extract
- 0.5 teaspoon Lemon Zest optional
Instructions
Preparation Steps
- Preheat oven to 325°F (160°C). Grease a 9-inch baking dish.
- In a large bowl, whisk together egg yolks, granulated sugar, flour, melted butter, and vanilla extract until smooth.
- Gradually whisk in the milk and lemon zest (if using).
- In a separate clean bowl, beat egg whites until stiff peaks form.
- Gently fold the beaten egg whites into the yolk mixture.
- Pour the batter into the prepared baking dish.
- Bake for 45-55 minutes, or until the top is golden brown and a toothpick inserted into the center comes out clean.
- Let the cake cool completely in the dish before chilling in the refrigerator for at least 2 hours. Serve cold.


