Thumbprint Cookies: The Ultimate Guide to Perfect, Buttery, Jammy Treats
Picture this: a crisp winter afternoon, the scent of vanilla and cinnamon drifting from your kitchen, and a plate of these little golden bites. That’s the magic of Thumbprint Cookies for me. They’re not just cookies; they’re tiny pockets of pure, unadulterated joy. A perfect balance of a tender, melt-in-your-mouth shortbread base, crowned with a jewel-like sphere of your favorite jam, and finished with a whisper of sparkling sugar. It’s a classic for a reason, and once you’ve made them, you’ll see why they’re a beloved staple in so many homes. This isn’t about complicated techniques or obscure ingredients—it’s about creating something beautiful and delicious that brings people together. Let’s dive in!
Thank you for reading this post, don't forget to subscribe!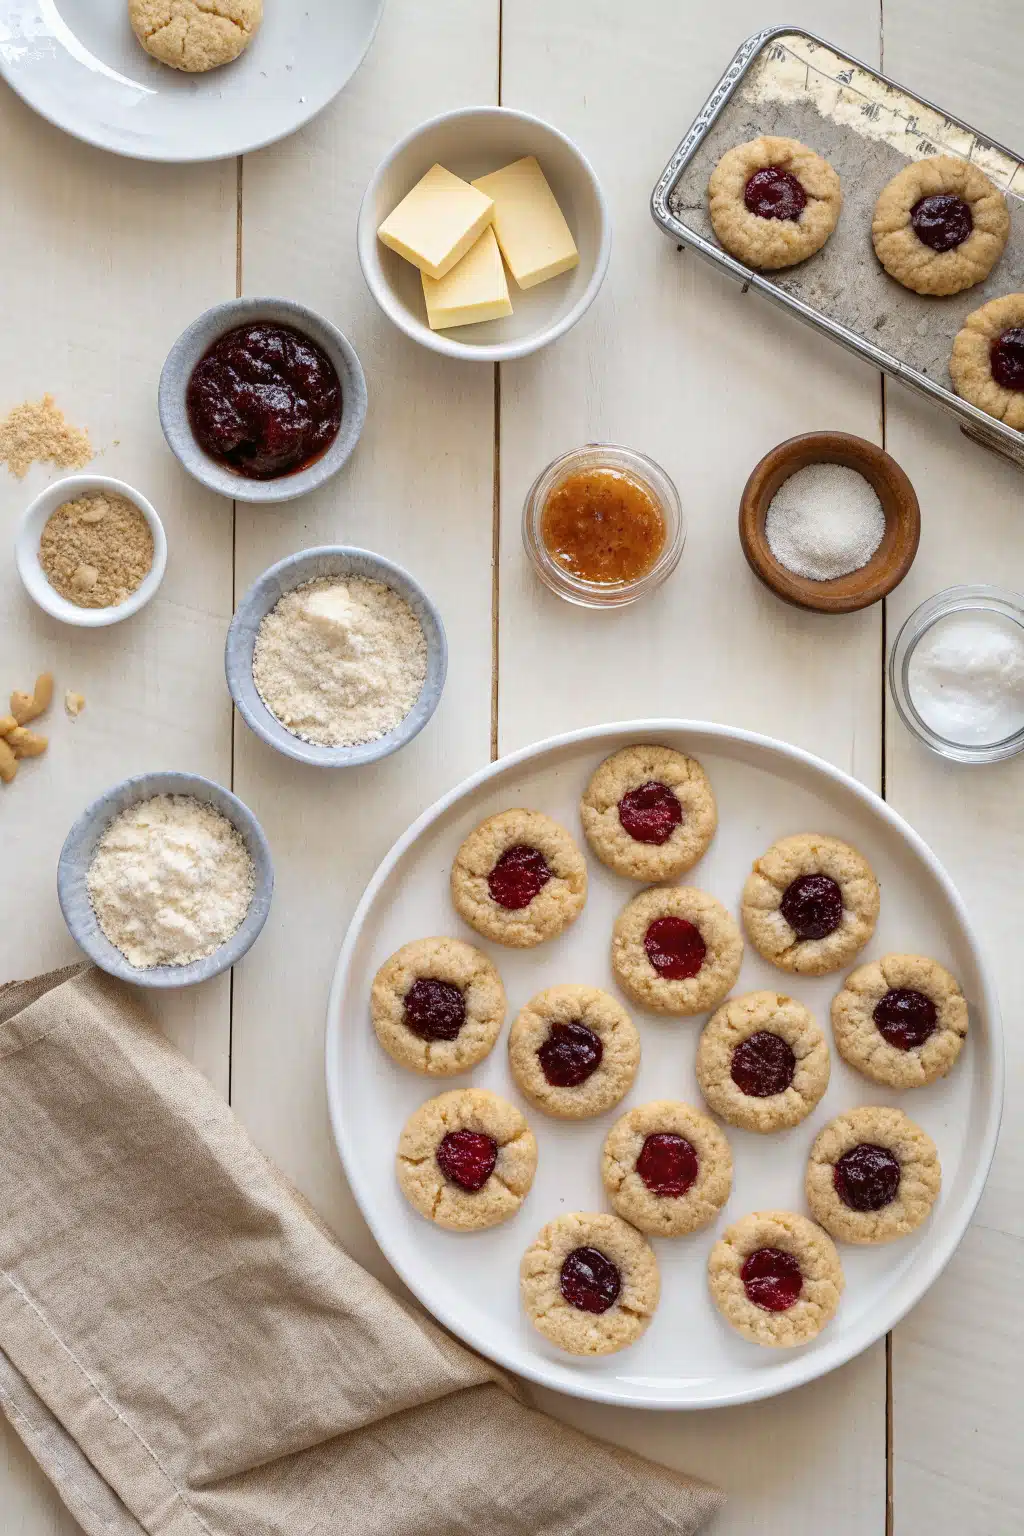
What Is Thumbprint Cookie?
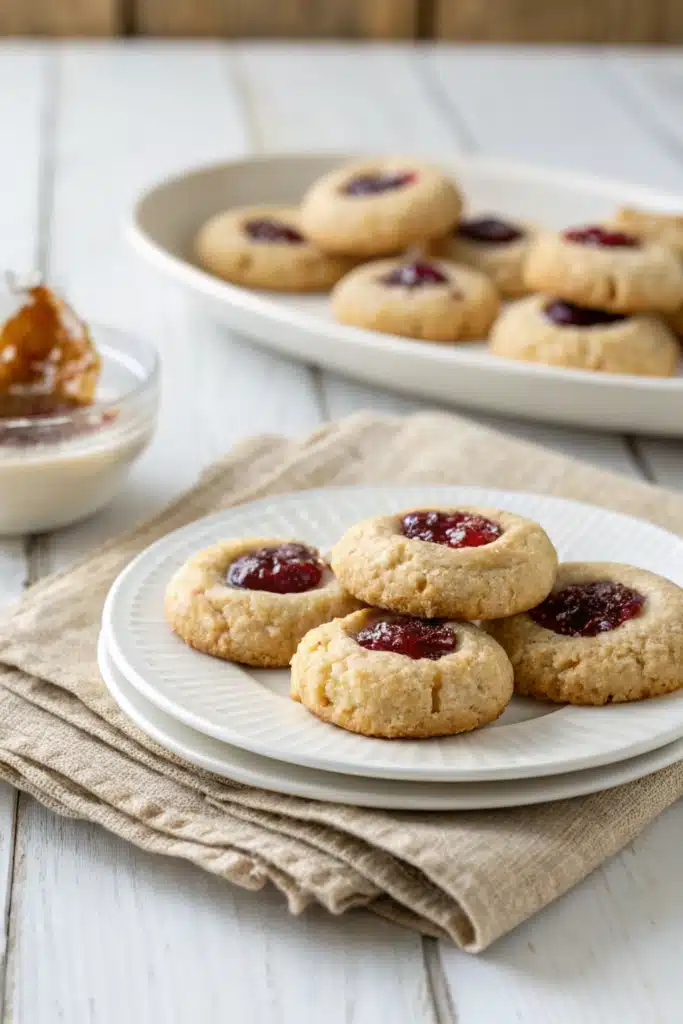
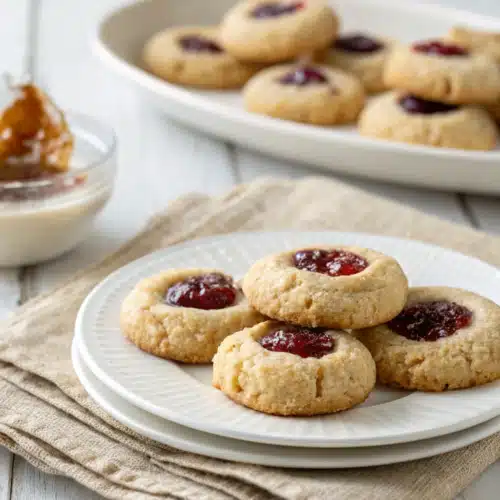
At its core, a thumbprint cookie is a small drop cookie characterized by a distinctive indentation in its center, which is then filled with a sweet preserve—most commonly raspberry, apricot, or blackberry jam, though the world of fillings is truly endless. The term “thumbprint” comes from the simple technique used to create the cavity: a gentle press with a fingertip (or the back of a teaspoon) right after the cookies are placed on the baking sheet. The dough itself is typically a rich, buttery shortbread, sometimes enhanced with a hint of almond extract for an extra layer of warmth. When baked, the edge becomes subtly crisp while the center remains soft, creating a delightful textural contrast against the jam’s slight chewiness. These cookies are a masterclass in simplicity, where a few high-quality ingredients combine to create something profoundly satisfying. Their elegant appearance makes them perfect for holiday platters, gift-giving, or simply as a special treat to enjoy with a cup of tea. They’re the kind of recipe that feels both nostalgic and timeless, a comforting reminder of simpler baking pleasures.
Why You’ll Love This Recipe
I absolutely adore making Thumbprint Cookies because they are the epitome of ‘simple, yet spectacular.’ There’s a certain charm in their straightforward preparation that I find incredibly rewarding. The process is meditative—mixing the rich, buttery dough, forming perfect little rounds, and gently pressing a fingerprint into each one before the oven works its magic. Watching them bake is always a delight; they transform from pale disks into golden-brown perfection, their delicate edges just beginning to set. But the real magic happens after baking. The aroma that fills your kitchen is warm, sweet, and utterly irresistible. And when you break into one, you get that perfect symphony of textures: the slight crunch of the crust giving way to the soft, yielding dough, all culminating in the burst of sweet, fruity jam. They’re incredibly versatile, too! While traditionalists swear by raspberry, you can really let your creativity shine with flavors like lemon curd, fig preserves, or even a swirl of chocolate ganache. Plus, they make fantastic gifts—just pop them in a pretty tin with a handwritten note, and you’ve got a thoughtful present that says, “I care.” Whether you’re a seasoned baker or just starting out, these cookies offer a foolproof way to create something beautiful and delicious that will impress everyone at the table.
How to Make Thumbprint Cookies
Quick Overview
Making Thumbprint Cookies is refreshingly simple! You start with a rich, buttery shortbread dough that’s easy to mix and work with. Once the dough is chilled (which makes it much easier to handle), you roll it out, cut it into uniform shapes, and bake until just golden. The most crucial step is creating the thumbprint: gently press your finger (or the back of a teaspoon) into the center of each cookie right after placing them on the tray. Then, while they’re still warm and pliable, you fill the indents with your chosen jam or preserve. As they cool, the cookies set up nicely, holding their shape and creating that perfect pocket of flavor. The entire process from start to finish takes less than two hours, making it an ideal project for a cozy afternoon or a last-minute dessert.
Ingredients
- For the Cookies:
- 1 ½ cups (190g) all-purpose flour
- ¼ teaspoon salt
- ¼ teaspoon ground cinnamon (optional, but adds warmth)
- ½ cup (1 stick, 113g) unsalted butter, cold and cut into small cubes
- ⅓ cup (65g) granulated sugar
- 1 large egg yolk
- 1 teaspoon pure vanilla extract
- For the Filling:
- ½ cup (120ml) seedless raspberry jam, apricot preserves, or your favorite fruit preserve
- For Finishing:
- ¼ cup (50g) coarse sugar (like Demerara or sanding sugar)

Step-by-Step Instructions
Step 1: Preheat & Prep Pan
Begin by preheating your oven to 350°F (175°C). Line a baking sheet with parchment paper or a silicone baking mat. This ensures the cookies won’t stick and allows for even heat circulation during baking. Having everything ready and within reach will make the process smoother, especially since we want to add the jam while the cookies are still warm.
Step 2: Mix Dry Ingredients
In a medium-sized mixing bowl, whisk together the flour, salt, and optional cinnamon. Whisking helps distribute the dry ingredients evenly and prevents any lumps of salt or spices from appearing in the final cookies. This step is quick but important for achieving a consistent texture.
Step 3: Cream Butter & Sugar
Using a handheld or stand mixer fitted with a paddle attachment, beat the cold butter and granulated sugar together on medium-high speed until the mixture becomes light and fluffy, about 2-3 minutes. The cold butter is key here; it creates air pockets when creamed, contributing to the cookies’ tender crumb. If using a food processor, pulse the butter and sugar until just combined.
Step 4: Combine Wet & Dry Ingredients
Reduce the mixer speed to low and add the egg yolk and vanilla extract. Mix until fully incorporated. Now, gradually add the flour mixture to the butter mixture, mixing only until just combined. Be careful not to overmix, as this can lead to tough cookies. The dough will be thick and slightly shaggy at first, but it will come together as you mix.
“Made the thumbprint cookies tonight and wow — perfect weeknight dinner. Will definitely make again!”
Step 5: Chill the Dough
Turn the dough out onto a lightly floured surface and gently knead it a few times until it forms a cohesive ball. Wrap the dough in plastic wrap and refrigerate for at least 30 minutes. Chilling is crucial—it firms up the butter, making the dough much easier to handle and preventing the cookies from spreading too much during baking. If you’re short on time, you can chill them for 15 minutes, but longer is better.
Step 6: Roll Out Dough
After chilling, place the dough between two sheets of parchment paper or plastic wrap. Using a rolling pin, roll the dough out to about ¼-inch thickness. If the dough becomes too soft to roll, return it to the fridge for another 10-15 minutes. Rolling between parchment makes transferring the dough to the baking sheet much easier and prevents sticking.
Step 7: Cut & Shape Cookies
Using a 2-inch round cookie cutter (a glass or jar lid works well too), cut out circles of dough. Place them on the prepared baking sheet, spacing them about 1 inch apart. Gather any scraps, gently re-roll, and cut more cookies. Don’t worry if the dough tears slightly; just patch it up with a little extra dough before re-rolling.
Step 8: Create Thumbprints
Using your index finger or the back of a small spoon, gently press into the center of each cookie to create a shallow indentation. Be careful not to press all the way through. This is the signature look of thumbprint cookies, so take your time to make them uniform. If the edges of the dough start to crack, just press them back together gently before proceeding.
Step 9: Add Sugar & Bake
Sprinkle the coarse sugar generously over each cookie, pressing it lightly into the dough so it adheres. This adds a lovely crunch and visual appeal. Bake in the preheated oven for 12-15 minutes, or until the edges are lightly golden but the centers still look pale. The cookies should not be browned at all—their beauty lies in their golden hue and the contrasting jam center.
Step 10: Fill & Cool
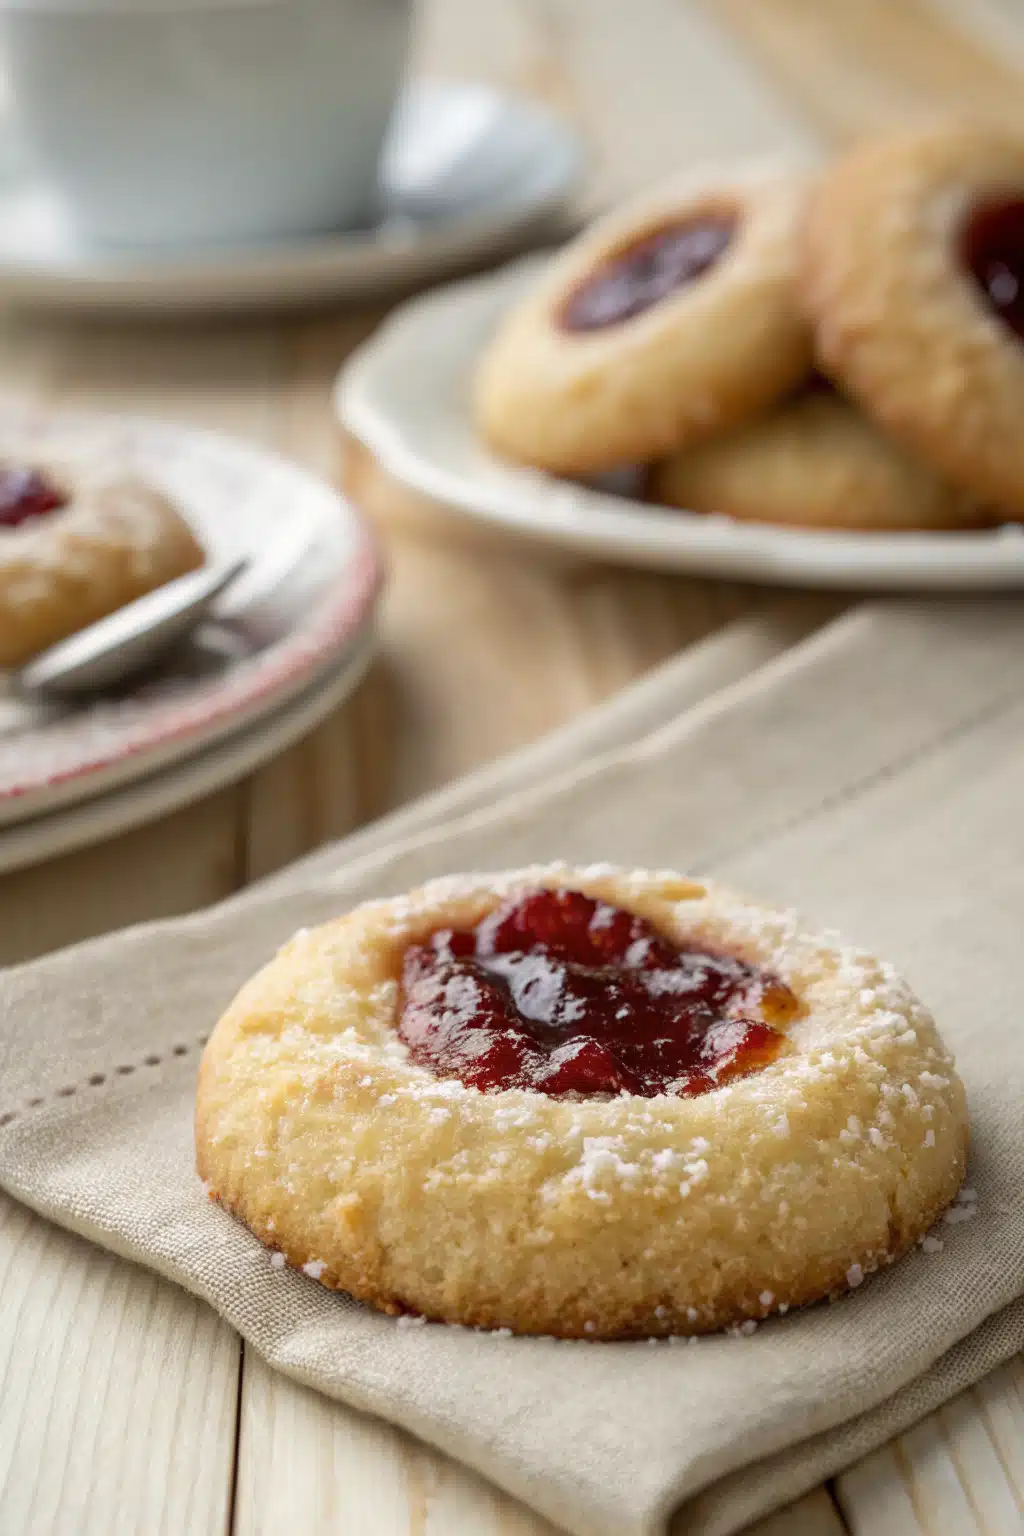
Remove the baking sheet from the oven and immediately press a small amount of jam into the center of each warm cookie. If the indentations have closed up slightly during baking, use a small knife or toothpick to reopen them. Allow the cookies to cool completely on the baking sheet on a wire rack. As they cool, the jam will thicken and set, creating a perfect pocket of flavor.
What to Serve It With
Thumbprint cookies are wonderfully versatile when it comes to serving suggestions. For a classic pairing, serve them alongside a pot of Earl Grey or English Breakfast tea—the robust tea complements the buttery sweetness beautifully. They also shine as part of a festive holiday spread, nestled amongst other seasonal treats like gingerbread men and peppermint bark. For a decadent afternoon treat, consider serving them with a dollop of whipped cream or a scoop of vanilla Ice Cream; the warm cookie contrasts delightfully with the cold dessert. Their elegant appearance makes them perfect for elegant gatherings, where they can be artfully arranged on a tiered stand alongside fresh berries and chocolate-dipped espresso beans. And of course, they make exceptional gifts! Package them in a decorative tin or cellophane bag tied with ribbon, perhaps accompanied by a small bouquet of dried lavender for an extra touch of charm. No matter how you serve them, these little gems never fail to bring a smile.
Top Tips for Perfecting Your Thumbprint Cookies
Mastering thumbprint cookies is all about understanding a few key principles that elevate them from good to great. First and foremost, temperature control is everything. Keep your butter cold throughout the process—even when creaming it with sugar—as this ensures those precious air pockets form, resulting in a tender, flaky texture. Don’t skip the chilling step; it’s non-negotiable for maintaining the cookie’s shape during baking. When rolling out the dough, aim for a consistent thickness; unevenness leads to some cookies being done before others. Speaking of jam, quality matters! Use a seedless variety for a smoother filling, and avoid overly runny jams that might leak out during baking. The thumbprint itself requires a delicate touch—press firmly enough to create a defined cavity but gently enough not to tear the dough. Finally, resist the urge to overbake! These cookies should be pale gold around the edges, not dark brown. The residual heat will continue cooking them slightly upon removal from the oven, so taking them out when they’re still light gives you the perfect texture. With these tips in mind, you’ll be well on your way to creating thumbprint cookies that are as visually stunning as they are delicious.
Storing and Reheating Tips
Proper storage is essential to maintaining the delightful qualities of your thumbprint cookies. For short-term enjoyment, store them in an airtight container at room temperature for up to one week. Layer the cookies between sheets of parchment paper to prevent them from sticking together. If you want to extend their shelf life further, you can freeze them. Place cooled cookies in a freezer-safe container, separating layers with parchment paper, and store for up to three months. To thaw, simply leave them at room temperature for a couple of hours. When it comes to reheating, there are several methods depending on what you prefer. For a fresh-from-the-oven experience, place the cookies on a baking sheet and warm them in a preheated 300°F (150°C) oven for about 5-7 minutes. Alternatively, you can reheat them in the microwave for 10-15 seconds per cookie, though this method won’t restore the crispness of the sugar topping. Another option is to briefly toast them under the broiler for 20-30 seconds, watching closely to prevent burning. Regardless of the method, allow the cookies to cool slightly after reheating before enjoying. This ensures the jam filling has time to settle back into its proper position, maintaining the integrity of the thumbprint cookie’s signature structure.
Frequently Asked Questions
“New family favorite! This thumbprint cookies was so flavorful and ridiculously easy. Crowd-pleaser for sure.”
Final Thoughts
Thumbprint cookies represent the beautiful intersection of simplicity and elegance in baking. They require no complicated techniques or specialty equipment, yet they deliver a sensory experience that’s both comforting and sophisticated. The journey from humble ingredients to these golden, jam-filled delights is surprisingly straightforward, yet each step offers opportunities for mindfulness and creativity. Whether you’re pressed for time or looking to impress guests, these cookies strike the perfect balance between effort and reward. Their versatility allows for personalization according to taste preferences, making every batch uniquely yours. Beyond their deliciousness, thumbprint cookies embody the spirit of sharing and hospitality—they’re the kind of treat that brings people together around a cup of tea or a festive gathering. So next time you need a moment of culinary joy, remember that sometimes the simplest recipes yield the most profound satisfaction. These little bites prove that with just butter, sugar, flour, and a splash of imagination, you can create something truly magical.
Thumbprint Cookies
Ingredients
Main Ingredients
- 2 cups all-purpose flour
- 0.5 cup granulated sugar
- 0.5 teaspoon salt
- 1 cup unsalted butter, softened
- 1 large egg yolk
- 1 teaspoon vanilla extract
- 0.5 cup seedless raspberry jam or your favorite flavor
Instructions
Preparation Steps
- Preheat the oven to 350°F (175°C). Line two baking sheets with parchment paper.
- In a medium bowl, whisk together the flour, sugar, and salt. Add the softened butter and mix with a pastry cutter or fork until the mixture resembles coarse crumbs.
- Stir in the egg yolk and vanilla extract until a soft dough forms. Divide the dough into 24 equal portions and roll each into a ball.
- Place the dough balls on the prepared baking sheets, spacing them about 2 inches apart. Use your thumb (or the back of a wooden spoon) to make an indentation in the center of each cookie.
- Fill each indentation with about 0.5 teaspoon of jam. Bake for 12–15 minutes, or until the edges are lightly golden.
- Remove from the oven and let cool on the baking sheet for 5 minutes before transferring to a wire rack to cool completely.


