You know those moments when you’re just craving something a little bit extra special? Something that feels like a real treat, but you also don’t want to spend hours in the kitchen? Yeah, me too. And honestly, I’ve tried a lot of things to satisfy those cravings. I’ve baked whole cakes, I’ve attempted elaborate cookies, and I’ve even gone down the rabbit hole of fancy layered desserts. But lately, I’ve been obsessed with a delightful little creation that combines two of my absolute favorite things: cake pops and Ice Cream Cones. If you’re looking for fun cake pop ice cream cone recipes, you’ve absolutely landed in the right place! These aren’t just cute; they’re a flavor explosion waiting to happen, and they’re surprisingly easy to whip up. Think of them as a party in your mouth, disguised as a whimsical treat.
Thank you for reading this post, don't forget to subscribe!What is cake pop ice cream cone?
So, what exactly are we talking about here? Imagine your favorite moist, delicious cake, crumbled and mixed with a creamy binder (like frosting or Cream Cheese), rolled into little balls. Now, instead of sticking them on lollipop sticks, we’re gently embedding them into the top of a sugar cone, or sometimes even a waffle cone for a bit more crunch. Then, we frost and decorate them to look like mini ice cream cones, complete with sprinkles, drizzles, or even tiny cherry toppings! It’s essentially a bite-sized cake that gets to wear a crunchy, sweet hat. It takes the adorable portability of a cake pop and gives it a delightful textural twist with the cone. It’s the best of both worlds, really, and it always gets such a fun reaction, especially from kids (and okay, let’s be honest, from the adults too!).
Why you’ll love this recipe?
There are so many reasons why I keep coming back to these cake pop ice cream cone recipes. First and foremost, the FLAVOR is out of this world. You get the soft, tender cake, the sweet and rich frosting binder, and then that satisfying CRUNCH from the cone. It’s a symphony of textures and tastes! What I love most about this is how surprisingly SIMPLE it is. Once you’ve baked your cake and let it cool, the assembly is really straightforward. It’s not fussy, and you don’t need any fancy equipment. Plus, it’s incredibly COST-EFFECTIVE. You can use leftover cake, or a simple boxed cake mix, and store-bought frosting. The cones are super cheap, and the decorations are usually things you already have in your pantry. It’s a budget-friendly way to create something that looks like it came from a high-end bakery. And the VERSATILITY! Oh my goodness, the possibilities are endless. You can make the cake any flavor you like – chocolate, vanilla, funfetti, Red Velvet. You can use different frostings, different cones, and decorate them for any holiday or occasion imaginable. I’ve made these for birthdays, for Halloween, even just for a Tuesday because we needed a little pick-me-up. They’re perfect for bake sales too, because they travel so well and always sell out. Honestly, compared to making individual cupcakes or a full cake, these are a lifesaver when you want something special without the fuss. They’re way more stable than a traditional cake pop on a stick, which is a huge win in my book!
How do you make cake pop ice cream cones?
Quick Overview
The process is pretty much like making regular cake pops, with just one delightful twist: we’re using Ice Cream cones as our vessel! You’ll bake a cake, crumble it up, mix it with frosting until it’s perfectly moldable, then press that mixture into the top of your sugar cones. After a quick chill to firm them up, you’ll dip them in melted chocolate or candy melts and decorate to your heart’s content. It’s a fun, hands-on process that’s perfect for getting the whole family involved. The hardest part is waiting for them to set!
Ingredients
For the main cake:
1 box (15.25 oz) yellow Cake Mix (or your favorite flavor!)
Ingredients called for on the cake mix box (usually eggs, oil, water)
*Pro Tip:* I often use buttermilk instead of water for an extra tender crumb. Don’t be afraid to experiment! Using a good quality vanilla extract can also elevate a basic yellow cake to something truly special.
For the Cake Pop Mixture:
1/2 cup buttercream frosting (or Cream Cheese Frosting for a tangier flavor)
1/4 cup chocolate chips (optional, for extra gooeyness inside)
For the Cones:
1 package (10-12 count) sugar cones
*Tip:* Waffle cones can also work, but they are a bit more delicate and might require a slightly different technique for embedding the cake mixture.
For the Coating & Decoration:
12 oz candy melts (in your desired colors) or good quality melting chocolate
1-2 tablespoons vegetable shortening or coconut oil (to help with consistency)
Sprinkles, edible glitter, drizzles of contrasting chocolate, small candies – whatever your heart desires!
Step-by-Step Instructions
Step 1: Bake the Cake
Preheat your oven according to the Cake Mix box directions. Grease and flour a 9×13 inch baking pan. Prepare the cake batter as instructed on the box. Pour the batter into the prepared pan. Bake for the time recommended on the box, or until a toothpick inserted into the center comes out clean. Let the cake cool completely in the pan, then invert it onto a wire rack to cool completely. I find that cooling it completely is key; warm cake makes for a gooey, unmanageable mess when you try to crumble it.
Step 2: Crumble the Cake
Once the cake is completely cool, crumble it into a large bowl. You want fine crumbs, almost like coarse sand. I usually do this by hand, but you can also pulse it a few times in a food processor, being careful not to over-process it into a paste. The goal is to break it down so it’s easy to mix with the frosting.
Step 3: Mix the Cake and Frosting
Add the 1/2 cup of buttercream frosting to the crumbled cake. If you’re using Cream Cheese frosting, make sure it’s softened but not melted. Gently mix the frosting into the cake crumbs with a spatula or your hands until it’s well combined and the mixture holds together when squeezed. It should have the consistency of Play-Doh – not too sticky, not too dry. If it seems too dry, add a tiny bit more frosting, a tablespoon at a time. If it seems too wet, add a few more cake crumbs or a tablespoon of breadcrumbs (yes, breadcrumbs can work in a pinch to absorb moisture!). This is the stage where you can also mix in those optional chocolate chips if you like!
Step 4: Form the Cake Pop Mixture Balls (Optional, but Recommended for Structure)
While you can press the mixture directly into the cones, I find it helps a lot for structure to roll small balls of the cake mixture first. Take about 1-2 tablespoons of the cake mixture and roll it into a smooth ball. Repeat until you have enough balls to fill the tops of your cones. This ensures a more even distribution of cake inside the cone.
Step 5: Fill the Cones
Take one sugar cone. Gently press a rolled cake ball (or a good spoonful of the cake mixture) into the wide opening of the cone. Pack it down gently but firmly, filling the cone almost to the top. You want a nice, compact layer of cake mixture that will hold its shape. Make sure the top surface is relatively smooth. Repeat with all your cones.
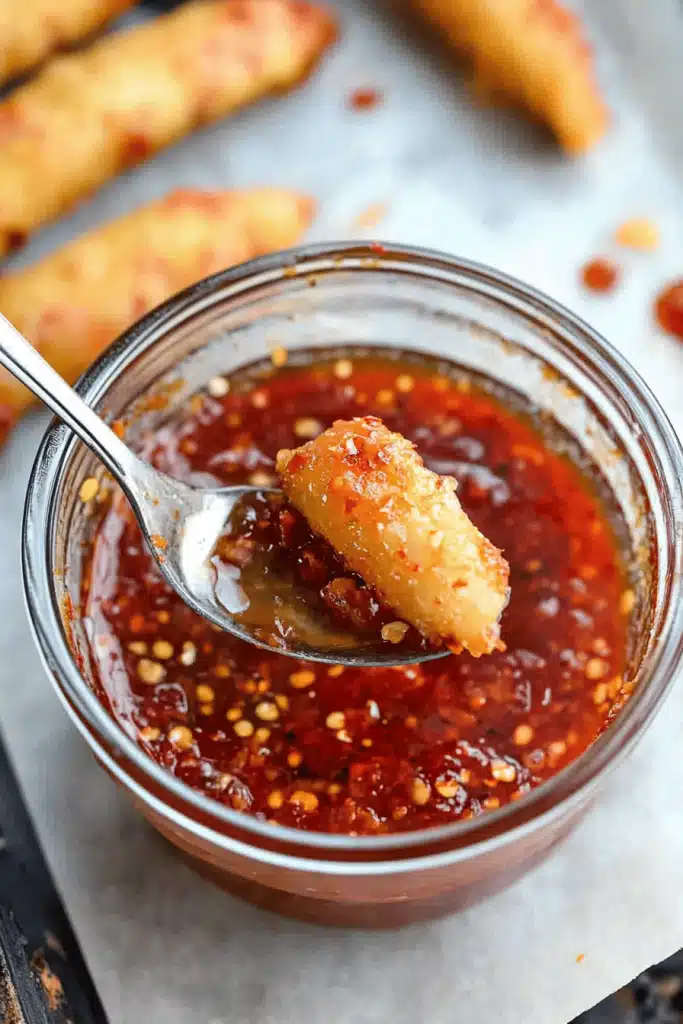
“I don’t know if I’ve ever eaten a better Sweet Treats on a Stick Recipes. The rub alone is wonderful, but the sauce??? Over the top!”
Step 6: Chill the Filled Cones
Place the filled cones on a baking sheet lined with parchment paper. Pop the baking sheet into the refrigerator for at least 30 minutes, or the freezer for about 15-20 minutes. This step is crucial for firming up the cake mixture, which makes dipping SO much easier and prevents the cake from crumbling off when you coat it.
Step 7: Prepare the Coating
While the cones are chilling, melt your candy melts or chocolate. Place the candy melts (and shortening/coconut oil, if using) in a microwave-safe bowl. Microwave in 30-second intervals, stirring well after each interval, until completely melted and smooth. Be patient – don’t overheat them, or they can seize up and become unusable. You want a smooth, fluid consistency that will coat the cones easily. If you’re using colored candy melts, you might need to stir them vigorously to get them smooth.
Step 8: Dip and Decorate
Retrieve the chilled cones from the fridge. Hold a cone by the pointy end and dip the top, cake-filled portion into the melted coating, rotating to cover it completely. Lift the cone out and let any excess coating drip back into the bowl. You can use a spoon to gently help coat any bare spots if needed. Place the dipped cone back onto the parchment-lined baking sheet. Immediately add your sprinkles, drizzles, or other decorations while the coating is still wet. Work quickly, as the coating will start to set. Repeat with all the cones.
Step 9: Let Them Set
Allow the dipped and decorated cake pop Ice Cream Cones to set completely at room temperature, or speed up the process by placing them back in the refrigerator for about 10-15 minutes. Once they’re firm, they’re ready to be enjoyed!
What to Serve It With
These cake pop Ice Cream cones are practically a standalone star, but they also pair beautifully with a variety of drinks and occasions!
For Breakfast: While they’re definitely a treat, a mini cake pop ice cream cone can be a fun addition to a special weekend breakfast. Serve it alongside some fresh fruit and a warm cup of coffee or a glass of fresh orange juice. It’s a little bit of sweetness to start the day!
For Brunch: These are perfect for a festive brunch! Arrange them on a tiered stand with other pastries and small bites. They look incredibly elegant, especially if you use pastel-colored candy melts and delicate sprinkles. A glass of bubbly or a mimosa would be the perfect beverage pairing.
As Dessert: Of course, they shine as a dessert! Serve them after dinner with a scoop of your favorite ice cream (yes, more ice cream!) or a dollop of whipped cream. A rich hot chocolate or a cappuccino also complements the sweetness beautifully. My kids love these after a family dinner; it feels like a special occasion every time.
For Cozy Snacks: These are fantastic for an afternoon pick-me-up or a movie night treat. Pair them with a cold glass of milk or a mug of herbal tea. They’re easy to hold and eat while you’re relaxing, and they’re so much more exciting than a plain cookie!
My family especially loves having these on a hot summer day, even though they’re cake! It’s like getting a mini ice cream cone experience but with the added bonus of delicious cake. It’s a fun little tradition we’ve started, and they always ask for them.
Top Tips for Perfecting Your Cake Pop Ice Cream Cones
I’ve made these countless times, and trust me, I’ve learned a few tricks along the way to make them even better!
Cake Preparation: The key to perfectly moldable cake pop mixture is really getting those crumbs fine. If you have large chunks, it won’t hold together well. I often bake my cake the day before and let it sit out overnight (covered loosely) to ensure it’s completely dry and easy to crumble. If your cake is still a little warm, it will absorb the frosting too quickly and become sticky.
Mixing Advice: Don’t overmix the cake and frosting! You want it just combined. Too much mixing can make the cake pop mixture tough or gummy. It should feel like a slightly sticky dough that holds its shape without crumbling. If it feels too dry, a tiny bit more frosting is your friend. If it’s too wet, a tablespoon of flour or even a crushed graham cracker can help absorb moisture.
Cone Filling: Press the cake mixture firmly into the cone, but don’t overstuff it to the point where it bulges out. You want a nice, smooth surface to work with for dipping. I like to make sure the very top of the cake mixture is as flat as possible before chilling, as this gives the coating a good base.
Chilling is Crucial: Seriously, don’t skip the chilling step! This is what prevents the cake mixture from falling apart when you dip it in the warm coating. It needs to be firm enough to hold its shape. I’ve tried rushing this step and it’s always a mess. Cold cones, warm coating – that’s the magic combo!
“Made the Sweet Treats on a Stick Recipes tonight and wow — perfect weeknight dinner. Will definitely make again!”
Coating Consistency: Getting your candy melts or chocolate to the right consistency is vital. If it’s too thick, it will be lumpy and hard to dip. If it’s too thin, it will slide right off. The addition of a little shortening or coconut oil really helps thin it out and make it smooth. If it starts to thicken up as you work, pop it back in the microwave for 10-15 seconds, stirring well.
Decoration Techniques: For clean lines, drizzle your contrasting chocolate *after* the base coating has set slightly. You can use a piping bag with a small tip, or even just a fork to create thin, elegant lines. For sprinkles, add them immediately after dipping, while the coating is still wet, so they adhere properly. If they don’t stick, gently press them into the coating.
Ingredient Swaps: Feel free to get creative with the cake flavor! Chocolate cake with a cream cheese frosting binder is divine. Red velvet is always a hit. For a dairy-free option, use a dairy-free cake mix, a dairy-free frosting, and dairy-free chocolate melts. I tested this with almond milk in the cake mix once and it made it even creamier!
Storing and Reheating Tips
These are best enjoyed fresh, but they can be stored for a few days if done properly.
Room Temperature: If you’re going to eat them within a day or two, you can store them in an airtight container at room temperature. Make sure they are completely set before packing them away. They should stay fresh for 2-3 days this way. Avoid humid environments, as this can make the coating sticky.
Refrigerator Storage: For longer storage, up to a week, keep them in the refrigerator. Place them in a single layer in an airtight container. You might want to place parchment paper between layers if you stack them. When you take them out, let them sit at room temperature for about 15-20 minutes before serving to take the chill off and allow the flavors to meld.
Freezer Instructions: Yes, you can freeze these! This is great if you want to make them ahead for a party. Wrap each cake pop ice cream cone individually in plastic wrap, then place them in a freezer-safe airtight container or bag. They can be stored in the freezer for up to 2-3 months. To thaw, remove them from the freezer and let them thaw in the refrigerator overnight, then bring to room temperature before serving.
Glaze Timing: If you plan to store these for more than a day, it’s best to add any delicate glazes or certain types of sprinkles *after* you take them out of the refrigerator and just before serving. Sometimes the moisture from refrigeration can affect the look of certain drizzles.
Frequently Asked Questions
Final Thoughts
I really hope you give these cake pop ice cream cone recipes a try! They are such a fun and whimsical way to enjoy your favorite cake flavors, and they always bring a smile to people’s faces. The combination of moist cake and crunchy cone is just irresistible, and the endless decorating possibilities make them perfect for any celebration or even just a rainy afternoon treat. They’re proof that you don’t need to be a master baker to create something truly special and impressive. If you love these, you might also enjoy my recipes for [Link to another related recipe, e.g., “Easy No-Bake Funfetti Cookies”] or [Link to another related recipe, e.g., “Decorated Sugar Cookies for Beginners”]. They share that same spirit of fun and deliciousness! Let me know in the comments below how yours turn out, or if you have any brilliant flavor combinations or decoration ideas. I can’t wait to hear about your creations! Happy baking!

cake pop ice cream cone recipes
Ingredients
Main Ingredients
- 10 store-bought Lofthouse Cookies
- 6 ounces Cream Cheese (softened and cubed)
- 6 ounces vanilla almond bark
- 15 ice cream cones approximately
- 3 ounces chocolate melting wafers
- 0.5 tablespoon coconut oil (for vanilla almond bark)
- 0.5 teaspoon coconut oil (for chocolate melting wafers)
- Sprinkles and M&Ms for decoration
Instructions
Preparation Steps
- In a mixing bowl, combine the cookie with the softened cream cheese until well blended and a dough forms.
- Using a cookie scoop, scoop out dough and roll into a ball, place on baking sheet lined with parchment paper. Place in the freezer for 20 minutes to set the dough.
- In the meantime, melt the vanilla almond bark or candy melts according to the package instructions until smooth and creamy. Add in 0.5 tablespoon of coconut oil to help thin the almond bark for easier dipping.
- Once the dough has chilled, carefully dip each cone into the melted almond bark, place the cooking dough top of the cone. Once chocolate has set and dough is secured to the ice cream cone, dip into almond bark. Gently shake off excess chocolate if necessary. Set aside for almond bark to harden.
- While the almond bark is setting, melt the chocolate chips or melting chocolate in a microwave-safe bowl in 30-second intervals until smooth. Add 0.5 teaspoon of coconut oil to help thin the chocolate. Transfer the melted chocolate to a small piping bag or zip-top bag with a tiny corner snipped off.
- Pipe a small swirl of melted chocolate on top of each dipped cone to resemble chocolate syrup.
- Place a red M&M candy on top of the chocolate swirl to complete the look of a cherry on top and add sprinkles.
- Allow the Mini Ice Cream Cone Cake Pops to set completely at room temperature or in the refrigerator before serving.


