Oh, where do I even begin with these strawberry cheesecake bites? Honestly, every time I make them, it feels like a little piece of sunshine lands in my kitchen. They’re just so darn delightful. I remember the first time I whipped these up – it was a sweltering summer afternoon, and I was craving something sweet but didn’t want to turn on the oven for hours. My kids, bless their hearts, were practically climbing the walls with boredom. I rummaged through the fridge, looking for inspiration, and landed on a block of Cream Cheese and a pint of beautiful, ripe strawberries. The idea for these little gems just clicked. They turned out even better than I’d imagined, a perfect harmony of creamy cheesecake and sweet, tangy strawberries, all wrapped up in a tender, cake-like base. They’re honestly my go-to when I need a fuss-free dessert that still feels special, kind of like a miniature, much-easier-to-make version of that classic New York cheesecake, but with a fruity twist that my whole family goes absolutely bonkers for. Seriously, these strawberry cheesecake bites disappear faster than you can say “yum!”
Thank you for reading this post, don't forget to subscribe!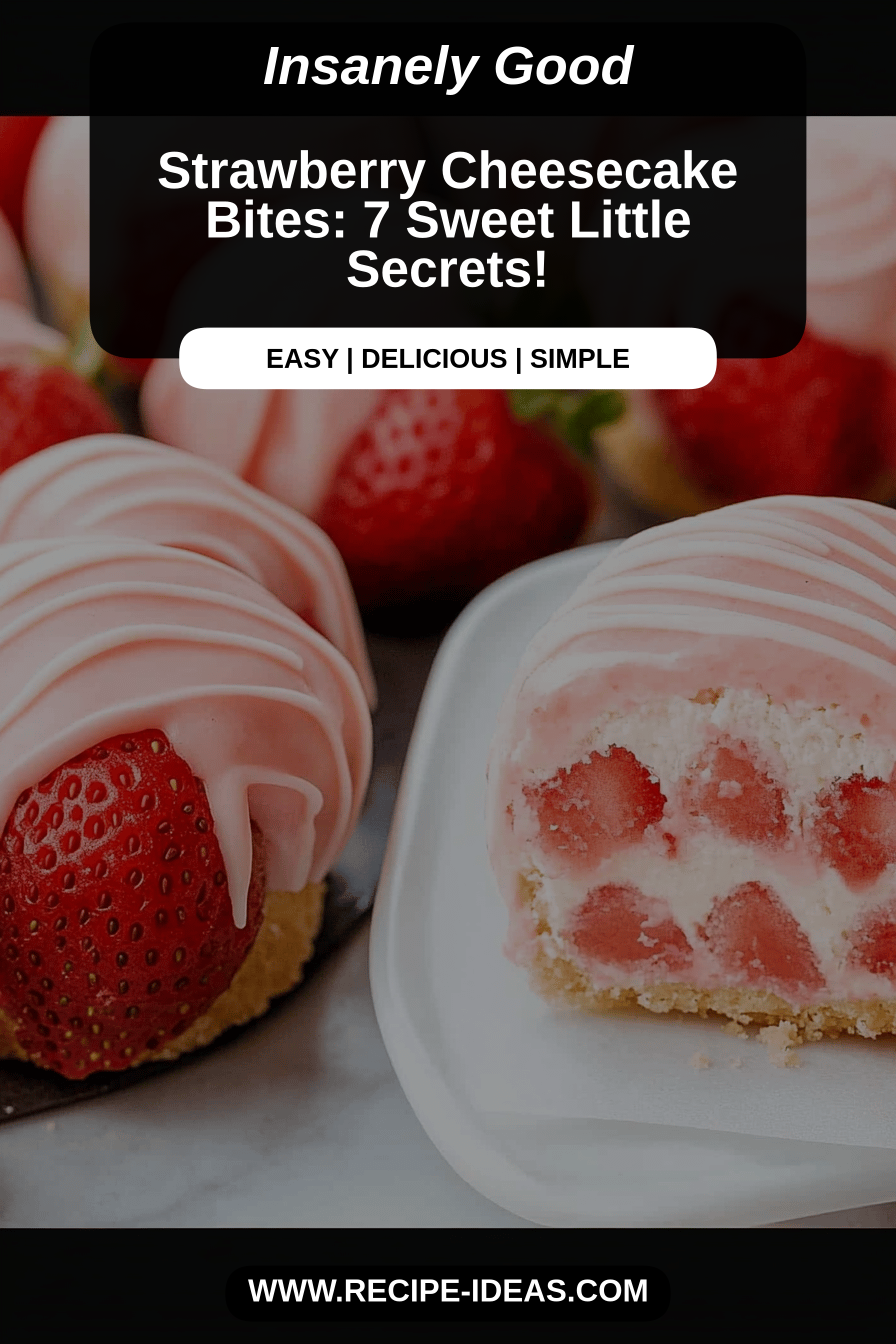
What are strawberry cheesecake bites?
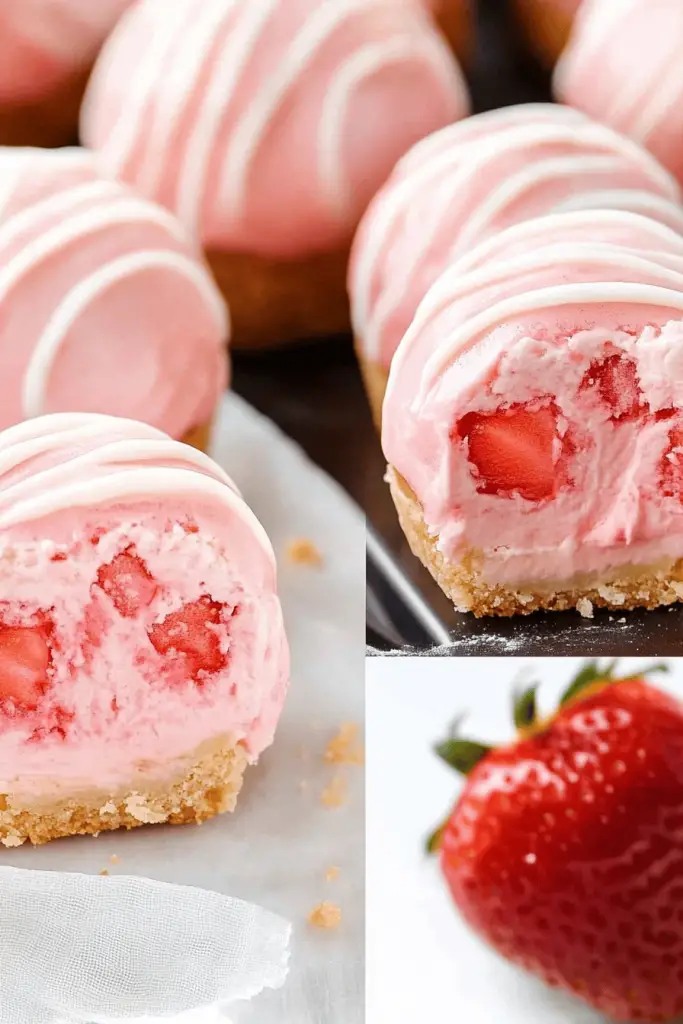
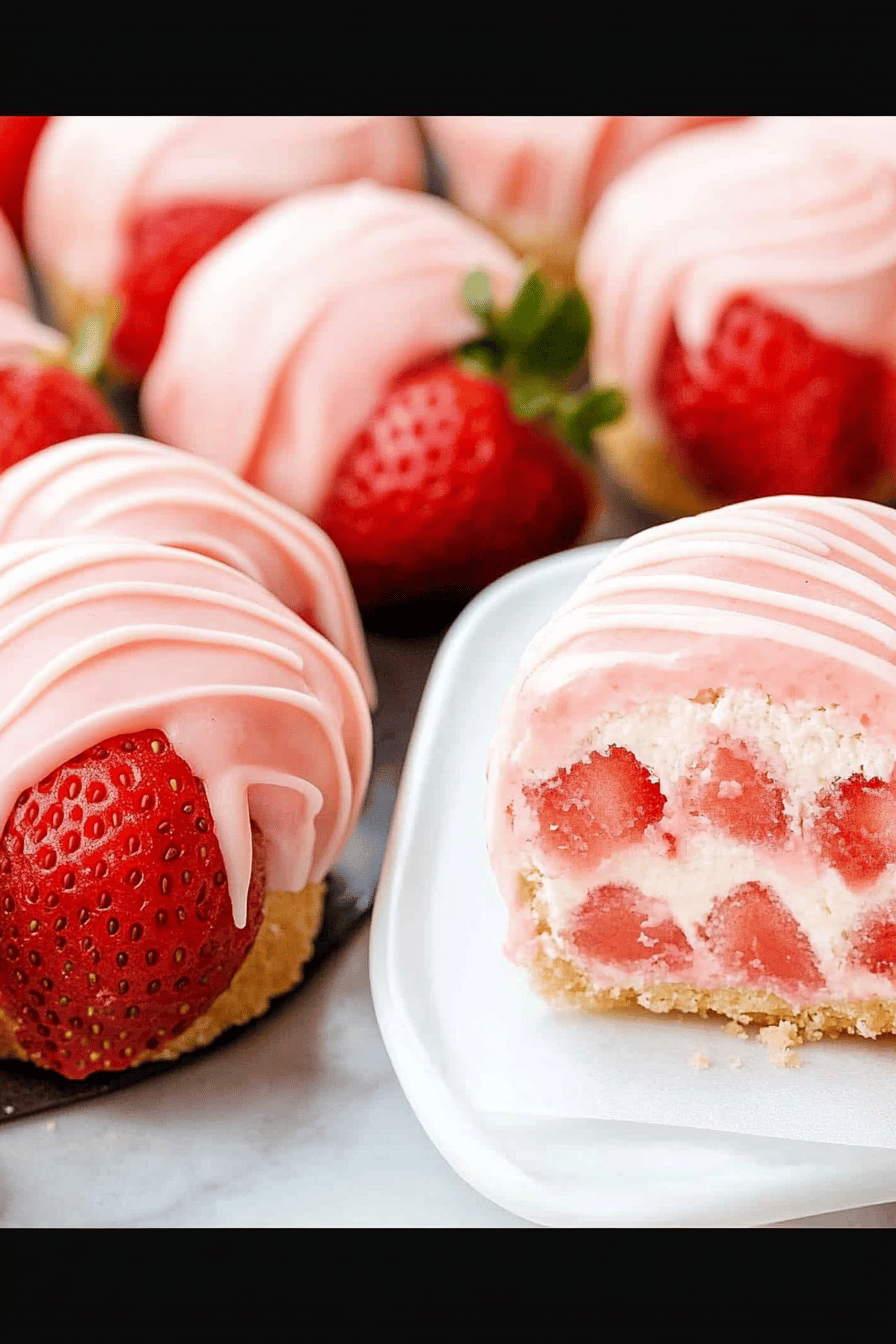
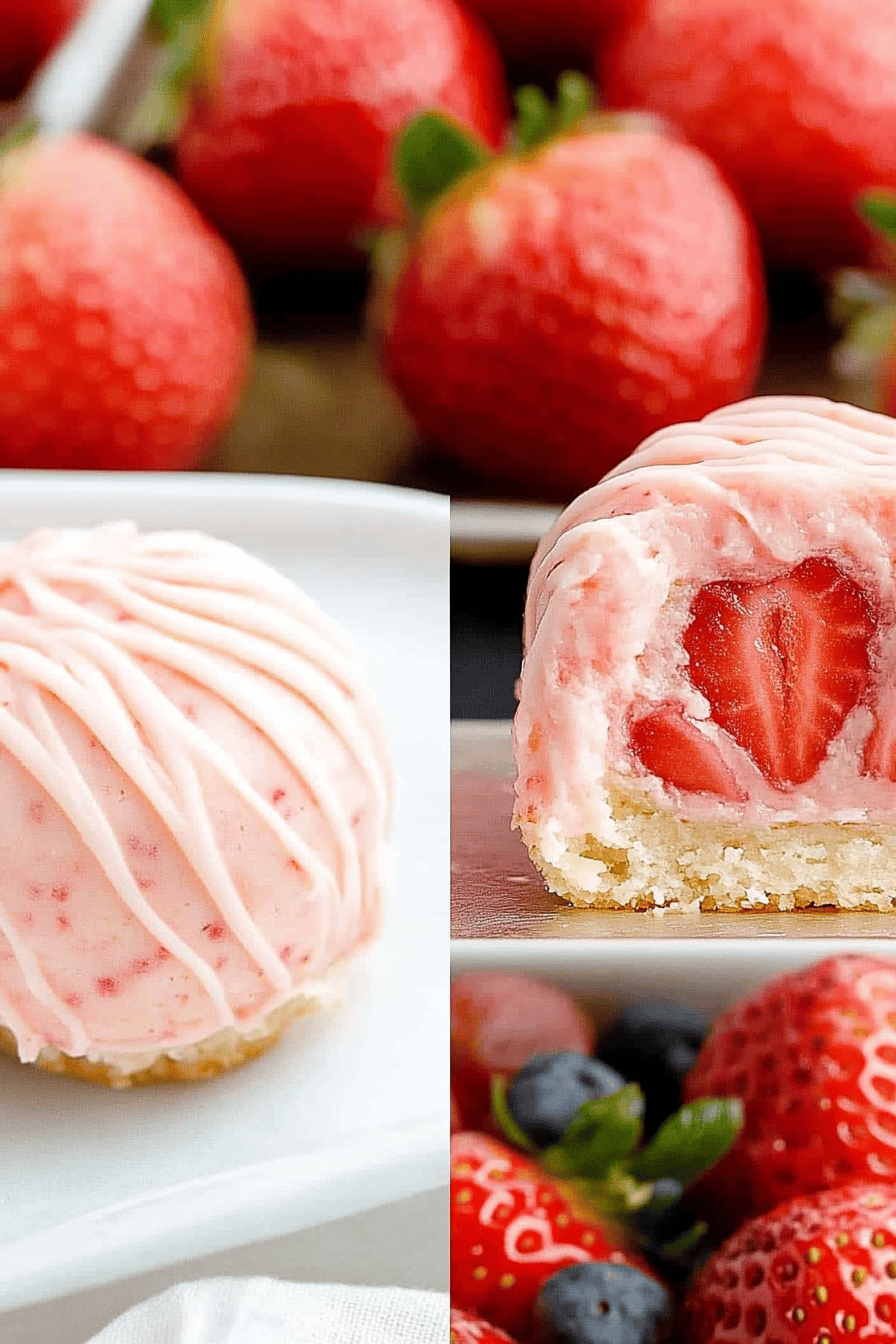
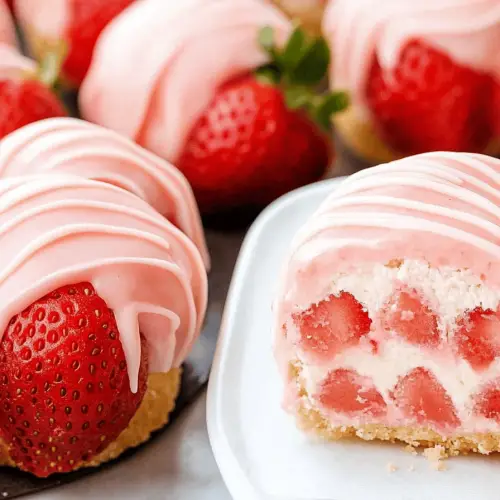
So, what exactly are these delightful little morsels I’m so gaga about? Think of them as the most delicious, bite-sized indulgence you can imagine. They’re essentially a super moist, tender cake base, often with a hint of lemon or vanilla to really make those flavors pop, topped with a luscious, creamy cheesecake filling and swirled with a vibrant, sweet strawberry compote. It’s like all the best parts of a full-sized Strawberry Cheesecake and a moist cake have been magically condensed into perfectly portioned, easy-to-eat bites. They aren’t your typical dense, heavy cheesecake; they’re lighter, fluffier, and incredibly moreish. The name itself, strawberry cheesecake bites, really says it all – it’s a playful, approachable treat that delivers all the rich, satisfying flavors of cheesecake without any of the fuss. They’re perfect for when you want that comforting cheesecake flavor but don’t have the time, or perhaps the patience, to bake a whole pie. They’re essentially little pockets of joy!
Why you’ll love this recipe?
What are some of the reasons why I love this strawberry cheesecake bites recipe?flavor is just out of this world. You get that irresistible tang of Cream Cheese, perfectly balanced by the sweetness of the cake base and the bright, fresh burst of strawberries. It’s a symphony of flavors that hits all the right notes without being overly sweet. And then there’s the simplicity. Honestly, I’ve tried my fair share of complicated dessert recipes, and this one is a lifesaver on busy nights or when I’m entertaining last minute. The steps are straightforward, and even if you’re a beginner baker, you’ll find this recipe incredibly forgiving. It’s not fussy at all! Plus, it’s surprisingly cost-efficient. Most of the ingredients are pantry staples, and even the fresh strawberries are usually quite affordable, especially when they’re in season. You get a ton of deliciousness without breaking the bank. And the versatility? Oh my goodness, you can serve these strawberry cheesecake bites at so many different occasions. They’re perfect for a casual family dessert, an elegant addition to a brunch spread, or even a delightful afternoon snack with a cup of tea. I’ve even made mini versions for kids’ parties, and they were a massive hit! What I love most about this recipe is that it delivers all the wow factor of a fancy dessert with the comfort and ease of something you’ve been making for years. It’s that perfect balance that makes a recipe truly special, and I think these strawberry cheesecake bites hit it right on the head. They’re just pure happiness in every bite!
How do I make strawberry cheesecake bites?
Quick Overview
Whipping up these divine Strawberry Cheesecake bites is surprisingly simple. We’ll start by creating a tender, lightly sweet base, then prepare a luscious cheesecake filling and a bright strawberry swirl. The magic happens when we layer these components and bake them until golden and set. It’s a straightforward process that guarantees a show-stopping dessert with minimal effort. You’ll be amazed at how easy it is to achieve that perfect cheesecake flavor and texture in bite-sized form.
Ingredients
For the Main Batter:
Here’s what you’ll need for the delicious base. I always try to use room temperature butter and eggs for this part, it really helps everything come together smoothly. Don’t skip this little step; it makes a big difference in texture!
- 2 cups all-purpose flour
- 1 teaspoon baking powder
- 1/4 teaspoon salt
- 1/2 cup (1 stick) unsalted butter, softened
- 1 cup granulated sugar
- 2 large eggs, room temperature
- 1 teaspoon vanilla extract
- 1/2 cup milk (whole milk gives the best richness, but 2% works too!)
For the Filling:
This is the creamy, dreamy heart of our strawberry cheesecake bites. Make sure your Cream Cheese is nice and soft – it’s the key to a lump-free, silky smooth filling. If you forget to leave it out, you can gently warm it in the microwave for about 30 seconds, stirring every 10 seconds, but be careful not to melt it!
- 16 ounces cream cheese, softened
- 1/2 cup granulated sugar
- 1 large egg
- 1 teaspoon lemon zest (optional, but I love the little zing it adds!)
For the Glaze:
This is what ties it all together with a beautiful finish and extra burst of strawberry flavor. I like a glaze that’s not too thick, just enough to drizzle and add a pop of color and sweetness.
“The strawberry cheesecake bites turned out amazing. My kids asked for seconds. Saving this one!”
- 1 cup fresh or frozen strawberries, hulled and roughly chopped
- 2 tablespoons granulated sugar
- 1 tablespoon lemon juice
Step-by-Step Instructions
Step 1: Preheat & Prep Pan
First things first, let’s get our oven fired up to 350°F (175°C). This is the perfect temperature for baking these bites so they get beautifully golden without drying out. While the oven heats up, grab a 9×13 inch baking pan. I always line mine with parchment paper, leaving an overhang on the sides. This makes lifting the baked cheesecake out so much easier later on – it’s a little trick that saves a ton of hassle!
Step 2: Mix Dry Ingredients
In a medium bowl, whisk together the flour, baking powder, and salt. Just a quick whisk to make sure everything is evenly distributed. This step might seem small, but it helps ensure your cake base has a nice, consistent texture. We don’t want any pockets of baking powder!
Step 3: Mix Wet Ingredients
In a separate large bowl, cream together the softened butter and granulated sugar until light and fluffy. This is where the electric mixer really comes in handy; it makes it so much easier to get that lovely airy texture. Then, beat in the eggs one at a time, making sure each egg is fully incorporated before adding the next. Stir in the vanilla extract and milk until just combined. Don’t overmix here; we’re just bringing it all together.
Step 4: Combine
Now, it’s time to bring the wet and dry ingredients together. Gradually add the dry ingredients to the wet ingredients, mixing on low speed (or stirring by hand) until just combined. Be careful not to overmix! Overmixing can lead to a tough cake base, and we want these bites to be wonderfully tender. A few streaks of flour are okay; they’ll disappear during baking.
Step 5: Prepare Filling
In a clean bowl (or the bowl of your stand mixer), beat the softened Cream Cheese and sugar together until smooth and creamy. This is crucial for a luscious filling! Then, beat in the egg and lemon zest (if using) until just combined. Again, avoid overmixing. We want it smooth, not airy.
Step 6: Layer & Swirl
Pour about half of the Cake Batter into your prepared baking pan and spread it evenly. Then, dollop spoonfuls of the cheesecake filling over the batter. Finally, spoon the remaining cake batter over the cheesecake filling. Now for the fun part: If you haven’t already made your strawberry compote (we’ll get to that in the next step if you want to make it fresh), you can dollop spoonfuls of your strawberry mixture over the top batter. Then, use a knife or a skewer to gently swirl the strawberry mixture and the top layer of batter together. Don’t go too crazy; just a few gentle swirls to create a marbled effect. This gives you those gorgeous pink streaks throughout the bites!
Step 7: Bake
Pop the pan into your preheated oven and bake for 30-35 minutes, or until the edges are golden brown and the center is set. A toothpick inserted into the center should come out mostly clean (a few moist crumbs are fine, but no wet batter). The cheesecake filling should be slightly jiggly in the very center, but it will continue to set as it cools.
Step 8: Cool & Glaze
Once baked, let the Strawberry Cheesecake bites cool in the pan on a wire rack for about 15-20 minutes. Then, carefully use the parchment paper overhangs to lift the entire slab out of the pan and place it on the wire rack to cool completely. While it cools, you can prepare your strawberry glaze. In a small saucepan, combine the chopped strawberries, sugar, and lemon juice. Cook over medium heat, stirring occasionally, until the strawberries break down and the mixture thickens slightly, about 5-7 minutes. Let it cool a bit. Once the cheesecake bites are completely cool, you can drizzle the cooled strawberry glaze over the top. I like to do this when the glaze is still a little warm so it spreads nicely.
Step 9: Slice & Serve
Once the glaze has set slightly, you can cut your Strawberry Cheesecake bites into squares. I usually cut them into about 24 pieces. The parchment paper makes this super easy. Serve them chilled or at room temperature. They’re absolutely delicious on their own, but a dollop of whipped cream or a dusting of powdered sugar is never a bad idea!
“Made the strawberry cheesecake bites tonight and wow — perfect weeknight dinner. Will definitely make again!”
What to Serve It With
These strawberry cheesecake bites are so versatile, they truly fit into almost any occasion. For breakfast, I love serving them with a strong cup of coffee or a nice glass of cold milk. They’re just sweet enough to feel like a treat to start the day, and the hint of strawberry is so refreshing. For brunch, they really step it up! I’ll arrange them on a pretty tiered stand alongside fresh fruit salad, mini quiches, and maybe some smoked salmon blinis. They add that perfect touch of elegance without being too heavy. For dessert, well, that’s their natural habitat, right? I often serve them after a lighter meal, maybe a grilled chicken salad or some pasta. They’re lovely with a small scoop of vanilla ice cream or a dollop of homemade whipped cream. And for those times when you just need a little something sweet to unwind, these are ideal for cozy snacks. I’ll pair them with a cup of herbal tea or a glass of red wine in the evening. My personal family tradition is to have them on movie nights; we just cut them up and share them right out of the pan while we’re all snuggled on the couch. They’re just perfect for sharing that cozy moment. I’ve also found they pair wonderfully with a Moscato or a late-harvest Riesling if you’re feeling a bit fancy for dessert!
Top Tips for Perfecting Your Strawberry Cheesecake Bites
I’ve made these strawberry cheesecake bites more times than I can count, and over the years, I’ve picked up a few tricks that I think really help elevate them from good to absolutely incredible. Let’s talk about zucchini prep – wait, did I say zucchini? Oh my goodness, I was thinking about another recipe! My apologies! For these strawberry cheesecake bites, the key is really in the details. Let’s focus on those. For the cake batter, the biggest tip I can give you is to not overmix once you combine the wet and dry ingredients. Seriously, this is where a lot of people go wrong. Mix just until there are no dry streaks of flour visible. A few lumps are fine! Overmixing develops the gluten in the flour, which will result in a tougher, denser cake base, and we want these bites to be light and tender. For the cheesecake filling, make absolutely sure your cream cheese is at room temperature. It sounds so simple, but it’s the absolute best way to get a super smooth, lump-free filling. If it’s cold, you’ll end up with little cream cheese lumps, and nobody wants that! When it comes to the strawberry swirl, I sometimes like to add a tiny pinch of cornstarch to my strawberry mixture before cooking it down for the glaze. This helps thicken it just a bit more, ensuring it doesn’t bleed too much into the batter and gives you those distinct, beautiful pink swirls. For ingredient swaps, I’ve experimented a lot. If you’re out of regular milk, almond milk or even a creamy oat milk works surprisingly well in the cake base, making it even a touch richer! For the strawberries, you can absolutely use frozen ones, just be sure to thaw them completely and drain off any excess liquid before using them in your swirl or glaze. When it comes to baking, ovens can be so finicky, can’t they? If you notice the edges are browning too quickly before the center is set, you can loosely tent the pan with foil for the last 10-15 minutes of baking. This protects the edges while allowing the center to cook through. And finally, for glaze variations, if you’re not a fan of strawberry, you could easily swap it out for raspberry or even a mix of berries! A little bit of orange zest in the glaze is also a lovely addition. Trust me on these little tips; they’ve been hard-won lessons from my own kitchen adventures!
Storing and Reheating Tips
One of the best things about these strawberry cheesecake bites is how well they keep, which means you can enjoy them for days (if they last that long, of course!). For storage at room temperature, I find they’re best consumed within a day or two, provided your kitchen isn’t too warm. Make sure they’re covered tightly with plastic wrap or an airtight container to keep them from drying out. If you’re in a warmer climate or planning to keep them for longer, the refrigerator is your best friend. Store them in an airtight container, and they should stay wonderfully fresh and delicious for up to 4-5 days. The chilling actually enhances the cheesecake flavor, in my opinion! Now, for the ultimate make-ahead option: freezer instructions. You can absolutely freeze these! Once they’re completely cooled and the glaze is set, I like to cut them into individual portions. Then, wrap each portion (or a small stack of them) tightly in plastic wrap, followed by a layer of aluminum foil, or pop them into a freezer-safe container. They’ll keep in the freezer for up to 2-3 months. To thaw, simply transfer them from the freezer to the refrigerator overnight. For the glaze timing advice, I generally recommend applying the glaze *after* the bites have cooled completely if you plan to refrigerate or freeze them. This prevents excess moisture. If you’re serving them the same day and they’re still warm, a slightly warm glaze can be lovely, but for longer storage, definitely wait until they’re fully cooled.
Frequently Asked Questions
Final Thoughts
Honestly, making these strawberry cheesecake bites is such a joy, and I truly hope you feel the same way when you try them. They’re more than just a recipe; they’re little moments of happiness that bring people together. The way the creamy cheesecake filling melts into the tender cake base, punctuated by those vibrant swirls of sweet strawberry goodness – it’s just pure bliss. They’re proof that you don’t need a whole afternoon or complex techniques to create something truly special and delicious. If you love this recipe, I think you might also adore my tangy lemon bars or my decadent chocolate lava cakes – they’re also big family favorites! Give these strawberry cheesecake bites a go, and please, please let me know how yours turn out in the comments below! I’d love to hear your stories, any little tweaks you made, or what your family thought. Your feedback means the world to me. Happy baking, everyone!
Strawberry Cheesecake Bites
Ingredients
Crust
- 2 cups graham cracker crumbs
- 6 tablespoons butter melted
- 2 tablespoons sugar
Cheesecake Filling
- 16 ounces cream cheese softened
- 0.5 cup powdered sugar
- 1 teaspoon vanilla extract
- 0.5 cup heavy cream
Strawberry Topping
- 1 cup fresh strawberries chopped
- 1 tablespoon sugar
Instructions
Preparation Steps
- In a medium bowl, combine graham cracker crumbs, melted butter, and 2 tablespoons of sugar. Mix until well combined. Press the mixture evenly into the bottom of a 24-cup mini muffin tin.
- In a separate large bowl, beat the softened cream cheese until smooth. Add powdered sugar and vanilla extract, and beat until combined.
- In a separate bowl, whip the heavy cream until stiff peaks form. Gently fold the whipped cream into the cream cheese mixture.
- Spoon or pipe the cheesecake filling evenly over the crust in the mini muffin tin.
- In a small bowl, gently mash the chopped strawberries with 1 tablespoon of sugar. Let sit for 5 minutes to release juices.
- Top each cheesecake bite with a spoonful of the strawberry mixture.
- Refrigerate for at least 1 hour, or until firm.
- Carefully remove from the mini muffin tin and serve chilled.


