There’s nothing quite like the smell of fresh-baked treats filling the house as Halloween approaches. I still remember my childhood—the excitement of choosing costumes, trick-or-treating, and, of course, the star of the night: sweet, spooky, delicious snacks. Over the years, I’ve perfected a recipe that hits all those nostalgia buttons—these Halloween cookie bars. They’re rich, chewy, with just enough crunch on top, and loaded with fall flavors and fun sprinkles. Honestly, they’re my secret weapon when I want to whip up something quickly that looks festive enough to wow the kids and tastes like I fussed over it for hours. My kids ask for these all the time, and I always do this when I want a no-fail dessert that still makes me feel like I spent hours in the kitchen. Plus, they’re great for pairing with hot apple cider or milk, making them an all-time favorite at my house. I promise, once you try these, they’ll become a staple for every spooky gathering!
Thank you for reading this post, don't forget to subscribe!What are Halloween cookie bars?
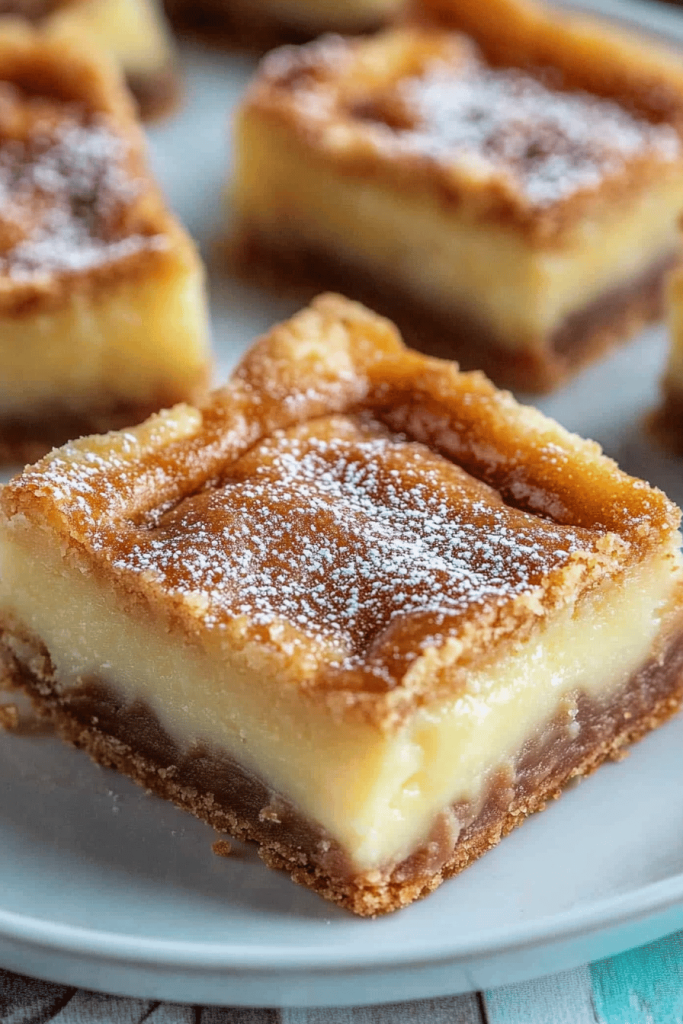
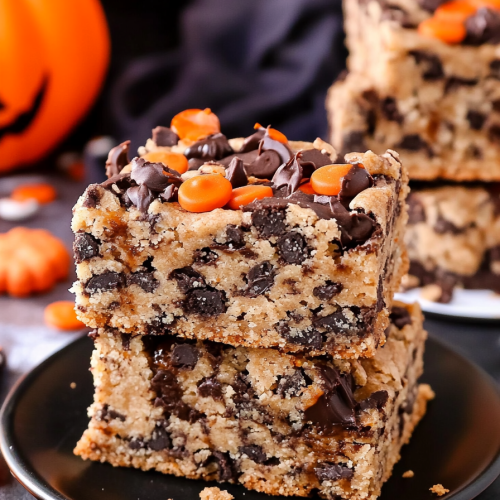
Think of Halloween cookie bars as the lovechild of your favorite Chocolate Chip Cookies and a brownie—that perfect mix of chewy and fudgy textures, all baked in one pan. These bars are essentially a cookie dough layered with toppings and a drizzle of glaze or icing, baked into a thick, crumbly, gooey treat that’s easy to cut into squares or spooky shapes. The name ‘cookie bars’ is pretty straightforward—they’re cookies, but in bar form, which makes serving and sharing a breeze. The “Halloween” part? That’s just my way of jazzing them up with fun colors, sprinkles, or themed candy to make them extra festive. Think of it as a party in every bite—perfect for making your home feel cozy and festive, especially when you want that nostalgic candy shop flavor but with way less fuss.
Why you’ll love this recipe?
Honestly, what I love most about these Halloween Cookie Bars is how simple they are to throw together, even when you’re short on time but still want something special. No rolling pin, no cookie cutters—just a trusty baking dish and a handful of ingredients. They’re budget-friendly, too—just pantry staples like flour, sugar, butter, and chocolate chips, with a few added goodies to make them scream Halloween fun. The flavor? Think warm vanilla, melty chocolate, and hints of cinnamon and pumpkin spice if you want to get fancy. They’re endlessly customizable—add in your favorite candies, swap out the chocolate for white or butterscotch chips, or sprinkle a little orange and black on top to really get into that spooky spirit. What’s really neat is how versatile they are: serve them as a quick snack, a party dessert, or even a cozy after-school treat. Plus, the kids can help! My favorite part is how these bars disappear in minutes at my house—I always end up grabbing seconds, and I’m pretty sure you will, too.
How do you make a Halloween cookie bar?
Quick Overview
This recipe is a total lifesaver on busy nights or when you’re hosting a Halloween get-together. You start by making a simple Cookie Dough, spreading it in a baking pan, then adding your favorite toppings—think spooky colored sprinkles, candy eyeballs, or mini chocolate candies. After baking until golden, you whip up a quick glaze or icing to drizzle on top, which sets beautifully and adds that glossy, irresistible finish. The best part? It all comes together in less than an hour, and clean-up is minimal. Trust me, once you make these, they’ll be your go-to Halloween treat—no complicated decorating or baking skills required!
Ingredients
For the Main Batter:
– 2 cups all-purpose flour (I like to use unbleached for richer flavor)
– 1 teaspoon baking powder
– ½ teaspoon salt
– ½ teaspoon cinnamon (optional, adds that warm fall aroma)
– ¾ cup unsalted butter, melted (trust me, softened butter doesn’t work as well in the mixer here)
– 1 cup packed light Brown Sugar
– ½ cup granulated sugar
– 2 large eggs
– 2 teaspoons vanilla extract
For the Filling and Toppings:
– 1 cup chocolate chips (dark, semi-sweet, or a mix)
– ½ cup Halloween-themed candies (mini Reese’s, candy corn, or gummy worms)
– Sprinkles in orange, black, or purple for decorating before baking
For the Glaze:
– 1 cup powdered sugar
– 2-3 teaspoons milk or cream (more if you want a thinner glaze)
– A few drops of orange or black food coloring (optional for fun Halloween vibes)
Step-by-Step Instructions
Step 1: Preheat & Prep Pan
Preheat your oven to 350°F (180°C). Line a 9×13-inch baking pan with parchment paper or grease it well—this helps with easy clean-up and getting neat edges. I always do this because nothing’s worse than a sticky, broken bar trying to come out of the pan!
Step 2: Mix Dry Ingredients
In a small bowl, whisk together the flour, baking powder, salt, and cinnamon if using. This step ensures everything’s evenly distributed—trust me, it makes a difference in the final texture!
“The Spooky Halloween Cookie Bars Recipe turned out amazing. My kids asked for seconds. Saving this one!”
Step 3: Mix Wet Ingredients
In a larger bowl, combine the melted butter, brown sugar, and granulated sugar. Whisk until smooth and glossy. Beat in the eggs one at a time, then stir in vanilla. It should be creamy and slightly fluffy—this is your rich cookie base.
Step 4: Combine
Gradually add your dry ingredients to the wet, mixing just until combined. Don’t overmix—overworking the dough makes the bars tough instead of tender. Fold in most of the chocolate chips (save a handful for sprinkling on top).
Step 5: Prepare Filling
Spread about two-thirds of the dough evenly in your prepared pan. Smooth with a spatula—this is your base layer. Dot with candies or mini chocolates if you want those surprise bursts in every slice.
Step 6: Layer & Swirl
Spread the remaining dough on top in spoonfuls or a rough layer. Use a spatula or back of a spoon to swirl slightly—this creates a marbled effect that looks adorable, especially when garnished with sprinkles or extra candies before baking.
Step 7: Bake
Bake in the preheated oven for 20-25 minutes. You’ll know they’re done when the edges are golden brown and the center still looks slightly soft but set. Don’t overbake, or they’ll turn dry—trust me, they’re best when just coming out of the oven and still a little gooey.
Step 8: Cool & Glaze
Let the bars cool in the pan for at least 10 minutes. Then, mix your glaze ingredients—powdered sugar, milk, and food coloring—until smooth. Drizzle over the slightly warm bars—it makes them look fancy and taste extra special.
Step 9: Slice & Serve
Once cooled completely, lift the bars out using the parchment paper and cut into squares or spooky shapes if you’re feeling creative. I like to cut into smaller pieces—these are rich! Serve with a glass of milk or a mug of apple cider, and watch them disappear.
What to Serve It With
These Halloween cookie bars are so versatile that they can be a standout at any occasion. For a cozy morning, pair them with a steaming mug of cinnamon latte or pumpkin-spiced coffee, and enjoy their warm aroma filling the kitchen. Hosting a Halloween brunch? Arrange the bars on a spooky platter, sprinkle a few edible glitter stars over them, and serve alongside pumpkin muffins and caramel apples—they add that festive touch no one can resist.
As dessert after a family dinner, I love plating a few bars on a vintage plate with a small scoop of vanilla ice cream or a dollop of whipped cream for extra indulgence. My kids adore them when I add a little extra candy on top, making each piece look like a tiny Halloween surprise. And on casual nights, a couple of these with a cup of hot chocolate make everything feel just a little more special. Honestly, these bars are your new best friend for any fall or Halloween gathering—simple, adorable, and utterly delicious.
Top Tips for Perfecting Your Halloween Cookie Bars
Over the years, I’ve learned a few tricks that make these bars even better. First, when preparing the dough, don’t overmix—this keeps them tender and chewy. I tested using a hand whisk versus a mixer, and honestly, a gentle hand works just fine for this recipe. For extra flavor, I sometimes add a teaspoon of pumpkin pie spice or a pinch of nutmeg—I find it really boosts that fall vibe.
For the toppings, I suggest using a mix of dark and white chocolate chips—it makes the visual pop and balances the sweet flavors. If you’re feeling creative, you can also add small pretzels, mini marshmallows, or candy eyeballs for that true Halloween feel. When swirling the top layer, try using a toothpick or a skewer to create fun spooky patterns—think spider webs or ghost outlines.
When baking, oven times can vary. I always start checking around 20 minutes, and if the edges are golden and a toothpick inserted in the center comes out with moist crumbs, they’re perfect. Don’t wait for them to seem completely set—these bars are best when slightly gooey inside. Once cooled, the glaze adds a shiny, festive touch. I learned that adding a splash of orange food coloring not only makes them more Halloween-appropriate but also makes the glaze appear like a sweet spooky sky.
“Packed with flavor and so simple. Exactly what I wanted from this Spooky Halloween Cookie Bars Recipe!”
Believe me, these tips are small but mighty—helping you get that bakery-quality look at home with barely any effort. I’ve made these with different kinds of flour and even with a drizzle of caramel instead of icing, and each version is a hit. Just have fun, and don’t stress about perfection; they turn out just right every time!
Storing and Reheating Tips
Once you’ve got these Halloween cookie bars fresh from the oven, it’s good to know how to keep them tasting just as delightful later. If you’re serving them the same day, store leftovers in an airtight container at room temperature. They stay soft and chewy for about 2-3 days this way. Just make sure to cover them well with plastic wrap or a tight-fitting lid—no one wants stale Halloween snacks!
If you want to keep them longer, pop the bars in a refrigerator stored in an airtight container—these stay fresh for up to a week, but they can get a little harder. To revive their softness, warm them in the microwave for about 10-15 seconds. If you’ve drizzled them with glaze, I recommend adding the glaze just before serving, as it can soften or melt if stored covered in the fridge for too long.
For freezing, wrap individual bars tightly in plastic wrap and then place them in a zip-top bag or freezer-safe container. They will keep for up to three months. When you’re ready to eat, let them thaw at room temperature or warm them gently in the microwave. The glaze might need a quick re-application, but overall, they’re just as tasty. Trust me, making these in advance is a real timesaver—perfect for busy Halloween weeks!
Frequently Asked Questions
Final Thoughts
If I had to pick a favorite holiday treat, these Halloween cookie bars would be up there with caramel apples and pumpkin bread. They’re cozy, festive, and honestly, fun to make. The best part? They come together so quickly that I can whip up a batch at the last minute whenever the craving strikes—perfect for surprise guests or when the kids come home asking for something sweet. Every time I make these, I feel a little bit like a kitchen magician, transforming simple ingredients into something totally magical and mini-party worthy.
Once you give this recipe a try, you’ll see how adaptable and foolproof it is. Feel free to get creative with toppings, add your favorite candy, or switch up the spices—I promise, you won’t be disappointed. I love hearing how others put their own spin on it, so tag me if you post your own versions. Happy baking, and I can’t wait to hear how yours turned out! Grab some cream cheese, sprinkle those sprinkles, and let the spooky season begin!
Halloween cookie bars
Ingredients
Main Ingredients
- 2.25 cups all-purpose flour
- 1 tsp salt
- 0.5 tsp baking soda
- 0.75 cups unsalted butter (softened)
- 1 cup granulated sugar
- 0.5 cup light brown sugar (packed)
- 2 large eggs
- 1 tsp pure vanilla extract
- 1.25 cups Cookies & Cream M&Ms
- 1.5 cups Oreos (chopped and divided)
- optional Halloween sprinkles
Instructions
Preparation Steps
- Preheat oven to 350°F. Line a 9x13 inch baking dish with parchment paper.
- In a bowl, whisk together flour, salt, and baking soda; set aside.
- In a stand mixer bowl, cream softened butter with granulated and brown sugars until light and fluffy.
- Add eggs one at a time, then vanilla, and beat until combined.
- Gradually add dry ingredients and mix on low until just combined.
- Fold in 1 cup of M&Ms and 1 cup of chopped Oreos.
- Spread dough evenly into prepared pan, sprinkle remaining M&Ms, Oreos, and sprinkles on top.
- Bake for 24-27 minutes, or until edges are golden. Allow to cool before cutting.


