There are certain smells that just instantly transport me back to my childhood kitchen. The comforting aroma of my grandmother’s Sunday roast, the sharp tang of lemons as she made her famous pie, and then there’s this. Oh, this Peanut Butter Fudge. It’s the stuff of pure magic, a no-bake wonder that my family begs for year-round, not just during the holidays. I remember sneaking into the kitchen as a kid, hoping for a tiny peek at the creamy swirls before it was set. It’s so ridiculously easy, I sometimes feel like I’m cheating, but the flavor? Absolutely divine. It’s that perfect balance of sweet and salty, with that unmistakable, irresistible peanut butter punch. If you’re anything like me, you love a good homemade treat but don’t always have the hours to dedicate to complex baking projects. This peanut butter fudge recipe is my absolute lifesaver on those busy weeknights when a craving hits hard, or when unexpected guests pop by. It’s so much simpler than traditional fudge, and honestly, I think it tastes even better. Forget those grainy, hard-to-make recipes; this is the one you’ll come back to again and again.
Thank you for reading this post, don't forget to subscribe!What is peanut butter fudge?
So, what exactly is this magical concoction? At its heart, peanut butter fudge is a sweet, dense confection made primarily from peanut butter, sugar, and a liquid binder, usually milk or cream. Unlike baked goods, it doesn’t rely on flour or eggs. It’s more like a set, creamy candy. Think of it as a super-rich, intensely flavored peanut butter treat that melts in your mouth. The “fudge” part comes from the process of cooking sugar to a specific temperature, then cooling it rapidly, which creates that characteristic smooth, slightly grainy texture that’s so satisfying. But my favorite version, the one I’m sharing with you today, is a no-bake marvel. It uses simple pantry staples and requires minimal cooking, making it incredibly approachable for even the most novice home cooks. It’s essentially a luxurious, Creamy Peanut Butter candy that’s incredibly satisfying and surprisingly easy to pull off. No fancy candy thermometer needed, though a little bit of careful timing does go a long way!
Why you’ll love this recipe?
Let me tell you why this Peanut Butter fudge recipe is a permanent fixture in my recipe box and will absolutely become one in yours too. First off, the flavor is just out of this world. It’s that classic, beloved peanut butter taste, amplified. It’s perfectly sweet, but not cloying, with just the right amount of salty undertones from the peanut butter to keep you coming back for another bite. The texture is pure bliss – creamy, smooth, and it just melts on your tongue. What I love most, though, is how ridiculously simple it is. Seriously, you can whip this up in less time than it takes to run to the store for a store-bought candy bar. The ingredients are likely already in your pantry, making it an incredibly cost-effective treat. No need for specialty items! Plus, it’s so versatile. You can swirl in chocolate, add nuts, or keep it pure and simple. It’s perfect for potlucks, bake sales, or just a personal treat. My kids actually ask for this all the time, and when they ask, I can usually get it made before they even finish their homework. It’s a guaranteed crowd-pleaser, and the fact that it requires no baking means it’s a lifesaver on hot summer days when you don’t want to turn on the oven. It’s way better than any store-bought version you’ll find, and the homemade love poured into it makes it even more special. I’ve made this countless times, and it never fails to impress.
How do you make peanut butter fudge?
Quick Overview
This Peanut Butter fudge recipe is all about simplicity and deliciousness. You’ll essentially melt butter, whisk in sugar and milk, bring it to a boil for a specific amount of time, then vigorously stir in peanut butter and vanilla until it’s smooth and glossy. Pour it into a prepared pan, let it set, and voilà! The key is that precise boiling time, which helps achieve that perfect fudge texture without being too soft or too hard. It’s a straightforward process that results in a deeply satisfying, creamy candy. Trust me, the minimal effort is so worth the incredible reward.
Ingredients
For the Main Fudge Base:
* 2 cups granulated sugar: This is the backbone of the fudge’s sweetness and texture. Make sure it’s regular granulated sugar for the best results. I’ve tried with less, but it just doesn’t set quite right.
* 1/2 cup unsalted butter: Using unsalted butter gives you more control over the final saltiness. Make sure it’s softened slightly so it melts evenly.
* 1/2 cup milk (whole milk is best for richness): Whole milk provides the best creamy texture. You can use 2%, but avoid skim as it can sometimes make the fudge a little less rich. I tested this with a splash of heavy cream once and it made it even more decadent!
* 1 teaspoon vanilla extract: This is for that classic warm flavor note. Use pure vanilla extract if you can; it makes a difference.
* 1 1/2 cups creamy Peanut Butter: This is the star! Use regular creamy peanut butter (like Jif or Skippy). Natural peanut butters can sometimes separate or alter the texture because they contain oil. I prefer the smooth, emulsified kind for this recipe.
* 1/4 teaspoon salt: If your peanut butter is unsalted, this is crucial to balance the sweetness and bring out that peanut butter flavor. If your peanut butter is salted, you might want to reduce this or omit it altogether.
Step-by-Step Instructions
Step 1: Preheat & Prep Pan
First things first, get your pan ready. You’ll want an 8×8 inch square baking pan. Line it with parchment paper, leaving some overhang on the sides. This is my secret weapon for easy removal – no sticking, no fuss! You can also grease it really well with butter or non-stick spray, but the parchment makes life so much simpler. Set it aside.
“The Simple Peanut Butter Fudge Recipe Delight turned out amazing. My kids asked for seconds. Saving this one!”
Step 2: Mix Dry Ingredients
In a medium saucepan (a heavy-bottomed one is best to prevent scorching), add your granulated sugar, softened butter, and milk. Give it a little whisk to combine them before you even turn on the heat. This just helps everything start melting together smoothly.
Step 3: Mix Wet Ingredients
Once the butter has melted and the sugar and milk are mostly combined, turn the heat to medium. Keep stirring gently until the sugar is completely dissolved and the mixture is smooth. You’ll want to bring this mixture to a rolling boil. A rolling boil is when bubbles are forming vigorously all over the surface and don’t stop when you stir.
Step 4: Combine
Now, this is the crucial part. Once you reach that rolling boil, set a timer for exactly 4 minutes. You need to keep stirring *constantly* during this time. Don’t walk away! This boiling process is what sets the fudge. After 4 minutes, immediately remove the saucepan from the heat. Let it sit for just a minute, but don’t let it sit too long or it can start to set in the pan. Then, quickly stir in your Peanut Butter, vanilla extract, and salt (if using). Stir vigorously until the peanut butter is completely melted and incorporated, and the mixture is smooth, glossy, and smells heavenly. This is where the magic really happens!
Step 5: Prepare Filling
There’s no separate filling for this particular Peanut Butter Fudge recipe, as the peanut butter *is* the star ingredient that creates that incredible flavor and texture throughout. The focus is on achieving that perfect, creamy fudge consistency by correctly cooking the sugar mixture and then fully incorporating the peanut butter.
Step 6: Layer & Swirl
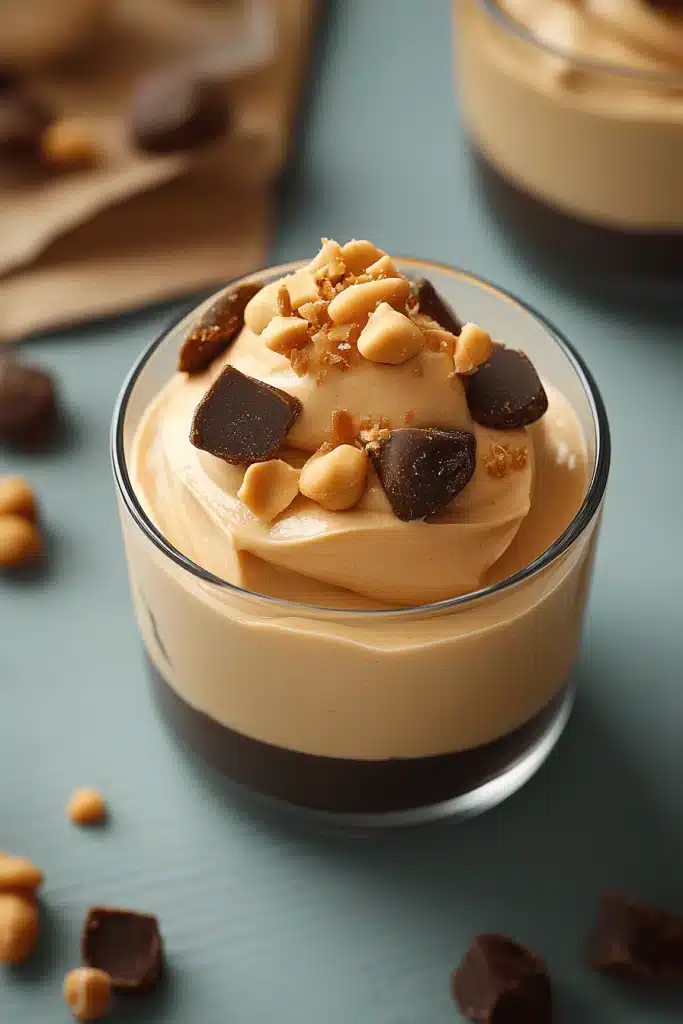
As soon as your fudge mixture is smooth and glossy, pour it into your prepared 8×8 inch pan. Use a spatula to spread it evenly. If you’re feeling fancy, you can swirl in some melted chocolate or chopped nuts at this stage. For a classic look, just smooth the top nicely. The goal is an even layer so it sets uniformly.
Step 7: Bake
Actually, there’s no baking involved in this recipe! It’s a no-bake wonder. The setting process happens at room temperature or in the refrigerator, relying on the cooked sugar mixture to firm up as it cools.
Step 8: Cool & Glaze
Now, let the fudge cool. You have a couple of options here. For a slightly softer fudge, let it cool on the counter for about 2 hours, or until it’s set but still a bit soft to the touch. For a firmer fudge, transfer the pan to the refrigerator for about 1-2 hours, or until it’s completely firm. There’s no glaze needed for this classic Peanut Butter fudge; the peanut butter itself creates the rich, creamy topping.
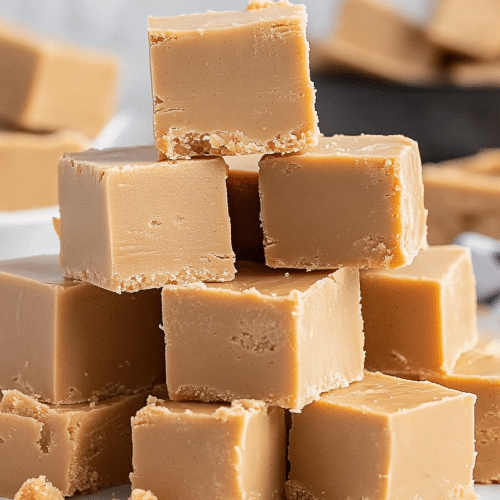
Step 9: Slice & Serve
Once the fudge is set, use the parchment paper overhang to lift the entire block out of the pan. Place it on a cutting board and slice it into small squares. I usually aim for about 1-inch squares, but you can cut them however you like. For the neatest slices, use a sharp knife, and wipe it clean between cuts if necessary. Enjoy your delicious homemade Peanut Butter fudge!
“New family favorite! This Simple Peanut Butter Fudge Recipe Delight was so flavorful and ridiculously easy. Crowd-pleaser for sure.”
What to Serve It With
This Peanut Butter fudge is so good, it really shines on its own, but I love pairing it with a few things to make it an even more special occasion. For breakfast, it’s a bit of a decadent treat, but a tiny square alongside a strong cup of coffee is pure heaven. It’s like a little sweet reward to start the day. For a more relaxed brunch setting, I sometimes cut it into slightly smaller bites and arrange them on a platter with fresh berries – the tartness of the berries cuts through the sweetness beautifully. And as a dessert? Oh, this is where it truly shines. It’s amazing on its own, of course, but imagine a small piece alongside a scoop of vanilla bean ice cream. The contrast of warm and cold, creamy and slightly fudgy, is just divine. Sometimes, I even drizzle a little extra melted chocolate over the top if I’m feeling extra indulgent. For those cozy evenings when you just need something sweet and comforting, a piece of this fudge with a glass of cold milk is simply perfect. My kids practically inhale it with milk after dinner. It’s that kind of dessert that feels special without being complicated, and it always brings smiles to faces.
Top Tips for Perfecting Your Peanut Butter Fudge
I’ve made this peanut butter fudge more times than I can count, and over the years, I’ve picked up a few tricks that make it even better. First, about the peanut butter: always use creamy, commercial peanut butter. Brands like Jif or Skippy are your best bet. Natural peanut butter, with its oil separation, can make your fudge greasy or crumbly. Stick to the smooth stuff for that perfect, emulsified texture. Next, the sugar mixture. That 4-minute boil is non-negotiable. If you don’t boil it long enough, it’ll be too soft and won’t set properly. If you boil it for too long, it can become hard and brittle. I highly recommend using a timer. When you add the peanut butter, stir like you mean it! You want it to be fully incorporated and create that glossy sheen. Don’t be afraid to really work it. For ingredient swaps, I’ve found that whole milk really does give the creamiest results. While 2% works, it’s just not quite the same richness. Also, if your peanut butter is already salted, definitely taste your mixture before adding the extra 1/4 teaspoon of salt – you might not need it. For an extra touch, if you love chocolate, you can melt a few ounces of semi-sweet chocolate chips and swirl them into the fudge just before pouring it into the pan. It adds another layer of flavor and looks beautiful. And remember, patience during the cooling stage is key. Don’t rush it! Letting it set properly ensures you get those clean cuts and that perfect, melt-in-your-mouth texture. I learned that the hard way once when I tried to cut into it too soon and ended up with a delicious, but messy, puddle of fudge.
Storing and Reheating Tips
The great thing about this peanut butter fudge is how well it stores, making it perfect for making ahead of time. If you’ve got leftovers (which is rare in my house!), you can store them at room temperature for about 2-3 days. Just make sure they’re in an airtight container, and try to keep them out of direct sunlight or warm spots, as it can get a bit soft. For longer storage, the refrigerator is your best friend. Pop that airtight container in the fridge, and the fudge will stay delicious for up to 2 weeks. It actually firms up a bit more in the fridge, which some people prefer. If you want to freeze it, this fudge freezes beautifully! Wrap the cut pieces tightly in plastic wrap, then place them in a freezer-safe container or bag. It can last for about 2-3 months in the freezer. To thaw, just take the pieces out of the freezer and let them come to room temperature for about 30 minutes, or you can thaw them in the refrigerator overnight for a firmer texture. For the glaze advice, since this recipe doesn’t have a separate glaze, the advice is more about how the fudge itself holds up. If you’ve swirled in melted chocolate, make sure that has set completely before storing. The fudge itself is best enjoyed at room temperature or slightly chilled.
Frequently Asked Questions
Final Thoughts
So there you have it – my absolute favorite peanut butter fudge recipe. It’s the kind of recipe that makes you feel like a baking wizard, even if you’re just starting out. It’s simple, it’s incredibly delicious, and it’s the perfect sweet treat for any occasion, or no occasion at all! I truly believe that some of the best food memories are made with simple, heartwarming recipes like this one. It’s a little taste of comfort and joy that you can whip up anytime. If you love this peanut butter fudge, you might also enjoy my recipes for no-bake chocolate chip cookies or my classic peanut butter blossoms. They’re all about bringing that homemade goodness to your table with minimal fuss. I can’t wait to hear what you think of this fudge! Please leave a comment below with your thoughts, or share your own variations and tips. And if you snap a picture, be sure to tag me – I’d love to see your creations! Happy fudging!
peanut butter fudge recipe
Ingredients
Main Ingredients
- 1 tablespoon water for the 8x8 inch pan to help keep the parchment paper in place
- 1 cup unsalted butter
- 1.5 cups creamy peanut butter NOT the natural or the natural no-stir varieties
- 2 teaspoons vanilla extract
- 3.25 cups powdered sugar sifted
- ounces M&M's OPTIONAL - for garnishing the tops of each piece of fudge
Instructions
Preparation Steps
- Prepare an 8x8 inch baking dish by lining it with parchment paper, ensuring extra overhang on the sides for easy removal. Add 1 tablespoon of water under the paper to hold it in place.
- In a medium microwave-safe bowl, combine the unsalted butter and creamy peanut butter. Heat for 60 seconds in the microwave. Carefully remove and stir until smooth.
- Stir in the vanilla extract until well incorporated.
- Slowly add the sifted powdered sugar, 1 cup at a time, stirring with a large spoon in between additions. Continue stirring until the powdered sugar is completely combined and no white streaks or lumps are visible. The mixture will become stiffer.
- Pour the fudge mixture into the prepared 8x8 inch baking dish. Use a spatula to help evenly distribute and smooth the fudge in the pan.
- Place another piece of parchment paper on top of the fudge. Use this to help smooth the top of the fudge. Leave this piece of parchment paper in place, and refrigerate the fudge for at least 2 hours to chill and set.
- Once firm, remove the fudge from the refrigerator. Using the over-hanging pieces of parchment paper, lift out the fudge and place it on a cutting board.
- Warm a large sharp knife under hot water. Dry the blade and carefully slice the fudge into 64 equal pieces.
- Optionally, place 2-3 M&M's on the top of each fudge piece for decoration.
- Store the fudge in an airtight container. It will keep for 3-4 days at room temperature, or up to 1 week in the refrigerator.


