Simple Chickpea Salad
Oh, I need to tell you about the most wonderful, no-fuss salad I’ve made in ages—it’s this vibrant, protein-packed Simple Chickpea Salad. It came about because I had a can of chickpeas and a handful of veggies staring at me from my fridge, daring me to do something with them. And boy, did it turn out delicious! This is one of those recipes that feels like an old friend: comforting, easy to throw together, and always hits the spot when you need something fresh but satisfying. Whether it’s for lunch prep or a light dinner, this chickpea salad never fails to impress.
Thank you for reading this post, don't forget to subscribe!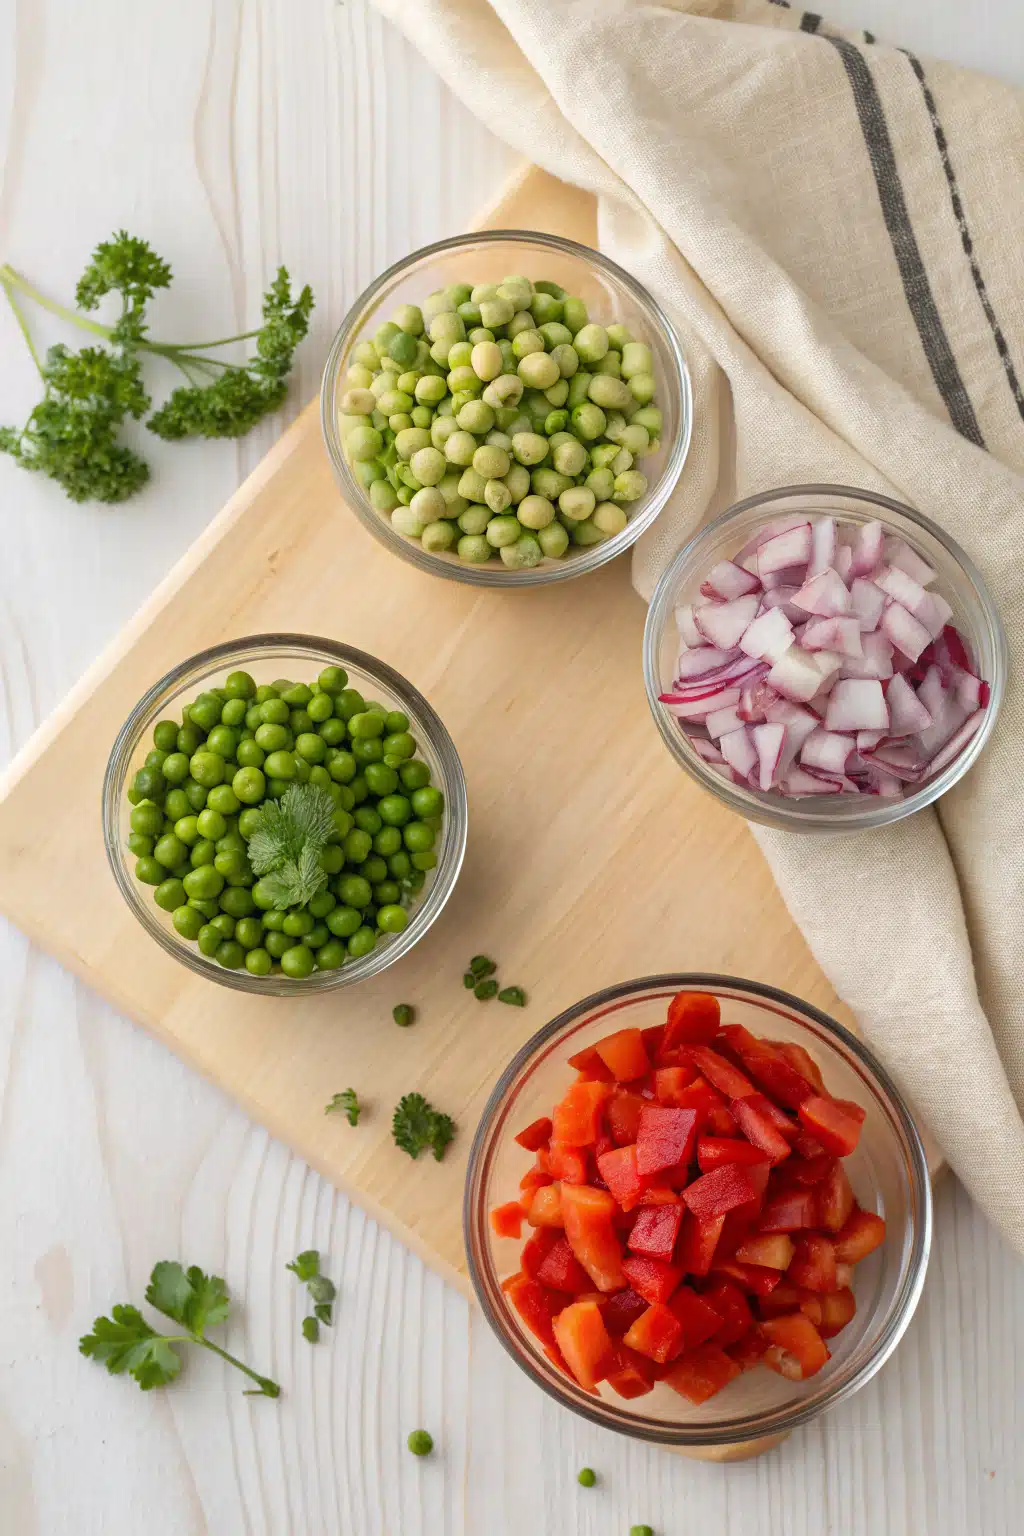
What Is Simple Chickpea Salad?
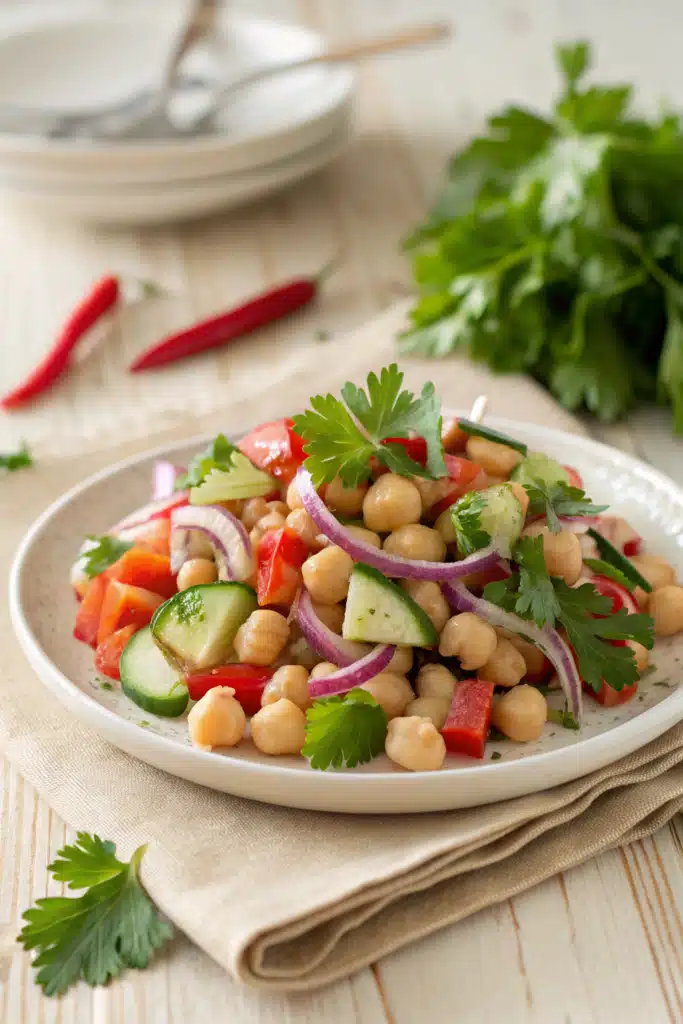
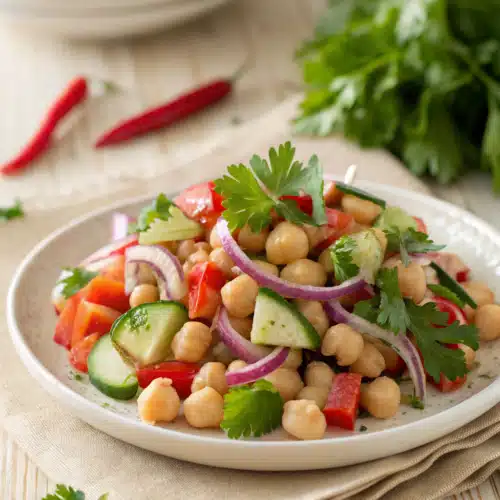
A Simple chickpea salad is exactly what it sounds like—a fresh, hearty mix of cooked or canned chickpeas with crisp vegetables, herbs, and a tangy dressing. Think diced cucumbers, cherry tomatoes, red onion, parsley or cilantro, all tossed together with chickpeas and dressed lightly with olive oil, lemon juice, salt, and pepper. Some folks add avocado, feta, or even a sprinkle of spices like cumin or paprika for extra flavor. The beauty lies in its versatility—it’s filling enough to be a main dish, yet light enough for a side. Plus, since it’s packed with plant-based protein and fiber, it’s a real crowd-pleaser whether you’re feeding a vegetarian household or just looking for healthier options.
Why You’ll Love This Recipe
This chickpea salad isn’t just another veggie bowl—it’s got soul. First off, it’s ridiculously easy. No cooking required if you use canned chickpeas (which I always do), and the prep time flies by. Second, it’s bursting with color, texture, and flavor. That crunch from the cucumber, the sweetness of the tomatoes, the earthiness of the chickpeas—it’s like a mini symphony in your mouth. And let’s talk about nutrition! Chickpeas are loaded with protein and fiber, making this salad not only tasty but also super satisfying. You’ll feel full longer, which means fewer afternoon cravings. Oh, and it keeps beautifully in the fridge for up to four days, so you can meal prep a whole week’s worth of lunches in one go. Trust me, once you try this simple chickpea salad, you’ll want it in your rotation every single week.
How to Make Simple Chickpea Salad
Quick Overview
Making this chickpea salad is as simple as gathering your ingredients and tossing everything together. There’s no baking, grilling, or complicated steps—just chop, mix, and dress. Most of the work happens while your chickpeas drain and rinse, which takes less than five minutes. Once everything’s chopped and ready, it’s just a matter of combining and letting the flavors meld. Seriously, you could have this dish on the table in under 15 minutes. Perfect for busy weekdays or last-minute entertaining!
Ingredients
- 1 (15 oz) can chickpeas, drained and rinsed
- 1 cup cherry tomatoes, halved
- 1/2 cup diced cucumber
- 1/4 cup finely chopped red onion
- 1/4 cup chopped fresh parsley or cilantro
- 2 tablespoons extra virgin olive oil
- 1 tablespoon fresh lemon juice (or lime juice)
- Salt and black pepper to taste
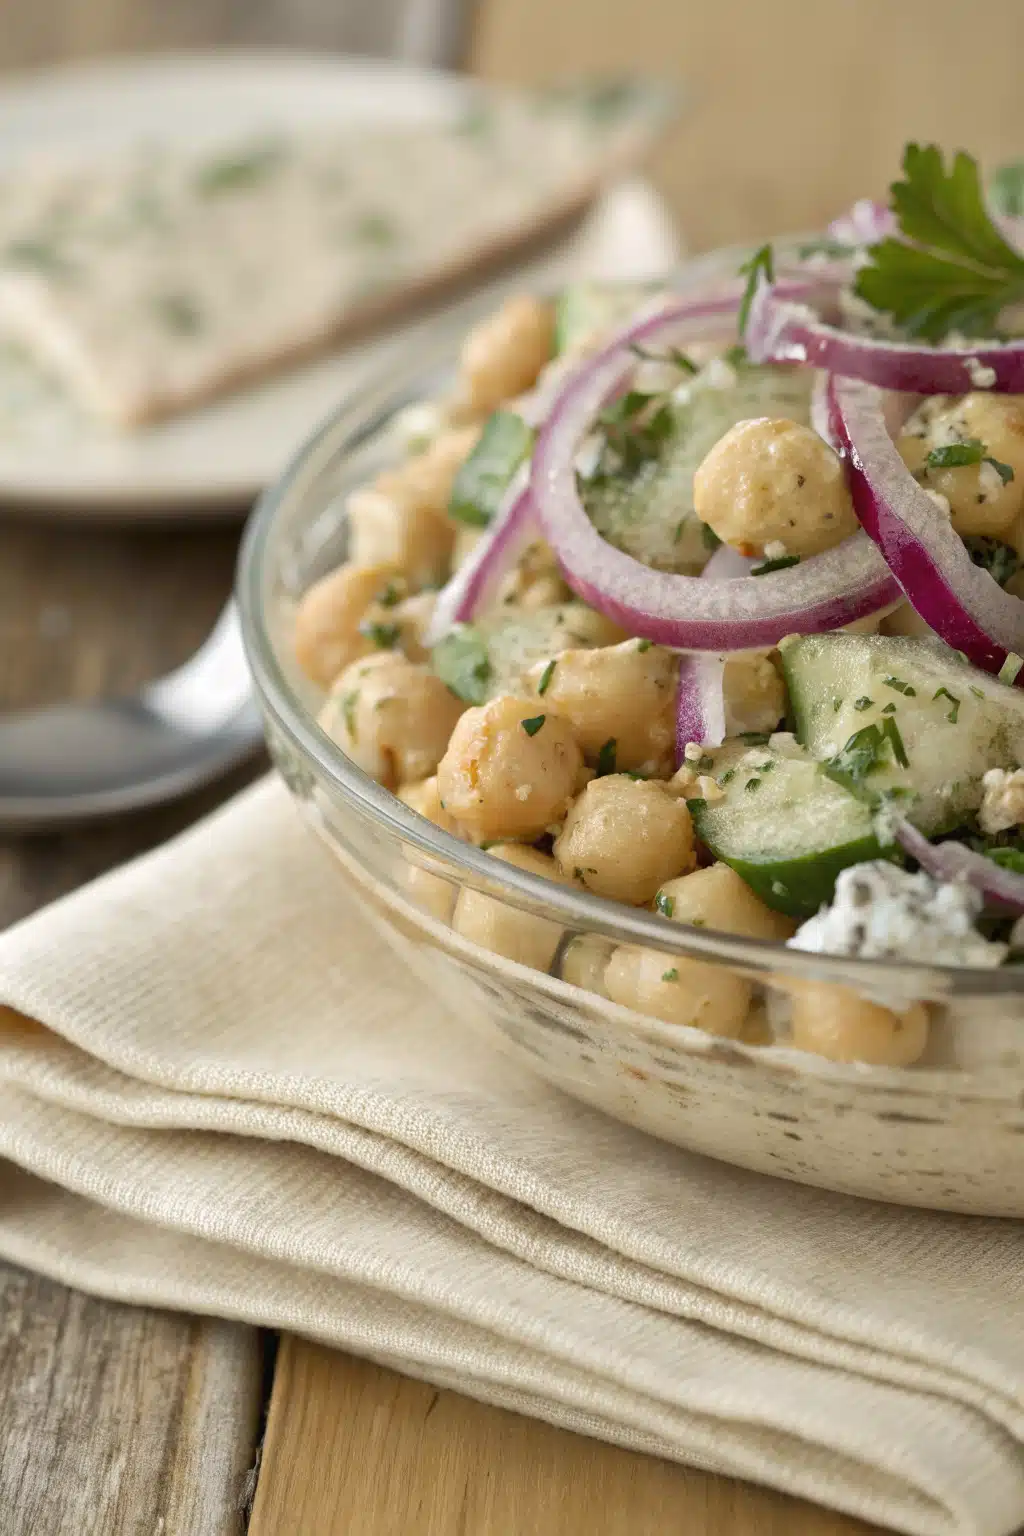
- Optional: 1/4 cup crumbled feta cheese or diced avocado
Step-by-Step Instructions
Step 1: Preheat & Prep Pan
Start by draining and rinsing your chickpeas thoroughly under cold water. Use a strainer and give them a gentle shake to remove excess moisture—this helps prevent the salad from becoming soggy later. While that’s happening, wash and dice your cucumber into small cubes, halve your cherry tomatoes, and finely chop the red onion and fresh herbs. Having everything prepped makes the next step a breeze!
“Made the simple chickpea salad tonight and wow — perfect weeknight dinner. Will definitely make again!”
Step 2: Mix Everything Together
In a large mixing bowl, combine the chickpeas, tomatoes, cucumber, red onion, and herbs. Give it a quick stir to make sure everything is evenly distributed. If you’re using feta or avocado, add those now too. They’ll keep best if added right before serving.
Step 3: Dress and Season
In a small bowl, whisk together the Olive oil, lemon juice, salt, and pepper. Pour the dressing over the salad and toss gently until every ingredient is coated. Taste and adjust seasoning if needed—remember, you can always add more lemon juice or salt depending on how tangy or savory you like it.
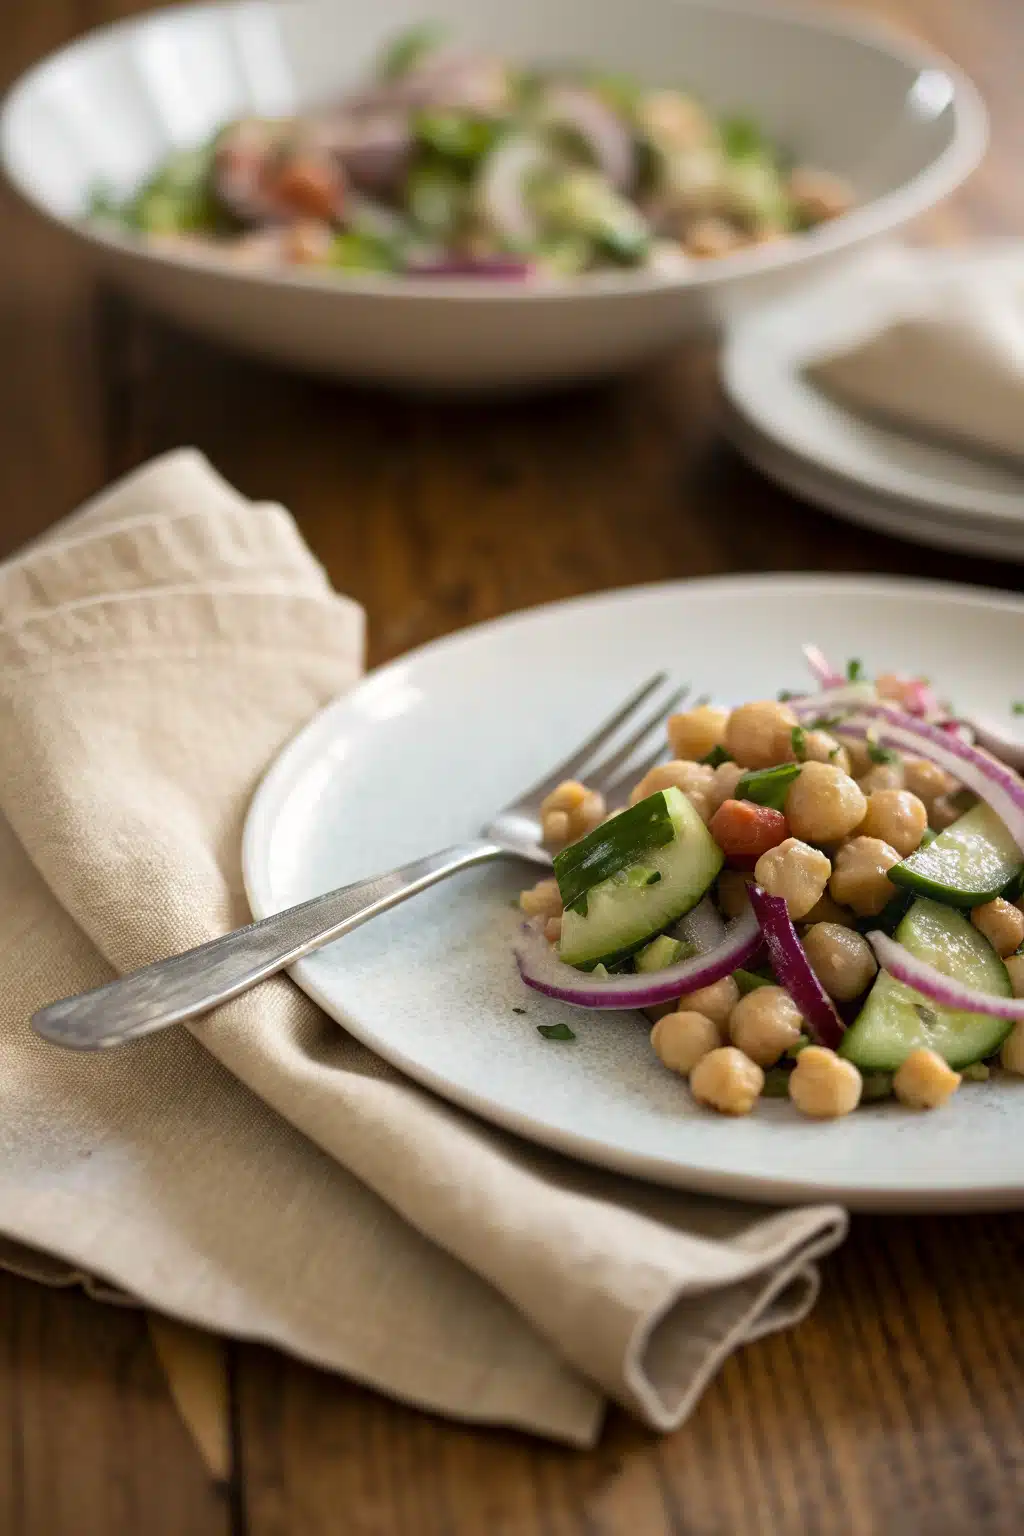
Step 4: Chill and Serve
For the Best Flavor, cover the salad and refrigerate for at least 15–20 minutes before serving. This lets the chickpeas soak up the dressing and brings out their full taste. Then grab a bowl, scoop some onto a plate, and enjoy immediately!
What to Serve It With
This chickpea salad pairs beautifully with almost anything! Serve it alongside grilled chicken or shrimp for a complete meal. It’s fantastic with warm pita bread or flatbreads on the side—perfect for dipping. If you’re hosting a picnic or barbecue, this salad travels well and adds a healthy, vibrant touch to any spread. You can also layer it inside a whole-grain tortilla for a quick wrap or stuff bell peppers with it for a fun twist. Honestly, it goes with everything—and nothing beats watching someone take their first bite and smile.
Top Tips for Perfecting Your Simple Chickpea Salad
If you want your chickpea salad to shine, here are a few insider tips. First, never skip rinsing the chickpeas—they’re often packed in starchy water that can make your salad gummy. Second, pat them dry with a paper towel after rinsing; dry chickpeas absorb dressing better. Third, chop your veggies uniformly so each spoonful has balanced flavors. And don’t over-dress—start with half the dressing, mix well, then add more if needed. Finally, let it chill! Flavor develops beautifully when everything marinates in the fridge for a bit. These little tricks will elevate your salad from good to great every single time.
Storing and Reheating Tips
One of the best things about this chickpea salad is how long it lasts. Store leftovers in an airtight container in the refrigerator for up to four days. It actually tastes even better the next day as the flavors blend together. Just note: if you added avocado or feta, consume within two days for peak freshness. This salad doesn’t reheat well—it’s meant to be eaten cold and crisp. So if you’re meal prepping, keep it separate from wet dishes and enjoy it straight from the fridge. No microwaving necessary!
Frequently Asked Questions
“Packed with flavor and so simple. Exactly what I wanted from this simple chickpea salad!”
Final Thoughts
This Simple Chickpea Salad has become a staple in our kitchen—easy, nutritious, and endlessly adaptable. It’s proof that wholesome meals don’t have to be complicated. Whether you’re feeding a family, packing school lunches, or whipping up a quick dinner, this salad delivers on taste, health, and simplicity. I hope you’ll give it a try soon—and once you do, I bet you’ll see why it’s earned its place in your recipe collection. Happy eating, friends!
Simple Chickpea Salad
Ingredients
Main Ingredients
- 30 oz canned chickpeas
- 1 cup cherry tomatoes halved
- 1 cucumber diced
- 0.5 red onion finely chopped
- 0.25 cup fresh parsley chopped
- 0.25 cup plain Greek yogurt
- 2 tablespoon tahini
- 2 tablespoon lemon juice
- 1 clove garlic minced
- 0.5 teaspoon ground cumin
- 1 teaspoon salt to taste
- 0.5 teaspoon black pepper to taste
- 2 tablespoon olive oil
Instructions
Preparation Steps
- In a large bowl, combine the chickpeas, cherry tomatoes, cucumber, red onion, and parsley.
- In a small bowl, whisk together the Greek yogurt, tahini, lemon juice, garlic, cumin, salt, and pepper until smooth. Slowly drizzle in the olive oil while continuing to whisk.
- Pour the dressing over the salad and toss gently to combine.
- Chill for at least 30 minutes before serving to allow flavors to meld.


