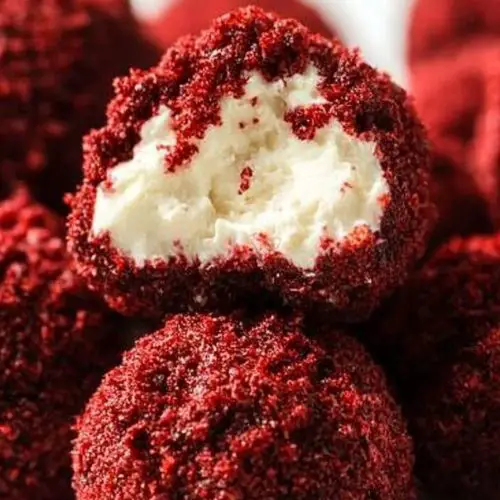
Red Velvet Cheesecake Bites are the ultimate bite-sized dessert that combines the rich, velvety texture of red velvet cake with a creamy, tangy cheesecake filling. These mini treats are a fun and indulgent way to enjoy two favorite desserts in one. The red velvet cake provides a moist, flavorful base, while the cheesecake filling offers a smooth and rich contrast. Whether you’re hosting a party, looking for a sweet snack, or preparing a special treat for the holidays, these Red Velvet Cheesecake Bites are sure to impress everyone with their vibrant color and irresistible taste.
Thank you for reading this post, don't forget to subscribe!Ingredients:
For the red velvet cake:
- 1 box red velvet cake mix (or homemade red velvet cake recipe)
- 1/2 cup water
- 1/2 cup vegetable oil
- 2 large eggs
For the cheesecake filling:
- 8 oz cream cheese, softened
- 1/2 cup powdered sugar
- 1/2 teaspoon vanilla extract
- 1/2 cup whipped topping (optional for extra creaminess)
For the coating:
- 1/2 cup white chocolate chips or melting chocolate (for dipping)
- 1 tablespoon vegetable oil (optional, to thin out the chocolate)
Directions:
For the red velvet cake:
- Preheat your oven to 350°F (175°C) and line a baking sheet with parchment paper or a silicone baking mat.
- Prepare the red velvet cake mix according to the package instructions, using water, vegetable oil, and eggs. Mix well until smooth.
- Drop tablespoon-sized portions of the cake batter onto the prepared baking sheet, leaving space between each portion.
- Bake for 8-10 minutes, or until a toothpick inserted into the center comes out clean.
- Allow the red velvet cake bites to cool completely on a wire rack.
For the cheesecake filling:
- In a medium bowl, beat the softened cream cheese, powdered sugar, and vanilla extract together until smooth and creamy.
- Gently fold in the whipped topping (if using) to create a lighter texture. Set the cheesecake filling aside.
Assembling the Red Velvet Cheesecake Bites:
- Once the red velvet cake bites have cooled, carefully slice each one in half horizontally to create a top and bottom layer.
- Place a small spoonful of cheesecake filling onto the bottom layer of each red velvet cake bite.
- Place the top layer of the cake back on top, pressing gently to sandwich the cheesecake filling inside.
For the coating:
- In a microwave-safe bowl, melt the white chocolate chips or melting chocolate in 20-second intervals, stirring in between, until smooth. Add vegetable oil to thin the chocolate if needed.
- Dip each red velvet cheesecake bite halfway into the melted chocolate, coating it evenly. Place the dipped bites on the prepared baking sheet.
- Let the chocolate set for about 15-20 minutes, or until firm. If you want to add extra decorations, you can sprinkle some red velvet cake crumbs on top or drizzle with extra melted white chocolate.
Notes:
- Cake Mix Alternative: If you prefer, you can make homemade red velvet cake from scratch instead of using a cake mix.
- Chocolate Coating Variations: You can use milk chocolate or dark chocolate for a different flavor profile.
- Storage: Store the Red Velvet Cheesecake Bites in an airtight container in the refrigerator for up to 4-5 days. For longer storage, you can freeze them for up to 1 month. Allow them to thaw in the fridge before serving.
Conclusion:
Red Velvet Cheesecake Bites are the perfect combination of two beloved desserts: rich red velvet cake and creamy cheesecake. With their irresistible flavor and easy-to-eat size, they’re perfect for parties, holiday gatherings, or just as a fun treat. These mini bites are guaranteed to satisfy your sweet tooth and impress your guests with their vibrant red color and delicious combination of textures. Quick to make and full of flavor, Red Velvet Cheesecake Bites are sure to become a go-to dessert for any occasion.
“New family favorite! This Red Velvet Cheesecake Bites was so flavorful and ridiculously easy. Crowd-pleaser for sure.”
Frequently Asked Questions
“Packed with flavor and so simple. Exactly what I wanted from this Red Velvet Cheesecake Bites!”

Red Velvet Cheesecake Bites
Ingredients
Main Ingredients
- 1.5 cups all-purpose flour sifted
- 1 cup sugar
- 8 oz cream cheese softened
Instructions
Preparation Steps
- Preheat your oven to 350°F (175°C) and line a baking sheet with parchment paper.
- Mix flour and sugar in a bowl until combined.


