There are some dishes that just feel like a warm hug, you know? The kind that, the moment you smell it baking, brings back a flood of happy memories and makes your stomach rumble with anticipation. For me, that dish is rattlesnake pasta. Now, before you get any funny ideas, no snakes are involved! The name comes from the beautiful, serpentine swirls of cheesy goodness that snake through the tender pasta. My Grandma Betty used to make this on Sundays, and the whole house would fill with this incredible aroma. It was a little bit of magic, really. It’s funny, because people often compare it to a baked ziti or a lasagna, but this rattlesnake pasta has this unique, comforting simplicity that just can’t be beat. It’s the perfect dish when you’re craving something truly satisfying without all the fuss. Honestly, this recipe is a lifesaver on busy weeknights when the kids are asking “what’s for dinner?” for the hundredth time. It’s become our go-to, and I’m so excited to share it with you!
Thank you for reading this post, don't forget to subscribe!What is Rattlesnake Pasta?
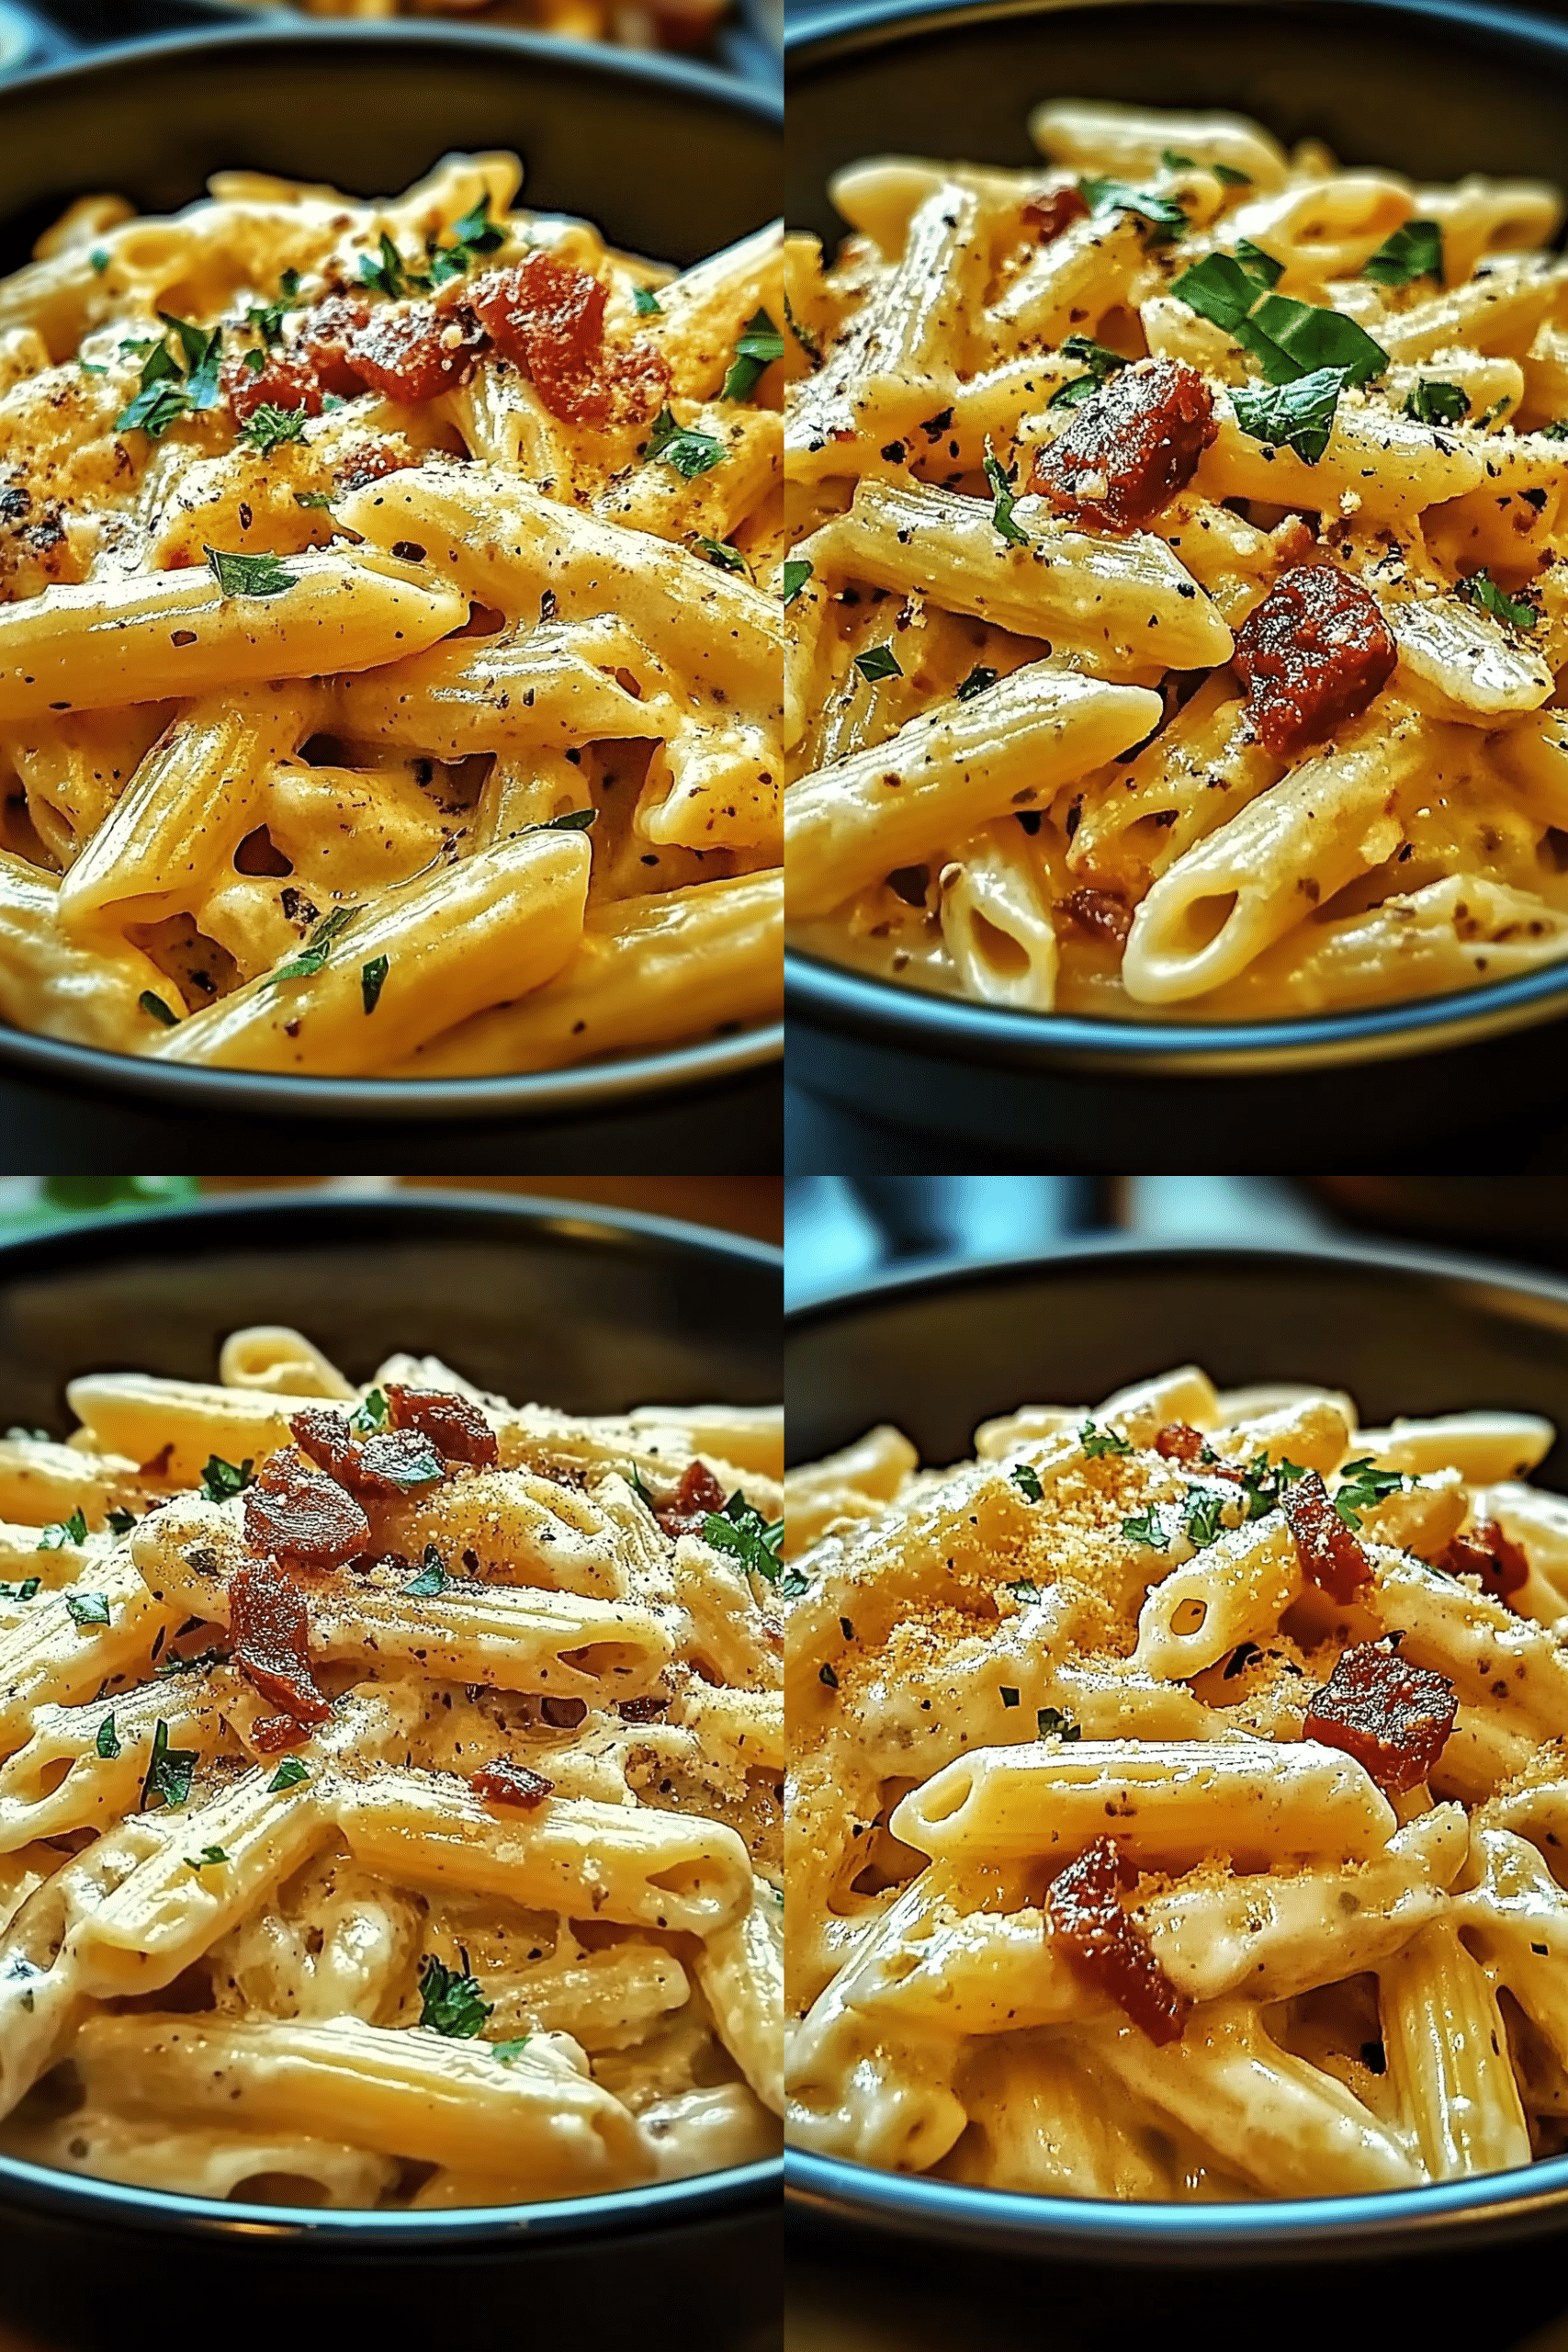
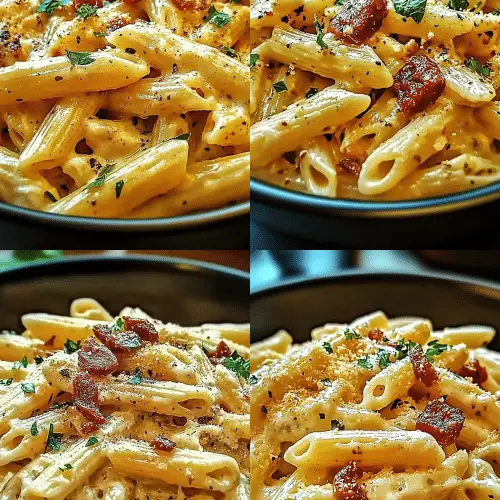
So, what exactly is this mysterious-sounding “rattlesnake pasta”? Think of it as a ridiculously comforting, cheesy pasta bake that’s both elegant enough for guests and casual enough for a Tuesday night. It’s essentially a layered casserole, but instead of flat sheets of pasta like lasagna, we use a fun, twisty pasta shape – usually rotini or fusilli – that perfectly captures all the creamy, cheesy sauce. The “rattlesnake” part comes from how the ingredients are layered and often swirled together before baking, creating these beautiful, winding patterns that look just like a coiled snake. It’s often made with a rich, creamy cheese sauce, sometimes a touch of tomato, and usually gets baked until it’s bubbly and golden brown on top. It’s the kind of comfort food that makes you feel instantly at home. It’s uncomplicated, utterly delicious, and always a crowd-pleaser.
Why you’ll love this recipe?
Oh, where do I even begin with why you’re going to fall head over heels for this rattlesnake pasta? First off, the flavor is just out of this world. It’s incredibly savory and rich, with that perfect balance of creamy cheese, tender pasta, and a subtle hint of garlic and herbs that just sings. It’s not overly complicated, which is a huge win in my book. You can whip it up in about 30 minutes of active time, and then the oven does all the hard work. And let’s talk about budget-friendliness! The ingredients are all super accessible and quite affordable, making it a fantastic option for feeding a family without breaking the bank. Plus, this rattlesnake pasta is incredibly versatile. You can easily add in cooked chicken or Italian sausage if you want to make it a heartier meal, or sneak in some extra veggies like spinach or bell peppers. What I love most about this dish is how it brings people together. It’s the kind of food that sparks conversation and creates happy moments around the dinner table. It’s a step up from your average weeknight pasta, but still wonderfully approachable. I’ve even made this for potlucks and special occasions, and it always gets rave reviews!
How do you make Rattlesnake Pasta?
Quick Overview
Making this rattlesnake pasta is a breeze, honestly. You’ll boil your pasta until it’s just shy of al dente, whip up a quick, creamy cheese sauce while it’s cooking, and then combine everything in a baking dish. The magic happens when you layer it all together and bake it until it’s bubbly and golden. The whole process is super straightforward, and the result is a dish that tastes like it took hours to prepare. It’s that perfect blend of effortlessness and impressive results that we all love in a recipe.
Ingredients
For the Main Pasta: For the main Pasta: For the main Pasta: For the main Pasta: For the main Pasta: For
1 pound rotini or fusilli pasta (this shape is key for capturing all that goodness!)
1 tablespoon olive oil
Salt, for pasta water
For the Creamy Cheese Sauce:
4 tablespoons unsalted butter
1/4 cup all-purpose flour
3 cups whole milk, warmed (warm milk incorporates more smoothly!)
1 teaspoon garlic powder (or 2 cloves fresh garlic, minced, sautéed first)
1/2 teaspoon onion powder
1/4 teaspoon black pepper
Pinch of nutmeg (my little secret for depth of flavor!)
2 cups shredded sharp cheddar cheese
1 cup shredded Monterey Jack cheese (or a blend like Colby Jack)
For the “Swirl” & Topping:
1/2 cup ricotta cheese (full-fat makes it extra creamy)
1/4 cup grated Parmesan cheese
1 large egg, lightly beaten
2 tablespoons chopped fresh parsley (plus more for garnish)
Salt and pepper to taste
“Made the rattlesnake pasta tonight and wow — perfect weeknight dinner. Will definitely make again!”
Step-by-Step Instructions
Step 1: Preheat & Prep Pan
First things first, let’s get that oven preheated to 375°F (190°C). This is a pretty standard baking temperature, and it helps ensure everything cooks evenly. While the oven is warming up, lightly grease a 9×13 inch baking dish with butter or cooking spray. This little step is crucial to prevent any sticking, which nobody wants when you’re eagerly waiting to dig into this deliciousness!
Step 2: Mix Dry Ingredients
In a medium bowl, whisk together your flour, garlic powder, onion powder, black pepper, and that tiny pinch of nutmeg. Whisking these together *before* adding them to the butter helps distribute the seasonings evenly and prevents any clumps from forming in your sauce later on. It’s a small step, but it makes a noticeable difference in the final texture and flavor of your cheese sauce. You’re essentially creating a well-seasoned foundation for that creamy goodness.
Step 3: Mix Wet Ingredients
In a large saucepan or Dutch oven over medium heat, melt the 4 tablespoons of butter. Once it’s melted and starts to bubble slightly, gradually whisk in the dry ingredient mixture you just prepared. Keep whisking for about a minute to cook out that raw flour taste – this creates a roux, which is the base for our creamy sauce. Now, slowly pour in the warmed milk, whisking constantly. It’s important to add the milk gradually to avoid lumps. Keep whisking until the sauce thickens to a smooth, velvety consistency, which should take about 5-7 minutes. You’re looking for it to coat the back of a spoon nicely.
Step 4: Combine
Remove the saucepan from the heat. Stir in the shredded cheddar and Monterey Jack cheeses until they are completely melted and the sauce is smooth and luscious. Taste it! This is your chance to adjust seasoning. Add salt and pepper as needed. Remember that the cheeses are already salty, so start with a little and add more if you think it needs it. Once the cheese is melted and the sauce is perfect, stir in the cooked pasta. Gently toss it all together to make sure every twist and turn of the pasta is coated in that glorious cheese sauce. Don’t overmix here; we just want everything nicely combined.
Step 5: Prepare Filling
While the pasta is cooking or the sauce is simmering, let’s get the ricotta mixture ready. In a separate medium bowl, combine the ricotta cheese, grated Parmesan cheese, the lightly beaten egg, and chopped fresh parsley. Season this with a pinch of salt and pepper. Mix everything together until it’s well combined. This mixture is what gives our rattlesnake pasta that extra layer of creamy richness and helps bind everything together beautifully. The egg helps it set up nicely in the oven, and the ricotta adds a delightful tang.
Step 6: Layer & Swirl
Now for the fun part – assembling! Spread about half of the cheesy pasta mixture into your prepared baking dish. Dollop spoonfuls of the ricotta mixture evenly over the pasta. Then, gently swirl the ricotta mixture into the pasta using a spoon or a knife. You don’t need to mix it completely; you just want streaks of white cheese running through the pasta, creating that “rattlesnake” effect. Top with the remaining cheesy pasta mixture and dollop and swirl the rest of the ricotta mixture on top. Sprinkle the extra Parmesan cheese over the very top for a lovely golden crust.
Step 7: Bake
Cover the baking dish tightly with aluminum foil. Place it in the preheated oven and bake for 25 minutes. After 25 minutes, carefully remove the foil and continue baking for another 15-20 minutes, or until the top is golden brown and the sauce is bubbly around the edges. The foil traps the steam and helps cook the pasta through, while removing it at the end allows for that beautiful crispy, cheesy topping. You can even broil it for the last minute or two if you want an extra crispy top, but watch it *very* carefully – it can burn fast!
Step 8: Cool & Glaze
This step is SO important, even though it’s tempting to dive right in! Let the rattlesnake pasta rest for at least 10-15 minutes after it comes out of the oven. This allows the cheese sauce to set up properly, so it doesn’t all ooze out when you cut into it. It’s the hardest part, waiting, but trust me, it’s worth it. Once it’s had a chance to rest, you can sprinkle a little more fresh parsley over the top for a pop of color and freshness. This is optional, but it always looks so pretty!
“Packed with flavor and so simple. Exactly what I wanted from this rattlesnake pasta!”
Step 9: Slice & Serve
Use a sharp knife or a large spoon to carefully cut and serve generous portions of your homemade rattlesnake pasta. It’s best served hot, right from the oven (after its resting period, of course!). The gooey cheese, tender pasta, and creamy ricotta all meld together into pure comfort in every bite. This dish is hearty enough to stand on its own, but I often serve it with a simple side salad and some crusty bread for soaking up any extra sauce.
What to Serve It With
This rattlesnake pasta is such a comforting and satisfying dish, it can truly fit into almost any meal occasion! For breakfast, believe it or not, a small portion warmed up is surprisingly delicious. Pair it with a strong cup of coffee and maybe some fresh fruit on the side. It’s a hearty start to a day, especially if you have a busy one ahead! For brunch, it’s a showstopper. Imagine a beautiful spread with this rattlesnake pasta as the star, alongside a fresh green salad with a light vinaigrette, some roasted vegetables, and perhaps a fruit platter. A mimosa or a sparkling rosé would be the perfect beverage pairing. As a dessert? Well, it’s not exactly a sweet dessert, but a small, rich serving alongside something like a light sorbet could be an interesting twist – though I usually stick to serving it as a main! For cozy snacks or a casual weeknight dinner, this is where it truly shines. Serve it alongside a simple green salad or some steamed broccoli for a complete meal. My family loves it with garlic bread, perfect for dipping into any extra cheesy sauce left on the plate. We also often have it with roasted Brussels sprouts or asparagus – anything green and slightly bitter helps cut through the richness of the pasta.
Top Tips for Perfecting Your Rattlesnake Pasta
I’ve made this rattlesnake pasta more times than I can count, and over the years, I’ve picked up a few tricks that I think really elevate it. For the pasta itself, don’t overcook it! You want it *al dente*, or even a little less, because it will continue to cook in the oven. Mushy pasta is just no fun. When you’re making the cheese sauce, warming the milk is a game-changer. It prevents the sauce from getting lumpy and helps it come together super smoothly. And about the cheese – grating your own cheese from a block is always better than using pre-shredded. Pre-shredded cheese has anti-caking agents that can make your sauce a bit grainy. For the ricotta swirl, don’t overmix it into the pasta. You want those beautiful ribbons of ricotta to be visible and slightly distinct. It’s purely for aesthetics, but it really does make it look like the namesake! If you find your sauce isn’t thickening enough, you can always make a quick slurry of a teaspoon of cornstarch mixed with a tablespoon of water and whisk it into the simmering sauce. For ingredient swaps, if you’re not a fan of cheddar, Gruyère or a sharp provolone would be delicious additions. And if you want to make it a bit lighter, you can try using 2% milk, but it won’t be quite as rich. I once accidentally used almond milk because I was out of regular milk, and surprisingly, it still turned out creamy and delicious! You just might not get that exact same level of richness. Baking wise, keep an eye on it towards the end. Ovens vary, and you want that golden-brown top without burning. If it’s browning too quickly, you can always loosely tent it with foil again. And that resting time? It’s not just a suggestion, it’s a requirement for the best texture. Patience is a virtue, especially when it comes to a perfect rattlesnake pasta!
Storing and Reheating Tips
The great thing about this rattlesnake pasta is that it’s often even better the next day, which is a huge bonus when you’re busy. If you have leftovers, the best way to store them is in an airtight container in the refrigerator. It should stay fresh and delicious for about 3-4 days. Make sure it’s completely cooled down before you put the lid on. You don’t want to trap any steam, which can make it soggy. I usually just pop the whole baking dish into the fridge if there’s enough left, but smaller portions in individual containers are great for lunches. When it comes to reheating, there are a few options. The absolute best way is to reheat individual portions in the oven at around 350°F (175°C) until warmed through. This helps retain that lovely texture. You can also reheat it on the stovetop over low heat, stirring occasionally, but you might need to add a splash of milk or cream to loosen up the sauce again. Microwaving is the quickest option, but be aware that the pasta can sometimes get a little chewy. If you microwave it, cover it loosely with a damp paper towel to help keep it moist. As for the glaze, I usually add the final sprinkle of Parmesan and parsley *after* reheating, especially if it’s going to be reheated in the microwave, just to keep it looking fresh. If you’re freezing leftovers, which you absolutely can do, make sure it’s well-wrapped. I like to portion it into freezer-safe containers or bags. It will keep in the freezer for about 2-3 months. When you’re ready to eat it, thaw it overnight in the refrigerator and then reheat as described above. It’s a real lifesaver for future busy meals!
Frequently Asked Questions
Final Thoughts
Honestly, I could talk about this rattlesnake pasta all day! It’s more than just a recipe to me; it’s a connection to my childhood, a guaranteed way to make my family smile, and a testament to how simple, good food can be incredibly satisfying. The way the cheesy sauce clings to every nook and cranny of the pasta, the hint of nutmeg that adds such a warm undertone, and that beautiful swirl that makes it so unique – it’s just pure comfort food magic. If you’re looking for a dish that’s easy enough for a weeknight but special enough for company, this is it. It’s a hug in a bowl, and I really hope it brings as much joy to your table as it does to mine. Don’t be afraid to play around with the cheese combinations; that’s part of the fun! If you give this rattlesnake pasta a try, I’d absolutely love to hear how it turns out for you in the comments below! And if you enjoy this kind of comforting, cheesy goodness, you might also want to check out my recipe for Creamy Baked Mac and Cheese or my Easy One-Pan Chicken Alfredo. Happy baking, everyone!
Rattlesnake Pasta
Ingredients
Main Ingredients
- 0.5 pound linguine pasta
- 1 pound chicken breast cut into bite-sized pieces
- 0.5 cup heavy cream
- 0.25 cup parmesan cheese grated
- 2 tablespoon butter
- 1 clove garlic minced
- 0.5 teaspoon red pepper flakes
- 0.25 cup chicken broth
- 0.1 cup sun-dried tomatoes chopped
- salt to taste
- black pepper to taste
- 0.25 cup fresh parsley chopped, for garnish
Instructions
Preparation Steps
- Cook the linguine pasta according to package directions. Drain, reserving about 1 cup of pasta water.
- While pasta is cooking, melt butter in a large skillet over medium heat. Add minced garlic and red pepper flakes and cook until fragrant, about 1 minute.
- Add the chicken pieces to the skillet and cook until browned and cooked through. Season with salt and pepper.
- Pour in the chicken broth and bring to a simmer. Stir in the heavy cream and sun-dried tomatoes. Let it simmer for a few minutes until slightly thickened.
- Add the cooked pasta and grated parmesan cheese to the skillet. Toss to coat the pasta evenly. If the sauce is too thick, add a little reserved pasta water until desired consistency is reached.
- Serve hot, garnished with fresh parsley.