
I’ve been making Philly Cheesesteak Bowls for years, and every time I do, the kitchen fills with that familiar, savory aroma that says “tonight is going to be good.” I remember the first time I swapped the classic sandwich for a bowl — it felt like a cozy upgrade: all the punchy beef, melty cheese, and caramelized onions, tucked into a warm bed of rice or cauliflower rice. It’s like the best of both worlds: the hometown flavor of Philadelphia, minus the crusty bread and awkward hands-full at the end. This version is a lifesaver on busy nights, and it travels well to potlucks or weeknights when everyone’s rushing in from practice. The flavor is incredible, the process is simple, and the bowls feel almost celebratory without any fuss. Philly Cheesesteak Bowls aren’t just a meal; they’re a little ritual you can lean on when you want something comforting, familiar, and deeply satisfying. And yes, I’ll admit it — my kids actually ask for seconds, which is basically the gold standard at my house.
Thank you for reading this post, don't forget to subscribe!What is Philly Cheesesteak Bowls?
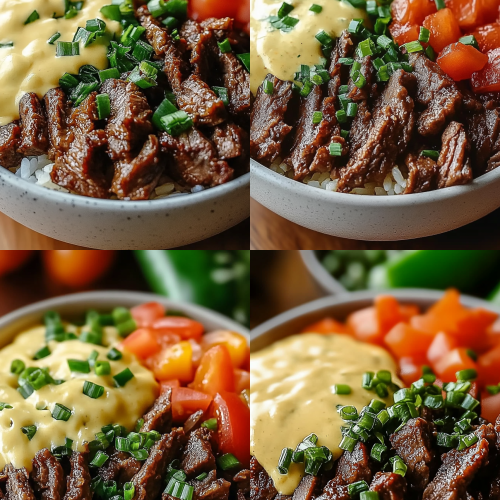
Philly Cheesesteak Bowls are simply the beloved sandwich turned inside-out for a bowl-based meal. Think thinly sliced, seared beef mingling with caramelized onions, sautéed peppers, melted cheese, and a rich, glossy finish — all ladled over a bed of rice, cauliflower rice, or mashed potatoes. The name comes from Philadelphia’s iconic cheesesteak, but in a bowl form you get all the punchy flavors without having to bite through bread. Think of it as a deconstructed Philly sandwich that’s perfect for weeknights or quick gatherings. It’s essentially comfort food with a practical twist: you control portions, toppings, and add-ins, so it’s easy to tailor for picky eaters or spice lovers alike. The aroma alone — beef onions, garlic, and provolone or cheddar melting together — has a way of drawing everyone to the kitchen like a magnet.
Why you’ll love this recipe?
What I love about Philly Cheesesteak Bowls is how
- Flavor: The beef gets a quick sear
- Simplicity: You can have this on the table in under 40 minutes, and most of the steps are hands-off once the beef hits the pan.
- Cost-efficiency: Beef is affordable when purchased on sale, and you’re using pantry-friendly seasonings plus a few veggies. It’s a satisfying meal that won’t break the bank.
- Versatility: Base ideas vary from rice to cauliflower rice to mashed potatoes. Sauce options range from a simple cheese melt to a more generous provolone swirl. You can swap in peppers, mushrooms, or zucchini depending on what you’ve got.
- Meal-prep friendly: Make the beef and onions ahead, store in the fridge, then reheat quickly for busy weeknights or lunch bowls. This is a recipe that truly adapts to your schedule.
If you’ve ever had a cheesesteak sandwich and found yourself wishing for a cleaner bowl-friendly version, this approach hits that sweet spot. It’s the kind of recipe I reach for when I want a homey, nostalgic flavor without a mountain of bread to deal with. And yes — if you’re hosting a casual dinner, it scales up beautifully. I’ve served Philly Cheesesteak Bowls to friends who swear they’re not meat-and-potatoes people, and they left happily surprised at how complete the bowl felt with every bite.
How to Make Philly Cheesesteak Bowls
Quick Overview
In a nutshell, you’ll sear super-thin beef, caramelize onions, and sizzle bell peppers in a hot pan, then nestle the savory mix into bowls with your choice of base. A melty cheese finish brings it all together, and a glossy glaze or sauce ties the flavors into one cohesive bite. The trick is to keep the beef slices whisper-thin and to let the onions and peppers do most of the flavor-building on the stovetop. If you’d like extra depth, finish the bowls under a hot broiler for a minute or two to melt cheese into oozy ribbons. This method keeps the process approachable while delivering the big, comforting flavors you crave in a Philly-style dish.
Ingredients
For the Main Batter (the beef base):
- 1 lb flank steak or shaved beef, very thinly sliced
- 1 tablespoon olive oil
- 1 teaspoon garlic powder
- 1 teaspoon onion powder
- 1/2 teaspoon smoked paprika (optional for a hint of warmth)
- Salt and Black Pepper, to taste
- 2 teaspoons cornstarch (optional, for a quicker sear if you’re not slicing very thin)
For the Filling:
- 1 large onion, thinly sliced
- 1-2 bell peppers (any color), thinly sliced
- 2 cloves garlic, minced
- 1 cup mushrooms, sliced (optional, for earthiness)
- 1 tablespoon Olive oil (additional)
- Salt and pepper, to taste
For the Glaze:
- 1/2 cup shredded provolone or mozzarella cheese
- 1/4 cup milk or half-and-half (for smooth melt)
- 1 teaspoon Dijon mustard (optional, for a tangy lift)
- Dash of hot sauce, to taste (optional)
Base Options (to serve with):
- Steamed white rice or brown rice
- Cauliflower rice for a lighter option
- Mashed potatoes or mashed cauliflower for a cozy bowl
- Quinoa or a simple greens bed if you prefer
Garnishes and finishing touches:
- Fresh parsley or chives, chopped
- Pickled peppers or giardiniera for extra zing
- A squeeze of lemon over the greens to brighten the dish
Step-by-Step Instructions
Step 1: Preheat & Prep Pan
Heat a large cast-iron skillet or heavy-bottomed pan over medium-high heat. You want that surface screaming hot when the meat meets it. While it’s warming, slice the onion, peppers, and mushrooms (if you’re using them) into thin crescents. A strong, confident knife works wonders here, especially to keep the beef slices tender. I always toss the pan with a little oil so nothing sticks, then lay in the onions first so they begin to caramelize as the pan heats.
Step 2: Mix Dry Ingredients
In a small bowl, combine the garlic powder, onion powder, paprika, salt, pepper, and cornstarch if you’re using it. The dry rub is what gives the beef that quick, close-to-steak sear and a hint of savory depth. I learned years ago that a modest dash of paprika brings a smoky edge that reads as “classic cheesesteak” in every bite.
Step 3: Mix Wet Ingredients
If you’re using any marinade components (like a splash of worcestershire or a touch of soy for depth), whisk them in a separate bowl. For this version, I keep it simple with just a light sprinkle of salt and a quick toss of olive oil to help the meat sear evenly. The goal is thin slices that fly into the pan and sizzle, not soggy chunks glommed together.
Step 4: Combine
Pat the beef dry and dust it with the dry mix, then toss to coat. If you’re using cornstarch, you’ll notice it helps the meat sear into crisp edges quickly. Add the coated beef to the hot pan in a single layer. Don’t crowd it — if you have to, do it in batches. You want a quick, hot sear so the outside browns and the inside stays juicy.
“New family favorite! This Philly Cheesesteak Bowls was so flavorful and ridiculously easy. Crowd-pleaser for sure.”
Step 5: Prepare Filling
While the beef sizzles, push it to one side of the pan and add a little more oil if needed. Add the onions first, letting them soften and begin to brown. After a couple minutes, toss in peppers (and mushrooms, if using), along with the minced garlic. A pinch of salt helps draw out moisture and caramelization. You’ll know you’re done with the filling when the onions are deeply golden and the peppers are blistered just a touch around the edges.
Step 6: Layer & Swirl
If you’re serving over rice or cauliflower rice, spoon a generous base into each bowl. Layer the beef and vegetables over the base, then lay a handful of cheese on top. The heat from the beef will start melting the cheese as you gobble the first bite, but if you want a more uniform melt, you can slide the bowls under a hot broiler for a minute or two. The swirl is your friend here — a quick pass with a spoon to distribute melted cheese across the top makes every bite feel indulgent.
Step 7: Bake
Preheat your oven to 400°F (200°C). Transfer the filled bowls to a baking sheet if you’re doing a bake-to-make-melty finish, and bake for 6-9 minutes until the cheese is beautifully draped and bubbling. If you prefer, you can skip the oven entirely and just let the cheese melt in the pan with a final minute of high heat under the broiler. Either way, you’re aiming for that glossy cheese gloss across the top and a little bit of toasty edge around the edges of the meat and veg.
Step 8: Cool & Glaze
Remove from the oven and let the bowls rest for a minute or two. While they cool slightly, whisk together your glaze components: warm milk with shredded cheese and a touch of mustard if you like. Stir until the mixture is smooth and pourable but not runny. Drizzle a little over the tops or swirl it through the cheese for a cohesive finish. The glaze is optional, but it gives a professional-looking sheen and extra depth of flavor that friends always notice.
Step 9: Slice & Serve
If you used larger pieces of beef, a quick slice against the grain helps every bite stay tender. Plate up with your chosen base, then spoon the beef and veggie mix over the cheese-laden top. A final sprinkle of parsley and a handful of pickled peppers add brightness. The first bite should be a melody of savory beef, sweet onions, and melted cheese that lingers enough to make you smile. My family loves a bright squeeze of lemon over a bed of greens on the side, but that’s totally optional. This is one of those dishes where a little personalization makes it feel like yours.
What to Serve It With
Philly Cheesesteak Bowls shine as a complete meal, but the sides and accompaniments can turn a weeknight into a little celebration. Here are a few ways I like to serve them, organized by occasion:
For Breakfast: A light sprinkle of fresh chives and a runny fried egg perched atop the bowl makes breakfast feel indulgent but still satisfying. A side of roasted potatoes or hash browns keeps the morning vibe hearty, and a cup of strong coffee or a mug of cold-pressed juice rounds things out nicely.
For Brunch: Serve with a bright, citrusy salad on the side and a crisp sparkling beverage. The color and contrast are fantastic, and the flavors wake up the palate before a long, relaxed brunch session with friends or family.
As Dessert: Okay, not literally dessert, but a little sweet finish can be a fun twist. Try a small spoonful of honey-balsamic glazed onions as a finishing accent for a surprising sweetness that pairs with the cheese without clashing. It’s a playful way to end a savory meal on a memorable note.
For Cozy Snacks: If you’re feeding a crowd while watching a game or settling in for a movie night, set out bowls with toppings like jalapeños, hot sauce, and extra pickles. A side of crispy baked potato wedges or chips adds texture, and a chilled beer or a cold soda gives you the perfect balance with the warm, cheesy bowl.
Personally, I love serving Philly Cheesesteak Bowls with a simple green salad dressed in lemony vinaigrette to cut through the richness. It’s a little ritual I’ve refined over time: a bright green bite, a bite of beefy goodness, and then a sip of something refreshing. The flavors stay with you in a comforting way, and the bowls feel almost effortless despite how fancy they look when plated just right.
Top Tips for Perfecting Your Philly Cheesesteak Bowls
Think of these as the small, practical tweaks I’ve learned from countless dinners in my kitchen. They’ve made all the difference when I want this dish to shine with minimal effort.
Zucchini Prep: If you add zucchini to the filling for extra moisture and a touch of green, shred it finely and salt it to draw out moisture. Squeeze the zucchini dry before adding to the pan to prevent sogginess. It blends in so nicely that you barely notice it, but you’ll notice the extra freshness in every bite.
Mixing Advice: When you’re mixing the dry and wet elements, don’t overwork the beef. You want it to sear with a crisp edge, not turn into a dense patty. If you’re using a marinade, let the beef rest for a short time so the flavors permeate without becoming mushy. This keeps the texture light and tender.
Swirl Customization: The swirl on top is a visual cue that makes the dish feel special. You can create interesting marbling by gently folding the cheese into the top layer of meat as it finishes melting. If you’re short on time, simply lay the cheese slices over the hot filling and let the residual heat do the rest.
Ingredient Swaps: Ground turkey or chicken works in a pinch, though the texture shifts a bit. If you’re avoiding dairy, try a plant-based cheese with a similar melt profile. For a spicier kick, add a pinch of chili flakes or a splash of hot sauce to the glaze for a brighter bite.
Baking Tips: Oven positioning matters. If your oven runs hot, place the bowls on a middle rack and monitor closely. If you’re using a broiler, keep a watchful eye so the cheese doesn’t scorch. If you prefer, skip the oven entirely and finish with a couple of minutes under the broiler after assembling the bowls.
“I don’t know if I’ve ever eaten a better Philly Cheesesteak Bowls. The rub alone is wonderful, but the sauce??? Over the top!”
Glaze Variations: The glaze is your chance to customize. A simple cheddar-bechamel variation adds extra creaminess, while a sharp cheddar with a touch of beer makes a more robust finish. If you’re not into glaze, a light drizzle of olive oil and a sprinkle of Italian herbs can also brighten the top without changing the core flavors.
Lessons learned: don’t rush the caramelization. Those few extra minutes to brown the onions turn a good bowl into a great one. And always taste as you go — a quick pinch of salt here and a drizzle of glaze there can completely transform the finish. The joy is in these little adjustments, because they reflect your kitchen, your hands, and your palate.
Storing and Reheating Tips
Philly Cheesesteak Bowls hold up surprisingly well, but a little care keeps them tasting fresh on day two or three.
Room Temperature: If you’re eating leftovers within a few hours, it’s fine to keep the components loosely covered on the counter for a short while. Don’t leave perishable ingredients out longer than two hours.
Refrigerator Storage: Seal the prepared filling and the base separately in airtight containers. The beef and onions can be kept for 3–4 days, and the base (rice or cauliflower rice) stays best fresh for 3–4 days as well. Reheat gently on the stove or in the microwave until steaming hot, then reassemble with a light glaze to refresh the melt.
Freezer Instructions: While not ideal for the complete dish due to texture changes, you can freeze the beef and onion mixture separately for up to 2 months. Thaw overnight in the fridge and reheat gently. Add fresh cheese or a fresh drizzle of glaze after reheating to recapture that silky finish.
Glaze Timing Advice: If you’re freezing, keep the glaze separate and add it after reheating. The glaze can separate a bit after freezing, so warming and then whisking it back to a smooth consistency is the easiest fix.
Overall, the flavor survives well, and the components reheat cleanly. It’s the kind of dish that makes busy weeks feel a touch more intentional, a little like a Sunday supper you can pluck from the fridge on a Tuesday.
Frequently Asked Questions
Final Thoughts
Philly Cheesesteak Bowls are a little celebration you can pull off on a Tuesday night. They remind me of my earliest memories of family dinners — the kitchen filled with laughter, the mix of sizzling meat and caramelized onions, and someone’s plate disappearing in seconds because the flavors were so honest and comforting. This dish is more than a recipe; it’s a reminder that good food doesn’t have to be complicated to feel special. I’ve made it countless times, and it never fails to deliver that warm, familiar hug of a meal. If you try it, tell me what base you choose, which cheese you melt on top, and how you like to finish it. I’d love to hear your twists and what your family loves most about Philly Cheesesteak Bowls. Happy cooking, friends!
PS — If you’re craving more bowls with bold, comforting flavors, you might also enjoy my Quick Pepper-Stamped Beef Bowls or a simple Mushroom-Wood-Smoked Cheddar Bowl. Both scratch that same nostalgic itch with a modern, weeknight-friendly twist. Share your variations in the comments below, rate the recipe, and tag a friend who needs a little kitchen warmth today. I can’t wait to hear how yours turns out!
Philly Cheesesteak Bowls
Ingredients
Main Ingredients
- 1.5 pounds sirloin or ribeye steak thinly sliced
- 1 tablespoon olive oil
- 1 large onion thinly sliced
- 2 bell peppers any color, thinly sliced
- 0.5 teaspoon salt
- 0.25 teaspoon black pepper
- 1 cup beef broth
- 8 slices provolone cheese or 1 cup shredded
Optional for Serving
- 4 cups cooked cauliflower rice
- 4 cups mixed greens
Instructions
Preparation Steps
- Heat olive oil in a large skillet or cast iron pan over medium-high heat.
- Add sliced onions and bell peppers to the skillet. Sauté for 8-10 minutes, or until softened and lightly caramelized. Remove from skillet and set aside.
- Increase heat to high. Add the thinly sliced steak to the hot skillet in a single layer. Cook for 1-2 minutes per side until browned, breaking it up with a spatula as it cooks.
- Season the steak with salt and pepper.
- Return the sautéed onions and peppers to the skillet with the steak. Pour in the beef broth and stir, scraping up any browned bits from the bottom of the pan. Let it simmer for 1-2 minutes until the liquid slightly reduces.
- Divide the steak and vegetable mixture into four equal portions within the skillet. Top each portion with 2 slices of provolone cheese. Cover the skillet for 1-2 minutes, or until the cheese is melted and bubbly.
- Serve immediately in bowls, optionally over cauliflower rice or mixed greens.


