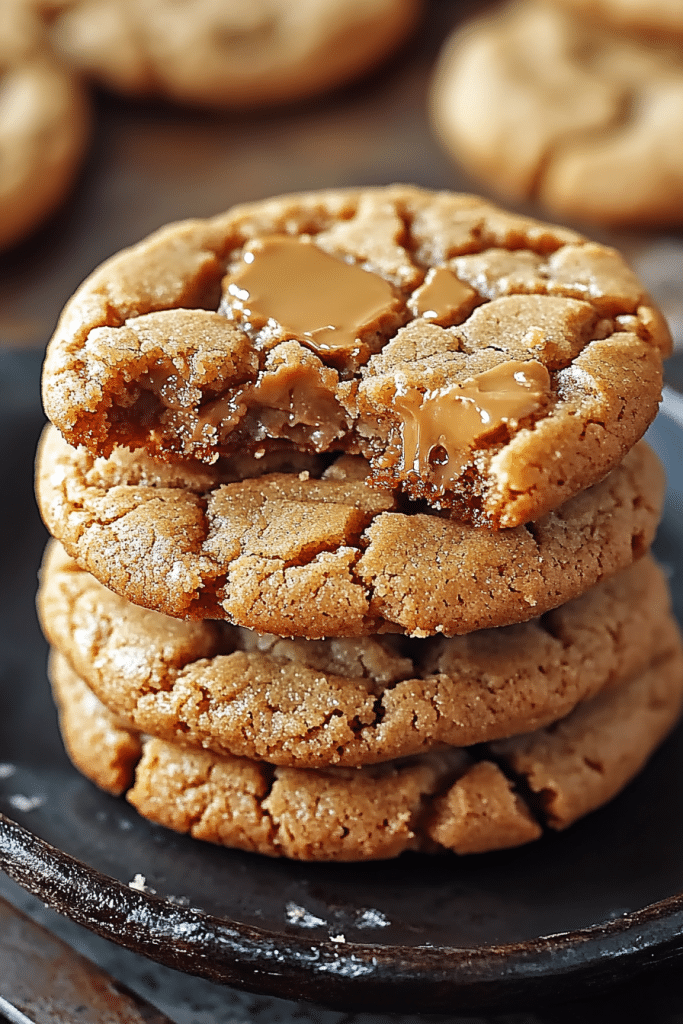
There are certain smells that just instantly transport me back to my childhood kitchen. The sweet, nutty aroma of peanut butter baking is definitely one of them. My Grandma Mae’s peanut butter cookies were legendary in our family, and honestly, I’ve spent years trying to recreate that perfect balance of chewy, slightly crisp edges, and that unmistakable, rich peanut butter flavor. This recipe? This is it. This is the one. It’s the cookie that disappears in minutes at any gathering, the one my nieces and nephews beg for, and my absolute go-to when that sweet craving hits and I don’t have time for anything elaborate. If you’re looking for a truly knockout peanut butter cookie, you’ve found your holy grail.
Thank you for reading this post, don't forget to subscribe!What is the recipe for peanut butter cookies?
So, what exactly makes this peanut butter cookie recipe so special? Think of it as the ultimate comfort cookie. It’s not overly complicated, but it packs a serious flavor punch. Unlike some super-fussy recipes, this one focuses on simplicity and quality ingredients to let that glorious peanut butter shine. It’s the kind of cookie that’s perfect for dipping in milk, crumbling over ice cream, or just enjoying on its own with a cup of coffee. The name itself, “The Best Peanut Butter Cookies You’ll Ever Make,” isn’t just a catchy title; it’s a promise. It’s about capturing that nostalgic taste we all crave, but with a texture that’s just *chef’s kiss* perfect. It’s essentially your childhood favorite, elevated just a tiny bit.
Why you’ll love this recipe?
What is the secret behind this peanut butter cookie recipe?flavorWhat is the perfect balance of peanut butter and almonds?simplicity. Seriously, this is a lifesaver on busy weeknights or when unexpected guests pop over. You can whip up a batch from start to finish in under an hour, and the steps are so straightforward, even beginner bakers will feel like pros. What I love most about this is how incredibly cost-efficient it is. Most of the ingredients are pantry staples, making it a budget-friendly treat that doesn’t skimp on taste. And talk about versatility! While they are absolutely divine on their own, I’ve also dipped them in chocolate, added some chopped nuts, or even used them as the base for mini peanut butter pies. It’s a crowd-pleaser that feels both familiar and special. If you’ve enjoyed my classic chocolate chip cookie recipe, you’re going to adore the comforting, familiar taste of these peanut butter delights. They’re a true testament to how simple ingredients can create something truly magical.
How to Make Peanut Butter Cookies
Quick Overview
This recipe is wonderfully straightforward. We’ll cream together our fats and sugars, add in the eggs and vanilla, then gently incorporate our dry ingredients. The magic happens with a touch of leavening that gives them the perfect lift and chew. You’ll form them into balls, give them a classic criss-cross pattern with a fork (a must for tradition!), and bake until they’re golden brown and irresistible. It’s a process that takes minimal effort but yields maximum deliciousness, proving that great cookies don’t need to be complicated.
Ingredients
For the Main Batter:
Butter: 1 cup (2 sticks) unsalted butter, softened. Make sure it’s nice and soft, not melted. This is key for creaming properly. I always pull my butter out about an hour before I start baking.
Peanut Butter: 1 cup creamy peanut butter. For the best flavor, I highly recommend using a good quality, unsweetened peanut butter. The natural kind works beautifully and really lets that peanut flavor shine through. Avoid the super sugary, hydrogenated stuff if you can; it changes the texture and taste.
Granulated Sugar: 3/4 cup. This provides sweetness and helps with crispness.
Brown Sugar: 3/4 cup, packed. The brown sugar is what gives these cookies their lovely chewiness and adds a hint of caramel flavor. Make sure it’s packed into your measuring cup!
“New family favorite! This Peanut butter cookies was so flavorful and ridiculously easy. Crowd-pleaser for sure.”
Eggs: 2 large eggs. Room temperature eggs incorporate better into the batter. If you forget, just pop them in a bowl of warm water for about 5-10 minutes.
Vanilla Extract: 2 teaspoons. Don’t skimp on good vanilla; it really rounds out the flavor profile.
All-Purpose Flour: 2 1/2 cups. Spooned and leveled. Measuring flour correctly is crucial – over-measuring can lead to dry, crumbly cookies.
Baking Soda: 1 teaspoon. This is our main leavener, giving the cookies their lift.
Salt: 1/2 teaspoon. Balances the sweetness and enhances the peanut butter flavor.
For the Classic Criss-Cross:
Fork: Clean and ready to go! This is non-negotiable for that classic look.
Step-by-Step Instructions
Step 1: Preheat & Prep Pan
Get your oven preheated to 375°F (190°C). Line your baking sheets with parchment paper. This is my secret weapon for easy cleanup and ensuring the cookies don’t stick. If you don’t have parchment paper, you can lightly grease your baking sheets, but parchment is definitely the way to go.
Step 2: Mix Dry Ingredients
In a medium bowl, whisk together the flour, baking soda, and salt. Give it a good whisk to make sure everything is evenly distributed. This ensures your leavening and salt are spread throughout, leading to consistent cookies.
Step 3: Mix Wet Ingredients
In a large bowl, cream together the softened butter and peanut butter until smooth and well combined. This is where a stand mixer or an electric hand mixer really shines, but you can absolutely do this by hand with a sturdy whisk and some arm power. Beat in the granulated sugar and brown sugar until light and fluffy. Then, beat in the eggs one at a time, followed by the vanilla extract. Make sure each egg is fully incorporated before adding the next.
Step 4: Combine
Gradually add the dry ingredients to the wet ingredients, mixing on low speed (or by hand) until just combined. Be careful not to overmix! Overmixing develops the gluten in the flour, which can make your cookies tough. Stop mixing as soon as you no longer see streaks of dry flour. The dough will be thick and wonderfully fragrant.
Step 5: Form & Criss-Cross
Roll the dough into balls, about 1 to 1.5 inches in diameter. Place them about 2 inches apart on your prepared baking sheets. This gives them room to spread. Now for the fun part – the classic peanut butter cookie criss-cross! Lightly press a fork into the top of each cookie ball to flatten it slightly, then press again in the opposite direction to create the criss-cross pattern. If the fork sticks, dip it in a little sugar or flour.
“I don’t know if I’ve ever eaten a better Peanut butter cookies. The rub alone is wonderful, but the sauce??? Over the top!”
Step 6: Bake
Bake for 9-11 minutes, or until the edges are lightly golden brown and the centers are still slightly soft. They will continue to set up as they cool. For chewier cookies, err on the shorter baking time. For slightly crispier edges, bake them a minute or two longer. Ovens can vary, so keep an eye on them the first time you make them!
Step 7: Cool & Enjoy
Let the cookies cool on the baking sheets for about 5 minutes before transferring them to a wire rack to cool completely. This is crucial for them to set properly. Trust me, resisting the urge to eat them straight from the oven is hard, but worth it!
What to Serve It With
These peanut butter cookies are wonderfully versatile, fitting in perfectly for any occasion. For a casual morning coffee break, they’re absolutely divine paired with a hot cup of coffee or a cold glass of milk. I sometimes cut them in half and toast them lightly for an extra crunch. For a more elaborate brunch spread, imagine these nestled amongst fruit platters and mini quiches – they add a comforting, homemade touch. I love serving them with a side of fresh berries. As a classic dessert, they’re a no-brainer. Serve them alongside a scoop of vanilla ice cream, or offer them as a sweet ending to a hearty meal. And for those cozy, lazy afternoons when you just need a little something sweet, these are your best friend. I often pair them with a mug of hot chocolate, especially during the colder months. My family has a tradition of making these every year for our “Movie Night Marathon,” and they’re always the first thing to go!
Top Tips for Perfecting Your Peanut Butter Cookies
Over the years, I’ve learned a few tricks that take these peanut butter cookies from good to absolutely unforgettable. First, regarding the peanut butter itself: the type really matters. While any creamy peanut butter will work, I’ve found that a natural, unsweetened peanut butter gives the most robust peanut flavor. If you use a sweetened one, you might want to slightly reduce the sugar in the recipe. For mixing the dough, the golden rule is *do not overmix*. Once you add the flour, mix only until just combined. Overmixing develops gluten, leading to tough cookies, and nobody wants that! You want them tender and chewy. The classic criss-cross pattern isn’t just for looks; it helps the cookies bake more evenly. If your fork gets sticky, dip it in a little granulated sugar between cookies; it prevents sticking and adds a touch of sparkle. For baking, pay attention to your oven. I always recommend the first batch as a test. Look for edges that are just starting to turn golden brown; the centers should look slightly soft. They will firm up as they cool. If your cookies spread too much, it could be that your butter was too soft, or you used a peanut butter that’s too oily. My go-to trick for perfectly shaped cookies is to chill the dough for about 15-20 minutes before rolling and baking, especially if your kitchen is warm. It firms up the fat and helps them hold their shape better. Lastly, for that extra touch of deliciousness, try adding a sprinkle of flaky sea salt on top right after they come out of the oven. It’s a small step, but it really elevates the flavor and balances the sweetness beautifully.
Storing and Reheating Tips
These peanut butter cookies are pretty sturdy, but knowing how to store them properly ensures they stay delicious for as long as possible. For room temperature storage, keep them in an airtight container. They’re usually good for about 3-4 days, though they tend to be best within the first couple of days. Make sure they are completely cool before sealing them up, otherwise, condensation can make them soggy. If you find they’re getting a little dry after a couple of days, you can toss a slice of bread into the container with them; it releases moisture and keeps them soft. For refrigerator storage, they’ll last a bit longer, usually up to a week. Place them in an airtight container lined with parchment paper. The chill might make them a bit firmer, so if you prefer a softer cookie, you can gently reheat them. To reheat, I like to pop a cookie or two on a microwave-safe plate for just 5-10 seconds. It warms them up perfectly and brings back that lovely soft texture. You can also pop them in a toaster oven at a low temperature for a minute or two. For freezer instructions, these cookies freeze beautifully, both baked and unbaked dough balls. If freezing baked cookies, let them cool completely, then wrap them individually in plastic wrap, followed by a layer of aluminum foil, or place them in a freezer-safe bag or container. They’ll keep well in the freezer for up to 2-3 months. To thaw, simply take them out and let them come to room temperature on the counter for a few hours. If you want to freeze the dough, roll it into balls, place them on a baking sheet, freeze until firm, then transfer to a freezer-safe bag. You can bake them directly from frozen, adding a minute or two to the baking time.
Frequently Asked Questions
Final Thoughts
So there you have it – my absolute favorite peanut butter cookie recipe. It’s a recipe steeped in nostalgia, perfected through countless batches, and guaranteed to bring smiles to whoever you share them with. The combination of that deep peanut butter flavor, the perfect chewy-crisp texture, and the sheer joy of making them makes this recipe a true winner in my book. It’s more than just a cookie; it’s a little bite of happiness. If you love these, you might also enjoy my recipes for chewy chocolate chip cookies or my classic sugar cookies for more baking inspiration. I truly hope you give these peanut butter cookies a try – I can’t wait to hear how they turn out for you! Don’t forget to leave a comment below with your thoughts or any delicious variations you come up with. Happy baking!
Peanut butter cookies
Ingredients
Main Ingredients
- 1 cup unsalted butter, softened
- 1 cup creamy peanut butter
- 0.75 cup granulated sugar
- 0.75 cup packed brown sugar
- 2 large eggs
- 1 teaspoon vanilla extract
- 2.5 cups all-purpose flour
- 1 teaspoon baking soda
- 0.5 teaspoon salt
Instructions
Preparation Steps
- Preheat oven to 350°F (175°C). Line baking sheets with parchment paper.
- In a large bowl, cream together softened butter and peanut butter until smooth.
- Beat in granulated sugar and brown sugar until well combined.
- Stir in the eggs one at a time, then stir in the vanilla extract.
- In a separate medium bowl, whisk together the flour, baking soda, and salt.
- Gradually add the dry ingredients to the wet ingredients, mixing until just combined.
- Roll dough into 1-inch balls and place them on the prepared baking sheets.
- Using a fork, make a criss-cross pattern on top of each cookie.
- Bake for 9 to 11 minutes, or until the edges are lightly golden brown.
- Let cookies cool on the baking sheets for a few minutes before transferring them to a wire rack to cool completely.