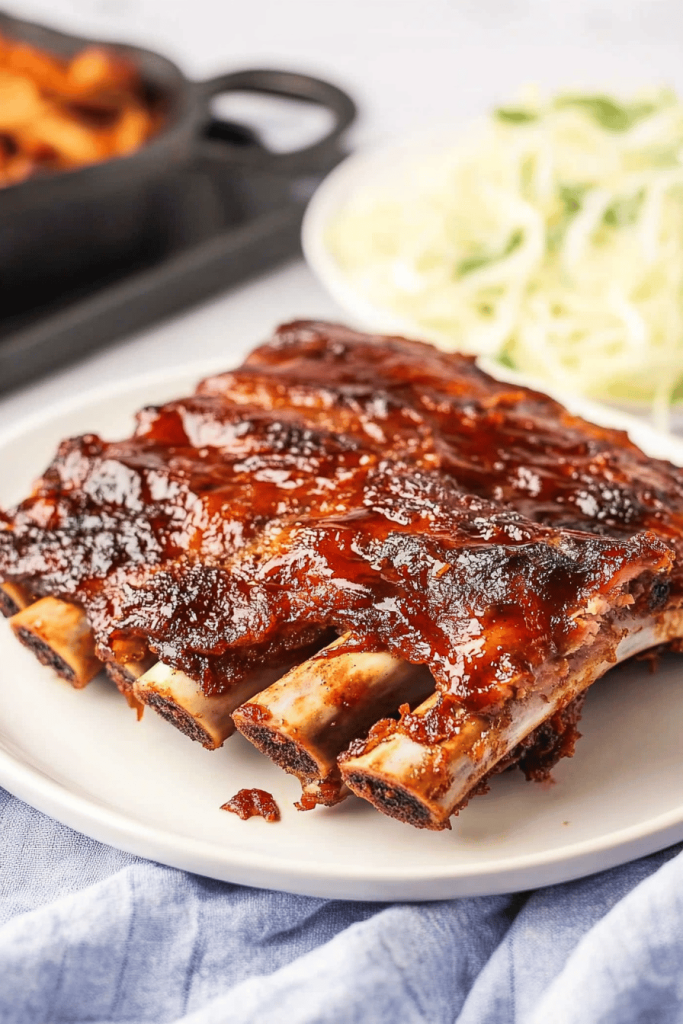
There are some meals that just scream comfort, aren’t there? For me, it’s always been a plate piled high with tender, fall-off-the-bone ribs. But let’s be honest, the thought of actually *barbecuing* them on a grill can be a bit intimidating, not to mention weather-dependent. That’s where this recipe for oven barbecued ribs comes in. It’s my absolute go-to when I’m craving that smoky, sweet, tangy goodness without all the fuss. I remember the first time I tried this method, I was convinced it couldn’t possibly yield the same results as a backyard smoker. Boy, was I wrong! My family devoured them so fast, I barely had time to snap a photo. This is the kind of dish that makes weeknights feel like a special occasion, and it’s surprisingly simple, which is exactly why I’m so excited to share it with you.
Thank you for reading this post, don't forget to subscribe!What are oven barbecued ribs?
So, what exactly are we talking about when we say “oven barbecued ribs”? Think of it as the best of both worlds, condensed into your very own kitchen. Instead of relying on wood smoke and charcoal, we’re using the magic of your oven to get those ribs incredibly tender and infused with all those classic barbecue flavors. We achieve that “barbecue” taste through a combination of a killer dry rub and a luscious, homemade sauce that gets caramelized beautifully in the heat. It’s essentially a more accessible, less labor-intensive way to enjoy ribs that still delivers that unmistakable smoky-sweet punch. No special equipment, just pure, unadulterated rib joy!
Why you’ll love this recipe?
Honestly, there are so many reasons why this recipe has become a staple in my kitchen. First off, the flavor is just out of this world. We’re talking about ribs that are so tender they practically melt in your mouth, with a sticky, slightly charred glaze that’s the perfect balance of sweet, tangy, and a little bit smoky. It’s the kind of flavor that makes you close your eyes and savor every bite. Then there’s the sheer simplicity of it all. You don’t need to be a pitmaster to nail this. The oven does most of the heavy lifting, and the steps are straightforward enough that even a beginner can achieve restaurant-quality results. And let’s talk about budget-friendliness! Ribs can sometimes be pricey, but by using this method and making your own sauce, you’re saving a ton of money compared to buying them pre-made or eating out. Plus, they are unbelievably versatile. Serve them at a backyard BBQ (even if it’s just in your backyard!), for a weeknight dinner, or even as a show-stopping appetizer. What I love most about this recipe is the pure satisfaction of seeing my family’s faces light up with every bite, knowing I made something so delicious with such ease. It’s truly a lifesaver on busy nights when everyone’s craving something hearty and comforting.
How do I make a grilled rib?
Quick Overview
The process for these oven barbecued ribs is wonderfully straightforward. We start by slathering the ribs with a flavorful dry rub that acts like a spice marinade, then we wrap them tightly to ensure maximum tenderness in the oven. After a slow cook, they’re unwrapped, brushed with a homemade barbecue sauce, and then returned to the oven for a final blast of heat to caramelize that glorious glaze. It’s a two-stage cooking process that guarantees incredibly moist and flavorful ribs every single time, with minimal hands-on effort required from you. You’ll be amazed at how easy it is to get that tender, saucy perfection.
Ingredients
For the Ribs & Dry Rub:
2 racks (about 2.5-3 lbs each) pork spare ribs or Baby Back Ribs. I usually go for spare ribs because they have a bit more meat and fat, which means more flavor and tenderness, but baby backs are fantastic too and often cook a little faster.
1/4 cup packed brown sugar. This adds a lovely sweetness and helps with caramelization.
2 tablespoons smoked paprika. This is key for that smoky depth of flavor. Don’t skimp on this!
1 tablespoon chili powder. For a gentle warmth that complements the sweetness.
1 tablespoon garlic powder. Because garlic makes everything better.
1 tablespoon onion powder. Adds another layer of savory goodness.
1 teaspoon ground black pepper. Freshly ground is always best if you have it.
1 teaspoon salt. Adjust to your preference, but this is a good starting point.
1/2 teaspoon cayenne pepper (optional). If you like a little kick, this is where you add it. I sometimes skip this if I’m worried about the little ones, but it’s lovely if you enjoy a bit of heat.
For the Homemade Barbecue Sauce:
1 cup ketchup. This is our sweet and tangy base.
1/4 cup apple cider vinegar. For that essential tanginess that cuts through the richness.
2 tablespoons Worcestershire sauce. It adds a fantastic umami depth.
2 tablespoons molasses. This gives our sauce a rich, dark sweetness and helps it thicken nicely.
1 tablespoon brown sugar. More sweetness and caramelization power.
1 teaspoon liquid smoke (optional, but recommended). If you don’t have it, don’t worry, the paprika helps, but this really amplifies the “barbecued” flavor.
1/2 teaspoon garlic powder.
1/2 teaspoon onion powder.
Salt and Black Pepper to taste.
Step-by-Step Instructions
Step 1: Preheat & Prep Pan
First things first, let’s get our oven ready. Preheat your oven to 300°F (150°C). This lower temperature is crucial for slow-cooking the ribs until they are fall-off-the-bone tender without drying out. While the oven heats up, prepare your ribs. If there’s a tough membrane on the bone side of your ribs, gently peel it off with a butter knife and a paper towel to get a good grip. This isn’t strictly necessary, but it does make the ribs more enjoyable to eat.
“The Oven Barbecued Ribs turned out amazing. My kids asked for seconds. Saving this one!”
Step 2: Mix Dry Ingredients
In a medium bowl, whisk together the brown sugar, smoked paprika, chili powder, garlic powder, onion powder, Black Pepper, salt, and cayenne pepper (if you’re using it). This is your magic spice blend! Make sure everything is well combined so you get an even distribution of flavor across the ribs.
Step 3: Mix Wet Ingredients
Now, let’s whip up that amazing barbecue sauce. In a saucepan, combine the ketchup, apple cider vinegar, Worcestershire sauce, molasses, Brown Sugar, liquid smoke (if using), garlic powder, and onion powder. Stir everything together well.
Step 4: Combine
This is where the real flavor application begins! Generously rub the spice blend all over both sides of the ribs. Don’t be shy; you want to coat them thoroughly. Then, lay out two large pieces of heavy-duty aluminum foil on your counter. Place one rack of ribs, bone-side down, on one sheet of foil. Wrap it up tightly, ensuring there are no gaps for steam to escape. Repeat with the second rack of ribs on the other foil sheet. This tight wrapping is what steams the ribs in their own juices and the spices, making them incredibly tender.
Step 5: Prepare Filling
While the ribs are starting their slow cook, let’s get that sauce ready to go. Place the saucepan with the sauce ingredients over medium heat. Bring it to a gentle simmer, stirring occasionally, and let it cook for about 10-15 minutes, or until it has thickened slightly. You’re looking for a nice, spoonable consistency. Taste it and adjust seasonings if needed – maybe a pinch more salt, or a touch more vinegar for tang. Once it’s reached your desired consistency and flavor, remove it from the heat.
Step 6: Layer & Swirl
Once the sauce is made and the ribs have had their initial cook, it’s time for the glorious glazing! Carefully unwrap the ribs from the foil. You’ll notice they’re already looking a bit tender. Place them back onto the foil sheets, or on a fresh baking sheet if you prefer, with the bone side down. Now, generously brush your homemade barbecue sauce all over the meaty side of the ribs. Make sure to get into all the nooks and crannies. You can apply a thin layer first, then a thicker one if you like extra glaze.
Step 7: Bake
Return the sauced ribs to the preheated oven, uncovered this time. Let them bake for another 20-30 minutes, or until the sauce is bubbly and slightly caramelized, and the edges are looking beautifully sticky. Keep an eye on them to prevent the sauce from burning, especially if your oven runs hot. You can also broil them for the last 1-2 minutes for an extra-charred finish, but watch them *very* closely!
Step 8: Cool & Glaze
Once they look perfectly glazed and irresistible, carefully remove the ribs from the oven. Let them rest for about 5-10 minutes. This is super important! It allows the juices to redistribute, ensuring every bite is as moist and tender as possible. During this resting period, you can even brush on another thin layer of sauce if you want that extra sticky glaze, or let it set slightly.
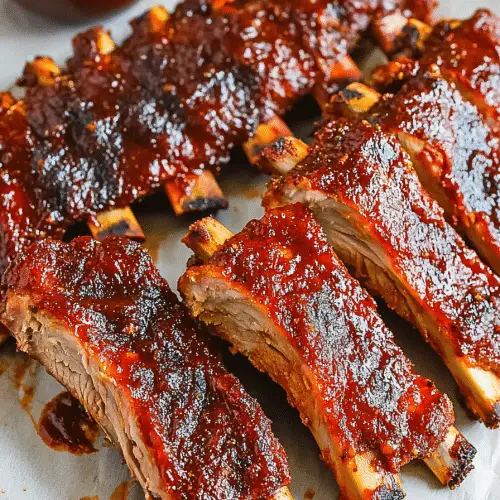
Step 9: Slice & Serve
Now for the best part! Transfer the ribs to a cutting board. Using a sharp knife, slice between the bones to separate the individual ribs. Serve them immediately while they’re warm and wonderfully saucy. The smell alone will have everyone rushing to the table!
“I don’t know if I’ve ever eaten a better Oven Barbecued Ribs. The rub alone is wonderful, but the sauce??? Over the top!”
What to Serve It With
These oven barbecued ribs are so versatile, they truly shine with a variety of sides. For a classic breakfast or brunch affair, imagine them alongside some fluffy scrambled eggs and crispy bacon, or perhaps a fresh fruit salad to cut through the richness. They also make a fantastic addition to a brunch spread, paired with some sweet potato hash or corn muffins. If you’re serving these as a dessert (yes, I’ve done it for special occasions!), a scoop of vanilla bean ice cream is surprisingly delightful, or a light, tangy fruit compote. But my absolute favorite way to enjoy them is as a cozy snack or a full-on dinner. They are heavenly with a creamy coleslaw, a big bowl of potato salad, or some Baked Beans. My kids always ask for them with mac and cheese on the side – a surefire hit at our house! For a lighter option, a simple green salad with a zesty vinaigrette works beautifully. Honestly, whatever you serve them with, these ribs are the star.
Top Tips for Perfecting Your Oven Barbecued Ribs
Over the years, I’ve picked up a few tricks that have made these oven barbecued ribs even better. For starters, the quality of your ribs matters. Look for racks that have good marbling (those little streaks of fat within the meat), as this will translate to a more tender and flavorful final product. When it comes to the dry rub, don’t be afraid to customize it! If you love more heat, add extra cayenne. If you’re a fan of smoky flavors, a pinch of chipotle powder can be amazing. The key to super tender ribs is the initial low and slow cooking in foil. Make sure it’s sealed TIGHTLY. I’ve learned the hard way that even a small leak can let precious moisture escape. For the barbecue sauce, patience is key. Letting it simmer allows the flavors to meld beautifully. If it gets too thick, a splash of water or apple cider vinegar can loosen it right up. And for that irresistible sticky glaze? Don’t rush the final bake. Keep an eye on them, but let them get that lovely caramelization. If your oven tends to burn things quickly, you can always lower the temperature slightly during that last phase or cover them loosely with foil if needed. I’ve also found that using a good quality ketchup as a base for the sauce makes a noticeable difference. As for ingredient swaps, if you’re out of molasses, dark corn syrup can work in a pinch, though molasses offers a richer flavor. And if liquid smoke isn’t your thing, you can achieve a great smoky flavor by adding a little extra smoked paprika or even a tiny amount of smoked salt.
Storing and Reheating Tips
One of the best things about this recipe is that leftovers (if you’re lucky enough to have any!) are just as delicious. Once the ribs have cooled completely, you can store them in an airtight container. At room temperature, they’re best consumed within two hours, just like any cooked meat. For longer storage, the refrigerator is your best friend. Wrapped tightly in plastic wrap or stored in a sealed container, they’ll keep well for about 3-4 days. The flavor often deepens overnight, making them even better the next day! If you want to freeze them, wrap them very well in plastic wrap, then in aluminum foil, or place them in a freezer-safe bag, squeezing out as much air as possible. They can last in the freezer for up to 2-3 months. To reheat, the best method for maintaining moisture is often in the oven. Wrap the ribs (chilled or thawed) loosely in foil and reheat at a moderate temperature, around 300-325°F (150-160°C), until warmed through. This usually takes about 15-20 minutes for chilled ribs and a bit longer for frozen ones. You can also gently warm them in a skillet over low heat, or even in the microwave if you’re in a real hurry, but be mindful of drying them out. If you’re reheating for a second saucing, you can brush them with a little extra sauce during the oven reheating process to revive that sticky glaze.
Frequently Asked Questions
Final Thoughts
I truly hope you give these oven barbecued ribs a try. They are, without a doubt, one of my most requested recipes, and for good reason. They deliver that irresistible smoky, sweet, tender, and tangy flavor that we all love about barbecue, but in a way that’s incredibly approachable for any home cook. The satisfaction of pulling these out of the oven, perfectly glazed and smelling absolutely divine, is hard to beat. They’re perfect for feeding a crowd, making a weeknight dinner feel extra special, or just satisfying a serious rib craving. If you loved this recipe, you might also enjoy my slow cooker pulled pork or my easy baked chicken wings – they offer similar comforting, crowd-pleasing flavors with minimal effort. I can’t wait to hear what you think! Please leave a comment below and let me know how your oven barbecued ribs turned out, and if you tried any fun variations. Happy cooking!
Oven Barbecued Ribs
Ingredients
Main Ingredients
- 2 pounds pork ribs spare ribs or baby back ribs
- 0.5 cup barbecue sauce your favorite kind
- 2 tablespoons brown sugar
- 1 teaspoon paprika
- 0.5 teaspoon garlic powder
- 0.25 teaspoon onion powder
- 0.125 teaspoon cayenne pepper optional, for a little heat
Instructions
Preparation Steps
- Preheat your oven to 300 degrees F (150 degrees C). Line a baking sheet with foil.
- In a small bowl, mix together the brown sugar, paprika, garlic powder, onion powder, and cayenne pepper (if using).
- Pat the ribs dry with paper towels. Rub the spice mixture all over the ribs.
- Place the seasoned ribs on the prepared baking sheet.
- Cover the ribs tightly with foil. Bake for 2 hours, or until the ribs are tender.
- Remove the foil. Brush the ribs generously with barbecue sauce.
- Return the ribs to the oven, uncovered, and bake for another 15-20 minutes, or until the sauce is caramelized and slightly sticky.
- Let the ribs rest for a few minutes before slicing and serving.


