There are some recipes that just stick with you, you know? The ones that become a staple in your kitchen, the ones you whip up when you need a guaranteed crowd-pleaser, or honestly, just when you need a little something sweet to brighten your day. For me, that’s this Oreo Delight. It’s not just a dessert; it’s pure comfort and joy in a pan. I remember the first time I made it, it was for a potluck, and I was honestly a little nervous. But everyone raved about it! It’s got that perfect balance of rich chocolate, creamy goodness, and that satisfying crunch from the Oreos. It’s like a no-bake cheesecake met a brownie and they had the most delicious love child. Honestly, it’s worlds away from your basic Chocolate Chip Cookie, offering a deeper, more decadent experience that feels truly special, yet it’s so ridiculously easy to make. If you’ve ever dreamt of a dessert that’s both sophisticated and ridiculously fun, you’ve found it. It’s my go-to when I need a quick fix that tastes like I spent hours in the kitchen.
Thank you for reading this post, don't forget to subscribe!
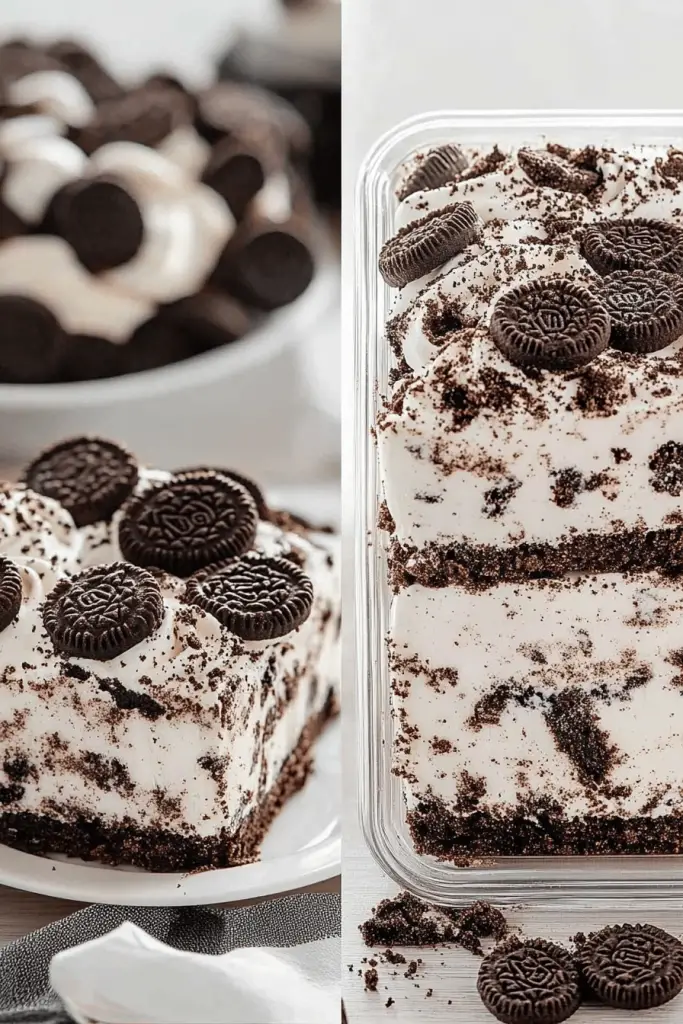
What is Oreo Delight?
So, what exactly IS this magical thing we call Oreo Delight? Think of it as a dreamy, layered dessert that’s all about celebrating the iconic Oreo cookie. It’s essentially a no-bake concoction that brings together a crumbly Oreo crust, a luscious, creamy filling, and a generous topping, often featuring more crushed Oreos. It’s not quite a cake, not quite a pie, and definitely not a cookie, but it’s everything you want in a rich dessert. The name itself just screams indulgence, doesn’t it? It’s a treat that appeals to cookie lovers everywhere, offering a delightful twist on a familiar favorite. It’s the kind of dessert that makes you close your eyes with the first bite and just savor every moment. It’s simple, yes, but the flavor combination is absolutely divine, creating a symphony of textures and tastes that will have you reaching for a second serving before you even realize it.
Why you’ll love this recipe?
There are so many reasons why this Oreo Delight has become a permanent fixture in my recipe rotation, and I just know you’re going to adore it too. First off, the flavor is just out of this world. You get that intense, rich chocolate flavor from the Oreos, perfectly balanced by the creamy, slightly tangy filling. It’s not overly sweet, which I really appreciate; it’s just right. Then there’s the simplicity – and believe me, this is a HUGE selling point for me. You don’t need to be a master baker to pull this off. It’s a no-bake wonder, meaning no oven required, which is a lifesaver during those hot summer months or when my oven is already occupied with something else. The ingredients are also super budget-friendly, which is always a plus. You likely have most of them in your pantry already! I also love its versatility. While it’s fantastic as is, you can totally play around with it. Add some chocolate chips to the filling, swap out the type of cookie, or even add a layer of Whipped Cream on top. It’s forgiving and adaptable. What I love most, though, is the sheer happiness it brings. It’s the kind of dessert that makes people smile. It’s nostalgic for some, a fun new discovery for others, and consistently delicious for everyone. Compared to other chocolate desserts, it offers a unique texture profile that’s incredibly satisfying. It’s a winner for parties, family gatherings, or just a quiet night in with a good book and a cup of tea. Seriously, you can’t go wrong with this one.
How do I make Oreos?
Quick Overview
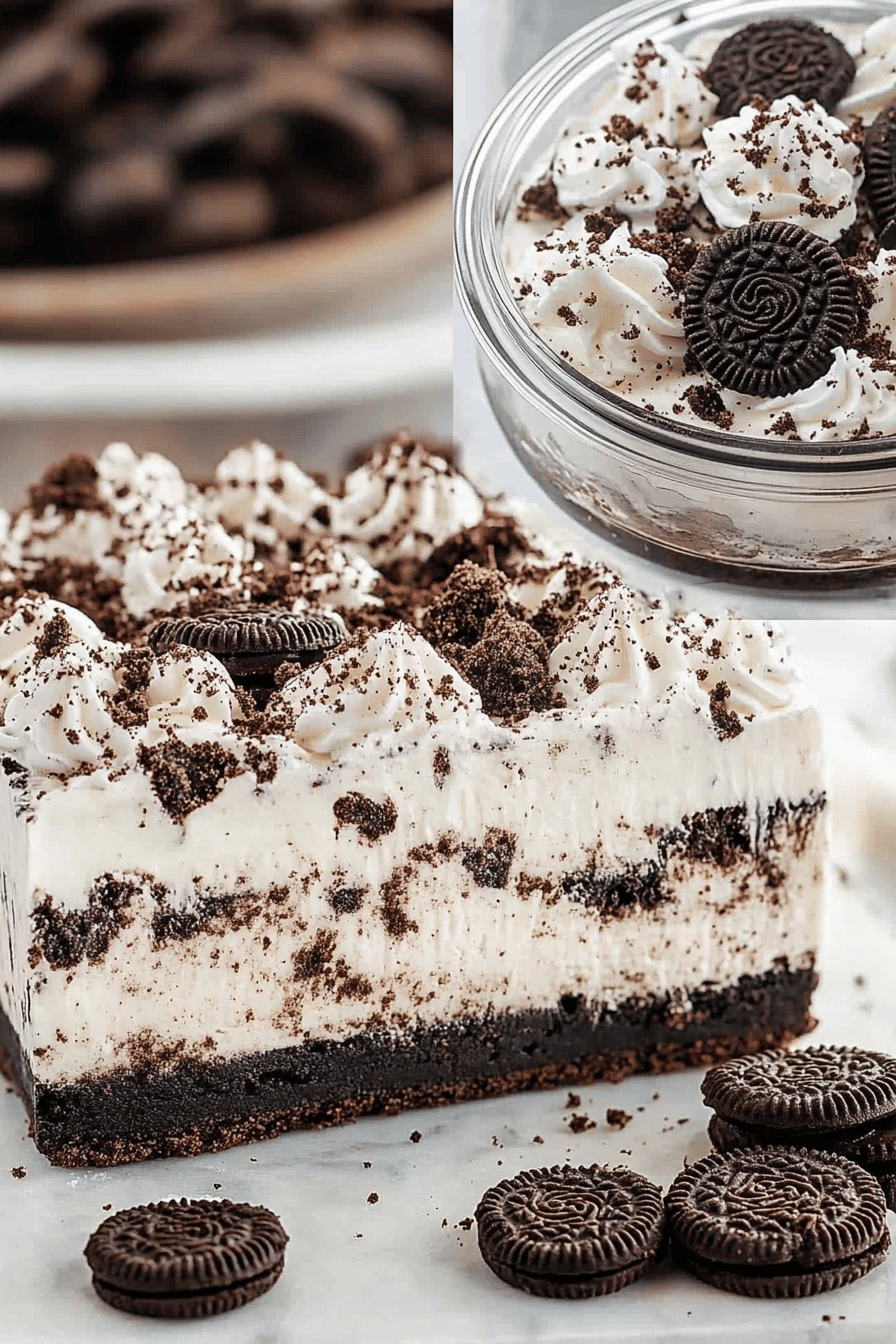
This Oreo Delight comes together in just a few simple steps, making it perfect for when you’re craving something decadent but short on time. We’ll start by creating a buttery Oreo crust, then whip up a luscious, creamy filling that’s unbelievably smooth. After layering everything together and chilling it to perfection, you’ll have an irresistible dessert that tastes like pure magic. The beauty of this recipe lies in its simplicity and minimal cleanup, making it a weeknight hero and a party showstopper all rolled into one. You’ll be amazed at how quickly you can go from basic ingredients to a show-stopping dessert.
Ingredients
For the Main Batter:
Oreo Cookie Crumbs: You’ll need about 2 sleeves of regular Oreo cookies, finely crushed. I like to use my food processor for this, but you can also place them in a zip-top bag and crush them with a rolling pin – it’s a great stress reliever, let me tell you! Make sure they’re really fine, almost like sand. The finer the crumbs, the better your crust will hold together.
Unsalted Butter, Melted: About 1/2 cup. This is what binds all those cookie crumbs together to form a solid base. Make sure it’s fully melted but not boiling hot when you mix it in.
For the Filling:
Cream Cheese, Softened: Two 8-ounce blocks. Make sure it’s softened to room temperature. This is crucial for a smooth, lump-free filling. Cold cream cheese is the enemy of creamy desserts! I usually take mine out of the fridge about an hour before I plan to start mixing.
Powdered Sugar: About 1 1/4 cups. Sifted, if you can, to avoid any lumps. This adds sweetness and helps create that wonderfully smooth texture.
“The Oreo Delight turned out amazing. My kids asked for seconds. Saving this one!”
Heavy Whipping Cream: 1 cup. This is what makes the filling light and airy. Make sure it’s very cold when you whip it. I sometimes pop my bowl and whisk attachment in the freezer for a few minutes beforehand.
Vanilla Extract: 1 teaspoon. A must for enhancing all those wonderful flavors.
Crushed Oreos: 1 cup. These are for mixing into the filling and for topping. Use your favorite kind – regular, double stuffed, or even the golden ones if you want a change of pace!
For the Glaze:
Semi-Sweet Chocolate Chips: 1 cup. You can use milk chocolate if you prefer a sweeter glaze, but semi-sweet gives a lovely rich contrast.
Butter: 2 tablespoons. This makes the glaze smooth and glossy, preventing it from hardening too much.
Step-by-Step Instructions
Step 1: Preheat & Prep Pan
First things first, grab an 8×8 inch or 9×9 inch baking dish. You don’t need to grease it because the crust will form a nice barrier, but you can if you’re extra cautious. Set it aside for now. We’re not using the oven for this recipe, so no preheating is needed!
Step 2: Mix Dry Ingredients
In a medium bowl, combine your finely crushed Oreo cookies. If you’re adding any extra mix-ins to the crust, like a tablespoon of cocoa powder for extra richness, stir them in now. Ensure everything is well combined before adding the wet ingredients.
Step 3: Mix Wet Ingredients
Pour the melted butter over the Oreo crumbs. Stir everything together until the crumbs are evenly moistened. It should resemble wet sand and hold its shape when you press it together.
Step 4: Combine
Press the buttered Oreo mixture firmly and evenly into the bottom of your prepared baking dish. Use the back of a spoon or a flat-bottomed glass to really pack it down. This is what creates your delicious crust, so make it firm!
Step 5: Prepare Filling
In a large bowl, beat the softened Cream Cheese with an electric mixer until it’s smooth and creamy. Gradually add the sifted powdered sugar and beat until well combined and there are no lumps. Be sure to scrape down the sides of the bowl as you go. Then, in a separate bowl, whip the cold heavy cream until stiff peaks form. Gently fold the whipped cream into the cream cheese mixture, along with the vanilla extract and 1 cup of crushed Oreos. Fold until just combined; you don’t want to overmix and deflate the whipped cream.
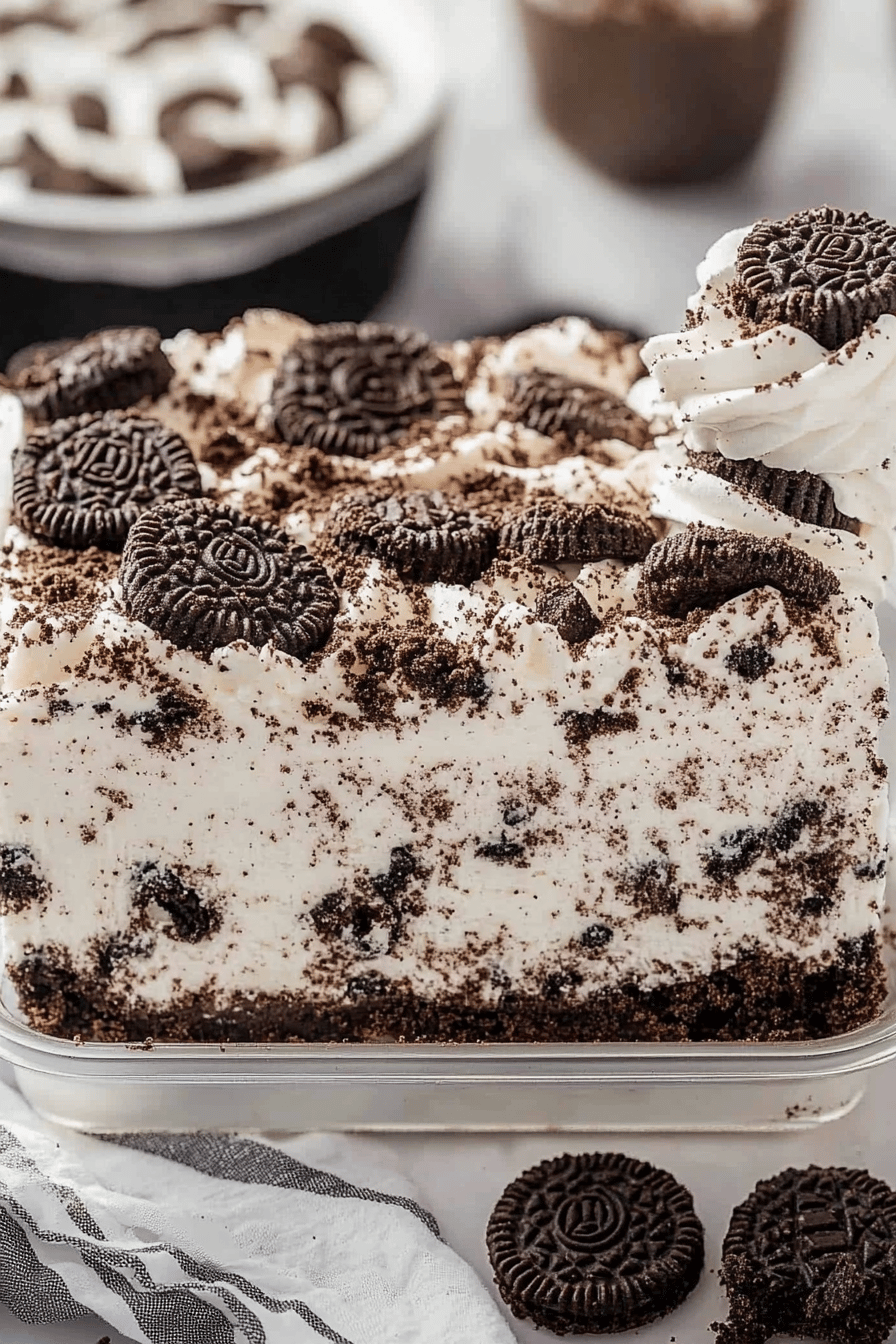
Step 6: Layer & Swirl
Spoon the creamy filling evenly over the Oreo crust. You can then sprinkle the remaining crushed Oreos over the top for that extra crunch and visual appeal. If you want to get fancy, you can swirl a little extra Cream Cheese mixture into the top layer of crushed Oreos for a marbled effect, but it’s totally optional!
“Packed with flavor and so simple. Exactly what I wanted from this Oreo Delight!”
Step 7: Bake
This recipe is no-bake! So, instead of baking, we’re going to chill it. Cover the dish tightly with plastic wrap and place it in the refrigerator for at least 4 hours, or preferably overnight, to allow it to set completely. This chilling time is crucial for the flavors to meld and the texture to firm up.
Step 8: Cool & Glaze
Once the Oreo Delight is fully chilled and firm, it’s time for the glaze. In a microwave-safe bowl, combine the semi-sweet chocolate chips and butter. Microwave in 30-second intervals, stirring between each, until the chocolate is smooth and melted. Be careful not to overheat it! Pour the melted chocolate glaze evenly over the chilled dessert. You can spread it with a spatula or just let it flow naturally. You can also sprinkle a few more crushed Oreos over the glaze while it’s still wet for an extra decorative touch.
Step 9: Slice & Serve
Let the glaze set for about 15-20 minutes at room temperature, or pop it back in the fridge for about 10 minutes if you’re in a hurry. Once the glaze is slightly firm, carefully slice the Oreo Delight into squares. I find using a sharp knife dipped in hot water and wiped dry between cuts gives you the cleanest slices. Serve chilled and get ready for the compliments!
What to Serve It With
This Oreo Delight is so wonderfully versatile; it truly shines in so many different settings. For a delightful breakfast treat, especially on a weekend, I love serving a small square with a strong cup of coffee. The richness of the dessert is balanced by the bitterness of the coffee, and it feels like a real indulgence. Presentation-wise, just a simple dusting of powdered sugar or a few fresh berries can elevate it. For a more elegant brunch spread, I’ll cut it into slightly smaller portions and arrange them on a tiered stand alongside other pastries and fruit salads. A sparkling mimosa or a light fruit juice pairs beautifully. As a dessert, well, it’s a star player! It’s perfect on its own, but if you want to go the extra mile, a dollop of fresh whipped cream or a scoop of vanilla bean Ice Cream is simply divine. For those cozy, relaxed moments – think movie nights or lazy Sunday afternoons – this is the ultimate comfort food. I’ll often cut generous slices and serve them with a glass of cold milk. My kids absolutely adore it this way; it’s their favorite “special treat.” I’ve also found that a sprinkle of sea salt on top of the chocolate glaze adds a wonderful flavor dimension that cuts through the sweetness, making it even more addictive.
Top Tips for Perfecting Your Oreo Delight
I’ve made this Oreo Delight more times than I can count, and over the years, I’ve picked up a few tricks that I think really make a difference. For the crust, make sure you’re crushing those Oreos really fine – almost to a powder. If there are large chunks, your crust might crumble when you slice it. Pressing that crust down firmly is key; don’t be shy! Use a flat-bottomed glass or the bottom of a measuring cup to get it really compact. When it comes to the Cream Cheese filling, the biggest tip is to ensure your cream cheese is truly at room temperature. If it’s cold, you’ll end up with a lumpy filling, no matter how hard you beat it. I usually let mine sit out for at least an hour, sometimes longer if it’s chilly in my kitchen. For the whipped cream, make sure it’s cold! I even chill my mixing bowl and whisk for about 15 minutes in the freezer before I start whipping. This helps it whip up faster and achieve those lovely stiff peaks. When folding the whipped cream into the cream cheese mixture, be gentle. You want to keep as much air in it as possible to keep the filling light and fluffy. Overmixing will deflate it, and you’ll end up with a denser dessert. For the swirling, if you decide to do it, don’t overdo it! A few gentle swirls are all you need to create a beautiful pattern without muddying the colors too much. As for the glaze, patience is a virtue. Let the chocolate chips melt slowly and stir gently to avoid seizing. If it seems a little too thick, you can add another tiny bit of butter or a teaspoon of milk to thin it out slightly. Conversely, if it’s too thin, add a few more chips. And a pro tip for slicing: always use a sharp knife that’s been warmed in hot water and wiped dry between cuts. It makes all the difference in getting clean, beautiful slices without smearing the chocolate. I’ve also experimented with different cookies – golden Oreos make a delicious, lighter version, and mint Oreos add a fun twist! Just remember that the filling will take on the flavor of whatever cookie you use.
Storing and Reheating Tips
This Oreo Delight is pretty forgiving when it comes to storage, which is another reason I love it so much! If you have any leftovers (which is rare in my house!), you can store them at room temperature for about 2 hours. After that, it’s best to refrigerate it to maintain freshness. I like to cover the dish tightly with plastic wrap to prevent it from drying out or absorbing any other odors from the fridge. Stored in the refrigerator, the Oreo Delight will stay delicious for about 3 to 4 days. The texture might change slightly over time, becoming a bit firmer, but it’s still wonderful. If you know you won’t be able to finish it within a few days, freezing is a great option. You can wrap the entire dish tightly in plastic wrap and then in aluminum foil, or cut it into individual portions and wrap each one separately. It freezes well for up to 2 months. When you’re ready to enjoy it from frozen, the best way to thaw it is in the refrigerator overnight. This allows it to defrost slowly and retain its best texture. If you’re in a hurry, you can let it thaw at room temperature for a couple of hours, but watch it closely. I generally recommend adding the glaze just before serving if you plan to freeze it, or re-glazing after thawing if the original glaze has become a bit dull. For reheating, I don’t typically reheat this dessert as it’s meant to be enjoyed chilled. However, if you prefer a slightly softer, warmer bite, you can gently warm individual slices in the microwave for about 10-15 seconds. Just be careful not to overheat it, as it can become too soft and melt unevenly.
Frequently Asked Questions
Final Thoughts
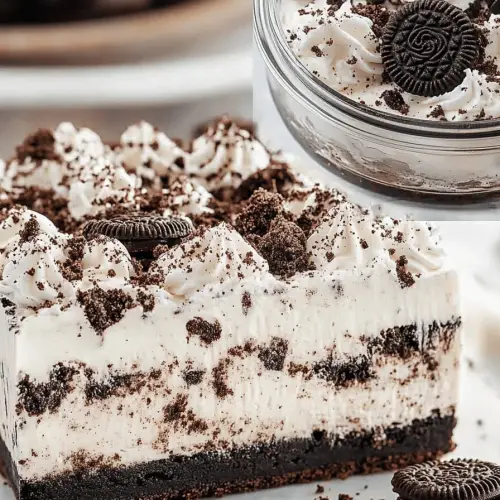
So there you have it – my absolutely favorite Oreo Delight Recipe! I truly hope you’ll give this a try. It’s one of those recipes that brings so much happiness with so little effort, and honestly, that’s the best kind of baking, right? It’s perfect for birthdays, holidays, or just a Tuesday when you need a little pick-me-up. The combination of the crunchy crust, the velvety smooth filling, and that luscious chocolate topping is just divine. If you’re a fan of rich, chocolatey, creamy desserts, you’re going to fall head over heels for this. It’s become a tradition in my home, and I have a feeling it might just become one in yours too. I’d absolutely love to hear how yours turns out, so please leave a comment below and let me know your thoughts, or share any fun variations you tried! Happy baking (or should I say, happy no-baking)!
Oreo Delight
Ingredients
Crust
- 24 cookies Oreo cookies finely crushed
- 0.5 cup butter melted
Filling
- 8 oz cream cheese softened
- 0.5 cup powdered sugar
- 1 teaspoon vanilla extract
- 8 oz whipped topping thawed
Toppings
- 12 cookies Oreo cookies chopped for garnish
Instructions
Preparation Steps
- In a medium bowl, combine the finely crushed Oreo cookies and melted butter. Press this mixture evenly into the bottom of a 9x13 inch baking dish.
- In a separate large bowl, beat the softened cream cheese until smooth. Gradually beat in the powdered sugar until well combined.
- Stir in the vanilla extract and then gently fold in the thawed whipped topping until just combined. Be careful not to overmix.
- Spread the cream cheese mixture evenly over the Oreo crust.
- Refrigerate for at least 2 hours to allow the dessert to set. Before serving, sprinkle the chopped Oreo cookies over the top.


