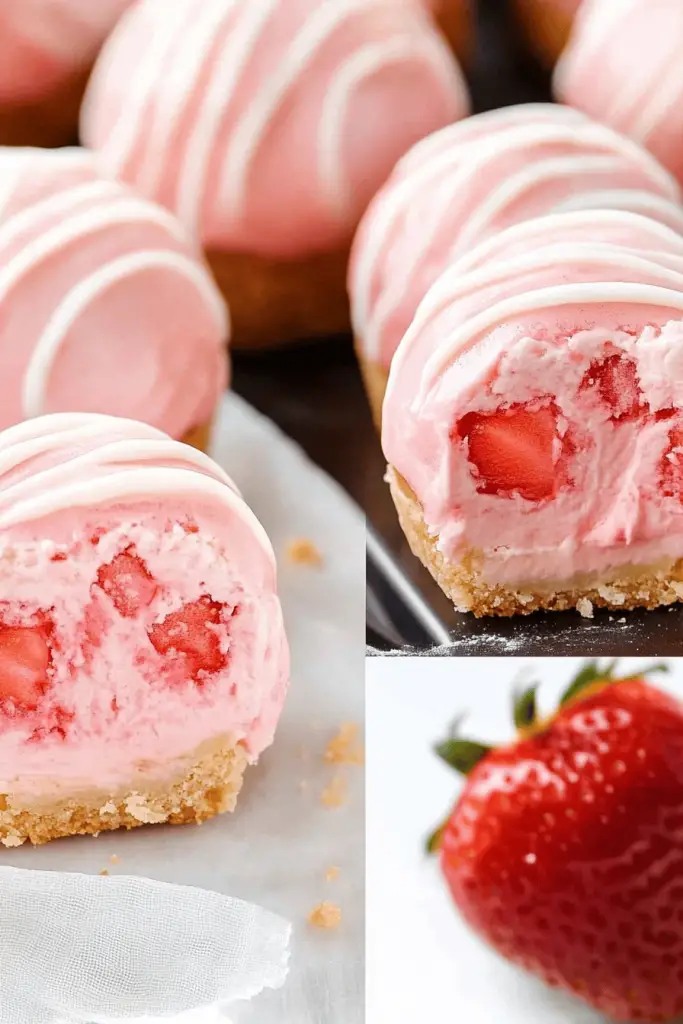
Oh, where do I even begin with these little squares of heaven? If you’re anything like me, the word “Oreo” and “cheesecake” together is practically a siren song. For years, I’ve been on the hunt for that perfect balance – the creamy tang of cheesecake married with the irresistible crunch and cocoa goodness of an Oreo cookie. And let me tell you, after countless batches, countless late-night cravings satisfied, and a whole lot of happy taste-testers (my family basically lives for these now), I’ve finally landed on a recipe that’s pure magic. These Oreo cheesecake bites are ridiculously easy, incredibly rich, and they disappear faster than you can say “more, please!” Forget fussing with a whole springform pan and a water bath; this is your shortcut to serious dessert bliss. They’re like the grown-up, slightly more sophisticated cousin of a Chocolate Chip Cookie, but with all the comforting familiarity of those beloved black and white cookies we all know and love.
Thank you for reading this post, don't forget to subscribe!What are Oreo Cheesecake Bites?
So, what exactly are these delightful little squares? Think of them as the ultimate shortcut to a decadent dessert experience. They’re essentially a rich, creamy, No-Bake Cheesecake filling swirled into a dark, fudgy, almost brownie-like base, all studded with generous chunks of crushed Oreo cookies. The “bites” part is key because they’re baked in a standard rectangular pan and then cut into perfectly portioned squares, making them ideal for sharing (or not sharing, I won’t judge!). It’s like taking all the best parts of a classic New York cheesecake and a chocolatey Oreo cookie, squishing them together into a portable, intensely satisfying treat. They’re not fussy, they don’t require any fancy techniques, and the name itself just screams deliciousness, doesn’t it? It’s the kind of dessert that makes people go, “Wow, you made this?!” even though it was surprisingly simple.
Why you’ll love this recipe?
Okay, so why should you drop everything and make these Oreo cheesecake bites right now? Let me count the ways! First and foremost, the FLAVOR. Oh. My. Goodness. You get that luxurious, smooth, tangy Cream Cheese filling that just melts in your mouth, perfectly contrasted by the deep, rich, chocolatey base that has just the right amount of chew. And then there are the Oreos – they’re not just sprinkled on top; they’re baked right into the batter, giving you little pockets of crunchy, chocolatey surprise in every single bite. It’s a flavor explosion, seriously!
Then there’s the SIMPLICITY. I’ve made elaborate cheesecakes before, and while they’re beautiful, they can be a real production. These bites? They are a lifesaver on busy nights when you need a serious sweet fix without spending hours in the kitchen. You can whip them up in no time, and the fact that they’re baked in a simple rectangular pan means less cleanup and less fuss. It’s the kind of recipe I turn to when company’s coming last minute or when that 10 pm craving hits hard and I don’t want to commit to a whole cake.
And let’s talk COST-EFFICIENCY. The ingredients are all pretty standard pantry staples, and even with the addition of cream cheese and Oreos, it’s far more budget-friendly than buying a fancy dessert from a bakery. Plus, you get so many delicious portions from One Pan!
But what I truly adore about these Oreo cheesecake bites is their VERSATILITY. They’re fantastic on their own, of course. But they’re also incredible served slightly warm with a scoop of vanilla ice cream, or even drizzled with a little extra chocolate ganache if you’re feeling extra fancy. They’re perfect for potlucks because they’re easy to transport and serve, and they’re always a massive hit with kids and adults alike. Honestly, if you love my classic Chocolate Chip Cookies or my ridiculously easy brownies, you are going to fall head over heels for these. They hit all the right notes: rich, chocolatey, creamy, and utterly satisfying. They’re proof that you don’t need complicated steps to achieve dessert perfection.
How do I make Oreo Cheesecake Bites?
Quick Overview
Making these Oreo Cheesecake Bites is wonderfully straightforward. You’ll start by creating a rich, chocolatey base by mixing some simple pantry ingredients, then you’ll whip up a smooth, creamy cheesecake filling. The magic happens when you swirl the two together, breaking up some Oreos and folding them in, before baking them to golden perfection. The best part? No water bath, no tricky crusts, just pure, unadulterated deliciousness baked into a pan and cut into bite-sized pieces. It’s designed to be easy, so even if you’re new to baking, you can absolutely nail this!
Ingredients
For the Chocolatey Base: For the Chocolatey Base: For the Chocolatey Base: For the Chocolatey Base: For the Chocolatey Base: For
We’re keeping this super simple, just like a good Brownie Batter. You’ll need all-purpose flour – just a cup and a half will do the trick. Make sure it’s measured correctly; too much and it can get a bit dense. Then, for that deep chocolatey flavor, we’re using unsweetened cocoa powder. About three-quarters of a cup should give you that rich hue and taste. Granulated sugar is next, about a cup and a half to sweeten things up beautifully. A teaspoon of baking powder will give it just a little lift, and half a teaspoon of salt is crucial for balancing all those sweet and chocolatey notes. For the wet ingredients, you’ll need two large eggs – make sure they’re at room temperature; it helps them incorporate better. Then, about half a cup of melted unsalted butter – I like using unsalted so I have more control over the saltiness. And finally, a teaspoon of vanilla extract to really round out the flavors.
For the Creamy Cheesecake Filling:
This is where the cheesecake magic happens! You’ll need two (8-ounce) blocks of Cream Cheese. Crucially, make sure these are softened to room temperature. This is non-negotiable for a smooth, lump-free filling. If they’re cold, you’ll end up with little pockets of cream cheese, and nobody wants that! Next, we’ll add about three-quarters of a cup of granulated sugar. Then, for that classic cheesecake tang, a tablespoon of lemon juice works wonders. And to bind it all together and make it super creamy, one large egg, again, at room temperature. A teaspoon of vanilla extract here too, because vanilla just makes everything better.
For the Oreo Crunch:
And of course, the stars of the show – Oreos! You’ll need about 15-20 Oreo cookies. You can use classic ones, or if you’re feeling adventurous, try double-stuffed or even mint Oreos for a fun twist! We’ll crush about half of them into coarse crumbs and chop the other half into bigger chunks. This gives us a nice variety of textures.
“The Oreo Cheesecake Bites How To turned out amazing. My kids asked for seconds. Saving this one!”
Step-by-Step Instructions
Step 1: Preheat & Prep Pan
First things first, let’s get our oven preheated to 350 degrees Fahrenheit (175 degrees Celsius). While that’s warming up, grab an 8×8 inch baking pan. I like to line it with parchment paper, leaving a little overhang on the sides. This makes lifting the baked bars out so much easier later on. Just press the parchment down into the corners and up the sides. If you don’t have parchment, a good greasing and flouring of the pan will work too, but parchment is my secret weapon for easy removal!
Step 2: Mix Dry Ingredients
In a medium-sized mixing bowl, whisk together the flour, cocoa powder, sugar, baking powder, and salt. Give it a good whisk until everything is well combined and there are no big lumps of cocoa. This ensures your base bakes up evenly and you don’t get any surprises with pockets of dry ingredients. I always give it a little extra whisking to make sure it’s super airy.
Step 3: Mix Wet Ingredients
In a separate, slightly larger bowl, whisk together the two eggs, melted butter, and vanilla extract. Whisk until it’s all nicely combined and smooth. This is going to form the luscious base of our bites.
Step 4: Combine
Now, pour the wet ingredients into the bowl with the dry ingredients. Using a spatula or a wooden spoon, mix just until everything is *barely* combined. Seriously, don’t overmix! A few streaks of flour are okay. Overmixing can make your base tough, and we want it to be tender and fudgy. We’re just bringing it together, not beating it into submission.
Step 5: Prepare Filling
In another bowl, beat the softened Cream Cheese with an electric mixer (or a whisk and some serious arm power) until it’s completely smooth and creamy. Add the granulated sugar and lemon juice, and beat again until well combined. Then, add the egg and vanilla extract and beat on low speed until just combined. Again, be careful not to overmix the cheesecake filling once the egg is in; you don’t want to incorporate too much air, which can lead to cracking.
Step 6: Layer & Swirl
Spoon about two-thirds of the chocolatey base batter into your prepared pan and spread it evenly. It might be a little thick, that’s okay. Dollop spoonfuls of the cheesecake filling over the base batter. Now, take a knife or a skewer and gently swirl the cheesecake filling into the chocolate base. Don’t over-swirl; you want distinct ribbons of both. Sprinkle about half of your crushed Oreos and chopped chunks over the top of the swirled batter. Then, carefully spoon the remaining chocolatey base batter over the cheesecake layer, trying to cover as much of the cheesecake as possible. Gently swirl this top layer a bit, and sprinkle the remaining Oreos over the very top. Don’t worry about perfection here; a little unevenness adds to the rustic charm!
Step 7: Bake
Place the pan in the preheated oven and bake for about 30-35 minutes. You’re looking for the edges to be set and slightly puffed, and the center to be mostly set but still have a very slight wobble – like a very, very firm Jell-O. A toothpick inserted near the center should come out with moist crumbs attached, not wet batter. Don’t overbake, or they’ll become dry and crumbly!
Step 8: Cool & Glaze
Once baked, remove the pan from the oven and let it cool completely on a wire rack. This is crucial! You want it to cool down for at least a couple of hours, or even better, pop it in the refrigerator for about an hour to firm up completely. This makes slicing so much cleaner. Once cooled, you can make a Simple Chocolate glaze if you like: melt about 1/2 cup of chocolate chips with 1 tablespoon of butter or coconut oil until smooth, then drizzle it over the top. Let the glaze set before slicing.
Step 9: Slice & Serve
Once completely cooled and the glaze (if using) has set, use the parchment paper overhang to lift the entire block out of the pan. Place it on a cutting board and slice it into 16 squares. For the cleanest cuts, use a sharp knife and wipe it clean between each cut. Serve these delicious Oreo cheesecake bites at room temperature or slightly chilled. They’re absolutely divine!
What to Serve It With
These Oreo cheesecake bites are pretty much a showstopper on their own, but if you’re looking to elevate the experience or pair them with something, I’ve got you covered. For a simple, elegant breakfast treat alongside your morning coffee, these are fantastic. The rich chocolate and cream cheese are a lovely contrast to a bold brew. They’re also surprisingly good for a fancy brunch! Imagine them nestled on a platter alongside fresh berries and perhaps some mini croissants. For dessert, they really shine. A scoop of good quality vanilla bean ice cream is a classic pairing that I never tire of. Or, if you want to go all out, a drizzle of raspberry coulis can add a beautiful tartness that cuts through the richness. And for those cozy snack moments? They’re perfect just as they are, maybe with a tall glass of cold milk – pure childhood nostalgia with a grown-up twist. My kids always ask for these with their afternoon snack, and honestly, I usually oblige!
Top Tips for Perfecting Your Oreo Cheesecake Bites
I’ve made these so many times, I’ve picked up a few tricks that I think really make a difference. First, **for the chocolatey base**, don’t be tempted to overmix once you add the wet ingredients to the dry. It’s that fine line between just combined and tough batter, and trust me, I’ve been on the wrong side of that line more than once! Stop mixing as soon as you don’t see big streaks of dry flour. For the **cheesecake filling**, softening your cream cheese is *key*. I usually leave it on the counter for a couple of hours, or if I’m in a real pinch, I’ll cut it into cubes and microwave it on 50% power for about 20-30 second intervals, stirring in between, until it’s just softened, not melted. Overmixing the filling after adding the egg can also cause cracking, so keep it gentle.
When it comes to the **Oreo crunch**, I like to get a mix of finely crushed Oreos and slightly larger chunks. This gives you both a delightful texture throughout and those satisfying cookie surprises. I usually pulse them in a food processor or put them in a zip-top bag and whack them with a rolling pin – it’s a great stress reliever! For **swirling**, don’t go crazy! You want distinct ribbons of chocolate and cream cheese, not a muddy mess. A few gentle passes with a knife or skewer is all you need. It’s more about visual appeal and taste contrast.
During **baking**, ovens can be tricky. If you know your oven runs hot, you might want to reduce the temperature by 10-15 degrees Fahrenheit. The doneness test is really important: you want the edges set and the center to have just a slight jiggle. It will continue to set up as it cools. My biggest **lesson learned**? Patience with the cooling process! Resist the urge to cut into them when they’re still warm; they’ll be gooey and fall apart. Letting them cool completely, and even chilling them briefly, makes for perfectly clean slices and a much better texture. If you don’t have time for the chill, just be extra careful when slicing. Finally, for the **glaze**, if it’s too thick, stir in a tiny bit of milk or water (a teaspoon at a time) until it’s pourable. If it’s too thin, add a few more chocolate chips or a touch more cocoa powder.
“I don’t know if I’ve ever eaten a better Oreo Cheesecake Bites How To. The rub alone is wonderful, but the sauce??? Over the top!”
Storing and Reheating Tips
One of the best things about these Oreo cheesecake bites is how well they store. Once they’ve completely cooled and you’ve sliced them, you can keep them at room temperature, covered tightly with plastic wrap or in an airtight container, for up to 2 days. I usually do this if I know they’ll be gobbled up quickly. For longer storage, the refrigerator is your best friend. Wrap them well in plastic wrap, then in foil, or place them in an airtight container. They’ll stay delicious in the fridge for up to 5 days. Honestly, the flavor often gets even better on the second day as the flavors meld!
If you want to keep them for even longer, these freeze beautifully! The best way to do this is to freeze the entire uncut block (after it’s completely cooled and set, and the glaze is firm) for about an hour until it’s firm enough to slice. Then, slice them into the individual bites. Wrap each bite tightly in plastic wrap, then in aluminum foil, or place them in a freezer-safe bag or container. They’ll keep well in the freezer for up to 2-3 months. To thaw, transfer the frozen bites to the refrigerator overnight. You can also thaw them at room temperature, but be mindful of condensation if it’s warm out.
A note on the glaze: if you plan on freezing them, I recommend glazing them *after* they’ve thawed. Glazes can sometimes become a little soft or sticky in the freezer and then during thawing. So, if freezing, store the bites plain and then drizzle with glaze once they’re thawed and ready to be served. If you’re just refrigerating them, the glaze usually holds up perfectly fine.
Frequently Asked Questions
Final Thoughts
Honestly, these Oreo cheesecake bites are a recipe that just brings me so much joy. They’re the perfect blend of classic flavors, made ridiculously easy for busy home bakers. They’re that special treat that feels indulgent but doesn’t require a whole afternoon of fussing. Whether you’re looking for an easy dessert for a party, a sweet surprise for your family, or just a way to satisfy a serious craving, these bites deliver every single time. I love them because they’re so adaptable – you can play with different Oreo flavors or even add a swirl of peanut butter to the filling. They’re a testament to how simple ingredients and a little bit of love can create something truly magical.
If you’re a fan of chocolate and cheesecake, I really hope you’ll give these Oreo cheesecake bites a try. They’re seriously addictive and have become a staple in my dessert rotation. For those who loved this recipe, you might also enjoy my incredibly fudgy brownies or my no-bake chocolate pie – they’re all in the same spirit of deliciousness made easy!
I can’t wait to hear what you think! Please leave a comment below to share your experience, any variations you tried, or how quickly they disappeared from your kitchen! And if you share a photo on social media, be sure to tag me!
Happy baking!
Oreo cheesecake bites
Ingredients
Main Ingredients
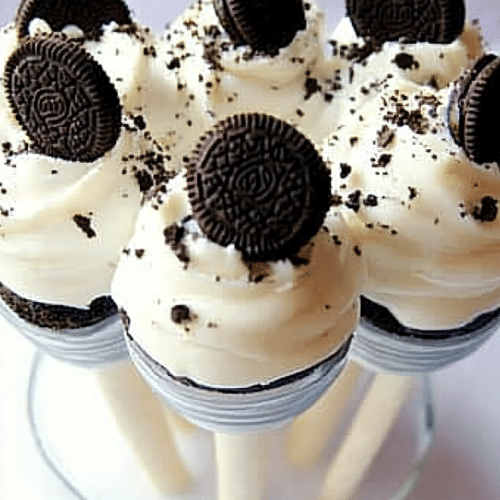
- 15.3 ounces Oreo cookies 1 package, divided
- 8 ounces cream cheese 1 block, softened
- 12 ounces white chocolate or chocolate melting wafers
- 1 tablespoon vegetable oil optional, for thinning chocolate
Instructions
Preparation Steps
- Crush about 5-6 Oreo cookies into fine crumbs and set aside for topping. Place the remaining Oreo cookies in a food processor and pulse until finely crushed.
- Add the softened cream cheese to the food processor with the crushed Oreos. Process until the mixture is well combined and smooth, scraping down the sides as needed.
- Transfer the mixture to a bowl, cover, and refrigerate for at least 1 hour, or until firm enough to roll.
- Once chilled, scoop the mixture by spoonfuls and roll into 1-inch balls. Place them on a parchment-lined baking sheet. Return the balls to the refrigerator for 20-30 minutes to firm up further.
- Melt the white chocolate in a microwave-safe bowl in 30-second intervals, stirring after each, until smooth. If desired, stir in 1 tablespoon of vegetable oil to thin the chocolate for easier dipping.
- Using a fork or a dipping tool, dip each chilled Oreo cheesecake bite into the melted chocolate, allowing any excess to drip off. Immediately place back on the parchment-lined baking sheet.
- While the chocolate is still wet, sprinkle each bite with some of the reserved Oreo cookie crumbs.
- Refrigerate the cheesecake bites for another 30 minutes, or until the chocolate coating is completely set. Store in an airtight container in the refrigerator.


