Oh, you guys. I’ve been meaning to share this recipe for ages, and I’m so excited that today is finally the day! If you’re anything like me, there are those days (or, let’s be honest, weeks) where the thought of preheating an oven and slaving over a hot stove just feels impossible. That’s where these no-bake cookies come in. They’re my absolute go-to when a sweet craving hits HARD, or when I need a little treat for the kids’ lunchboxes without adding an extra hour to my already packed day. They remind me so much of my grandma’s kitchen – that wonderful mix of chocolate, peanut butter, and a hint of vanilla that just screams comfort. They’re like little bites of happy memory, and honestly, they’re probably even better than those classic chocolate-oatmeal cookies you find everywhere because they’re just SO much easier. No baking, no fuss, just pure, unadulterated deliciousness.
Thank you for reading this post, don't forget to subscribe!What are no-bake cookies?
So, what exactly *are* these magical little treats? Think of them as the ultimate shortcut to cookie heaven. They’re essentially a sweet mixture, usually involving oats, cocoa, peanut butter, and sugar, cooked briefly on the stovetop and then dropped onto parchment paper to set. The “no-bake” part means you bypass the oven entirely! It’s pretty genius when you think about it. The magic happens because of the way the sugar and liquid ingredients cook down, creating a syrup that hardens as it cools, binding everything together into a chewy, satisfying cookie. They’re essentially a cooked candy that happens to taste exactly like your favorite childhood cookie, but without all the baking drama. It’s a concept that’s been around forever, but my version is the one that always gets rave reviews at parties and family gatherings.
Why you’ll love this recipe?
Honestly, where do I even begin with why this recipe is a keeper? First off, the flavor is just out of this world. You get that rich, decadent chocolate flavor, the creamy, nutty goodness of peanut butter, and a subtle sweetness that’s just perfect. It’s a classic combo for a reason! But what I truly adore about these no-bake cookies is how incredibly simple they are. Seriously, I can whip up a batch in about 15 minutes from start to finish, and that includes the cooling time! It’s a lifesaver on busy nights when everyone’s asking “What’s for dessert?” and I haven’t had a second to plan. Plus, they’re surprisingly budget-friendly. You probably already have most of the ingredients in your pantry, and if not, they’re super affordable at any grocery store. And the versatility! While I love them just as they are, I’ve experimented with adding a dash of espresso powder to deepen the chocolate flavor, or even a sprinkle of sea salt on top. They’re perfect for a quick snack, a party platter, or just when you need a little pick-me-up. What I love most about this recipe is that it’s foolproof. Even if you’re new to baking (or, you know, cooking in general!), you can totally nail this. It’s one of those recipes that makes you feel like a kitchen superstar without breaking a sweat.
How do I make no-bake cookies?
Quick Overview
This is seriously as simple as it gets. You’ll bring a few core ingredients to a boil in a saucepan, let them bubble for a minute or two, then stir in the oats and peanut butter off the heat. A quick mix, and then you’re just dropping spoonfuls onto parchment paper to set. That’s it! The stovetop cooking creates a gooey, delicious base that hardens beautifully, giving you that perfect chewy texture without ever needing an oven. It’s a fast, fuss-free way to get your cookie fix!
Ingredients
For the
You’ll need 2 cups of granulated sugar. This is the backbone of our sweet, syrupy goodness. Make sure it’s regular granulated sugar; other types can affect the texture. Then, we’ve got 1/2 cup of unsalted butter. I always go for unsalted so I can control the saltiness myself. A 1/4 cup of milk – any kind will work, from whole milk for richness to almond milk for a slightly different flavor profile (I’ve tested it!). And for that classic, unmistakable flavor, 2 tablespoons of unsweetened cocoa powder. Make sure it’s unsweetened, not hot chocolate mix, or your cookies will be way too sweet and lack that deep chocolate flavor. A pinch of salt (about 1/4 teaspoon) to balance out the sweetness and enhance all those lovely flavors.
For the Filling:
This is where the magic really happens for texture and depth. You’ll need 1/2 cup of creamy peanut butter. I personally prefer creamy because it blends in so smoothly, but crunchy works too if you like a bit more texture! 1 teaspoon of vanilla extract – this really elevates all the other flavors. And the star of the show for that classic chewy texture: 3 cups of rolled oats. Old-fashioned rolled oats are best here; instant oats can turn them a bit mushy, which isn’t what we want. Make sure they’re rolled oats, not steel-cut or quick-cooking.
For the Glaze:
Actually, these no-bake cookies don’t require a separate glaze! The mixture itself creates a wonderfully sweet and chewy “cookie” that’s perfect on its own. No extra steps needed!
“The no bake cookies turned out amazing. My kids asked for seconds. Saving this one!”
Step-by-Step Instructions
Step 1: Preheat & Prep Pan
Alright, the very first thing we need to do is get our “baking” station ready, even though we’re not actually baking! Grab a sheet of parchment paper and line a baking sheet or a large platter with it. This is super important because these cookies can get a little sticky as they cool, and the parchment paper is your best friend for easy cleanup and to prevent them from sticking. You don’t need to preheat an oven at all, which is the beauty of this recipe! Just have your parchment-lined surface ready to go.
Step 2: Mix Dry Ingredients
In a medium-sized saucepan (one that’s not too small, so you have room to stir!), combine the granulated sugar, unsalted butter, milk, and cocoa powder. Add that pinch of salt now too. Give it a good whisk to combine everything. It will look a bit like a watery chocolate mixture, and that’s exactly what we want at this stage. Make sure there are no big lumps of cocoa powder hiding in there. This ensures a smooth, consistent texture in your final cookies.
Step 3: Mix Wet Ingredients
Now, place the saucepan over medium heat on your stovetop. Bring the mixture to a rolling boil, stirring occasionally. Once it’s boiling, you need to let it boil for exactly one minute. This is a crucial step for the cookies to set properly! Don’t let it boil for much longer, or they can get too hard; too short, and they might not set at all. After that one minute, carefully remove the saucepan from the heat. Now, stir in the creamy peanut butter and the vanilla extract. Stir until the peanut butter is completely melted and everything is smoothly incorporated. It should be a gorgeous, glossy, chocolatey mixture.
Step 4: Combine
Once your peanut butter and vanilla are all melded into that chocolatey goodness, it’s time to add the oats. Pour the 3 cups of rolled oats directly into the saucepan. Using a sturdy spoon or a spatula, stir everything together really well. You want to make sure every single oat is coated in that delicious chocolate-peanut butter mixture. This is where you can really feel the mixture starting to thicken up. Keep stirring until it’s all combined and looks cohesive. Don’t overmix to the point of mushing the oats, but ensure there are no dry spots left.
Step 5: Prepare Filling
In this particular no-bake cookie recipe, the “filling” is actually incorporated directly into the main batter in Step 4 with the oats and peanut butter. The combination of the cooked sugar mixture and the peanut butter creates that perfectly chewy texture and rich flavor that people love in these no-bake cookies. So, there’s no separate filling to prepare!
Step 6: Layer & Swirl
This is the fun part where we make our cookies! You’ll want to work relatively quickly here because the mixture starts to set as it cools. Using two spoons (one to scoop, one to help push it off), drop rounded tablespoons of the cookie mixture onto your prepared parchment paper. You can make them as big or as small as you like, but standard tablespoon size is usually perfect. Space them out a little because they might spread just slightly. For a nice swirl effect, I sometimes gently press the top of each cookie with the back of a spoon dipped in a little water (to prevent sticking), but it’s totally optional. The natural texture from the oats and peanut butter is beautiful on its own!
Step 7: Bake
Remember, we’re making *no-bake* cookies, so there’s no baking involved! This is the best part – no oven required. Once you’ve dropped all your cookies onto the parchment paper, you just need to let them sit and cool. This is where they firm up and get that perfect chewy consistency. You can let them cool at room temperature, which usually takes about 30-60 minutes, depending on how warm your kitchen is. If you’re impatient (like me!), you can pop them into the refrigerator for about 15-20 minutes to speed things up. Just make sure they are completely set before you try to move them.
Step 8: Cool & Glaze
As mentioned in the previous step, these cookies don’t require a glaze. The chocolate-peanut butter mixture itself is what makes them so delicious and gives them their signature look. Once the cookies have cooled and firmed up to your liking (either at room temperature or in the fridge), they are ready to go! The texture will be chewy and slightly fudgy in the center, with a bit of firmness on the outside. They’re perfect just as they are.
“Made the no bake cookies tonight and wow — perfect weeknight dinner. Will definitely make again!”
Step 9: Slice & Serve
Once your no-bake cookies are fully cooled and set, they’re ready to be devoured! You can gently peel them off the parchment paper. They’re best served at room temperature for that ideal chewy texture. If they’ve been in the fridge, let them sit out for about 10 minutes to soften up a bit. They’re perfect on their own, but you can also serve them with a glass of cold milk, a cup of coffee, or even a scoop of vanilla ice cream for an extra special treat. They look so inviting with their rustic, homemade charm. Enjoy!
What to Serve It With
These no-bake cookies are wonderfully versatile and pair perfectly with a variety of beverages and occasions. For a simple breakfast treat or a quick morning pick-me-up, they’re fantastic with a hot cup of coffee or a tall glass of cold milk. Their sweetness is just enough to cut through the richness of coffee. For a more elegant brunch spread, I love serving them alongside fresh fruit salads or mini quiches. Their rich chocolatey flavor adds a delightful contrast. When I’m serving them as a dessert, they’re an absolute hit after a hearty meal. They’re especially good after a chocolate cake (yes, more chocolate!) or a fruit-based pie. For a cozy snack time, they are simply unbeatable. I often serve them with warm apple cider in the fall or a soothing cup of herbal tea. My kids absolutely love them with hot chocolate, and honestly, who can blame them? They’re also a crowd-pleaser at parties and potlucks; I’ve found they disappear in minutes!
Top Tips for Perfecting Your No-Bake Cookies
Over the years of making these no-bake cookies countless times, I’ve picked up a few tricks that make them even better. First, when it comes to the oats, make sure you’re using old-fashioned rolled oats. They have the best texture – chewy and substantial. Quick oats can get a little mushy, and steel-cut oats won’t soften enough. For mixing, once you add the oats, stir just until they’re coated. Overmixing can make the cookies tough. The key to getting that perfect set is the boil time in Step 3. One full minute of boiling, no more, no less. If you boil it too long, they’ll be hard and brittle; too short, and they’ll be too soft and sticky. I learned this the hard way after a batch turned into brittle candy! For ingredient swaps, while peanut butter is classic, almond butter or sunflower seed butter work well too, though they might alter the flavor profile slightly. If you want a richer chocolate flavor, a teaspoon of instant espresso powder added with the cocoa can really deepen the taste without making it taste like coffee. When dropping the cookies, a cookie scoop can help you make them more uniform in size, which is nice for presentation. If your mixture seems too thick or too thin when you add the oats, don’t panic! If it’s too thick, add a tablespoon more milk; if it’s too thin, add a tablespoon more oats. Just remember these are rustic cookies, so perfection isn’t the goal; deliciousness is!
Storing and Reheating Tips
One of the best things about these no-bake cookies is how well they store. If you’ve managed to have any leftovers (which is rare in my house!), you can keep them at room temperature in an airtight container for up to 3-4 days. I usually put a piece of wax paper between layers to prevent them from sticking together. For longer storage, or if your kitchen is particularly warm, they’re perfectly happy in the refrigerator for up to a week. They’ll be a bit firmer when chilled, which some people actually prefer! Just let them sit out for about 10-15 minutes before serving to soften up. If you want to freeze them for even longer enjoyment, wrap them individually in plastic wrap, then place them in a freezer-safe bag or container. They’ll stay delicious for up to 2-3 months. To thaw, simply transfer them from the freezer to the refrigerator overnight, or let them come to room temperature on the counter for a couple of hours. And remember, no glaze to worry about – these are ready to enjoy straight from storage!
Frequently Asked Questions
Final Thoughts
So there you have it – my absolute favorite no-bake cookies! They’re proof that you don’t need a fancy oven or a ton of time to create something truly delicious and satisfying. They’re perfect for those moments when you need a quick sweet fix, a treat for the kids’ bake sale, or just something comforting to share. The combination of chocolate and peanut butter is just timeless, and the chewy texture is so addictive. I really hope you give these a try. They’re a recipe that brings joy to my kitchen, and I have a feeling they’ll bring joy to yours too! If you love this recipe, you might also enjoy my Easy No-Bake Brownies or my Fudgy Chocolate Chip Cookie Bars for more quick and delicious treats. I can’t wait to hear what you think! Let me know in the comments below how yours turn out, and if you have any fun variations you’ve tried!
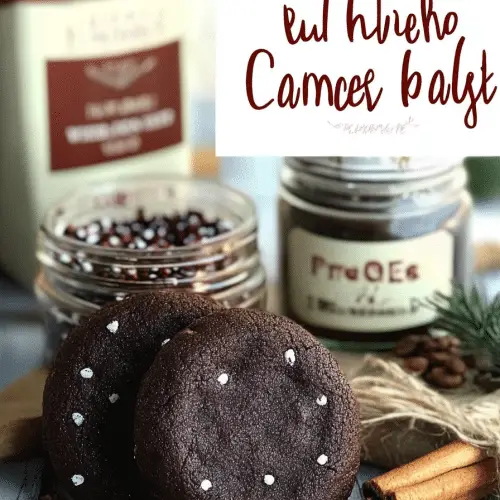
no bake cookies
Ingredients
Main Ingredients
- 2 cups granulated sugar
- 0.5 cup butter
- 0.25 cup milk
- 1 teaspoon vanilla extract
- 2 tablespoons unsweetened cocoa powder
- 3 cups rolled oats
- 0.5 cup peanut butter
Instructions
Preparation Steps
- In a saucepan, combine sugar, butter, milk, and cocoa powder. Bring to a boil over medium heat, stirring constantly.
- Boil for 1 minute, then remove from heat. Stir in vanilla extract and peanut butter until smooth.
- Add the rolled oats and mix well to coat.
- Drop spoonfuls of the mixture onto waxed paper to cool and set.


