
Oh, hello there! Come on in, grab a mug. I’ve been dying to share this with you. You know how sometimes you get that undeniable craving for something specific? Like, a really good, chocolatey, coconutty treat? That’s exactly what happens to me, and for the longest time, my go-to was always buying those little Mounds bars from the candy aisle. But then, one day, I thought, “Why not try to recreate that magic at home?” And let me tell you, this Mounds bar recipe? It’s a game-changer. It’s got all that rich, dark chocolate and that sweet, chewy coconut goodness you love, but with that extra special homemade touch. Honestly, it’s so good, it rivals the store-bought version, and then some. My family devours these faster than I can make them, and I have a feeling yours will too!
Thank you for reading this post, don't forget to subscribe!What is a mounds bar?
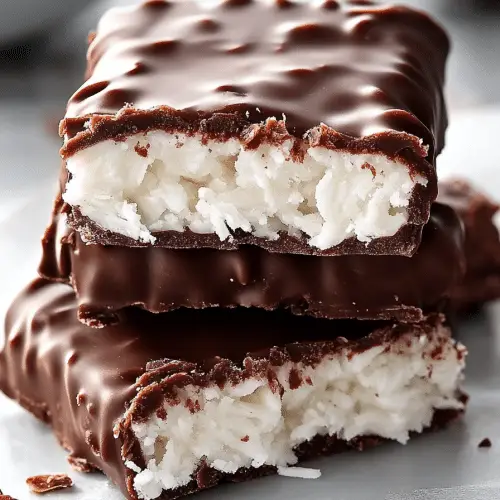
So, what exactly are we talking about when we say Mounds Bar Recipe? Think of it as the ultimate homemade tribute to that classic candy bar. At its heart, it’s a deliciously sweet and chewy coconut filling enrobed in a rich, dark chocolate coating. The magic is in that simple, yet incredibly satisfying combination. It’s not fancy, it’s not complicated, but oh boy, is it delicious. We’re talking about that satisfying chew from the coconut, perfectly balanced by the slight bitterness of dark chocolate. It’s the kind of treat that just makes you happy. It’s essentially taking that nostalgic candy bar experience and elevating it with fresh ingredients and a whole lot of love.
Why you’ll love this recipe?
There are so many reasons why this Mounds Bar Recipe has become a staple in my kitchen, and I just know you’re going to adore it too. First off, the flavor is just out of this world. That dense, sweet coconut center is pure bliss, and when it’s dipped in that crisp, dark chocolate shell, it’s a match made in heaven. Seriously, the contrast between the chewy coconut and the snap of the chocolate is just *chef’s kiss*. And the best part? It’s surprisingly easy to make! I know sometimes baking from scratch can feel intimidating, but this recipe is incredibly forgiving. I’ve made it on busy weeknights when I needed a quick sweet fix, and it’s always come out perfectly. It uses simple, pantry-staple ingredients, which means you don’t need to make a special trip to the store. Plus, it’s super cost-effective compared to buying boxes of Candy Bars. I’ve even experimented with adding a little shredded sweetened lime zest to the coconut filling once, and it was divine – like a tropical getaway in every bite! What I love most about this Mounds Bar Recipe is that it’s versatile. It’s fantastic on its own, but it’s also a wonderful addition to a dessert platter, a teacher’s gift, or even just a little something to brighten your own afternoon. It’s that perfect bite when you’re craving something sweet but don’t want to commit to a whole cake or a batch of cookies.
How do I make my own mounds?
Quick Overview
Making these homemade Mounds Bars is a straightforward process that really breaks down into three main parts: creating the chewy coconut filling, forming and chilling the bars, and finally, dipping them in glorious dark chocolate. It’s all about getting that perfect texture in the filling and ensuring your chocolate coating is smooth and sets up nicely. Trust me, it’s far simpler than you might think, and the payoff is absolutely worth it. You’ll be amazed at how quickly you can whip up a batch of these incredible treats!
Ingredients
What is the coconut filling?
This is where all the chewy, sweet goodness comes from. I always opt for sweetened shredded coconut; it gives you the best texture and sweetness without having to add too much extra sugar. If you can find it, the fine shred gives a lovely consistency, but the medium shred is perfectly fine too. Make sure it’s not desiccated or unsweetened, as that will change the texture and sweetness dramatically. You’ll need about 3 cups of sweetened shredded coconut. We’ll also use a can of Sweetened Condensed Milk – this is the magic binder that brings it all together and gives it that signature chew. Use the full fat kind for the best results; it makes the filling incredibly rich and creamy. A half-cup (or more, to taste!) of granulated sugar is also key to that classic Mounds bar sweetness, and a teaspoon of vanilla extract is a must for rounding out the flavors. Sometimes, I even add a pinch of salt to the filling to really make the coconut and chocolate flavors pop. It’s a little trick I learned ages ago and it makes a world of difference!
For the Chocolate Coating:
This is where you get that satisfying snap when you bite into your Mounds bar. I prefer using good quality dark chocolate chips or a chopped dark chocolate bar. Look for something with at least 60% cacao for a nice, rich flavor that isn’t too sweet. You’ll need about 2 cups of chocolate. To help the chocolate melt smoothly and give it that lovely sheen, we’ll add a tablespoon or two of coconut oil. This is optional, but it really helps achieve a perfect consistency for dipping and a beautiful finish. Some people use vegetable oil, but I find coconut oil complements the coconut filling so well.
Step-by-Step Instructions
Step 1: Preheat & Prep Pan
First things first, let’s get our workspace ready. You’ll want to line a baking sheet with parchment paper or wax paper. This is super important because our Coconut bars will be sticky, and the paper prevents them from adhering to the pan. Make sure the paper extends a little over the edges, so it’s easy to lift the bars out later. I usually don’t preheat the oven just yet; we’ll bake these briefly later if needed, but the main chilling happens in the fridge.
“The Mounds Bar Recipe turned out amazing. My kids asked for seconds. Saving this one!”
Step 2: Mix Dry Ingredients
In a large bowl, combine the sweetened shredded coconut, granulated sugar, and that pinch of salt if you’re using it. Give it all a good stir with a spatula or wooden spoon to ensure everything is evenly distributed. This step is simple but crucial for getting that consistent coconut flavor throughout each bar. Don’t worry if it looks a bit dry at this stage; the condensed milk will work its magic.
Step 3: Mix Wet Ingredients
Now, for the binders! Pour the sweetened condensed milk over the dry ingredients. Add the vanilla extract as well. This is where it starts to come together and smell absolutely amazing. I always take a moment here to just inhale that sweet, coconutty aroma – it’s heavenly!
Step 4: Combine
Using your spatula or spoon, mix everything together until it’s thoroughly combined. You want to make sure there are no dry pockets of coconut left. The mixture should be thick and hold together when you squeeze it. It will be a little sticky, and that’s exactly what we want. If it seems a little too dry and crumbly, you can add another tablespoon or two of condensed milk. Conversely, if it’s too wet and loose, add a little more shredded coconut, a tablespoon at a time, until it reaches the right consistency. I’ve found that the moisture content in coconut can vary, so a little adjustment is sometimes needed. Don’t overmix it though; we just want everything incorporated smoothly.
Step 5: Prepare Filling
Now, we’re going to form our Mounds bars. Take spoonfuls of the coconut mixture – I usually aim for about 1 to 1.5 tablespoons per bar – and shape them into little logs or rectangular shapes. They don’t need to be perfect; in fact, I think they look even more charming when they’re a little rustic. Place these formed bars onto your prepared baking sheet. Once they are all shaped, pop the entire baking sheet into the freezer for about 15-20 minutes, or until they are firm. This step is key to making them easier to handle and dip in chocolate without falling apart. They should feel solid to the touch when you take them out.
Step 6: Layer & Swirl
This step is usually part of the baking process itself, where you might swirl in a filling. For Mounds bars, we’re not really swirling anything *into* the coconut. This step is more about setting up for the chocolate dip. So, once those coconut logs are nice and firm from their time in the freezer, they’re ready for their chocolate bath!
Step 7: Bake
Some recipes call for a brief bake of the coconut filling to help it firm up a little more, but I find that chilling them thoroughly in the freezer does the trick just fine and keeps the coconut extra chewy. If you do prefer a slightly firmer, more baked coconut center, you can bake them for about 10-12 minutes at 350°F (175°C) after shaping them on the parchment paper. Just keep an eye on them so they don’t brown too much. For me, the no-bake chewy texture is the Mounds bar I know and love, so I usually skip this step.
Step 8: Cool & Glaze
This is where the chocolate magic happens! Place your firm coconut bars on the parchment-lined baking sheet. In a microwave-safe bowl or a double boiler, melt your dark chocolate chips (or chopped chocolate) with the coconut oil. Stir frequently until smooth and creamy. If microwaving, heat in 30-second intervals, stirring in between, until mostly melted, then stir until completely smooth. The coconut oil helps make it more fluid for dipping and gives it a lovely shine. Now, carefully dip each chilled coconut bar into the melted chocolate, ensuring it’s fully coated. A fork or a dipping tool works best. Let any excess chocolate drip off, then gently place the chocolate-coated bar back onto the parchment paper. You can use a toothpick to help smooth the bottom if needed. Work relatively quickly, as the chocolate will start to set.
Step 9: Slice & Serve
Once all your Mounds bars are dipped, let them sit at room temperature for a few minutes to allow the chocolate to set. You can speed this up in the refrigerator for about 10-15 minutes if you’re impatient (like me!). Once the chocolate is firm, you can carefully peel them off the parchment paper. These are best served at room temperature or slightly chilled. I find they have the perfect balance of chewy coconut and crisp chocolate when they’re not straight from the fridge. Slice into them with a sharp knife for a clean cut, and enjoy your incredible homemade Mounds bars!
What to Serve It With
These homemade Mounds Bars are so versatile, they’re not just for dessert! I love finding different ways to enjoy them. For a simple breakfast treat alongside my morning coffee, I’ll just grab one or two. The sweetness is just enough to get my day started without being overwhelming. For a more festive brunch spread, I like to arrange them on a nice platter with some fresh berries or a dollop of whipped cream. They add a fun, decadent element without being too heavy. As a dessert, they’re perfect after a hearty meal. I sometimes serve them with a scoop of vanilla bean Ice Cream or a glass of milk – classic comfort! And for those cozy snack moments, when you just need a little something sweet to curl up with, these are absolute perfection. My kids especially love them as an after-school snack. They’re also a fantastic addition to cookie tins during the holidays, or just to have on hand for unexpected guests. They really do fit in anywhere!
“Made the Mounds Bar Recipe tonight and wow — perfect weeknight dinner. Will definitely make again!”
Top Tips for Perfecting Your Mounds Bars
I’ve made this Mounds Bar Recipe more times than I can count, and over the years, I’ve picked up a few tricks that I think will really help you achieve Mounds bar perfection. First, regarding the coconut: make sure you’re using sweetened shredded coconut. If you use unsweetened, you’ll find the filling isn’t sweet enough, and if you use desiccated coconut, it can become too dry. The sweetened shredded kind is key for that signature texture and taste. When you’re mixing the filling, don’t be afraid to get your hands in there if needed! It helps ensure everything is really well combined, especially getting all that condensed milk mixed into the coconut. I learned this the hard way – trying to mix it all with a spoon sometimes leaves dry bits. And when you’re shaping the bars, press them firmly together. This is what helps them hold their shape when you dip them. If they feel too soft or crumbly, chill them for a little longer. For the chocolate coating, I always recommend using a good quality dark chocolate. It really makes a difference in the final flavor, providing that lovely contrast to the sweet coconut. If your chocolate seems too thick, add a little more coconut oil, but do it sparingly, a teaspoon at a time, until you get a smooth, dippable consistency. And for dipping, a fork is your best friend! You can gently lower the bar in, lift it out, let the excess drip, and then place it on the parchment paper. Sometimes I use a chopstick inserted into the bottom of the bar before chilling to make dipping even easier and avoid getting chocolate on my fingers!
One of my favorite little “lessons learned” is about the chill time. It’s so tempting to rush the chilling process, but trust me, giving those coconut bars enough time to firm up in the freezer is crucial. If they’re too soft, they’ll fall apart in the chocolate. I usually aim for at least 15-20 minutes, and if I’m making a big batch, I’ll even do two chilling sessions: one after shaping, and another after dipping if the chocolate seems to be melting from the warmth of the bar. For ingredient swaps, I’ve had success using a dairy-free sweetened condensed milk alternative if you’re going dairy-free, but the texture might be slightly different. You can also play with the type of chocolate – milk chocolate works, but it’s much sweeter, so you might want to reduce the sugar in the coconut filling if you go that route. When it comes to baking (if you choose to do that brief bake), make sure your oven rack is in the center. This ensures even heating. If you notice your bars browning too quickly on the bottom, you can always place an extra layer of parchment paper underneath the baking sheet. Finally, for glaze variations, beyond just dark chocolate, you can drizzle some white chocolate over the top for a striped effect, or even use a bit of melted milk chocolate for a classic chocolate coconut bar experience. Just make sure whatever coating you choose is smooth and sets up well!
Storing and Reheating Tips
Storing these homemade Mounds Bars is pretty straightforward, and they keep remarkably well, which is always a bonus! For room temperature storage, they’ll last for about 3-4 days. Keep them in an airtight container, perhaps with a layer of parchment paper between them so they don’t stick together, especially if your kitchen is a bit warm. They’ll maintain their chewiness nicely. If you live in a warmer climate, or if you just prefer your Mounds bars a little firmer, refrigerator storage is your best bet. They’ll stay fresh in an airtight container in the fridge for up to a week, sometimes even a bit longer. The chocolate shell will be nice and firm, and the coconut will remain delightfully chewy. I usually prefer them slightly chilled, so this is my go-to method.
Now, if you’ve made a massive batch (which I totally recommend because they disappear so fast!), freezing is a fantastic option. Wrap each individual Mounds bar tightly in plastic wrap, and then place them in a freezer-safe bag or container. They can last for a good 2-3 months in the freezer. When you want one, you have a couple of options: you can either let it thaw at room temperature for about 30 minutes to an hour, or if you’re craving that firm chocolate snap, you can enjoy it straight from the freezer! It’s almost like a frozen chocolate-coconut treat. The key with freezing is really making sure they are well-wrapped to prevent freezer burn. I’ve found that wrapping them twice – once in plastic wrap and then in foil or a freezer bag – works best for long-term storage. As for glaze timing advice, if you’re planning to store them at room temperature or in the fridge, dip them and let the chocolate set fully before storing. If you’re freezing them, the chocolate shell will likely be quite solid by the time they’re frozen, so you shouldn’t have any issues there either.
Frequently Asked Questions
Final Thoughts
I truly hope you give this Mounds Bar Recipe a try. It’s one of those recipes that just brings so much joy, both in the making and the eating. It’s a little taste of nostalgia, elevated with homemade goodness. The combination of that rich, chewy coconut and the crisp dark chocolate is just something special, and I think you’ll be really surprised at how easy it is to make something so delicious right in your own kitchen. If you love this recipe, you might also enjoy my homemade Almond Joy bars (just add some toasted almonds to the filling before dipping!) or my recipe for classic chocolate chip cookies. They’re all about bringing those beloved flavors into your home. I can’t wait to hear what you think! Please leave a comment below and let me know how your Mounds bars turned out, and if you tried any fun variations. Happy baking, or should I say, happy candy making!
Mounds Bar Recipe
Ingredients
Coconut Filling
- 3.5 cups shredded sweetened coconut
- 0.75 cup sweetened condensed milk
- 1 teaspoon vanilla extract
Chocolate Coating
- 10 ounces semi-sweet chocolate chips or dark chocolate chips
- 2 tablespoons coconut oil
Instructions
Preparation Steps
- In a medium bowl, combine the shredded coconut, sweetened condensed milk, and vanilla extract. Mix until well combined.
- Press the coconut mixture into an 8x8 inch baking dish lined with parchment paper. Ensure it's evenly distributed and firm.
- Chill the coconut base in the refrigerator for at least 1 hour, or until firm.
- Once chilled, cut the coconut base into desired bar shapes (e.g., rectangles).
- In a microwave-safe bowl or a double boiler, melt the chocolate chips with the coconut oil. Stir until smooth.
- Dip each coconut bar into the melted chocolate, ensuring it's fully coated. You can use forks or toothpicks to help.
- Place the coated bars on a parchment-lined baking sheet. You can drizzle extra chocolate on top if desired.
- Refrigerate the bars for at least 30 minutes to allow the chocolate to set.


