
Mexican Wedding Cookies
There’s something magical about the first bite of a Mexican wedding cookie—those delicate, snow-white crumbly morsels that melt on your tongue like a whispered secret. I remember my abuela making them for every family celebration, her kitchen filling with the nutty-sweet scent of almonds and powdered sugar. These aren’t just cookies; they’re tiny works of edible art that carry generations of love in every pinch. Whether you’re hosting a bridal shower, baby shower, or simply want to treat someone special (or yourself!), these little gems never fail to create joy. They’re the kind of recipe that transforms an ordinary moment into something truly memorable.
Thank you for reading this post, don't forget to subscribe!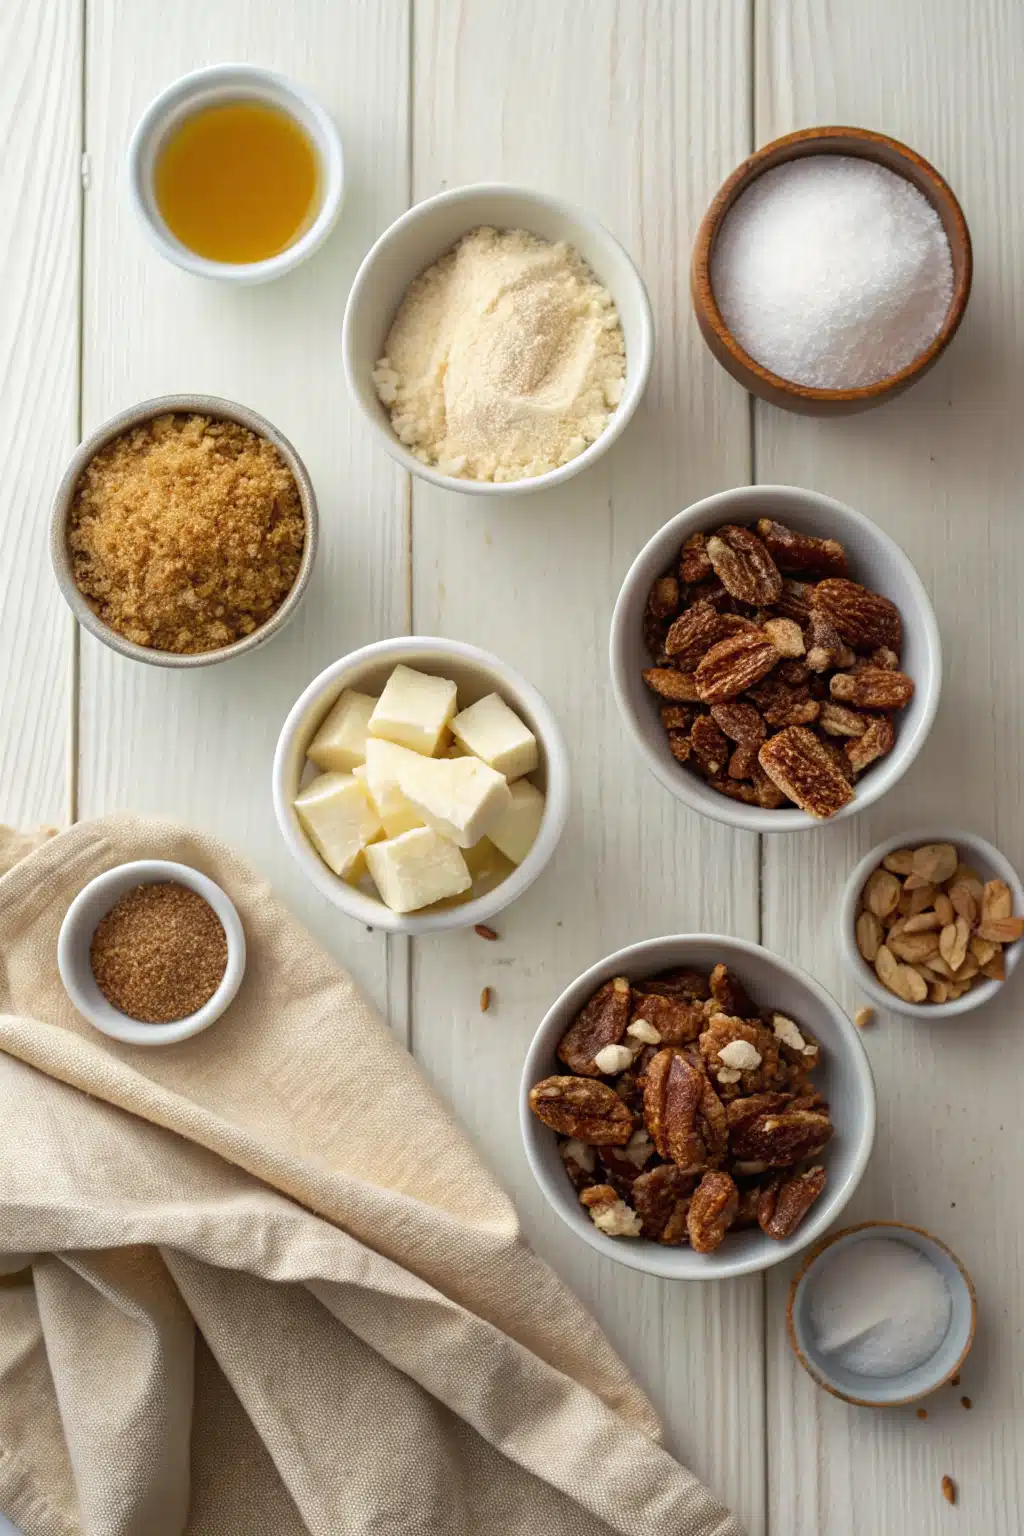
What Is Mexican Wedding Cookies?
Also known as Tunas or Polvorones, Mexican wedding cookies are buttery, tender shortbread-like treats dusted generously in confectioners’ sugar. Unlike traditional American wedding cookies, these feature finely ground almonds instead of pecans or walnuts, giving them a uniquely delicate texture and subtle floral aroma. The name “wedding” comes from their association with celebrations rather than literal weddings—they’re served at baptisms, quinceañeras, holidays, and yes, weddings. Historically, they originated in Spain but evolved in Mexico through the use of local ingredients like almonds and lard (though modern versions use butter). What makes them extraordinary is how one small bite can transport you back to grandmother’s kitchen with its comforting simplicity and elegant finish.
Why You’ll Love This Recipe
First off—these cookies practically melt in your mouth. Seriously. One bite and you’ll understand why people line up for hours during holiday markets to get their hands on them. Second, they’re incredibly forgiving for beginners. No complicated piping techniques or tempering chocolate required. Just mix, scoop, roll, and bake. Third, they travel well! Perfect for gifting in pretty tins or shipping to faraway loved ones (just double-wrap if mailing). Fourth, they pair beautifully with both coffee and warm spiced cider—especially during autumn gatherings. And finally? They’re gluten-free friendly (if you use certified GF oats), though I always recommend using regular oats if you don’t need it that way—because honestly, nothing beats real butter and fresh-roasted almonds.
How to Make Mexican Wedding Cookies
Quick Overview
This recipe yields about 3 dozen small cookies and takes roughly 90 minutes total—but most of that time is hands-off waiting. Start by preheating your oven and preparing your baking sheet. Then cream together softened butter, granulated sugar, and vanilla until light and fluffy. Stir in flour, ground almonds, and salt until fully combined. Chill the dough for at least 30 minutes (this step is crucial for easy handling). Roll into small balls, coat in more powdered sugar, then bake until pale golden around the edges. Let cool completely before storing. It’s really that simple!
Ingredients
- 1 cup (2 sticks) unsalted butter, softened to room temperature
- ¾ cup granulated sugar
- 1 teaspoon pure vanilla extract
- 1½ cups all-purpose flour
- ⅔ cup finely ground blanched almonds (you can pulse whole almonds in food processor until very fine)
- ½ teaspoon salt
- 2–3 cups powdered sugar (for coating)
Step-by-Step Instructions
Step 1: Preheat & Prep Pan
Preheat your oven to 350°F (177°C). Line two large baking sheets with parchment paper or silicone mats. Having two sheets ready will help you maintain even spacing and prevent overcrowding.
Step 2: Cream Butter & Sugar
In a large mixing bowl, beat the softened butter and granulated sugar together using a hand mixer or stand mixer fitted with the paddle attachment. Mix on medium-high speed until the mixture becomes pale, creamy, and almost doubled in volume—about 2–3 minutes. Scrape down the sides occasionally for even blending.
Step 3: Add Vanilla & Dry Ingredients
Mix in the vanilla extract. In a separate bowl, whisk together the flour, ground almonds, and salt. Gradually add the dry ingredients to the wet mixture, mixing on low speed until just combined. Do not overmix—just until no white streaks remain. The dough should look crumbly at first, then come together when pressed.
“Packed with flavor and so simple. Exactly what I wanted from this Mexican wedding cookies!”
Step 4: Chill Dough
Transfer the dough onto a piece of plastic wrap, shape it into a disc, and refrigerate for at least 30 minutes (up to 24 hours). Chilling firms up the dough so it holds its shape during rolling—trust me on this step!
Step 5: Shape & Coat Cookies
Remove chilled dough from fridge. Using a small cookie scoop (about 1 tablespoon size) or two spoons, portion out dough and roll into tight balls. Place each ball onto prepared baking sheets, spacing them about 1½ inches apart. Gently press each ball down slightly with your palm to flatten just a bit—they spread minimally while baking.
Step 6: Bake
Bake in preheated oven for 18–22 minutes, rotating trays halfway through, until edges turn a very light golden brown but centers still look soft. Don’t overbake—they continue cooking slightly on the cooling rack.
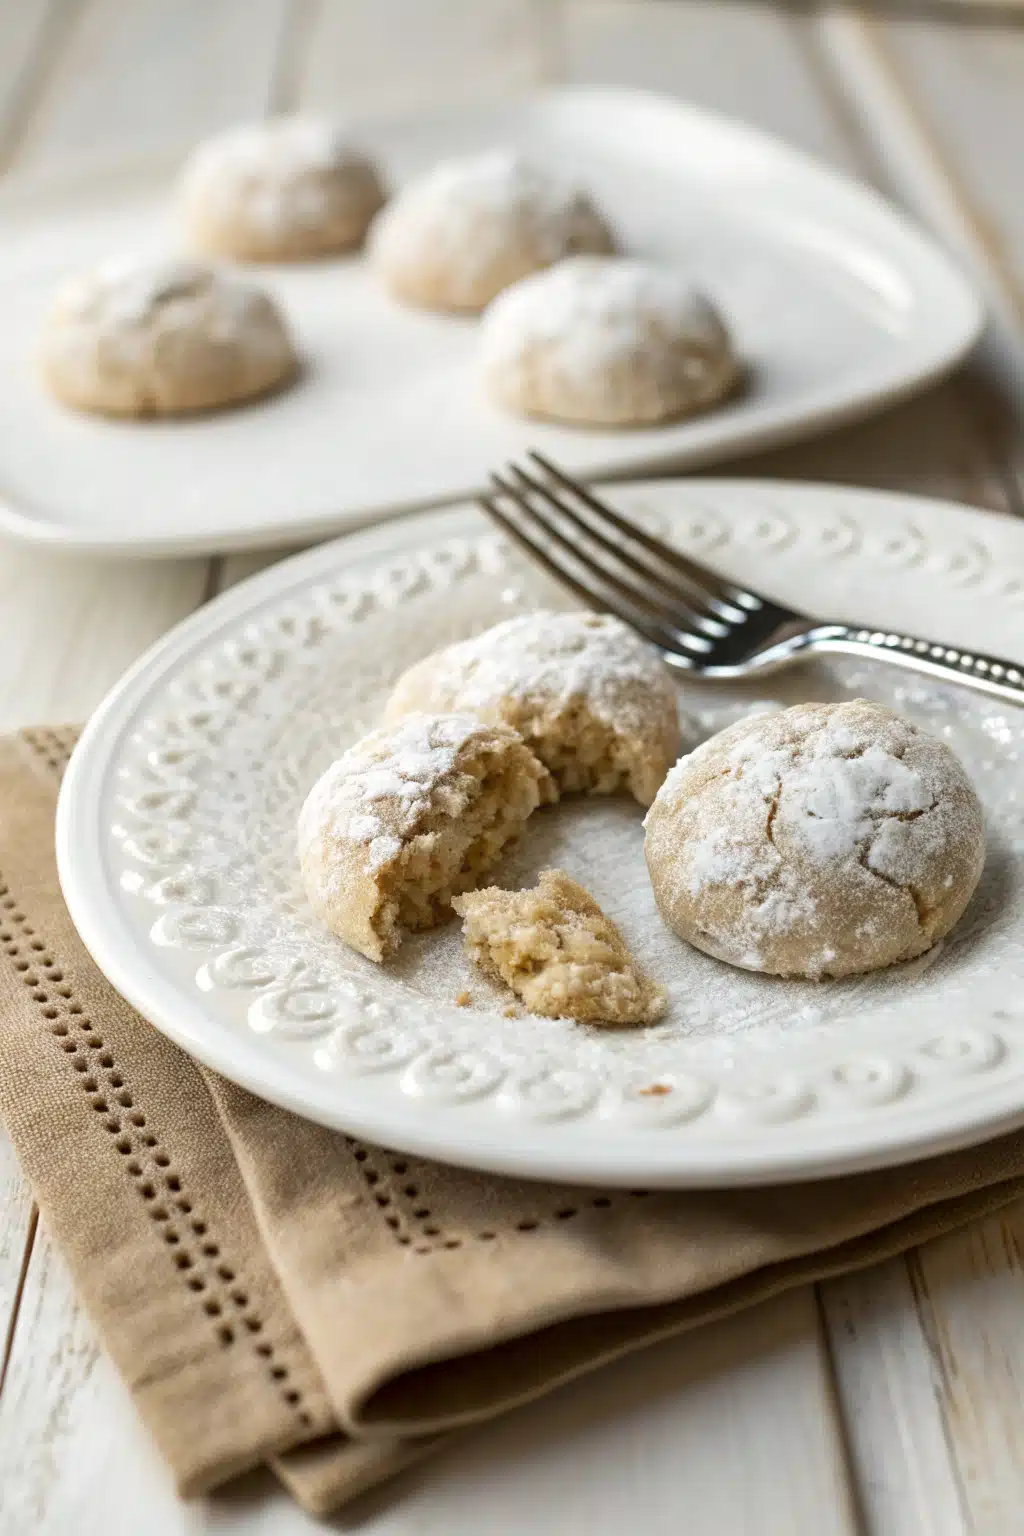
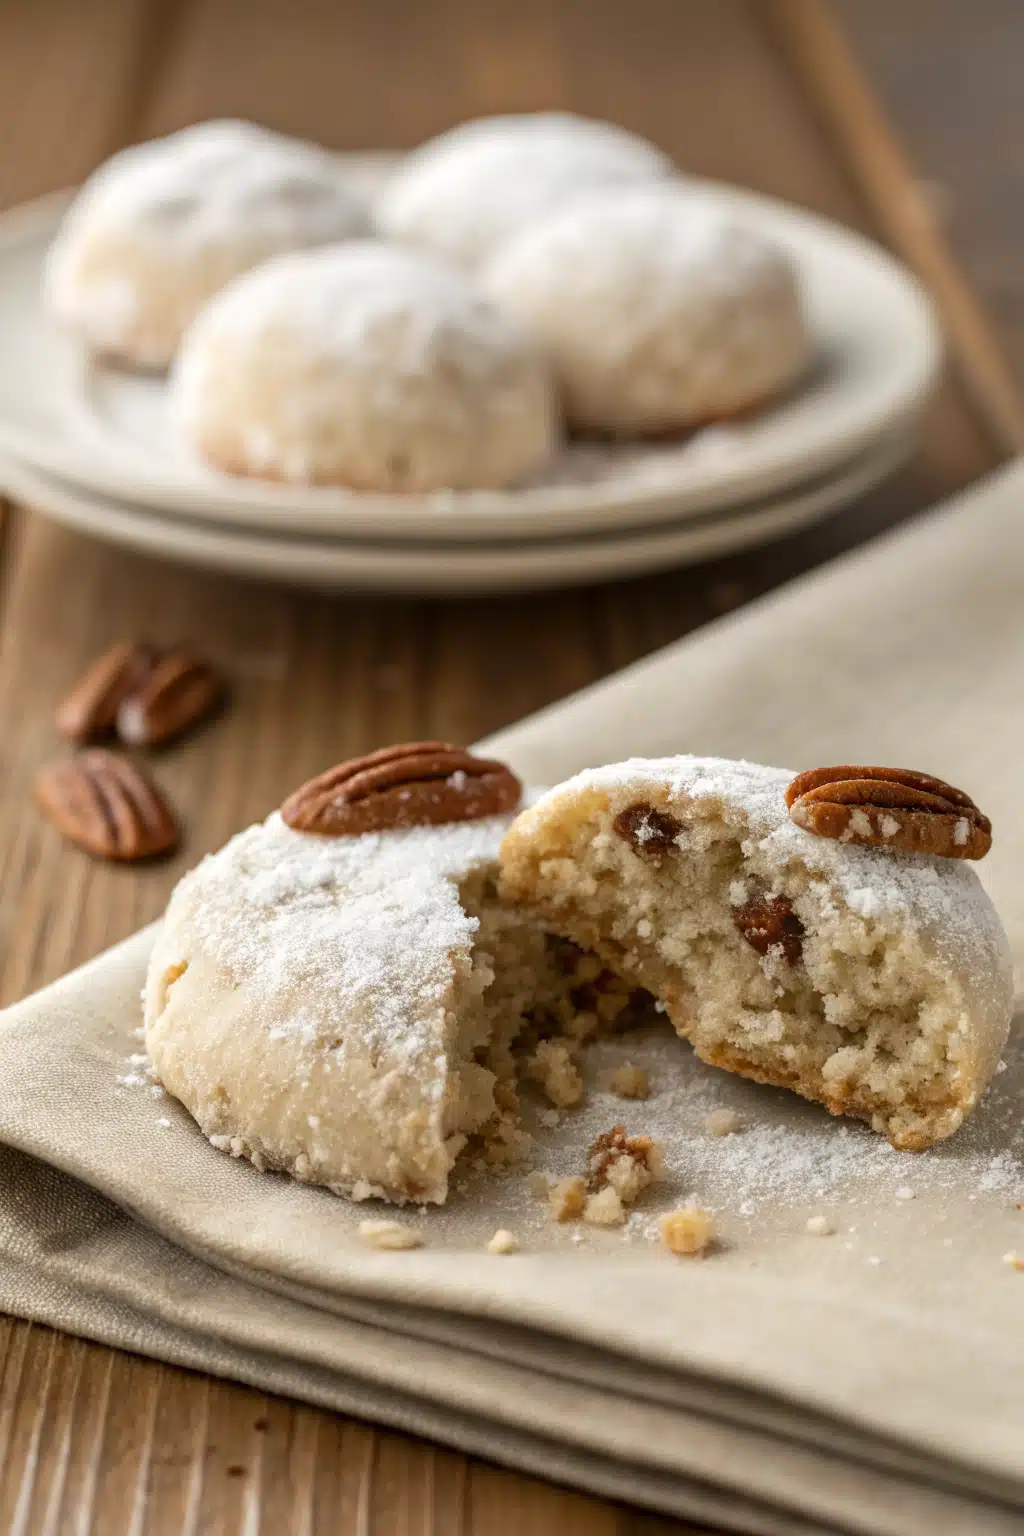
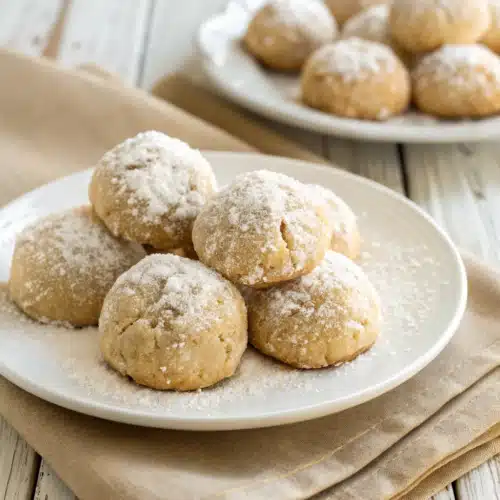
Step 7: Cool & Dust
Let cookies cool on baking sheets for 10 minutes. Meanwhile, sift powdered sugar into a shallow bowl. Once cookies are cool enough to handle (but still warm), roll each one in powdered sugar until fully coated. Return to baking sheet and repeat with remaining cookies. For extra festive flair, give them a second dusting once completely cooled.
What to Serve It With
These cookies shine brightest when paired with bold flavors. Serve them alongside strong black coffee, espresso, or Hot Chocolate for a cozy afternoon treat. At parties, offer them with a side of fresh fruit—like sliced strawberries or pomegranate arils—to cut through the sweetness. They also pair beautifully with savory elements such as aged brie cheese or dark chocolate truffles. If you’re serving at a bridal shower or wedding reception, arrange them in tiered stands alongside macarons or petit fours. And don’t forget a sprinkle of edible flowers for Instagram-worthy presentation!
Top Tips for Perfecting Your Mexican Wedding Cookies
First, never skip chilling the dough—it’s non-negotiable for clean shaping and preventing spreading. Second, make sure your butter is truly softened, not melted. Cold butter creates lumps; room-temperature butter blends smoothly. Third, grind your own almonds if possible. Store-bought pre-ground almonds sometimes contain additives that affect texture. Fourth, measure flour correctly by spoon-and-level method—no packing! Fifth, let cookies rest on baking sheet for 10 minutes before moving—they’re fragile when hot. Sixth, store in an airtight container at room temperature for up to 5 days (if they last that long!). And seventh—don’t skimp on the powdered sugar coating. That’s what gives them their signature snowy appearance and subtle sweetness.
Storing and Reheating Tips
Store Mexican wedding cookies in an airtight container at room temperature for up to 5 days. To keep them fresh longer, layer cookies between sheets of parchment paper to prevent sticking. For storage beyond 5 days, freeze unbaked dough balls for up to 3 months—bake straight from frozen (add 2–3 minutes to baking time). To reheat, place cookies in a low oven (200°F / 93°C) for 5–7 minutes until warmed through. Avoid microwaving—it ruins their delicate crumb. If cookies have lost their powdered sugar coating, simply dust them again before serving. Pro tip: Keep a jar of powdered sugar on hand specifically for recoating!
Frequently Asked Questions
“New family favorite! This Mexican wedding cookies was so flavorful and ridiculously easy. Crowd-pleaser for sure.”
Final Thoughts
Mexican wedding cookies are more than just dessert—they’re a labor of love wrapped in sugar and almonds. Each batch tells a story of tradition, family, and celebration. Whether you’re making them for a milestone event or simply because today deserves a little sweetness, these cookies bring people together in the most delicious way. So grab your apron, preheat that oven, and remember: the best recipes aren’t just followed—they’re cherished. Now go share a smile (and maybe one of these!) with someone who matters.
Mexican Wedding Cookies
Ingredients
Main Ingredients
- 1 cup unsalted butter, softened
- 0.5 cup granulated sugar
- 1 teaspoon pure vanilla extract
- 0.25 teaspoon almond extract
- 2 cups all-purpose flour
- 0.25 teaspoon salt
- 0.5 cup finely chopped almonds
- 0.5 cup powdered sugar, for rolling
Instructions
Preparation Steps
- Preheat the oven to 350°F (175°C). Line baking sheets with parchment paper.
- In a large bowl, cream together the softened butter and granulated sugar until light and fluffy, about 2–3 minutes.
- Add the vanilla extract and almond extract; mix well to combine.
- Gradually add the flour and salt, mixing just until the dough comes together. Do not overmix.
- Fold in the finely chopped almonds until evenly distributed throughout the dough.
- Shape the dough into 1-inch balls and place them on the prepared baking sheets, spacing them about 2 inches apart.
- Flatten each ball slightly with your palm or the bottom of a glass dipped in water.
- Bake for 12–15 minutes, or until the edges are lightly golden but the centers still look soft.
- Remove from the oven and let cool on the baking sheet for 5 minutes before transferring to a wire rack to cool completely.
- Once cooled, roll each cookie in powdered sugar until fully coated. Repeat with remaining cookies.


