
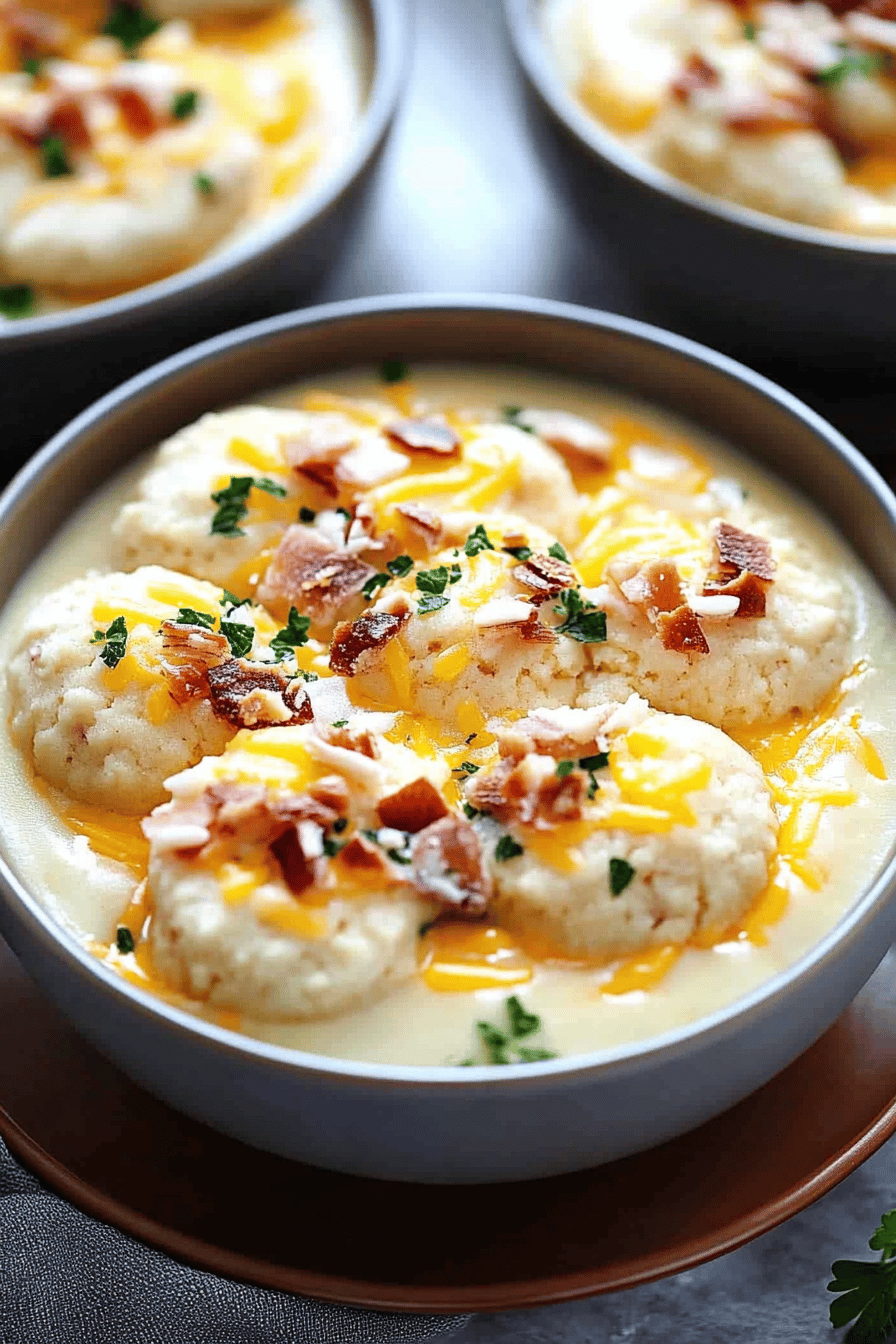
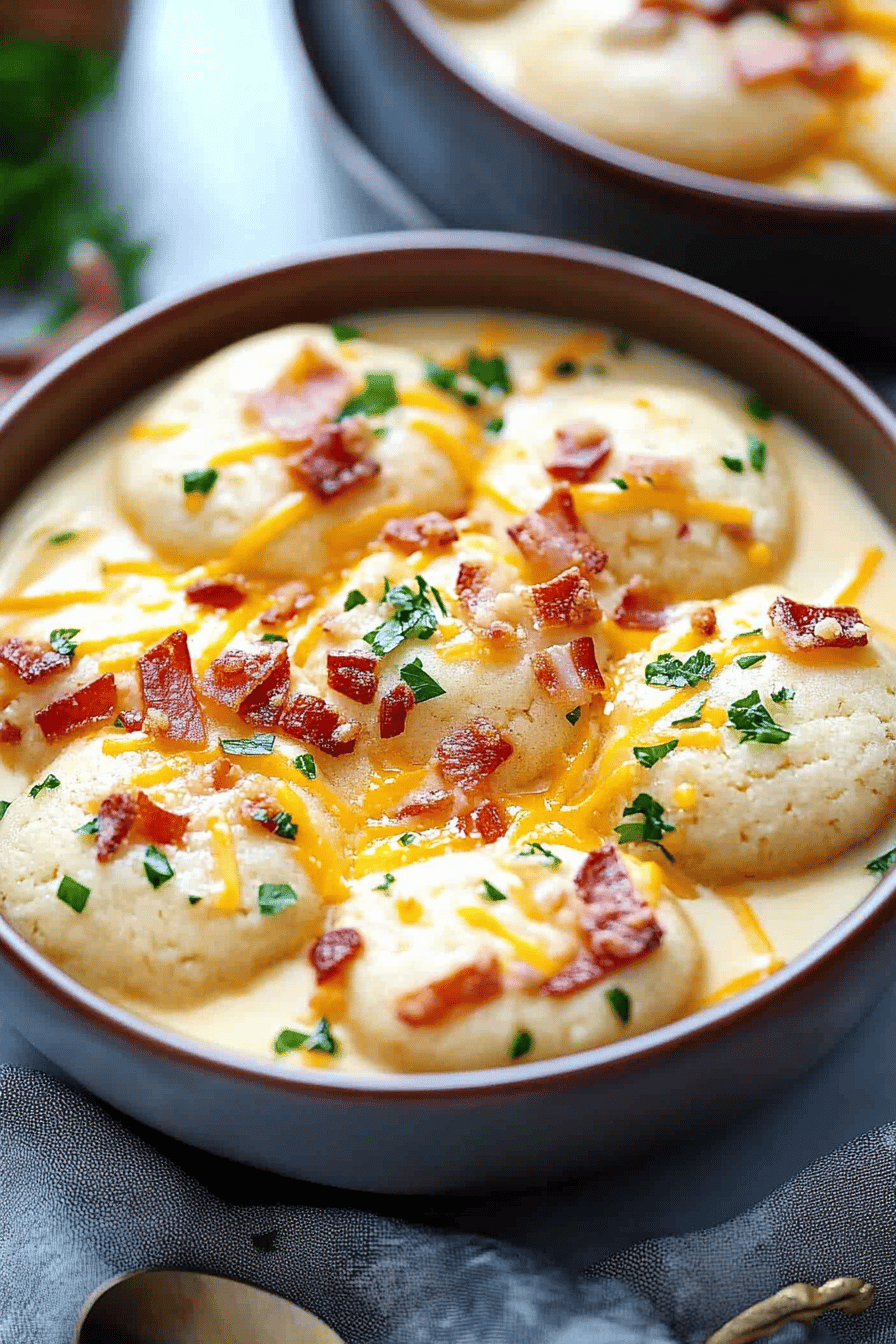
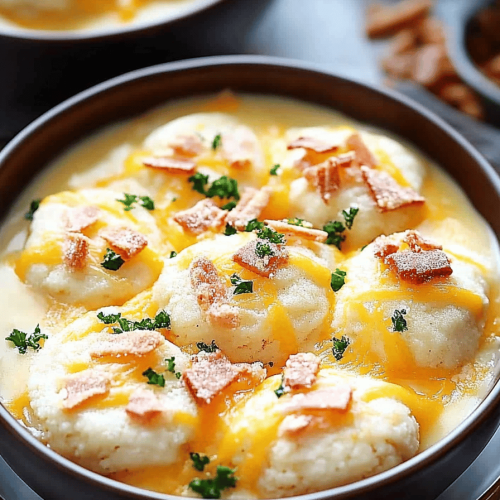
Okay, friend, let me tell you about these things.Melting Moments Cookies are aThey’re not just any cookie; they’ve got a warm hug from your grandma, but in cookie form! I swear, one bite and I’m instantly transported back to my childhood kitchen, sneaking cookies from my parents. What is the cooling rack? What are Shortbread Cookies? What is the ingredient that takes them to a whole new level? What’s the kind of treat that makes you close your eyes and savor every little crumb? You know how sometimes you crave something sweet, simple, and utterly comforting? I always make a double batch because they disappear so fast around here – you’ve been warned!
Thank you for reading this post, don't forget to subscribe!
What is Melting Moments Cookies?
Melting Moments Cookies are made with are basically melt-in-your-mouth perfection. Think of them as delicate, buttery shortbread, but with the addition of cornstarch, which gives them that incredibly tender texture that’s almost like powder. The name says it all – they literally melt in your mouth! They’re small, round cookies, often decorated with a simple buttercream or icing. It’s essentially a classic Cookie Recipe elevated by a few clever tweaks. I’ve made them with different extracts before (almond is divine!), but the classic vanilla is what always reminds me of home. They’re surprisingly easy to make too, which is always a bonus!
Why you’ll love this recipe?
Where do I start?What are Melting Moments Cookies? is a game-changer, I promise. The *flavor* is out of this world – buttery, sweet, and subtly vanilla-y. They’re not overly sweet, which I appreciate, and that melt-in-your-mouth texture? Unbeatable. What I love most about this is how *simple* it is to make. Seriously, you probably already have all the ingredients in your pantry. No fancy equipment needed, no complicated techniques – just straightforward baking that anyone can master.
And let’s talk about cost-efficiency. These cookies are incredibly budget-friendly. Butter, sugar, flour, cornstarch – these are staples that won’t break the bank. Plus, they make a big batch, so you get a lot of bang for your buck! The versatility is another reason to love this recipe. You can easily customize the flavor by adding different extracts, citrus zest, or even a touch of spice. I’ve even dipped them in chocolate before for an extra-special treat. If you’re a fan of easy shortbread or Sugar Cookies, these are definitely going to be your new favorite. They’re just that good!
How do you make Melting Moments Cookies?
Quick Overview
Making these Melting Moments Cookies are delicious.Is it easier than you think? How do you start by creaming butter and sugar, then adding the dry ingredients? How do you keep the dough nice and tender? Roll the dough into small balls, bake until just lightly golden, and then let them cool completely. Top with a sprinkle of powdered sugar or buttercream. What makes this recipe so good?
Ingredients
For the Main Batter: Why is it important to
* 1 cup (2 sticks) unsalted butter, softened. Make sure it’s *actually* soft, not melted. I usually leave mine out for about an hour before baking.
* 1/2 cup powdered sugar, sifted. Sifting is important to avoid lumps!
* 1 3/4 cups all-purpose flour. I prefer unbleached.
* 1/2 cup cornstarch. This is the key to that melt-in-your-mouth texture. Don’t skip it!
* 1 teaspoon vanilla extract. Good quality vanilla makes a difference.
For the Buttercream Frosting:
* 1/4 cup (1/2 stick) unsalted butter, softened. Again, Softened is key. * 1 1/2 cups powdered sugar, sifted. * 2-3 tablespoons milk or cream. Add gradually until you reach the desired consistency. * 1/2 teaspoon vanilla extract.
What are the steps to
Step 1: Preheat & Prep Pan
Preheat your oven to 325°F (160°C). Line a baking sheet with parchment paper. This prevents sticking and makes cleanup a breeze. Trust me, you don’t want to skip the parchment paper! Getting the oven temperature right is crucial for that delicate texture. If it’s too hot, the cookies will spread and brown too quickly.
Step 2: Cream Butter and Sugar
In a large bowl, cream together the softened butter and sifted powdered sugar until light and fluffy. This usually takes about 3-5 minutes with an electric mixer. The mixture should be pale and almost airy. This step is important because it incorporates air into the batter, which contributes to the cookies’ tender texture. I always scrape down the sides of the bowl a couple of times to make sure everything is evenly mixed.
“Packed with flavor and so simple. Exactly what I wanted from this Melting Moments Cookies!”
Step 3: Add Vanilla
Mix in the vanilla extract until well combined. Vanilla extract enhances the flavor, creating a delicious aroma while baking.
Step 4: Add Dry Ingredients
In a separate bowl, whisk together the all-purpose flour and cornstarch. Gradually add the dry ingredients to the wet ingredients, mixing on low speed until just combined. Be careful not to overmix the dough! Overmixing will develop the gluten in the flour, resulting in tough cookies. The dough should be soft and slightly crumbly.
Step 5: Roll into Balls
Roll dough into 1-inch balls. Place cookies on the prepared baking sheet, leaving a little space between each cookie. I like to use a small cookie scoop to make sure that all the cookies are the same size.
Step 6: Bake
Bake for 12-15 minutes, or until the edges are just slightly golden. Do not overbake cookies. They should still be pale in the center. Is it true that they will continue to set up as they cool? Keep a close eye on them during the last few minutes of baking, as oven temperatures can vary.
Step 7: Cool Completely
Let the cookies cool on the baking sheet for a few minutes before transferring them to the wire rack. To cool completely. This prevents them from breaking while they’re still warm and delicate. How do I make a frosting?
Step 8: Make the Buttercream
While cookies are cooling, make the buttercream frosting. In a large bowl, cream together the softened butter and sifted powdered sugar until light and fluffy. Set aside. Gradually add milk or cream until you reach the desired consistency. Stir in the vanilla extract.
Step 9: Decorate
Frost the cooled cookies with the buttercream. You can use a piping bag for a fancy look, or simply spread the frosting on with a knife. I like to add a small swirl of frosting on top of each cookie. Add sprinkles if you’re feeling festive!
What should I serve it with?
These What are Melting Moments Cookies?Are perfect for any occasion?For Breakfast:Pair these with a strong cup of coffee or latte. The sweetness of cookies is a nice contrast to the bitterness of coffee. I like to arrange them on a pretty plate with berries.For Brunch: Serve them alongside a Fruit Salad, quiche, or a mimosa bar. They add a touch of elegance to any brunch spread. I often put them on a tiered serving stand for a more dramatic presentation.
As Dessert:What are some of the best after-dinner treats? Serve them with a scoop of vanilla Ice Cream or drizzle of chocolate sauce. My family loves me with a glass of cold milk.For Cozy Snacks:What are some comfort food recipes? I like to snuggle up on the couch with a blanket and ice cream. I have to make cookies.
How do you perfect a melting moment cookie?
Okay, so I’ve made these. I know they’reMelting Moments Cookies are aI’ve learned a lot along the way. How do I make a perfect recipe every time?Butter Prep:Make sure your butter is softened, but not melted. If the cookie is too soft, it will spread too much in the oven. I usually take mine out of the fridge about an hour before baking.Mixing Advice:Don’t overmix dough! Overmixing will develop gluten in the flour, resulting in hard cookies. Is it better to have a crumbly dough than overmixed dough?Ingredient Swaps: You can substitute almond extract for the vanilla extract for a different flavor profile. I’ve also tried adding a pinch of cinnamon or nutmeg for a warm, spicy twist.
Baking Tips: Keep a close eye on the cookies while they’re baking, as oven temperatures can vary. They should be just lightly golden around the edges. Don’t overbake them! They will continue to set up as they cool. I rotate my baking sheet halfway through baking to ensure even browning.
Glaze Variations: If you don’t want to make buttercream, you can simply dust the cookies with powdered sugar. Or, you can make a simple glaze by whisking together powdered sugar and milk. I’ve also added a few drops of food coloring to the glaze for a fun, festive look.
Powdered Sugar: Make sure your powdered sugar is sifted or don’t add lumps. This step is crucial for creating the soft, melt-in-your-mouth texture that we want.
“Made the Melting Moments Cookies tonight and wow — perfect weeknight dinner. Will definitely make again!”
Storing and Reheating Tips
These Melting Moments Cookies are best enjoyed fresh, but they can be stored for later.
Room Temperature: Store the cookies in an airtight container at room temperature for up to 3 days. Make sure they’re completely cool before storing them. I usually line the container with parchment paper to prevent them from sticking together.
Refrigerator Storage: For longer storage, you can refrigerate the cookies in an airtight container for up to a week. However, they may become slightly drier in the refrigerator.
Freezer Instructions: To freeze the cookies, wrap them individually in plastic wrap and then place them in a freezer-safe bag or container. They can be frozen for up to 2 months. Let them thaw completely at room temperature before serving.
Glaze Timing Advice: It’s best to add the glaze or buttercream frosting right before serving. If you add it too far in advance, it may become sticky or runny.
Frequently Asked Questions
Final Thoughts
These Melting Moments Cookies are truly special. They’re easy to make, incredibly delicious, and they always bring a smile to everyone’s face. Whether you’re baking them for a holiday gathering, a special occasion, or just a cozy night in, they’re sure to be a hit. I hope you enjoy making them as much as I do! If you loved this recipe, you might also like my shortbread or Sugar Cookie recipes. Happy baking! And please, leave a comment below and let me know how yours turn out. I’d love to hear about your own variations and tips! And don’t forget to rate this recipe!
Delightful Chocolate Chip Oatmeal Cookies
Ingredients
Main Ingredients
- 1.5 cups all-purpose flour
- 1 teaspoon baking soda
- 1 teaspoon ground cinnamon
- 0.5 teaspoon salt
- 1 cup unsalted butter softened
- 0.75 cup brown sugar lightly packed
- 0.5 cup granulated sugar
- 2 units large eggs
- 2 teaspoons vanilla extract
- 3 cups old-fashioned oats
- 1.5 cups chocolate chips
Instructions
Preparation Steps
- Preheat your oven to 350°F (175°C). Line a baking sheet with parchment paper.
- In a medium bowl, whisk together the flour, baking soda, cinnamon, and salt. Set aside.
- In a large bowl, cream the softened butter, brown sugar, and granulated sugar until light and fluffy.
- Beat in the eggs one at a time, then stir in the vanilla extract.
- Gradually add the dry ingredients to the creamed mixture, mixing just until combined.
- Stir in the oats and chocolate chips using a spatula or wooden spoon.
- Drop tablespoon-sized portions of dough onto the prepared baking sheet, spaced about 2 inches apart.
- Bake in the preheated oven for 10-12 minutes, or until the edges are golden brown. Let cool on the baking sheet for a few minutes before transferring to wire racks to cool completely.


