
There’s something magical about a bowl of Marinated Olives that can turn any quiet weeknight into a little celebration. I remember the first time I stumbled on a jar that tasted like sunshine—lemon zest, garlic, a kiss of chili, and herbs that smelled like Sunday mornings. It wasn’t fancy, just bright, punchy, and incredibly easy. Compare it to hummus on a cracker or a handful of roasted nuts, and this one quietly steals the show with less effort. This version is my everyday favorite: a simple flourish that travels from pantry to picnic, from a salty snack to a party-ready board—without turning your kitchen into a science project. I’ve tested it countless times, and it never fails to disappear in minutes. My kids actually ask for seconds, which is how I know we’ve got a keeper. So here’s how I make Marinated Olives at home, with a few little tips I’ve picked up along the way. Let’s dive in and bring a little sun-drenched zest to your table.
Thank you for reading this post, don't forget to subscribe!
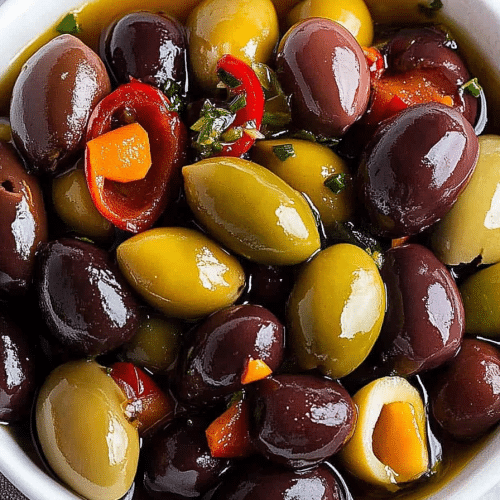
What is a Marinated Olive?
Marinated Olives are olives that have taken a little bath in a bright, fragrant mixture of oil, citrus, garlic, and herbs. Think of it as a flavor shower for olives—essentially olives steeped in a remarkable, olive-oil-based marinade that picks up lemon zest, garlic, hint of chili, and fresh herbs. It’s not a complicated dish; it’s a simple concept dressed up with personality. The name itself tells you what you’re getting: bold, briny olives that taste more vibrant than the jar on your counter. I love that you can tailor the notes to your mood—extra lemon for brightness, more chili for a kick, or a handful of fennel seeds for a hint of sweetness. It’s basically a little jar of make-ahead magic that makes weeknights feel special without demanding a lot of time or fuss. This is the kind of dish that earns a permanent spot on our snack table because it’s reliable, versatile, and, frankly, addictive in the best way possible.
Why you’ll love this recipe?
What I love most about Marinated Olives is the way they deliver big flavor with almost no effort. The aroma alone—garlic mellowing in Olive oil, citrus notes waking up the room—already makes people smile. The flavor profile is a perfect balance of brine and brightness: you get that salty punch from the olives, softened with the citrus, a kiss of heat from crushed red pepper, and the warmth of herbs that makes the whole bite feel familiar and comforting. It’s incredibly simple to pull together, and you can do it with ingredients you likely already have on hand. Budget-wise, olives are a pantry workhorse; a jar or two can stretch into dozens of servings. Versatility is another big win: beyond snacking, they brighten salads, roast together with veggies, or top a crostini for an effortless party appetizer. What I love most about this recipe is how forgiving it is—swap in what you’ve got, and the result still tastes like a kiss from a sunny coast. I’ve shared this with neighbors, colleagues, and family, and the response is almost always the same: “Is there more of that lemony garlic stuff?” Yes, there is. And you can make it tonight.
How do I make Marinated Olives?
Quick Overview
This is one of those recipes that feels like a tiny miracle: mix a few ingredients, toss with olives, let them mingle, and voilà—snack time that feels fancy but is actually effortless. You’re not cooking a complicated sauce; you’re building a bright, aromatic bath that makes every bite sing. The beauty is in the simple balance: Olive oil coats, lemon zests wake, garlic softens, and herbs layer in fragrance. If you’re roasting the olives for extra depth (which I often do for a stronger bite), you get a toasty, concentrated finish that still tastes fresh and lively. You can serve this right away or let it marinate overnight for deeper flavor. Either way, you’ll have a go-to snack that’s ready to roll for parties, weeknights, or an easy gift for friends.
Ingredients
For the Main Marinade:
- 2 cups mixed olives, pitted or whole (green and black for color)
- 3 tablespoons extra-virgin olive oil
- 1 tablespoon fresh lemon juice
- Zest of 1 lemon
- 2 garlic cloves, thinly sliced
- 1 teaspoon crushed red pepper flakes (adjust to heat preference)
- 1 teaspoon fresh thyme leaves
- 1 teaspoon fresh rosemary, finely chopped
- 1/2 teaspoon flaky sea salt, plus more to taste
- Freshly ground Black Pepper to taste
For the Filling:
- Optional citrus bits: 2 orange segments, finely chopped
- 1 tablespoon chopped flat-leaf parsley
- 1/2 teaspoon fennel seeds (optional for a subtle sweetness)
- Extra zest like orange or lime (to taste)
For the Glaze:
- 2 tablespoons extra-virgin olive oil
- 1 teaspoon lemon juice
- A pinch of crushed Red Pepper or paprika for color
- Optional: a whisper of honey or agave to balance acidity
Step-by-Step Instructions
Step 1: Preheat & Prep Pan
If you’re roasting the olives for extra depth, preheat the oven to 350°F (175°C). Line a baking sheet with parchment paper so nothing sticks and you can scoop everything up easily later. This is optional, but I’ll tell you, a quick roast deepens the color and rounds out the brine in a really comforting way. If you’re skipping the roast, you can proceed directly to mixing the marinade.
Step 2: Mix Dry Ingredients
In a small bowl, combine the salt, pepper, thyme, rosemary, and red pepper flakes. Dry seasonings are the backbone here—think of them as the perfume that lands on every olive’s skin.
Step 3: Mix Wet Ingredients
In another bowl, whisk together olive oil, lemon juice, and lemon zest. The zest is where the Bright Citrus aroma lives; don’t skip it, even if you feel tempted to just pour the juice in. Garlic goes in next, sliced thin so it softens but doesn’t disappear into the crowd.
Step 4: Combine
Pour the wet mixture over the olives in a large bowl. Add the dry seasoning and toss gently to coat every olive. If you’re roasting, spread the olives in a single layer on the prepared sheet after this step and slide them into the oven for about 10–12 minutes, giving them a turn halfway through to ensure even color.
Step 5: Prepare Filling
If you’re including the filling notes, mix your optional citrus bits, parsley, and fennel seeds in a small bowl. This is your chance to layer in a little texture and brightness that goes beyond the brine. Toss once more to distribute evenly.
Step 6: Layer & Swirl
Transfer the olives to a serving dish. Drizzle a touch more olive oil over the top, then sprinkle with the filling mix. Use a gentle swirl motion with your spoon to distribute the filling so some bites explode with citrus while others stay garlicky and herb-forward. The goal is to have a little color and texture in every spoonful, not a uniform slurry.
“New family favorite! This Marinated Olives: Your 7 Best Flavor Hacks was so flavorful and ridiculously easy. Crowd-pleaser for sure.”
Step 7: Bake
If you roasted earlier, you’re done with the bake. If you didn’t, you can give them a quick 5–7 minute bake just to warm through and coax a little more aroma from the garlic and herbs. Keep an eye on them—olives can go from golden to burnt quickly if you’re not paying attention. You’ll know they’re ready when their edges look lightly bronzed and the garlic scents are irresistible.
Step 8: Cool & Glaze
Let the olives rest for a few minutes at room temperature. Then whisk together the glaze ingredients and drizzle lightly over the olives. A gentle toss helps the glaze cling without pooling. The glaze is optional, but it makes the presentation feel extra polished and gives you a glossy finish that catches the eye on a cheese board.
Step 9: Slice & Serve
There’s not a ton of slicing in this dish, but you can channel a little chef energy by cutting a few olives in half to reveal the bright, juicy interiors for photos or grazing boards. Serve with small forks or toothpicks and an extra plate for pits if you left some olives whole. I love pairing these with crusty bread, fresh baguette slices, or a simple cheese board featuring soft cheeses, almonds, and a drizzle of honey. It’s the kind of snack that looks effortlessly chic but is really a two-bowl job—one for the olives, one for the rest of the party.
What to Serve It With
Marinated Olives shine on a range of occasions, and they taste best when you set them out with a few thoughtfully chosen companions. Here are a few ideas that keep the mood festive and relaxed:
For Breakfast: A slice of crusty bread smeared with ricotta and a dusting of lemon zest, a tiny bowl of olives on the side, and a hot coffee. The contrast between the warm, creamy dairy and the bright, salty olives is spot-on to kick-start the day with sunshine rather than heaviness.
For Brunch: Serve alongside a platter of baked eggs in mini ramekins, roasted cherry tomatoes, and a crisp cucumber salad. A glass of sparkling water or light white wine makes the table feel easygoing and celebratory.
As Dessert: Okay, this one feels a little cheeky, but hear me out: pair Marinated Olives with a tiny wedge of Dark Chocolate and a strong espresso. The saltiness and brightness do a surprising little dance with chocolate’s bitterness, creating a weirdly delightful end-of-meal moment.
For Cozy Snacks: When you’ve got friends over and want something that looks impressive but doesn’t require hours in the kitchen, this is your go-to. Serve with a warm loaf of bread, a round of cheese, and a quick hummus dip. The olives pull the whole board together and invite people to linger longer than they intended.
In our house, these Marinated Olives are a staple because they’re flexible, forgiving, and always a crowd-pleaser. They pair beautifully with a simple green salad, a piece of crusty bread, or a cheese board that’s just begging for a bright, briny bite. If you’ve got plans to entertain, make a double batch—I swear, you’ll be glad you did. Friends appreciate the little bites that feel “chef-y” without any stress, and this is one of those things that makes you feel like you nailed it without breaking a sweat.
Top Tips for Perfecting Your Marinated Olives
These tips come from countless tweaks in my kitchen and a few lessons I learned the hard way. They’ll help you coax the most flavor out of your olives while keeping everything balanced and bright.
Olive Prep: If you’re using olives with pits, you can either pit them or leave the pits in for a rustic look. Pitting makes every bite smoother, but this is one of those personal preference details that won’t wreck the dish either way. If you’re using a brined olive, give them a quick rinse and pat dry so they don’t cling to the glaze and overpower the marinade.
Mixing & Texture: Don’t overwork the olives when you toss them with marinade. A light toss to coat is enough; you want some olives to catch more marinade than others so you get a little texture in every bite. If you’re using roasted olives, the edges will crisp slightly and that contrast is delicious against the briney center.
Marination Time: The flavors deepen with time. If you can, give the olives a few hours or overnight in the fridge. The lemon zest and garlic mellow a touch and the herbs release their perfume slowly, which makes the dish feel more layered and grown-up without extra effort.
Swirl Customization: Swirling isn’t just about mixing; it’s about presenting the olive bed so each bite can carry a little of the citrus, a pinch of chili, and a whisper of herb. If you’re building a board, you can place a few olives with lighter color next to others with a more saturated hue to create a visual rhythm that makes the platter inviting.
Ingredient Swaps: I’ve tried this with different citrus as the star—orange, lime, or a combination. Each one changes the vibe. For a milder profile, add more parsley and a pinch of sugar to balance the acidity. For more heat, increase red pepper flakes or add a tiny splash of hot pepper oil.
Baking Tips: If you’re roasting, keep a close eye on them. They can go from perfectly bronzed to lightly burnt in minutes. A quick turn and a watchful eye will save you from bitterness and maintain the vibrant citrus aroma.
“Packed with flavor and so simple. Exactly what I wanted from this Marinated Olives: Your 7 Best Flavor Hacks!”
Glaze Variations: The glaze is a flexible finish. A splash of White Wine or sherry vinegar can brighten the glaze, while a touch of honey can soften acidity. If you’re serving with dairy cheeses, a lighter glaze keeps everything harmonious rather than clashing with the dairy fat.
Lesson learned: the first time I skipped the glaze, the olives still tasted fantastic. The second time, I added a gentle glaze and noticed the overall brightness pop in photos and on the palate. Trust me on this one—glaze is optional, but it’s a small step that makes a big difference for presentation and mouthfeel.
Storing and Reheating Tips
Marinated Olives are happy in the fridge for a good while, and the flavor only deepens with time. Here’s how I keep them at their best.
Room Temperature: Not recommended for more than a couple of hours, especially if you’ve added citrus and garlic. Keep them chilled when you’re not serving them for safety and flavor longevity.
Refrigerator Storage: Store in a clean, airtight container. They’ll keep beautifully for up to 2 weeks. If you roasted the olives, they’ll still be tasty in that window, and the glaze will keep gloss and brightness intact.
Freezer Instructions: Freezing olives in marinade is not ideal; the texture can change and the oil may separate. If you must freeze, freeze olives with marinade in a well-sealed container for up to 2–3 months, then thaw in the fridge and give them a gentle toss before serving.
Glaze Timing Advice: If you plan to reheat, add glaze after thawing and a quick re-warm in a low oven or a warm pan. This keeps the surface from becoming oily and helps the glaze cling to the olives again.
Flavor-wise, these hold up well for days, especially when kept in the briny, lemony oil. I’ve tucked them into lunch boxes, brought them on picnics, and even used them as a bright topping on a simple bowl of grain and greens. The key is to keep them cool, well-covered, and gently tended—no pressure, just a little care, and they’ll keep you company through many weeknights and gatherings.
Frequently Asked Questions
Final Thoughts
This recipe for Marinated Olives is one of those tiny rituals I keep coming back to—the kind of dish that teaches you that simple ingredients, treated with care, can feel like a warm invitation. The olives shine with brightness from the lemon, mood from the herbs, and a gentle warmth from garlic and chili. It’s the kind of thing I reach for when I want a snack that feels special but doesn’t demand a babysitting session in the kitchen. If you’re entertaining, drop a little bowl on the table with some rustic bread and a few cheeses, and watch how the room lightens with everyone’s smiles. If you’re feeding a hungry crew after work, these olives are a fast fix that doesn’t compromise on taste. Give them a try, and I’d love to hear which tweaks you love—extra lemon, more heat, a different herb blend. Happy marinating, friends, and may your snacks be bright and your moments together even brighter!
Marinated Olives
Ingredients
Main Ingredients
- 3 cups mixed olives such as Kalamata and Sicilian, pitted
- 2 tsp dried oregano
- 1 cup extra virgin olive oil
- 4 cloves garlic peeled and cut in half
- 6 strips lemon peel
- 3 strips orange peel
- 0.5 number long red cayenne chili finely sliced, seeds removed, or more to taste
Instructions
Preparation Steps
- Add your olives and dried oregano to a bowl or jar.
- Cut the chili in half lengthwise, remove the seeds and membrane. Finely slice the chili and add as much or as little as you like.
- Peel and finely slice the garlic.
- On low heat, gently warm the olive oil, garlic, chili, and citrus peels in a small saucepan for 5 minutes.
- Top the olives with the warm olive oil mixture.
- Serve warm, or allow the flavors to infuse for a minimum of 4 hours. Enjoy the olives, along with the flavor-filled oil, with crusty bread.
- Use the olives and oil within 4 days. Please refer to safety precautions regarding storing fresh ingredients in oil.


