There’s honestly something magical about this time of year — the way the house fills with cozy warmth, the scent of cinnamon and fresh baked goodies wafting through the air, and little moments that turn into cherished family traditions. I remember the first time I saw a snow globe cake, and honestly, I was seduced by how whimsical and charming it looks. It’s like holding a tiny Winter Wonderland in your hands, and the best part? It’s surprisingly easy to make! I’ve tested and tinkered with lots of cake recipes over the years, and I’ll tell you, this one’s a lifesaver on busy nights when you want something beautiful without the fuss. Plus, my kids ask for this all the time — it’s become a staple in our holiday baking lineup. Trust me, once you master this, it’ll become your go-to showstopper for birthdays, winter gatherings, or just because you deserve a little extra magic in your life.
Thank you for reading this post, don't forget to subscribe!What is a snow globe cake?
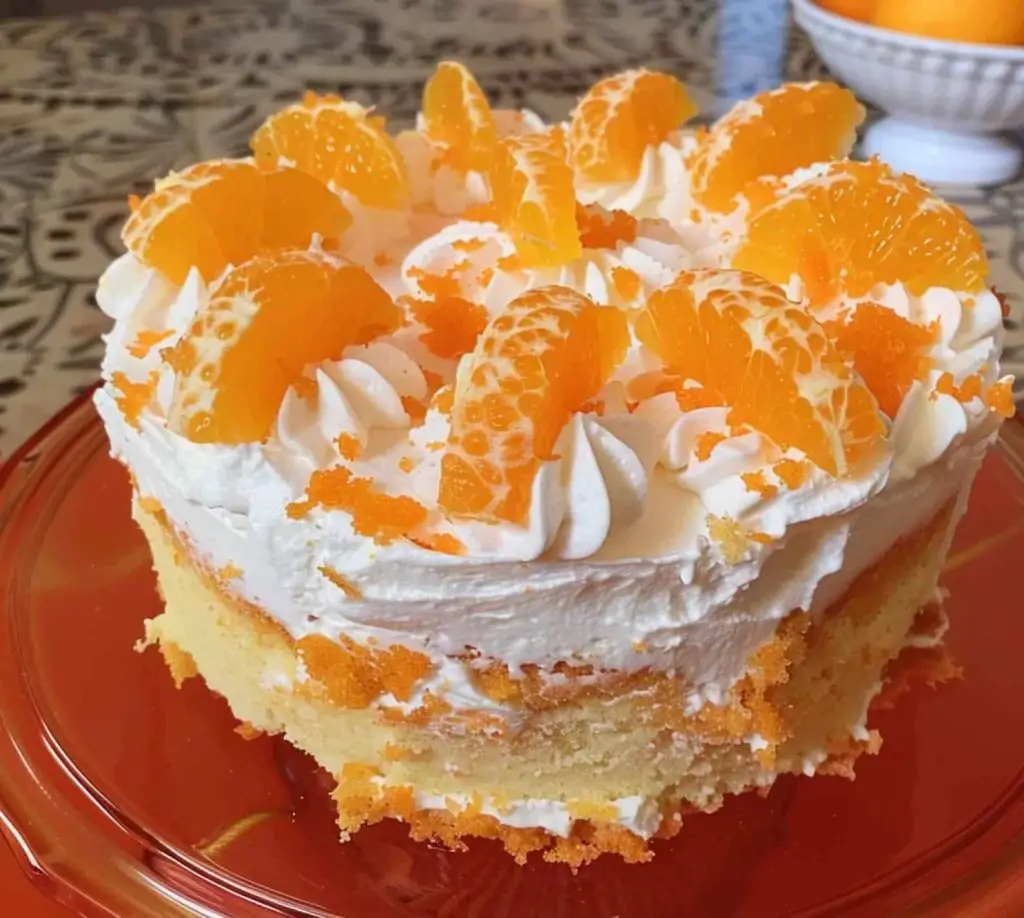
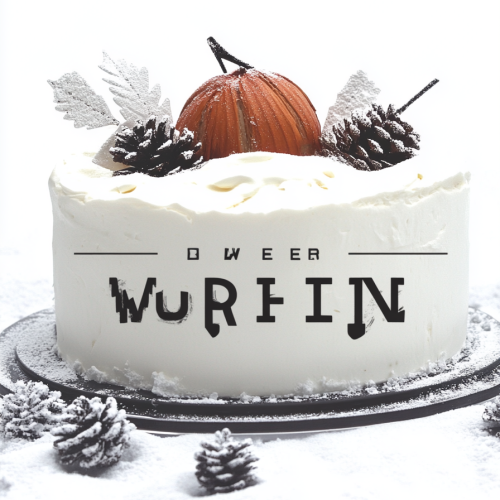
Think of a snow globe cake as a miniature winter scene frozen in time, encased in a soft, moist cake layer. The name comes from the way it captures that charming, snowy landscape — but instead of glass and glitter, you’ve got edible elements and frosting transforming into a tiny holiday scene. It’s essentially a layered or Bundt Cake that’s decorated to look like a snow globe—complete with snow-like frosting, edible glitter, and sometimes even tiny figurines or candy trees inside the “globe.” It’s such a fun, eye-catching treat that marries the whimsy of a snow globe with the comfort of homemade cake. What I love most about it is how customizable it is — you can do wintery scenes, snowy forests, or even a festive holiday village.
Why you’ll love this recipe?
Honestly, there’s so much to love about this snow globe cake — it’s like a little piece of edible holiday art. First off, the flavor. The cake itself is moist and buttery, with a hint of vanilla that pairs perfectly with all the decorations and frosting. Plus, I always do this when I want to sneak in a little extra flavor — I’ve tested it using almond milk instead of regular milk, and it made the cake even creamier and just a touch more sophisticated. The frosting is fluffy and light, mimicking snow, and adding a little shimmer with edible glitter is such a fun touch. What I love most about this is how easy it is to assemble, especially because it looks super impressive. No fancy piping skills required — just a little patience and creativity. Plus, it’s so budget-friendly, requiring common ingredients you probably already have in your pantry. It’s versatile, too — you can adapt it for different celebrations, from festive holidays to winter birthdays. Honestly, this cake feels like a warm hug, and I promise, it disappears in minutes at my house every time I make it.
How do I make a snow globe cake?
Quick Overview
This cake begins with a simple, tender vanilla batter, baked into a beautiful round or bundt shape. While it cools, I prepare a creamy frosting that I tint with just a touch of blue or white — you want it to look like fresh snow. The fun comes with decorating: I carve out a little scene in the cake, fill it with tiny candy trees or snowmen, and then frost the outside with fluffy white frosting. Finish it off with edible glitter and a few crystallized sugar snowflakes, and you’ve got a stunning, magical centerpiece that everyone will rave about. The best part? You don’t need to be a professional to pull this off — the hardest part is resisting the urge to squish the frosting before it sets!
Ingredients
For the main cake:
– 2 ½ cups all-purpose flour (I like to use a good quality one for better texture)
– 1 ½ cups sugar
– ½ teaspoon baking powder
– ½ teaspoon baking soda
– ¼ teaspoon salt
– ¾ cup unsalted butter, softened (trust me on this, butter makes all the difference)
– 3 large eggs
– 1 teaspoon vanilla extract
– 1 cup whole milk (or almond milk for a dairy-free version)
For the Filling & Scene:
– Tiny candy trees, snowmen, or snowflake sprinkles
– Edible glitter or shimmer dust (optional but totally worth it for that magical effect)
– Small marzipan or fondant figurines, if you want extra details
For the Frosting & Decoration:
– 2 cups heavy cream or whipping cream
– ½ cup powdered sugar
– 1 teaspoon vanilla extract
– Blue or white gel food coloring (or both for ombre effects)
– Edible glitter
– Crystallized sugar snowflakes or white pearl sprinkles
“The Magical Surprise Inside Cake How To turned out amazing. My kids asked for seconds. Saving this one!”
Step-by-Step Instructions
Step 1: Preheat & Prep Pan
Start by heating your oven to 350°F (175°C). Grease your cake pan generously with butter or non-stick spray, and lightly dust with flour if you want a smooth release. I usually use a bundt pan or a round cake pan — both work fine. If you’re feeling fancy, a silicone mold gives you super clean edges, but the classic round works just as beautifully. Make sure your oven rack is in the middle so everything bakes evenly. While the oven preheats, I recommend lining the bottom of your pan with parchment paper for extra easy removal — trust me, it makes a difference!
Step 2: Mix Dry Ingredients
In a medium bowl, whisk together the flour, baking powder, baking soda, and salt. Doing this early ensures your dry ingredients are evenly distributed, which is crucial for a light, airy cake. I’ve definitely forgotten this step and ended up with clumps of baking soda here and there, so I always do this first!
Step 3: Mix Wet Ingredients
In a large mixing bowl, cream the softened butter and sugar together until light and fluffy — about 3-4 minutes. I love using a hand mixer for this, but a good old whisk works if you’re patient. Add the eggs one at a time, mixing well after each. Then, stir in the vanilla and milk. The mixture should look smooth, slightly pale, and inviting — it smells like pure dessert heaven.
Step 4: Combine
Gradually add the dry ingredients into the wet mixture, folding gently until just combined. Be careful not to overmix — the secret to fluffy cake is just mixing enough to incorporate everything without deflating the batter. If you see a few lumps, that’s okay! Overmixing can lead to dense cake, and we definitely don’t want that.
Step 5: Prepare Filling
If you plan on adding tiny scene elements inside, now’s the time to set them aside. Think miniature candy trees, snowmen, or sprinkles that look like snow. To make the inside extra special, you can spoon a little of the batter into the pan first, add your scene, then cover with more batter. That way, your little winter tableau stays hidden until you cut in — a real surprise!
Step 6: Layer & Swirl
If you want to do a marble or swirl effect, pour half the batter into the pan, add your scene elements, then gently swirl the remaining batter over the top with a toothpick or skewer. For a more traditional look, pour the batter in one go and once baked, carve out your scene with a small knife or spoon — I do this when I want that layered, snow globe vibe.
Step 7: Bake
Pop it into your preheated oven and bake for about 35-40 minutes, or until the top is golden and a toothpick inserted into the center comes out clean. If you’re using a bundt pan, check a little earlier because it can cook faster around the edges. Keep an eye on it; every oven varies. Once baked, let the cake cool in the pan for about 15 minutes, then transfer to a wire rack to cool completely. I find that letting it cool fully is key for smooth decorating — no soggy frosting disasters here!
Step 8: Cool & Glaze
While the cake cools, whip up the frosting. Beat the heavy cream with powdered sugar and vanilla until soft peaks form. Divide in half and tint one part blue, the other white, to create a snowy, frosty look. Now, frost your cake with a fluffy layer of white. Be generous — you want it to resemble fresh snow! Use a spatula or a piping bag for optimal effect. Sprinkle some edible glitter on top while the frosting is still soft for a twinkling snow effect. Add crystallized sugar snowflakes or tiny candy trees on top, and you’re almost there!
Step 9: Slice & Serve
Once your snow globe is frosted and glittered, it’s time to present. Use a sharp serrated knife to carefully slice through, revealing the secret winter scene inside. Serve on a beautiful plate, and pair with a warm cup of cocoa or mulled wine if you’re feeling extra festive. My favorite way to enjoy this is with a scoop of vanilla Ice Cream on the side — it’s like snow in your mouth, but way better. Trust me, this cake makes everyone smile — it’s just so charming and dreamy. Your guests will be *awe-struck* when they see that tiny snowy scene inside!
“Made the Magical Surprise Inside Cake How To tonight and wow — perfect weeknight dinner. Will definitely make again!”
What to Serve It With
This snow globe cake is quite the showstopper, but the right pairings can really elevate the experience. For breakfast or brunch, serve it alongside hot coffee or spiced chai — the warm flavors contrast wonderfully with the cool, snowy look of the cake. If you’re serving it as a holiday dinner dessert, I love adding a splash of cinnamon or peppermint in a Whipped Cream topping for an extra seasonal touch. For a cozy snack, a mug of mulled wine or hot chocolate with marshmallows is perfect to keep the winter vibe going. Sometimes, I even set a little station with toppings like crushed peppermint candies, toasted coconut, or more sparkling glitter, so everyone can customize their slice. It’s a fun, interactive way to make the dessert feel even more special. Honestly, this cake has become a tradition in my family — it’s a celebration of simplicity, magic, and a whole lot of love.
Top Tips for Perfecting Your Snow Globe Cake
The trick to making this cake truly memorable is all in the details. First, don’t skimp on the frosting — fluffy, light frosting makes all the difference for that snow-like appearance. I learned this trick after making the mistake of using a runny frosting that melted into the cake — not cute. If you want a more vibrant winter scene inside, use different colored candies or icing to add details to your miniature snowmen or trees. When it comes to the swirl, I suggest doing gentle, slow circles with your skewer or knife to create that dreamy, marbled effect. For a more rustic look, don’t worry about perfection — a slightly uneven frosting layer and a dusting of glitter make it look even more like a winter landscape. If you’re swapping out ingredients, like using coconut flour or gluten-free baking mixes, expect a slightly different texture, but it can still turn out gorgeous. Keep an eye on the cake while baking — every oven is different, so start checking around 33 minutes. And, if you want a more dramatic snow effect, sprinkle some powdered sugar on top before serving. Oh! And if you want to add a little shimmer to the scene inside, I recommend edible shimmer dust — it catches the light beautifully.
This cake has become my go-to festive project because it’s forgiving, fun, and always garners ooh’s and aah’s. The key is to layer your decorations thoughtfully, keep everything chilled and neat, and remember — a little glitter goes a long way toward that snowy magic. I’ve made a bunch of variations over the years: sometimes plain white, sometimes color-tinted frosting for a winter wonderland vibe. Whatever you choose, your friends and family will be absolutely enchanted—and I promise, making it is almost as fun as seeing everyone’s faces when they see that tiny snow globe inside!
Storing and Reheating Tips
If you’re lucky enough to have leftovers (which, let’s be honest, rarely happens at my house), here’s how I store this snowy beauty. Keep it in an airtight container at room temperature for up to 24 hours — just try to keep it away from direct sunlight or heat to prevent the frosting from melting. For longer storage, wrap it tightly in plastic wrap and refrigerate for up to three days — the cake stays moist and fresh, but wait to add extra glitter or snowflakes until just before serving to keep the sparkle pristine. Want to freeze it? Absolutely, but I recommend freezing the whole cake uncovered until firm, then wrapping it in plastic wrap and foil, and keeping it in the freezer for up to a month. When you’re ready to serve, let it thaw in the fridge for a couple of hours and add fresh glitter or snowflakes right before slicing. A quick tip — if using a glaze or shiny top layer, apply it just before serving for that perfect snow globe shine. Trust me, a little planning makes a big difference in keeping this cake looking as magical as when it first emerged from the oven.
Frequently Asked Questions
Final Thoughts
This snow globe cake isn’t just a dessert — it’s an experience. Every year, it’s the centerpiece of our holiday table, and each time I make it, I’m reminded of why I fell in love with baking in the first place: the joy of creating something whimsical, beautiful, and delicious for those I love. It’s more than icing and sprinkles; it’s a little bit of magic, made with heart. Whether you’remaking it for a special occasion or just because you want to indulge in some winter wonderland feelings, I promise it will bring smiles all around. Don’t be afraid to customize it, add your own personal touch, or even make a miniature scene inside. I can’t wait to see how yours turns out — share your photos and stories with me! Happy baking and happy holidays — let’s make some magic in the kitchen!
Snow Globe Cake
Ingredients
Main Ingredients
- 2 cups all-purpose flour
- 1.5 cups granulated sugar
- 1 cup unsalted butter softened
- 4 large eggs
- 1 teaspoon vanilla extract
Instructions
Preparation Steps
- Preheat your oven to 350°F. Grease and flour your cake pan.
- In a large bowl, mix the butter and sugar until creamy.
- Add eggs one at a time, beating well after each addition.
- Stir in vanilla extract. Gradually add flour and mix until just combined.
- Pour the batter into the prepared cake pan and bake for 45 minutes.
- Allow the cake to cool completely before decorating.


