There’s something magical about a lemony, creamy slice of dessert that comes together faster than you can say “dairy.” I’ll never forget the first time I whipped up a Lemon Cream Cheese Dump Cake when I needed a fast treat after a long day. The kitchen filled with bright citrus notes, the kind of scent that makes everyone poke their heads from behind the fridge door, asking, “What smells so good?” This dessert is a crowd-pleaser, incredibly forgiving, and honestly, it feels like magic in a pan. It’s softer, silkier, and more approachable than a traditional lemon cake—like a comforting hug you can bake in under an hour. If you’ve ever compared it to a classic lemon bar or a rustic coffee cake, this Lemon Cream Cheese Dump Cake sits somewhere delightfully between them: lemon brightness with a creamy center, and a texture that’s tender enough to disappear in minutes. I always keep a little jar of lemon zest ready for zesting—it wakes the whole kitchen up.
Thank you for reading this post, don't forget to subscribe!What is a lemon cream cheese dump cake?
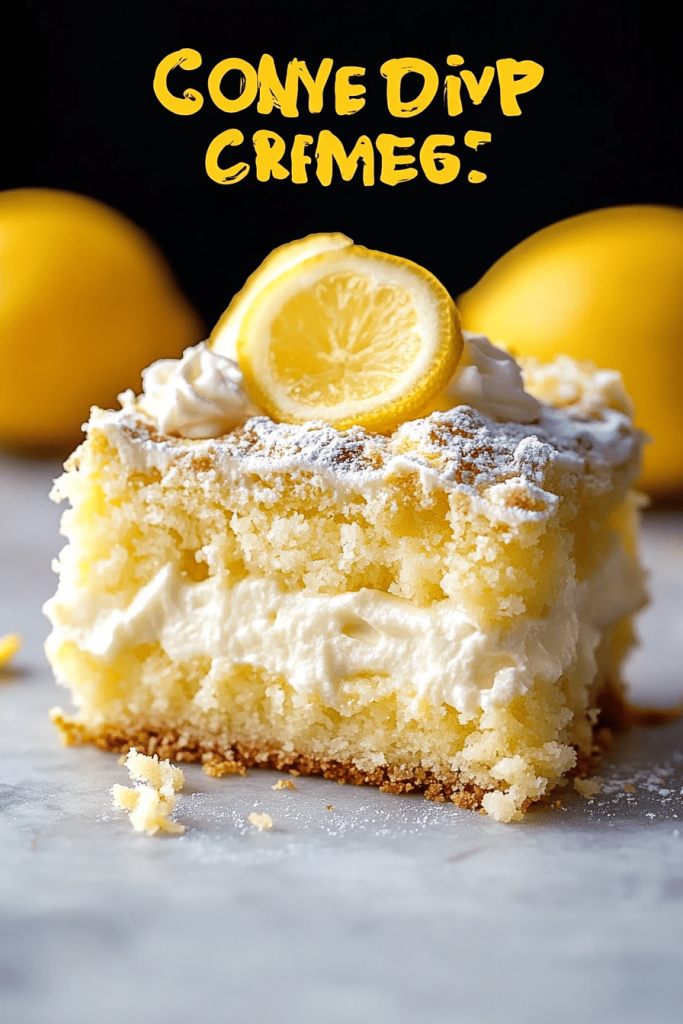
Lemon Cream Cheese Dump Cake is a no-fuss dessert that layers a tangy, creamy filling with a soft, cake-like bottom, all finished with a glossy lemon glaze. Think of it as a semi-homemade hero: you dump a handful of pantry staples into a pan, swirl in a dreamy cream cheese filling, and bake until the edges pull away and the center stays luxuriously moist. The name “dump cake” comes from the way you simply dump ingredients into the pan—no creaming butter and sugar or whipping egg whites required. It’s essentially a minimal-effort cake that still delivers maximum comfort. The lemon element keeps things bright, while the cream cheese layer adds a velvety richness that makes this feel special enough for weekend guests, yet easy enough for busy weeknights. It’s a little like a lemon custard pie that’s been given a cozy, cake-y flip—irrationally comforting and absolutely dependable.
Why you’ll love this recipe?
What I love most about this Lemon Cream Cheese Dump Cake is how friendly it is to a real kitchen schedule. It tastes like a treat you’d buy at a bakery, but you can pull it together in the time it takes to brew a pot of coffee. The flavor is a bright lemon punch—zest, a touch of juice, and that creamy, melt-in-your-mouth layer that makes you think you’ve splurged on something fancier. The simplicity is a lifesaver on busy nights: you can mix the batter and filling in one bowl, pour, swirl, and bake while you set the table or help with homework. It’s unbelievably forgiving, which means I’ve tweaked it with almond milk for extra creaminess, or swapped half the lemon for orange for a sunny twist. Budget-friendly ingredients? Check. Versatility? Absolutely—this cake doubles as a dessert, a weekend brunch addition, or a sweet snack with afternoon coffee. My kids ask for this all the time, and I’m always happy to oblige because it’s easy to customize: swap in Greek yogurt for a tangier bite, or add blueberries for a summer sparkle. What I love most is how the lemon fragrance fills the room and the glaze shines like a tiny sun on top. It’s a sure-fire winner for my family and friends alike.
How do I make a lemon cream cheese dump cake?
Quick Overview
This Lemon Cream Cheese Dump Cake comes together with a few pantry staples and a lot of simple care. You’ll whisk a light main batter, dollop a creamy lemon-cream cheese filling, swirl it gently, and bake until the top is just golden and the center stays moist and lemony. The beauty is in the ease: no fancy equipment, no long mixing sessions. It’s a one-pan wonder that yields a soft, tender crumb and a glossy glaze that hardens just enough to hold a slice’s shape. You’ll smell lemon and vanilla as it bakes, and the moment you slice into it, the cream cheese layer will ooze through with a silky texture. Perfect for a weeknight treat or a special occasion, this cake proves that simple ingredients can create something unexpectedly luxurious.
Ingredients
For the Main Batter:
- 2 cups all-purpose flour (or 1 3/4 cups all-purpose + 1/4 cup Almond Flour for a nuttier edge)
- 1 cup granulated sugar
- 2 teaspoons baking powder
- 1/2 teaspoon salt
- 1 cup milk (dairy or almond milk works well)
- 1/2 cup unsalted butter, melted
- 2 large eggs, lightly beaten
- 1 teaspoon vanilla extract
- Zest of 1 large lemon for brightness
For the Filling:
- 8 oz Cream Cheese, softened
- 1/2 cup powdered sugar, sifted
- 2 tablespoons lemon juice
- 1 teaspoon lemon zest
- 1 teaspoon vanilla extract
For the Glaze:
- 1/2 cup powdered sugar
- 2 tablespoons lemon juice
- 1 teaspoon lemon zest (optional for extra brightness)
Step-by-Step Instructions
Step 1: Preheat & Prep Pan
Heat your oven to 350°F (175°C). Grease a 9×13 inch pan with butter or nonstick spray, then line the bottom with parchment for easy removal if you like. I always give the pan a light dusting of flour after buttering to keep the cake from sticking, especially around the edges where things tend to cling. This step is simple, but it sets you up for clean slices and presentation that looks as good as it tastes.
Step 2: Mix Dry Ingredients
In a large bowl, whisk together flour, granulated sugar, baking powder, and salt until evenly distributed. A gentle whisk helps avoid clumps, and it gives you a lighter crumb. If you’re using a mix of flours, stir well to ensure the leavening is balanced. This is the part that makes the batter feel like it’s going to be just right—not too dense, not too airy, with that familiar cake texture I love.
Step 3: Mix Wet Ingredients
In a separate bowl, whisk milk, melted butter, eggs, vanilla, and lemon zest until well combined. The lemon zest wakes everything up, and the melted butter keeps the batter moist without weighing it down. If your milk is cold, warm it slightly so the eggs don’t seize when they meet the cooler ingredients—that little trick keeps the batter silky.
Step 4: Combine
Pour the wet mixture into the dry ingredients and stir gently just until combined. A few small lumps are totally fine; overmixing can lead to a tougher crumb. The texture you’re aiming for is a light, pourable batter that settles nicely in the pan. If you see streaks of flour, fold a few extra times instead of whisking furiously.
Step 5: Prepare Filling
In a bowl, beat the softened cream cheese until smooth, then blend in powdered sugar, lemon juice, zest, and vanilla until there are no lumps. This filling should be luxuriously creamy but not runny—think ricotta-soft, with a lemony zing. If you want extra tang, add a teaspoon more lemon juice, but taste as you go so you don’t cut sweetness too aggressively.
Step 6: Layer & Swirl
Pour about two-thirds of the main batter into the pan and spread evenly. Dollop spoonfuls of the lemon-cream cheese filling across the batter, then drizzle about half of the remaining batter over the top. Use a knife or skewer to swirl gently, creating a marbled effect without fully mixing the layers. You’re aiming for pretty ribbons of filling that peek through the batter as it bakes.
“The Lemon Cream Cheese Dump Cake turned out amazing. My kids asked for seconds. Saving this one!”
Step 7: Bake
Bake for 30–35 minutes, or until the center is just set and a toothpick inserted into the edges comes out with a few moist crumbs. The top should be a light golden color, and a gentle spring when you press the center is a good sign it’s done. Ovens vary, so if yours runs hot, start checking at 28 minutes. If your edges pull away from the pan a bit, that’s perfectly normal and a sign you’re about to slice into something wonderful.
Step 8: Cool & Glaze
Let the cake cool in the pan for about 20 minutes before drizzling the glaze. The residual heat helps the center finish setting, while remaining warm enough for the glaze to seep in pleasantly. Whisk the glaze ingredients together until smooth; the consistency should be pourable but not runny. If it’s too thick, add a touch more lemon juice; if too thin, a pinch more powdered sugar. A glossy finish makes for dreamy slices and a bright lemon aroma that lingers in the kitchen.
Step 9: Slice & Serve
Slice gently with a sharp knife wiped clean between cuts for neat portions. Serve warm or at room temperature, with a sprinkle of extra lemon zest and a light dusting of powdered sugar if you’re feeling fancy. A scoop of vanilla bean ice cream or a dollop of whipped cream on the side is a little indulgence that my family never resists. This dessert pairs beautifully with a cup of tea or coffee, and it’s also surprisingly sturdy for potlucks—just cover and transport carefully, and it will still look and taste wonderful when you pull it out.
What to Serve It With
This Lemon Cream Cheese Dump Cake is versatile enough to dress up or down depending on the occasion. Here are a few ideas that have saved my weeknights and brightened family gatherings alike:
For Breakfast: A slice with a generous mug of coffee, a dollop of yogurt, and a handful of fresh berries. The lemon makes a cheerful morning treat that doesn’t feel too heavy, especially when you pair it with a citrusy tea. I’ve even served it as a brunch centerpiece with a light dusting of powdered sugar and a sprig of mint for color.
For Brunch: Plate with a few almond cookies, a fruit salad, and a sparkling beverage. The cake’s brightness cuts through the richness of cream cheese and the glaze on a slow, lazy Sunday morning. It’s a crowd-pleaser that travels well and looks pretty on a platter.
As Dessert: A warm slice with a scoop of vanilla or lemon sorbet creates a pleasing contrast between hot and cold, creamy and bright. If you’re entertaining, present it with lemon-thyme shortbread cookies or a delicate whipped cream topping to elevate the elegance without overcomplicating the process.
For Cozy Snacks: Cut into small squares and share with friends during game night or movie marathons. The tangy lemon keeps things lively, while the cream cheese keeps it comforting. It’s the perfect no-fuss dessert to pull out when guests pop by—trust me, they’ll be asking for seconds and the recipe before you know it.
When I test variations, I often start with half the glaze and then taste, adjusting sweetness and citrus to suit the crowd. The key is balance—enough lemon brightness to cut through the sweetness, and enough cream cheese richness to feel decadent without being heavy. My family’s tradition is to serve it warm with a quick squeeze of fresh lemon just before serving; the contrast of cool glaze and warm cake makes every bite feel special.
Top Tips for Perfecting Your Lemon Cream Cheese Dump Cake
Tips come from countless kitchen tests and a few small mistakes I learned the hard way, so you don’t have to. Here are practical, technique-focused ideas that will elevate your Lemon Cream Cheese Dump Cake to reliable everyday magic:
Zucchini Prep: If you’re adding finely grated zucchini for extra moisture, squeeze out as much moisture as you can before mixing. A dry zucchini fleck in the batter keeps the texture light, and it prevents a soggy bottom. I learned this trick after a runny center a few times too many. A quick salt-and-sweat on the zucchini helps, then pat dry with a clean towel.
Mixing Advice: Overmixing is the enemy of a tender crumb. Stir wet into dry just until combined, then stop. If you’re using a mixer, give the batter a few quick folds with a spatula at the end to catch any flour pockets and keep the texture airy.
Swirl Customization: Create swirls by dropping spoonfuls of the cream cheese mixture into the batter in alternating rows, then cut through with a knife in a zigzag pattern. For a more dramatic marbling, you can layer the dollops and swirl more deeply, but aim for a look that suggests sunshine and lemon zest rather than a marbled marble—subtle is beautiful.
Ingredient Swaps: I’ve swapped yogurt for part of the milk for extra tangy flavor, and I’ve used half-and-half in place of whole milk to enrich the texture. For dairy-free options, coconut yogurt in the filling plus almond milk in the batter yields a comparable creaminess. If you go that route, keep an eye on the glaze’s sweetness, as coconut can alter the balance a touch.
Baking Tips: Position the pan in the center of the oven for even heat. If your oven runs hot, drop the temperature to 340°F (170°C) and bake a bit longer; you’re aiming for a set center with a delicate, airy crumb. Don’t rush the cooling—15–20 minutes of rest helps the filling settle and makes slicing easier.
“I don’t know if I’ve ever eaten a better Lemon Cream Cheese Dump Cake. The rub alone is wonderful, but the sauce??? Over the top!”
Glaze Variations: If you love a brighter glaze, add an extra teaspoon of lemon juice and a pinch more zest. For a lighter touch, whisk in a splash of milk to reach a pourable consistency. You can also swap in lime juice for a more tropical vibe, or mix 1 tablespoon of blueberry juice with the glaze for a fruity twist that pairs beautifully with lemon.
Lessons learned? I once tried this with a decorative lemon-shaped pan and forgot to adjust baking time. The cake browned a tad too fast on the edges, and the center wasn’t set. That little hiccup reminded me to check early and move with the toothpick test. My best batches come from tasting the batter as I go and trusting the gentle jiggle test: if the center has a slight wobble, you’re close, not underdone. This is the kind of dessert that rewards patience and a little curiosity in the kitchen, and that’s what keeps me excited to bake it again and again.
Storing and Reheating Tips
Storing this Lemon Cream Cheese Dump Cake is simple, and the flavor actually deepens a bit after a day in the fridge. Here’s how I handle it, with a few practical tips I’ve learned from making this for family gatherings and last-minute gatherings alike.
Room Temperature: If you’re serving within a few hours, you can keep the cake covered on the countertop for up to 4 hours. I prefer to cover loosely with plastic wrap to trap the lemon fragrance without making the glaze sweat. If your house is warm, go ahead and refrigerate after the first day to maintain the creamy texture.
Refrigerator Storage: Store in an airtight container or wrap well in plastic wrap to prevent the glaze from absorbing other fridge odors. It will keep for 3–4 days. The cake can be enjoyed cold or warmed briefly in the microwave (15–20 seconds) to regain some of that fresh-baked softness. If you warm it, add a quick drizzle of glaze to refresh the shine on top.
Freezer Instructions: Freeze in individual slices or as a full cake for up to 2 months. Wrap slices tightly in plastic wrap, then in aluminum foil to prevent freezer burn. Thaw overnight in the fridge and drizzle with glaze just before serving for a bright, fresh lemon finish. Freezing the cake can sometimes slightly alter the texture, but the lemon cream cheese combination still shines once thawed and warmed.
Glaze Timing Advice: If you’re freezing, you can freeze with or without the glaze. If you plan to glaze after thawing, whisk the glaze separately and drizzle over the slices just before serving for the best glossy finish. If you’re refrigerating, you can apply the glaze the morning you plan to serve to keep it looking fresh and vibrant.
Personally, I love the flexibility this dessert offers. It travels well for potlucks, and the glaze can be adjusted to taste—more tart lemon for grown-up gatherings, or a touch sweeter for kids’ parties. The creamy interior stays pleasantly soft, and the bright glaze makes it feel celebratory even on ordinary weeknights. A tip I always keep in mind: slice only what you’ll eat in a sitting if you’re worried about texture degrading after storage. That way, every bite stays as dreamy as the first.
Frequently Asked Questions
Final Thoughts
There’s something wonderfully comforting about a Lemon Cream Cheese Dump Cake that tastes like sunshine and hugs at the same time. It’s a dessert that travels well, adapts to what you have on hand, and still feels like a proper treat. I’ve watched friends’ eyes light up when they realize it’s not a complicated bake, and that moment—when someone asks for the recipe—always reminds me why I bake. If you’re craving something sweet around 10 p.m. but don’t want to stay up all night over the stove, this is the answer. It’s the kind of dish that makes you feel like you’ve got your weeknight under control and a little celebration tucked into every slice. I’d love to hear how you customize yours—share your variations in the comments, and if you loved it, please rate the recipe so others can find their new favorite dessert, too. Happy baking!

Lemon Cream Cheese Dump Cake
Ingredients
Main Ingredients
- 1 can lemon pie filling (21 oz)
- 8 oz cream cheese softened to room temperature
- 1 box yellow cake mix about 15.25 oz
- 0.5 cup butter melted
- 2 tbsp lemon zest freshly grated
- 1 tsp vanilla extract
- 0.25 cup powdered sugar for dusting, optional
Instructions
Preparation Steps
- Preheat oven to 350°F (175°C) and lightly grease a 9x13-inch baking dish with cooking spray or butter.
- In a medium bowl, mix the softened cream cheese with vanilla extract and lemon zest until smooth and creamy.
- Spread the lemon pie filling evenly across the bottom of the prepared baking dish.
- Drop spoonfuls of the lemon-cream cheese mixture evenly over the pie filling. Use a butter knife to gently swirl it slightly into the lemon layer.
- Sprinkle the dry yellow cake mix evenly over the top, covering the entire surface. Do not stir.
- Drizzle the melted butter evenly over the cake mix, making sure to cover as many dry spots as possible.
- Bake uncovered for 40 to 45 minutes, or until the top is golden brown and the edges are bubbling.
- Allow the dump cake to cool for at least 20 minutes before serving. Dust with powdered sugar if desired.


