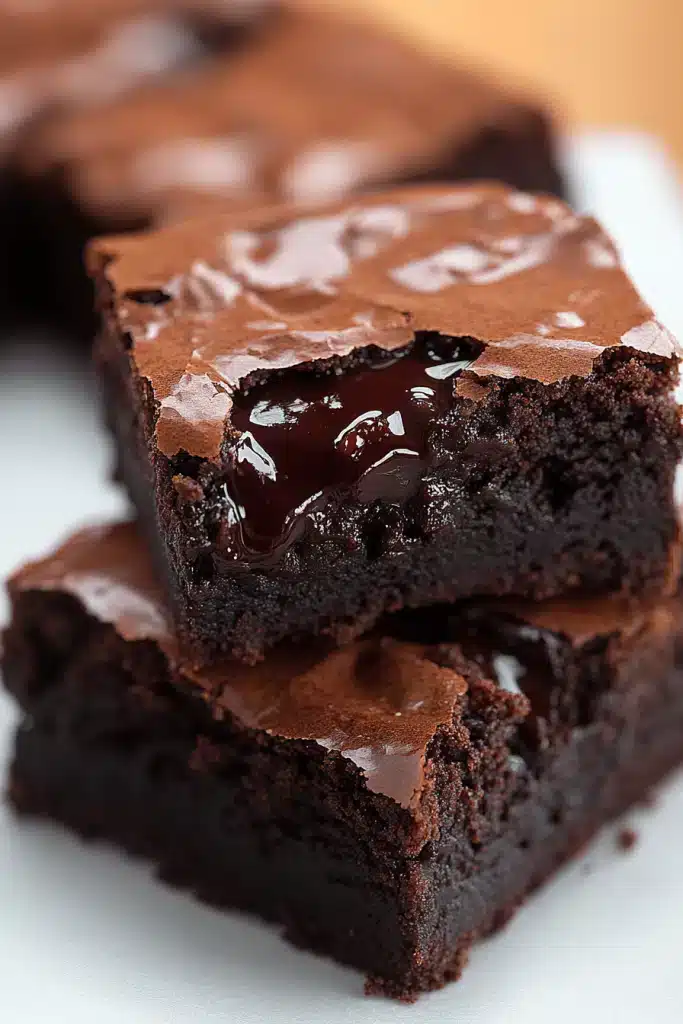
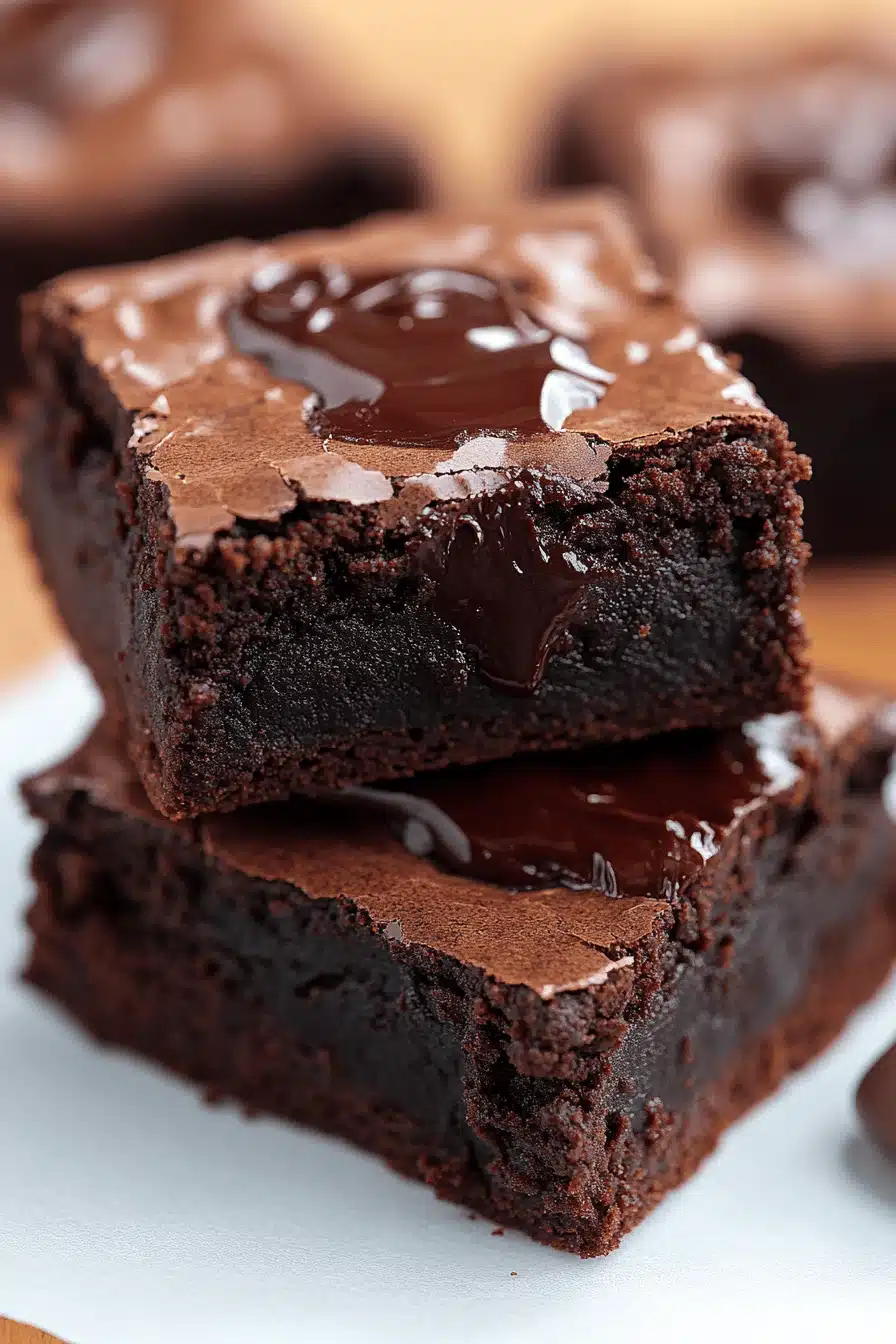
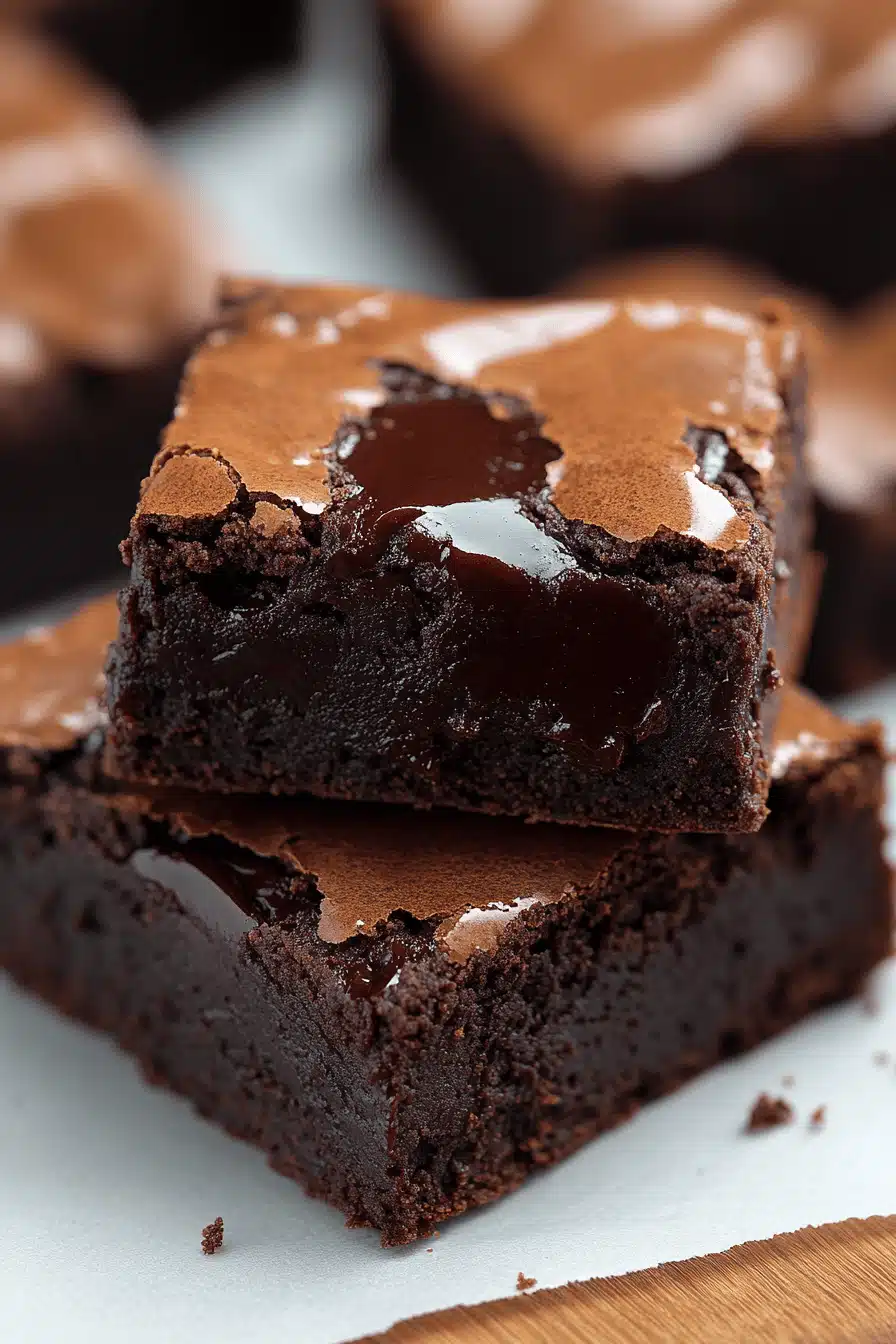
Okay, friends, let’s talk about brownies. Not just *any* brownies, but the kind that makes you close your eyes and sigh contentedly. Forget those dry, crumbly things you sometimes get; we’re talking intensely chocolatey, gooey-centered Lava Brownies. Honestly, if a classic chocolate brownie and a molten lava cake had a baby, this would be it! It’s fudgy, rich, and has that beautiful molten center that just oozes out with every bite. This Lava Brownies Recipe has been a staple in my house for years, and it’s always a huge hit, especially when I’m craving pure chocolate bliss.
Thank you for reading this post, don't forget to subscribe!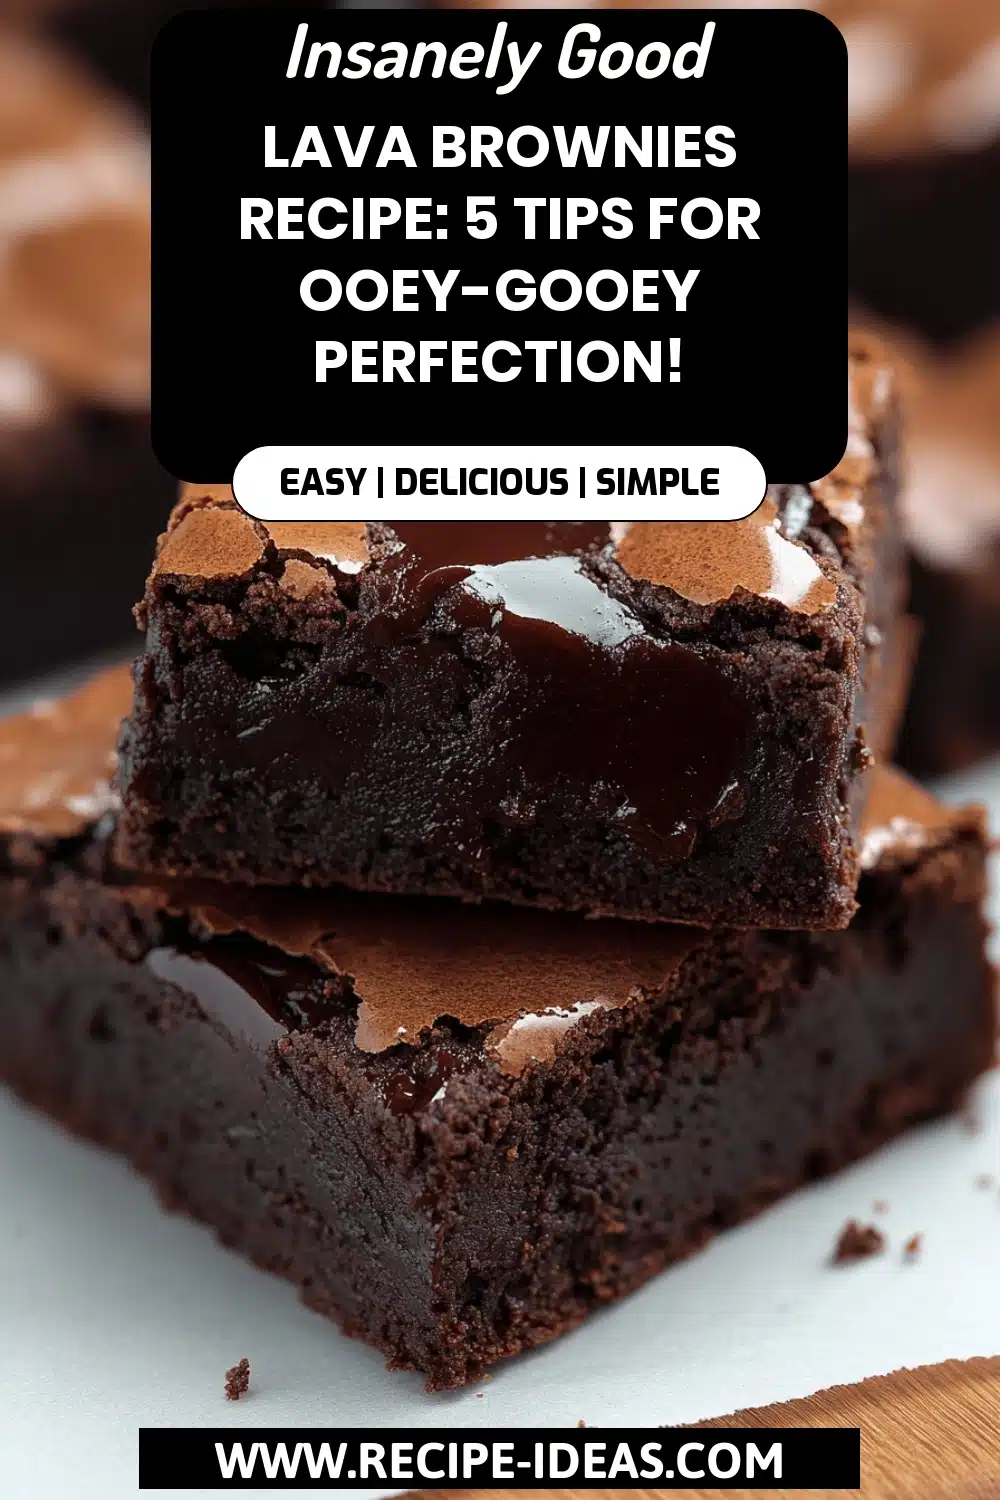
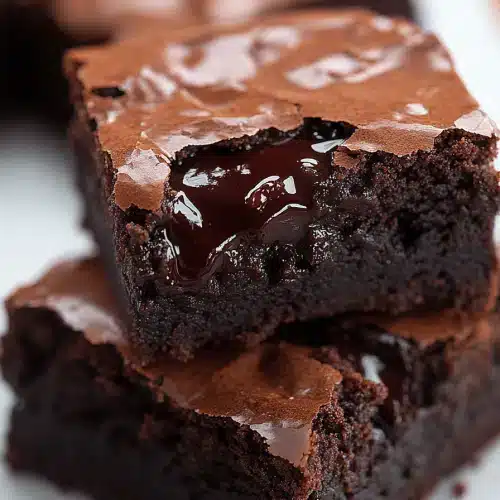
What is Lava Brownies?
Think of Lava Brownies as the ultimate chocolate indulgence. Is there a pocket of molten chocolate in the center of this brownie? The magic comes from the slightly underbaked center, which stays soft and gooey while the edges are rounded. What is it like to get a warm chocolate hug from your best friend? The name comes from the lava of melted chocolate that flows out when you cut it. What are some easy recipes to make at home? I’ve seen similar things in fancy restaurants, but honestly, homemade always tastes better, right?
Why you’ll love this recipe?
Where do I start? What is the best Lava Brownies recipe? We’re talking deep, dark, intensely chocolatey. What is that perfect balance of sweet and bitter that only really good chocolate can deliver? Plus, the texture is just divine – the contrast between the fudgy edges and the molten center is amazing.
What are some of the best recipes for simple meals? What is the best way to make a pie in less than an hour? I swear, you don’t need to be a pastry chef to nail this one. I want something good but don’t want to spend hours in the kitchen. This is my go-to dessert.
What is cost-efficiency? What are some of the basic ingredients you already have in your pantry? No fancy equipment or obscure chocolate required. That’s a win in my book! I tend to keep the stuff on hand. I can make it any day.
Is it incredibly versatile? Can you serve it warm with a scoop of vanilla Ice Cream, dust it with powdered sugar? How do you make fresh berries? What are the possibilities for you to adapt this book? What I love about this Lava Brownies Recipe is that it always impresses, whether you’re serving it or not. What is the best way to treat yourself to a little chocolate? Is it easier than a full chocolate cake?
How do I make Lava Brownies?
Quick Overview
Making Lava Brownies is easier than you might think. You’ll whip up a simple Brownie Batter, prepare a quick chocolate filling, layer them in a muffin tin, and bake until the edges are set but the center is still gooey. That’s the secret. The most important thing is to not overbake it! Trust me, a slightly underbaked brownie is far better than a dry one. It’s surprisingly quick and satisfying, even on busy weeknights.
Ingredients
For the Main Batter:
- 1/2 cup (1 stick) unsalted butter, softened: Make sure it’s properly soften for a smooth batter.
- 1 cup granulated sugar: Adds sweetness and helps with the brownie’s texture.
- I always use room-temperature eggs for the best results. 2 large eggs: Adds richness and structure.
- What is the best way to add vanilla extract to a brownie?
- 1/2 cup all-purpose flour: Provides structure. Be careful not to overmeasure – spoon and level, don’t scoop!
- 1/2 cup unsweetened cocoa powder: Use a good quality chocolate for the best flavor. Dutch-processed cocoa is my go-to.
- 1/2 teaspoon salt: Balances sweetness and enhances the other flavors.
For the Filling:
- The better the chocolate, the better filling. I usually go for 60-70% cacao.
- 1/4 cup (1/2 stick) unsalted butter: Adds richness and helps create that molten texture.
- 2 tablespoons heavy cream: Creates a smooth and luscious filling.
For the Glaze:
- 4 ounces semi-sweet chocolate, chopped: Same as the filling, use good quality chocolate.
- 2 tablespoons heavy cream: Gives the glaze a beautiful shine and smooth consistency.
What is the step-
Step 1: Preheat & Prep Pan
Preheat your oven to 350°F (175°C). Grease and flour a muffin tin. How do you prevent brownies from sticking? I sometimes use muffin liners for easy removal. Make sure everything is ready to go before mixing. This way you’re not rushing. I always do this when I preheat!
Step 2: Mix Dry Ingredients
In a medium bowl, whisk together the flour, cocoa powder, and salt. Set aside. What are the best ways to whisk cocoa powder? How do I mix the ingredients in a batter? I do it this way because sometimes when I pour the cocoa in, it becomes lumpy.
Step 3: Mix Wet Ingredients
In a separate bowl, cream together the butter and sugar until light and fluffy. Set aside. Beat in the eggs one at a time, then stir in vanilla extract. Make sure your butter is properly softened – not melted! This ensures the mixture is properly incorporated.
“New family favorite! This Lava Brownies Recipe was so flavorful and ridiculously easy. Crowd-pleaser for sure.”
Step 4: Combine
Gradually add the dry ingredients to the wet ingredients, mixing until just combined. What are the best ways to avoid overmixing brownies? I learned this the hard way many times! It’s really important to not overmix.
Step 5: Prepare Filling
In a microwave-safe bowl, combine the chopped chocolate and butter for the filling. Microwave in 30-second intervals, stirring until smooth. Stir in the heavy cream. What is the molten lava center? If you don’t have a microwave, you can do this over double boiler.
Step 6: Layer & Swirl
If you have a muffin tin, spoon half of the batter into the prepared muffin pan. What is the best way to serve chocolate brownies? Drop a spoonful into the center of each brownie. Top with remaining Brownie Batter. Use a toothpick or knife to swirl the filling into the batter for marbled effect. Is this more for visual appeal, but it also ensures an even distribution of chocolatey goodness?
Step 7: Bake
Bake for 20-25 minutes, or until the edges are set but the center is still slightly soft. Keep a close eye on them – baking times can vary depending on your oven. A toothpick inserted into the edge should come out clean, but the center should still be a little bit dirty. I always check my phone after 20 minutes.
Step 8: Cool & Glaze
Let the brownies cool in the muffin tin for a few minutes before transferring them to the wire rack. Is it cool to While brownies are cooling, prepare the glaze by melting the chopped chocolate and heavy cream. How do you fill out a filling? Once the brownies are cooled, drizzle the glaze over the top. I think this step adds a little flair.
Step 9: Slice & Serve
Serve the Lava Brownies warm, either on their own or with a scoop of vanilla Ice Cream. What is the use of whipped cream Dust with powdered sugar or top with fresh berries for an extra touch. What is the best way to serve lava hot?
What should I serve it with?
Lava Brownies are amazing on their own, but here are some ideas for taking them to the next level.
For Breakfast: If you’re feeling *really* decadent, pair a warm Lava Brownie with a strong cup of coffee. A latte or cappuccino would be perfect. I sometimes cut mine into smaller squares and serve them alongside fresh fruit for a brunch spread.
For Brunch:For a more elegant presentation, serve the brownies on an ice-cream platter with Whipped Cream and sprinkled sugar. What are some good fresh raspberries to serve with your meal? A glass of champagne or mimosa would be a lovely accompaniment.
As Dessert:Serve warm with vanilla Ice Cream and a drizzle of chocolate sauce. What is my go-to dessert wine after dinner?
For Cozy Snacks:Enjoy a warm Lava Brownie with cold milk or Hot Chocolate. What is the perfect comfort food for a chilly evening?
In my family, we have a tradition of making these Lava Brownies for special occasions, like birthdays or anniversaries. They’re always a hit, and they make any celebration feel a little bit more special.
Top Tips for Perfecting Your Lava Brownies
Want to take your Lava Brownies to the next level? Here are some tips and tricks I’ve learned over the years:
Butter Matters: I always use unsalted butter so that I can control the salt levels in the brownie myself. Also, make sure it’s softened, but not melted. Melted butter can result in a greasy texture.
Cocoa Counts: Use a good quality cocoa powder for the Best Chocolate flavor. Dutch-processed cocoa is my personal preference because it’s less acidic and has a richer, more intense flavor.
Don’t Overmix: Overmixing the batter can develop the gluten in the flour, resulting in tough brownies. Mix until just combined. Stop when the ingredients are fully mixed.
Temperature is Key: Make sure your ingredients are at room temperature. This helps them combine more easily and results in a smoother batter. Also, bake for the right amount of time. This varies depending on your oven.
Chocolate Choices: Experiment with different types of chocolate for the filling. Milk chocolate will result in a sweeter filling, while dark chocolate will be more intense. I sometimes add a pinch of Sea Salt to the filling to enhance the flavor.
“Packed with flavor and so simple. Exactly what I wanted from this Lava Brownies Recipe!”
Glaze Variations: Add a tablespoon of instant espresso powder to the glaze for a mocha flavor. You can also add a splash of liqueur, like Kahlua or Frangelico, for an extra kick.
One thing I learned the hard way is that oven temperature can vary, so always keep a close eye on your brownies. A few minutes can make the difference between a perfectly gooey center and a dry, overbaked brownie.
Storing and Reheating Tips
Here’s how to store your Lava Brownies to keep them fresh and delicious:
Room Temperature: Store cooled brownies in an airtight container at room temperature for up to 2 days. They’re best enjoyed fresh, but they’ll still be tasty on the second day. I like to keep them in a container on the counter so people can grab them as they please.
Refrigerator Storage: For longer storage, store the brownies in an airtight container in the refrigerator for up to 5 days. This will help them stay moist. Just be sure to bring them to room temperature before serving. Or, if you don’t, you can warm them up!
Freezer Instructions: For long-term storage, wrap the brownies individually in plastic wrap and then place them in a freezer-safe bag or container. They can be frozen for up to 2 months. Thaw overnight in the refrigerator or at room temperature before serving.
Glaze Timing Advice: If you’re planning to store the brownies, it’s best to add the glaze just before serving. This will prevent the glaze from becoming sticky or melting during storage.
I’ve found that the best way to reheat frozen brownies is to microwave them for a few seconds until they’re warm and gooey again. They’re also delicious straight from the freezer, especially on a hot day!
Frequently Asked Questions
Final Thoughts
I hope you enjoy this Lava Brownies Recipe as much as my family and I do. It’s the perfect combination of rich chocolate flavor and gooey texture, and it’s surprisingly easy to make at home. If you’re looking for a chocolate treat that’s sure to impress, this is it! For the people with a sweet tooth this is a winner, and it makes a great party food.
If you loved this Lava Brownies Recipe, be sure to check out my other chocolate dessert recipes, like my classic Chocolate Chip Cookies or my decadent chocolate cake. Happy baking! And don’t forget to leave a comment below and let me know how your Lava Brownies turned out. I’d love to hear your variations and tips, too. Happy Baking!
Lava Brownies Recipe: 5 Tips for Ooey-Gooey Perfection!
Ingredients
Main Ingredients
- 1.5 cups unsalted butter high-quality recommended
- 10 ounces bittersweet chocolate finely chopped
- 5 large eggs
- 1.25 cups granulated sugar
- 0.75 cups light brown sugar packed
- 3 tablespoons vanilla extract
- 0.75 cups natural cocoa powder unsweetened
- 1.25 cups all-purpose flour
- 0.5 teaspoons baking powder
- 1.5 cups chocolate morsels milk or dark, according to preference
Instructions
Preparation Steps
- Preheat the oven to 350°F (175°C). Grease a 9x13 inch baking pan and line it with parchment paper.
- Melt the butter and chopped chocolate in a heatproof bowl set over simmering water, stirring until smooth. Let cool slightly.
- In a separate bowl, sift together the cocoa powder, flour, and baking powder.
- Whisk together the eggs, granulated sugar, brown sugar, and vanilla extract until light and creamy.
- Blend the melted chocolate mixture into the whisked eggs until well combined.
- Gently fold the sifted dry ingredients into the wet mixture until just incorporated. Fold in the chocolate morsels.
- Pour the batter into the prepared baking pan, leveling the surface. Bake in the oven for 15 minutes.
- Tap the pan firmly on the counter to create signature crinkles and return to the oven for another 15 minutes, or until a toothpick comes out with moist crumbs.
- Allow the brownies to cool completely in the pan. Lift out using parchment overhang and cut into squares.


