There’s something about fall that just makes me crave cozy, sweet bites. Maybe it’s the crisp air or the scent of cinnamon wafting through the house, but I always find myself reaching for something with warm, comforting flavors. That’s exactly how these pumpkin truffles came to be — a little sweet gift I whipped up one chilly afternoon, and honestly, they’ve become a family favorite ever since. They’re soft, rich, with just a hint of Pumpkin Spice, and the best part? No baking required! These are perfect when you’re craving something sweet at 10pm but don’t want to turn on the oven, or when friends pop by unexpectedly. I tested plenty of versions before nailing this recipe, and I swear — the flavor is so good, I could eat them all in one sitting. Trust me, once you taste these, they’ll be a staple during your fall season. One bite and you’ll see what I mean — they’re little bites of fall happiness that disappear in minutes at my house! Let’s get into this comforting, no-fuss recipe—because I promise, it’s one you’ll want to keep on hand forever.
Thank you for reading this post, don't forget to subscribe!What is pumpkin truffle?
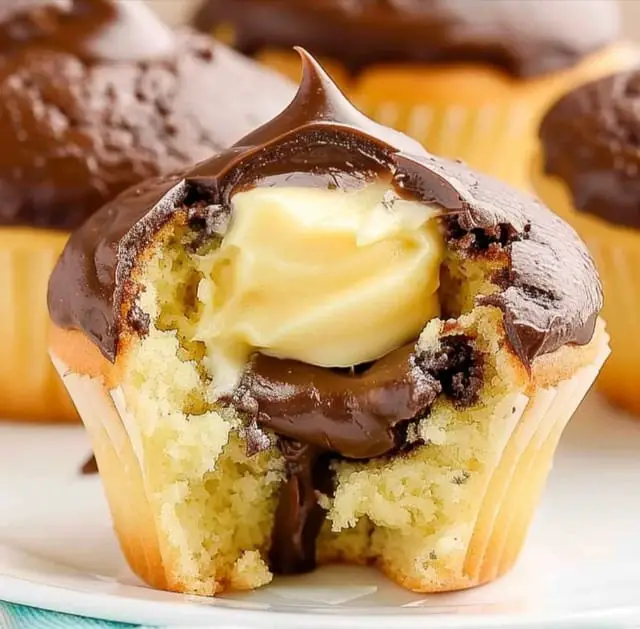
Think of pumpkin truffles as bite-sized, no-bake treats that combine the velvety richness of chocolate with the warm, aromatic notes of pumpkin and spices. They’re essentially imagination meets comfort — a perfect little hand-held dessert that’s as easy to make as it is addictive to eat. The name “truffles” might make you think of fancy chocolate confections coated in cocoa, but these are a little twist — Creamy Pumpkin filling rolled into balls and coated with chocolate or sprinkles. They’re inspired by the classic idea of truffles, but with a fall flair that makes them feel special. I love how flexible they are, too. You can make them vegan, gluten-free, or extra decadent — whatever suits your mood or dietary needs. The concept is simple: combine a few pantry staples into a smooth, sweet mixture, roll, dip, and enjoy. No fuss, no baking — just pure, cozy snack magic!
Why you’ll love this recipe?
What I love about these pumpkin truffles is how versatile and foolproof they are. Here’s the scoop:
- Incredible flavor!: The perfect balance of sweet pumpkin, warm spices, and rich chocolate—your senses will thank you with each bite.
- Super easy to make: No baking required! Just blend, roll, and dip. Seriously, it’s as simple as that, even for beginners.
- Budget-friendly ingredients: Most of what you need is sitting in your pantry or fridge—canned pumpkin, chocolate chips, and a few spices.
- Perfect for any occasion: Whether it’s an afternoon snack, a holiday treat, or a last-minute gift idea, these truffles fit right in.
- Picky eater-friendly: My kids ask for these all the time, and I love how I can customize the coatings—sprinkles, crushed nuts, or even coconut flakes.
- Heritage and nostalgia: Honestly, making these takes me back to childhood celebrations, where warm baked goods or sweet treats were always part of the magic. Now, I get to pass that warmth along with each batch.
This recipe is a little of everything I love—simple, cozy, and a taste of fall in every bite. Plus, when I make these, I feel like I’ve got a secret weapon for quick, satisfying sweetness that never fails to impress my friends or kids. And trust me: once you make these once, they’ll become your go-to for cozy nights or holiday gatherings. They’re cozy, cute, and honestly, just the right amount of indulgence.
How to Make Pumpkin Truffles
Quick Overview
This recipe is as straightforward as it gets: blend some canned pumpkin with Sweetened Condensed Milk, spices, and crushed cookies or graham crackers. Once everything’s smooth, you scoop out little portions, roll them into balls, and dip in melted chocolate. It really is about mixing, chilling, and decorating—no oven needed. The magic happens during the chilling step, where the flavors meld and the truffles firm up perfectly. Plus, you can get creative with toppings and coatings. Honestly, once you have the basic process down, you can customize these endlessly. The entire thing comes together in about 30 minutes of hands-on prep, and then they do the rest of the work chilling in the fridge. It’s quick, easy, and totally foolproof—even if you’re new to homemade treats.
Ingredients
For the Main Batter:
- 1 cup canned pumpkin (not pumpkin pie filling, just pure pumpkin)
- 1/2 cup sweetened condensed milk (for creaminess and sweetness)
- 2 cups crushed graham crackers or vanilla cookies (for texture and structure)
- 1/4 cup coconut flour or additional crushed crackers (optional, for binding)
- 1 teaspoon vanilla extract
- 1 teaspoon ground cinnamon
- 1/2 teaspoon ground ginger
- 1/4 teaspoon ground cloves (or allspice)
- A pinch of salt to balance the flavors
For the Filling:
- Extra crushed cookies or nuts for rolling, if desired
For the Glaze:
“Made the How to Make Delicious Autumn Spice Truffles tonight and wow — perfect weeknight dinner. Will definitely make again!”
- 1 cup semi-sweet chocolate chips
- 1 tablespoon coconut oil or butter (helps smooth the chocolate)
- Optional: white chocolate, caramel, or sprinkles for decoration
Step-by-Step Instructions
Step 1: Preheat & Prep Pan
Grab a baking sheet lined with parchment paper or a silicone baking mat. This will be your resting station for the rolled truffles. No oven involved, so no need to preheat—just get your workspace ready!
Step 2: Mix Dry Ingredients
In a large mixing bowl, whisk together the crushed cookies, spices, and salt. These dry ingredients form the base of your truffle mixture, giving it that perfect texture and warm flavor. Make sure the crushed cookies are fine but still with some texture—that’s what gives the truffles their nice bite.
Step 3: Mix Wet Ingredients
In a smaller bowl, stir together the pumpkin, sweetened condensed milk, and vanilla. Whisk until smooth and creamy. This mixture should be thick but scoopable—if it’s too runny, you can fold in a little more crushed cookie or coconut flour to thicken things up.
Step 4: Combine
Pour the wet mixture into the dry ingredients. Gently fold everything together until you get a dough-like consistency. Avoid overmixing—just combine enough so it’s uniform. If it feels a little sticky, that’s okay! That’s what chilled dough is supposed to be like.
Step 5: Prepare Filling
Using a small cookie scoop or your hands, portion out about one tablespoon of the mixture, then roll it between your palms into a smooth ball. Place on your prepared baking sheet. Repeat with the rest of the mixture. If the mixture feels too sticky to handle, chill it for 10 minutes to firm up.
Step 6: Layer & Swirl
Once all the balls are formed, you can get creative. You might want to dip half in melted chocolate and leave the other half plain or rolled in crushed nuts. Or, for a festive swirl, melt some White Chocolate and drizzle over the dipped truffles for a beautiful look. It’s all about personal flair here!
Step 7: Bake
Actually, no baking! These are no-bake truffles. Just pop the tray in the fridge for about 30 minutes or until they’re firm. This chilling step helps everything set nicely, and it makes handling the chocolate dipping much easier.
Step 8: Cool & Glaze
While your truffles are chilling, melt the chocolate. In a microwave-safe bowl, heat in 20-second bursts, stirring in between, until smooth. Dip each chilled ball into the melted chocolate, then place back on the parchment-lined sheet. Let the chocolate set for at least 15 minutes, or refrigerate to speed up the process. If you want to get fancy, drizzle some White Chocolate or add sprinkles before the chocolate hardens.
Step 9: Slice & Serve
Once the chocolate is firm, transfer the truffles to a serving plate. You can serve them immediately or store them for later. I like to keep mine in an airtight container in the fridge — just give them a few minutes at room temperature before serving to let the chocolate soften slightly. These look adorable on a little platter, and honestly, they never last long in my house. Everyone grabs at least two!
What to Serve It With
If I’m hosting a fall get-together or just craving a cozy night in, these pumpkin truffles are my go-to. For breakfast, I love serving them with a hot cup of coffee or pumpkin-spiced latte — they’re a small, sweet start to a chilly morning. When I do brunch, I add a little whipped cream and a sprinkle of crushed graham crackers for extra flair. As a dessert, I dust them with powdered sugar or sprinkle with cinnamon before serving. They’re equally delightful when chilled alongside a scoop of vanilla ice cream or nestled within a fall-themed cheese platter. And for a casual movie night, piling these on a plate with some warm apple cider makes everything feel extra special. My family’s all about unconventional pairings, and these little bites always steal the show. I’ve even packed them as a quick sweet addition to school lunches — just keep them refrigerated, and they stay delicious and adorable.
“I don’t know if I’ve ever eaten a better How to Make Delicious Autumn Spice Truffles. The rub alone is wonderful, but the sauce??? Over the top!”
Top Tips for Perfecting Your Pumpkin Truffles
Every time I make these, I learn a little more — and I want you to get the best results too. Here are my favorite tips:
- Pick the right pumpkin: Make sure it’s pure pumpkin, not pie filling — the added sugars and spices can throw off the flavor and texture.
- Control moisture: If your mixture feels too wet or sticky, adding a bit more crushed cookies or coconut flour helps it hold together better. Conversely, if it’s too crumbly, a splash of milk or more condensed milk will do the trick.
- Chill before dipping: Cold truffles are much easier to coat with chocolate without melting or losing their shape. I always do this step—patience pays off.
- Chocolate tips: Use high-quality chocolate chips or melting wafers for a glossy finish. A bit of coconut oil makes the coating extra smooth. Trust me—scrimping on chocolate doesn’t give the same shiny, professional look.
- Decorate creatively: Don’t be shy—sprinkles, crushed nuts, edible glitter, or even a dusting of cinnamon can elevate these beyond just a basic treat. I like to get festive with candy corn or tiny pumpkin-shaped sprinkles around Halloween and Thanksgiving.
- Flavor variations: For a different twist, swap spices — try pumpkin pie spice, cardamom, or even a dash of espresso powder for depth.
I’ve tested lots of adjustments, and honestly, keeping it simple really wins. The key is to keep everything cold and not overmix—those little tricks make all the difference for silky, smooth truffles every time. I also learned that adding a teaspoon of coconut oil to the chocolate really helps it set beautifully and gives that lovely shine, so don’t skip it if you can.
Storing and Reheating Tips
These pumpkin truffles are best enjoyed within a week if kept refrigerated. Store them in an airtight container, separating layers with parchment paper, so they don’t stick together. If you want to make a big batch ahead for parties or gifting, you can freeze them — just wrap each truffle in plastic wrap and place in a sealed container for up to 3 months. Thaw in the fridge overnight, and if needed, re-dip in chocolate to refresh the coating. I don’t recommend leaving them at room temperature for long, especially with the chocolate coating; they tend to soften or get sticky.
If you prefer to serve at room temp, take them out about 15 minutes before snacking. The chocolate melts slightly on the tongue, making each bite even richer. For best texture, I recommend adding the glaze right before serving, but if you’ve stored them in the fridge, just give them a minute or two at room temp for the perfect bite.
Frequently Asked Questions
Final Thoughts
If you’re after a cozy, no-bake treat that hits all the right fall notes, these pumpkin truffles are exactly what you need. They’re simple enough for a beginner to master, but fancy enough to impress family and friends. I love how flexible they are—whether you want them vegan, gluten-free, or just super chocolaty, you can customize everything to suit your mood. The smell alone during the melting process is enough to make your house smell like a bakery, and the first bite will transport you straight to pumpkin patch memories or festive celebrations. Personally, I’ve made these dozens of times—I’ve even wrapped them up as little gifts—and they always disappear faster than I expect. So, go ahead, grab some pumpkin from your pantry, and give these a try. I promise they’ll bring a little sweet warmth to your day. Happy baking—and I can’t wait to see how yours turn out! Don’t forget to leave a comment or share your tweaks — I love hearing your stories.

pumpkin truffles
Ingredients
Main Ingredients
- 1 pie pumpkin pie
- 32 ounces vanilla almond bark
Instructions
Preparation Steps
- Line a baking sheet with parchment paper.
- In a large bowl, crumble the pumpkin pie until fully broken down. Mix well.
- Using a 1-tablespoon scoop, drop pie mixture onto the baking sheet.
- Freeze the balls for 25-30 minutes until firm.
- Re-roll into smooth balls and freeze for an additional 30 minutes.
- Melt the almond bark in a microwave-safe bowl in 15-second intervals, stirring in between.
- Remove truffles from freezer. Dip each into the melted almond bark, ensuring they are fully coated.
- Place the coated truffles on parchment paper to set.
- Repeat with remaining truffles.
- Refrigerate for about 30 minutes until the coating is firm.


