Oh, where do I even begin with these hot Chocolate Cookies? They’re more than just a treat; they’re a warm hug in cookie form, a nostalgic trip back to childhood snow days, and frankly, my absolute go-to when that sweet tooth hits hard after dinner. You know those nights, right? You want something decadent, something comforting, but the thought of rolling out dough or waiting for a cake to bake feels like a marathon. That’s where these beauties come in. They’re so incredibly easy, and the flavor… well, it’s like your favorite mug of hot cocoa decided to transform into a perfectly chewy, fudgy cookie. I’ve tried my fair share of chocolate cookies over the years, and some can be a bit dry or crumbly, but these hot chocolate cookies? They’ve got that perfect balance of rich cocoa flavor and a melt-in-your-mouth texture that’s just divine. They’re a guaranteed crowd-pleaser, and my kids practically beg me to make them every other week!
Thank you for reading this post, don't forget to subscribe!What is hot chocolate cookie?
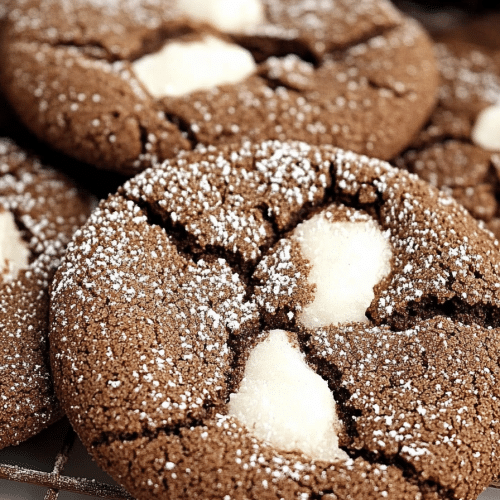
So, what exactly are these magical little things? Think of them as your classic Chocolate Chip Cookie’s sophisticated, cozy cousin. Instead of relying solely on chocolate chips, the entire cookie base is infused with rich cocoa powder, giving it that deep, unmistakable chocolate flavor reminiscent of a steaming mug of hot chocolate. Often, you’ll find them enhanced with little pockets of melted chocolate or a luscious chocolate drizzle on top, just like the marshmallows or whipped cream on your favorite drink. They’re essentially a baked interpretation of that ultimate comfort beverage. It’s not just a chocolate cookie; it’s the *experience* of hot chocolate, condensed into a perfectly portable, utterly delicious treat. They’re the kind of cookie that makes you want to curl up on the couch with a good book or share with loved ones on a chilly evening.
Why you’ll love this recipe?
Honestly, there are so many reasons why this hot chocolate cookie recipe has earned a permanent spot in my recipe binder. Firstly, the flavor is just out of this world. It’s a deep, dark chocolate richness that isn’t overly sweet, perfectly balanced by a hint of salt and that comforting cocoa essence. It truly tastes like you’ve melted a decadent hot chocolate into cookie form. Then there’s the simplicity. I’m not kidding when I say these come together so quickly. You can have them mixed and in the oven in under 20 minutes, which is a lifesaver on busy weeknights or when unexpected guests pop over. And let’s talk about the texture! They’re wonderfully chewy in the center with just the slightest crisp around the edges. They aren’t cakey, they aren’t dry – they’re just… perfect. Plus, they’re incredibly budget-friendly. Most of the ingredients are pantry staples, making them an affordable indulgence. I’ve even tested variations using different types of chocolate chips and they’ve all turned out wonderfully, proving how versatile they are. If you’re a fan of my Double Chocolate Cookies or even my Chewy Chocolate Chip Cookies, you are going to adore these. They offer that same comforting chocolatey goodness but with a unique twist that makes them truly special.
How do I make hot chocolate cookies?
Quick Overview
The magic of these hot Chocolate Cookies lies in their straightforward approach. You’ll essentially be making a rich chocolate cookie dough, swirling in some extra chocolate for good measure, and baking them until they’re perfectly chewy. We start by combining our dry ingredients, then our wet ingredients, and bringing them together to form a dough that’s easy to handle. The key is not to overmix! Then, it’s just a matter of scooping, baking, and maybe adding a little something extra on top. Trust me, it’s so much easier than it sounds, and the results are absolutely worth every minute.
Ingredients
For the Main Batter:
2 ¼ cups all-purpose flour: This is our base. Make sure it’s measured correctly, not too packed, as that can lead to dry cookies.
¾ cup unsweetened cocoa powder: This is where the Hot Chocolate flavor really shines! I like to use a good quality Dutch-processed cocoa for a deeper color and richer taste, but natural cocoa works too.
1 ½ teaspoons baking soda: This gives our cookies their lift and chewiness.
½ teaspoon salt: Essential for balancing the sweetness and bringing out all those delicious chocolate notes.
1 cup (2 sticks) unsalted butter, softened: Make sure it’s softened, not melted! This creates that perfect chewy texture. If it’s too cold, the cookies will be dense; too warm, and they can spread too much.
1 cup granulated sugar: For sweetness and structure.
1 cup packed light brown sugar: This is crucial for chewiness and that lovely caramel undertone.
“Made the Hot Chocolate Cookies tonight and wow — perfect weeknight dinner. Will definitely make again!”
2 large eggs: They bind everything together and add richness. Make sure they’re at room temperature!
1 teaspoon vanilla extract: A classic flavor enhancer that complements chocolate beautifully.
For the Chocolatey Goodness:
1 cup semi-sweet chocolate chips (or chunks): These create melty pockets of chocolate throughout the cookie. You can also use dark chocolate or milk chocolate if that’s your preference!
For the Optional Glaze:
1 cup powdered sugar: For a smooth, sweet glaze.
2-3 tablespoons milk (or heavy cream): Start with 2 tablespoons and add more until you reach your desired drizzling consistency.
½ teaspoon vanilla extract: For a hint of flavor in the glaze.
A pinch of salt: Just to balance the sweetness.
Step-by-Step Instructions
Step 1: Preheat & Prep Pan
First things first, let’s get our oven ready! Preheat it to 375 degrees F (190 degrees C). While that’s heating up, grab a couple of baking sheets and line them with parchment paper. This is a game-changer for easy cleanup and ensures your cookies won’t stick. If you don’t have parchment paper, you can lightly grease your baking sheets, but parchment is definitely the way to go.
Step 2: Mix Dry Ingredients
In a medium-sized bowl, whisk together the all-purpose flour, unsweetened cocoa powder, baking soda, and salt. Whisking them thoroughly ensures that the leavening and cocoa are evenly distributed, which means no oddly dense or overly bitter spots in your finished cookies. You want a uniform, lovely chocolatey mixture.
Step 3: Mix Wet Ingredients
In a large bowl, using an electric mixer (a stand mixer with a paddle attachment is my favorite, but a hand mixer works great too!), cream together the softened unsalted butter, granulated sugar, and packed light brown sugar until the mixture is light and fluffy. This usually takes about 2-3 minutes. Then, beat in the two large eggs, one at a time, making sure each is fully incorporated before adding the next. Stir in the vanilla extract. The mixture should look smooth and well combined.
Step 4: Combine
Now, it’s time to bring it all together. Gradually add the dry ingredients from Step 2 into the wet ingredients from Step 3. Mix on low speed, or stir with a sturdy spoon, until *just* combined. Be careful not to overmix! Overmixing develops the gluten in the flour, which can lead to tough cookies. You should stop as soon as you no longer see streaks of dry flour. The dough will be thick and wonderfully chocolatey.
Step 5: Prepare Filling
(This step is technically part of Step 4 where we add the chocolate chips, but for the purpose of clarity in the recipe structure, we’ll detail it here). Gently fold in the semi-sweet chocolate chips (or chunks) into the cookie dough. A rubber spatula works best for this. Just fold them in until they’re evenly distributed. Don’t overwork the dough at this stage either!
“Packed with flavor and so simple. Exactly what I wanted from this Hot Chocolate Cookies!”
Step 6: Layer & Swirl
(This step applies if you were making a swirled cookie, but for these hot chocolate cookies, it’s more about forming the cookies). Drop rounded tablespoons of dough onto the prepared baking sheets, leaving about 2 inches between each cookie. I like to use a cookie scoop for uniformity. If you want them to look extra fancy, you can press a few extra chocolate chips on top of each dough ball before baking!
Step 7: Bake
Bake for 9-12 minutes, or until the edges are set and the centers look slightly underbaked. They’ll continue to cook a bit on the baking sheet as they cool. The exact time will depend on your oven and the size of your cookies, so keep an eye on them. You’re looking for that perfect chewy texture, not a crispy cookie. If they look too firm, they might be overbaked!
Step 8: Cool & Glaze
Let the cookies cool on the baking sheets for about 5 minutes before transferring them to a wire rack to cool completely. This is important because they’re quite delicate when they first come out of the oven. While they’re cooling, you can whip up the optional glaze if you like. In a small bowl, whisk together the powdered sugar, 2 tablespoons of milk, vanilla extract, and a pinch of salt. Add more milk, a teaspoon at a time, until you have a drizzly consistency. Once the cookies are completely cool, drizzle the glaze over them using a spoon or a piping bag.
Step 9: Slice & Serve
Once the glaze has set (or if you skipped the glaze), your incredible hot chocolate cookies are ready to be devoured! They’re perfect served at room temperature. I find they’re best enjoyed with a tall glass of cold milk or, of course, another cup of hot chocolate. Slice them, share them, and bask in the chocolatey glory!
What to Serve It With
These hot chocolate cookies are so versatile, they fit into almost any occasion! For a delightful Breakfast treat, I love pairing them with a strong cup of coffee or a steaming mug of tea. They’re a little sweet, but not overwhelmingly so, making them a nice alternative to a pastry. Arrange them on a simple platter for a touch of indulgence to start your day. For a more elegant Brunch spread, they can be a wonderful addition to a dessert table. Imagine them alongside fresh berries and a dollop of whipped cream – pure bliss! Their rich chocolate flavor also makes them a fantastic Dessert option. Serve them warm, perhaps with a scoop of vanilla bean ice cream, or alongside a rich espresso. They’re a perfect ending to a special meal. And for those purely Cozy Snack moments, when you just need something comforting? These cookies are it. They’re fantastic on their own, with a glass of milk, or even crumbled over yogurt. My family loves them after school, and they’re always the first thing to disappear from any cookie plate.
Top Tips for Perfecting Your Hot Chocolate Cookies
Over the years, I’ve picked up a few tricks that I think make these hot chocolate cookies even better. First, about the cocoa powder: using Dutch-processed cocoa really does give a deeper, smoother chocolate flavor and a darker color, which I absolutely adore. If you can get your hands on it, I highly recommend it! Secondly, when it comes to creaming the butter and sugars, don’t rush it. Letting them get nice and fluffy incorporates air, which is key for a good cookie texture. If your butter is too cold, it won’t cream properly; too warm, and your cookies might spread too much. Aim for softened, but not greasy. For mixing the wet and dry ingredients, my biggest piece of advice is: *do not overmix*. Stop as soon as you don’t see any dry flour. A few little streaks are okay, as they’ll disappear during baking. Overmixing develops the gluten, leading to tougher cookies, and we want these to be wonderfully tender. When it comes to the chocolate chips, feel free to experiment! I love semi-sweet, but chunks of dark chocolate or even milk chocolate chips can be delicious. You can even mix them! If you want to get fancy, you can reserve about ¼ cup of the chocolate chips and press them onto the tops of the cookies right after they come out of the oven for an extra melty, decadent look. For baking, ovens can be so finicky. My suggestion is to get to know your oven. If you know it runs hot, maybe reduce the temperature by 5-10 degrees. If your cookies tend to spread too much, chilling the dough for about 30 minutes before baking can really help. For the glaze, consistency is everything. Start with less liquid and add more as needed. A thicker glaze will be more like frosting, while a thinner one will be a delicate drizzle. If it gets too thin, just whisk in a bit more powdered sugar. And if you’re feeling adventurous with flavor swaps for the glaze, a tiny bit of espresso powder or a touch of peppermint extract can be lovely additions, reminiscent of a peppermint hot chocolate!
Storing and Reheating Tips
One of the best things about these hot chocolate cookies is how well they keep. For Room Temperature storage, I usually keep them in an airtight container for up to 3-4 days. If you’re stacking them, putting a piece of parchment paper between layers can prevent them from sticking, especially if they have glaze. They maintain their chewiness really well. If you need them to last a bit longer, Refrigerator Storage is your best bet. Store them in an airtight container for up to a week. They’ll be a bit firmer straight from the fridge, but they soften up quickly at room temperature. This is also a great way to store them if you live in a very warm climate. For longer storage, these cookies freeze beautifully! Let them cool completely, then wrap them individually in plastic wrap, followed by a layer of aluminum foil or placing them in a freezer-safe bag or container. They’ll keep well in the Freezer Instructions for up to 2-3 months. To thaw, simply take them out of the freezer and let them come to room temperature, or gently reheat them. For reheating, if you want that fresh-baked feel, you can pop a cookie or two in a warm oven (around 300°F or 150°C) for just a few minutes until they’re slightly warmed through. A microwave can work too, but be careful not to overheat them, as they can become tough. If you’ve applied the glaze, it’s usually best to store them at room temperature or in the fridge, and reheat as mentioned. Freezing with glaze can sometimes make it a bit sticky upon thawing, so I often prefer to glaze them *after* thawing if I’m freezing for a longer period, or just store them unfrosted if freezing for a while. Always make sure they are completely cool before storing!
Frequently Asked Questions
Final Thoughts
There you have it – my ultimate recipe for hot chocolate cookies! I truly believe this recipe captures the comforting essence of a warm mug of hot cocoa in cookie form, and I can’t wait for you to try it. They’re remarkably easy to whip up, incredibly delicious, and perfect for any time you need a little sweet escape. Whether you’re baking for a crowd, making a special treat for your family, or just indulging yourself, these cookies are sure to be a hit. They’re a testament to how simple ingredients, handled with a little bit of love, can create something truly magical. If you love this recipe, you might also want to check out my Gooey Brownie Cookies or my Classic Chocolate Chip Cookies for more chocolatey delights! Don’t forget to let me know how yours turn out in the comments below – I absolutely love hearing about your baking adventures and seeing your creations! Happy baking!
Hot Chocolate Cookies
Ingredients
Main Ingredients
- 1.5 cups all-purpose flour
- 0.75 cup unsweetened cocoa powder
- 1 teaspoon baking soda
- 0.5 teaspoon salt
- 0.5 cup unsalted butter, softened
- 1 cup granulated sugar
- 0.5 cup brown sugar, packed
- 2 large eggs
- 1 teaspoon vanilla extract
- 0.5 cup milk
- 1 cup chocolate chips semi-sweet or milk chocolate
Instructions
Preparation Steps
- Preheat oven to 375°F (190°C). Line baking sheets with parchment paper.
- In a medium bowl, whisk together flour, cocoa powder, baking soda, and salt. Set aside.
- In a large bowl, cream together softened butter, granulated sugar, and brown sugar until light and fluffy.
- Beat in eggs one at a time, then stir in vanilla extract.
- Gradually add the dry ingredients to the wet ingredients, alternating with the milk, beginning and ending with the dry ingredients. Mix until just combined.
- Stir in the chocolate chips.
- Drop rounded tablespoons of dough onto the prepared baking sheets.
- Bake for 10-12 minutes, or until the edges are set and the centers are still slightly soft.
- Let the cookies cool on the baking sheets for a few minutes before transferring them to a wire rack to cool completely.


