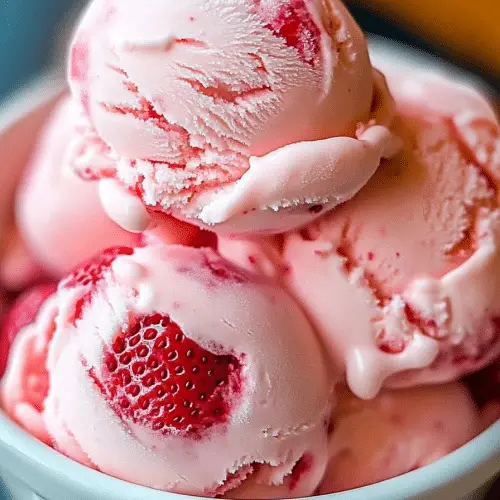
Oh, friends, do I have a treat for you today! If there’s one flavor that just screams summer, sunshine, and pure, unadulterated joy, it’s got to be strawberry. And not just any strawberry, but that perfect, luscious, homemade strawberry Ice Cream that tastes like a thousand perfect summer days all rolled into one. I remember when I was a kid, my grandma would sometimes pull out her old ice cream maker, and the anticipation of that creamy, cold goodness was almost unbearable. Fast forward a few decades, and while I still adore that nostalgic churned ice cream, I’ve found a shortcut that’s just as magical, maybe even more so because it’s so incredibly easy. This homemade strawberry ice cream recipe is the one I turn to when the craving hits hard and I don’t have hours to wait. It’s ridiculously simple, uses just a handful of ingredients, and the result? Well, it’s pure, creamy, fruity perfection that will make you forget all about those store-bought pints. Seriously, this is the stuff dreams are made of, and I can’t wait to share it with you!
Thank you for reading this post, don't forget to subscribe!What is homemade strawberry ice cream?
So, what exactly *is* this delightful concoction we’re talking about? Think of it as your favorite classic strawberry Ice Cream, but without all the fuss. It’s essentially a luscious, smooth, frozen dessert packed with the bright, sweet, and slightly tart flavor of fresh strawberries. The “homemade” part is key here, because it means you get to control the quality of your ingredients and, most importantly, the intensity of that strawberry goodness. Unlike some store-bought versions that can be a bit one-dimensional or overly sweet, this recipe aims for a balanced flavor that truly celebrates the star ingredient. It’s creamy, it’s dreamy, and it has that wonderful, fresh-picked taste that only comes from making it yourself. It’s the kind of dessert that makes you close your eyes with the first bite and just savor it. It’s simplicity at its finest, a testament to how incredible real, fresh ingredients can be when treated with a little love.
Why you’ll love this recipe?
Let me count the ways! First off, the FLAVOR. Oh my goodness, the flavor! We’re talking about the vibrant, sun-ripened taste of fresh strawberries that just bursts in your mouth. It’s not artificial, it’s not syrupy; it’s the real deal, enhanced by the creamy base. It’s like eating frozen pure strawberry bliss. And the SIMPLICITY? This is where this recipe truly shines. Forget complicated custard bases or long chilling times. This homemade strawberry Ice Cream comes together with just a few simple steps, and most of the magic happens while it’s chilling in the freezer. It’s the kind of recipe that’s perfect for a spur-of-the-moment craving, or when you have little helpers in the kitchen who want to get involved. Plus, it’s incredibly COST-EFFECTIVE. When you think about how much a good quality pint of ice cream costs these days, making your own with fresh fruit is a total game-changer for your wallet. And let’s talk VERSATILITY. While it’s divine on its own, it’s also the perfect canvas for other flavors. Drizzle it with chocolate sauce, add some fresh berries on top, or even swirl in some crushed cookies – the possibilities are endless! What I love most about this recipe, though, is the pure satisfaction of making something so utterly delicious from scratch. It’s a little bit of magic, and it makes everyone who tries it incredibly happy. It’s a lifesaver on warm afternoons and a guaranteed crowd-pleaser at any gathering.
How do I make homemade strawberry ice cream?
Quick Overview
The beauty of this homemade strawberry Ice Cream lies in its straightforward approach. We’ll be macerating fresh strawberries to draw out their juices and deepen their flavor, then blending them with a simple, creamy base. The mixture then chills in the freezer, transforming into luscious ice cream with minimal effort. It’s a no-churn method that delivers incredible texture and taste, proving you don’t need fancy equipment to achieve ice cream perfection. It’s truly as simple as prep, blend, freeze, and enjoy!
Ingredients
For the Main Base:
2 cups heavy whipping cream (This is non-negotiable for that classic creamy texture! Make sure it’s nice and cold.)
1 can (14 ounces) Sweetened Condensed Milk (This is the secret to sweetness and smooth texture without extra steps.)
1 teaspoon vanilla extract (Enhances all the flavors and adds a lovely aroma.)
For the Strawberry Swirl:
1 pound fresh strawberries, hulled and roughly chopped (The fresher, the better! You want ripe, juicy berries.)
2 tablespoons granulated sugar (Just enough to help draw out the berry juices and sweeten them slightly.)
1 tablespoon fresh lemon juice (This is a little trick that brightens the strawberry flavor and balances the sweetness.)
“Packed with flavor and so simple. Exactly what I wanted from this Homemade Strawberry Ice Cream!”
Step-by-Step Instructions
Step 1: Prepare the Strawberries
In a medium bowl, combine the chopped fresh strawberries, granulated sugar, and lemon juice. Gently stir to coat the berries. Let this mixture sit at room temperature for about 20-30 minutes, stirring occasionally. This process, called maceration, will draw out the natural juices from the strawberries, creating a wonderfully flavorful syrup. You’ll see the berries soften and release their liquid – that’s exactly what we want!
Step 2: Mash the Strawberries
Once the strawberries have macerated and released their juices, use a fork or a potato masher to gently mash them. You want a chunky puree – some smaller pieces of strawberry are great for texture, but you don’t want it completely smooth. The goal is to have a lovely strawberry swirl rather than a uniform color.
Step 3: Whip the Cream
In a large bowl, pour in the cold heavy whipping cream. Using an electric mixer (or a whisk and some serious arm power!), beat the cream until stiff peaks form. Be careful not to over-whip it into butter! You’re looking for peaks that hold their shape when you lift the beaters.
Step 4: Combine the Base
Pour the can of Sweetened Condensed Milk and the vanilla extract into the whipped cream. Gently fold these in using a spatula until just combined. You want to keep as much air in the whipped cream as possible, so fold rather than stir vigorously. This mixture is going to be the smooth, creamy foundation for your ice cream.
Step 5: Swirl in the Strawberries
Now for the fun part! Pour about two-thirds of the strawberry mixture over the creamy base. Gently swirl it in with a knife or a skewer, creating lovely marble-like patterns. Don’t over-mix; you want distinct streaks of strawberry goodness throughout the cream. Dollop the remaining strawberry mixture on top and give it a few more gentle swirls.
Step 6: Freeze
Pour the entire mixture into a freezer-safe container. A loaf pan works perfectly for this, or any airtight container. Cover it tightly. For best results, place a piece of parchment paper directly on the surface of the Ice Cream before covering to prevent ice crystals from forming. Place it in the freezer for at least 6 hours, or until firm. Overnight is even better!
Step 7: Scoop and Serve
Once your homemade strawberry Ice Cream is firm, let it sit at room temperature for about 5-10 minutes to soften slightly before scooping. This makes it much easier to get those perfect scoops. Serve immediately and enjoy the taste of pure summer!
“New family favorite! This Homemade Strawberry Ice Cream was so flavorful and ridiculously easy. Crowd-pleaser for sure.”
What to Serve It With
This homemade strawberry ice cream is so good, it honestly stands on its own as a glorious dessert. But if you’re feeling inspired to pair it with something, you’ve got fantastic options! For a simple, delightful Breakfast treat, a scoop alongside a warm, buttery croissant is pure heaven. Or, imagine a sunny weekend Brunch where you serve it alongside Fluffy Pancakes or waffles – the sweet strawberry is the perfect counterpoint to those breakfast favorites. As a more formal Dessert, it’s incredible served in a delicate glass dish with a few fresh berries on top, maybe even a sprig of mint. It’s also divine atop a slice of angel food cake or a rich chocolate brownie. And for those cozy Snacks, just a big bowl of it while you’re curled up on the couch watching a movie is absolute perfection. My family also loves it when we have a picnic – it’s so easy to transport and always a huge hit. We’ve even had it on top of warm fruit crumbles, and let me tell you, that combination is out of this world!
Top Tips for Perfecting Your Homemade Strawberry Ice Cream
You know, I’ve made this homemade strawberry Ice Cream so many times, I’ve picked up a few tricks along the way that really make a difference. For the Zucchini Prep (wait, wrong recipe! Haha! For the *Strawberry* Prep!), the key is ripeness. Don’t try to make this with sad, pale strawberries. Use the most vibrant, fragrant berries you can find – it makes all the difference in flavor. And don’t be afraid of that sugar and lemon juice maceration; it’s essential for developing that deep, jammy strawberry flavor. For Mixing Advice, remember that gentle folding is your best friend. We want that airy, whipped cream texture to carry through to the final ice cream. Overmixing the base will result in a denser, icier consistency, and nobody wants that. When it comes to the Swirl Customization, have fun with it! You can do more or less swirling depending on how much contrast you want. For those who love little bits of fruit, mash the strawberries less. If you prefer a smoother texture, mash them a bit more. Ingredient Swaps are always a question I get. While this recipe is pretty perfect as is, I’ve experimented with adding a tiny pinch of salt to the strawberry mixture, which really enhances the fruitiness. Some people have also had success using half-and-half instead of all heavy cream, but it will result in a slightly less rich ice cream. Baking Tips? Well, we’re not baking here, but freezing tips are crucial! Make sure your freezer is at its coldest setting, and don’t open the door too often while it’s chilling. Using a shallow, wide container can also help it freeze more evenly. And for Glaze Variations… well, we don’t have a glaze in this particular recipe, but if you were to add a chocolate shell or a caramel drizzle on top after scooping, make sure it’s slightly warm so it flows nicely but not so hot that it melts your ice cream instantly!
Storing and Reheating Tips
Storing this glorious homemade strawberry ice cream is pretty straightforward, but a few things can help keep it at its best. If you’re lucky enough to have leftovers (which is rare in my house!), you can keep it at Room Temperature for a very short time, maybe 10-15 minutes before it starts to melt significantly. For Refrigerator Storage, well, ice cream doesn’t really do well in the fridge – it will just melt! So, it really needs to be kept frozen. For Freezer Instructions, the best way to store it is in an airtight container. I highly recommend pressing a piece of plastic wrap or parchment paper directly onto the surface of the ice cream before putting on the lid. This creates a barrier that helps prevent freezer burn and those dreaded ice crystals, keeping it smooth and creamy for up to 2-3 weeks. After that, it’s still edible, but the texture might start to change. If it does get a bit icy, don’t despair! You can always give it a good stir with a fork before serving to break up some of the ice crystals. There’s no real “reheating” needed for ice cream, just a short thaw time is all it takes to bring it back to scoopable perfection!
Frequently Asked Questions
Final Thoughts
So there you have it – my absolute favorite way to make incredible homemade strawberry ice cream right in your own kitchen, with surprisingly little effort. It’s a recipe that proves you don’t need a fancy ice cream maker to achieve that dreamy, creamy texture and that vibrant, fresh strawberry flavor we all love. It’s perfect for those spontaneous dessert desires, for making little ones’ eyes light up, or just for treating yourself because you deserve it! If you’re a fan of fruity, frozen delights, you might also love my Homemade Raspberry Sorbet or my No-Churn Blueberry Vanilla Ice Cream. They’re made with that same spirit of simplicity and deliciousness! I genuinely can’t wait for you to try this homemade strawberry ice cream. Let me know in the comments below how yours turned out, or if you have any favorite ways to serve it. Happy scooping!
Homemade Strawberry Ice Cream
Ingredients
Main Ingredients
- 1.5 pounds fresh strawberries hulled and sliced
- 1 cup granulated sugar
- 2 cups heavy cream cold
- 1 cup whole milk cold
- 1 teaspoon vanilla extract
- 0.5 teaspoon lemon juice
Instructions
Preparation Steps
- In a bowl, toss the sliced strawberries with the granulated sugar. Let sit for about 15-20 minutes, or until the strawberries have released their juices.
- Puree the strawberry mixture in a blender or food processor until smooth. Strain the puree through a fine-mesh sieve to remove seeds, pressing gently. Discard the solids.
- In a separate large bowl, whisk together the heavy cream, whole milk, vanilla extract, and lemon juice until well combined.
- Add the strawberry puree to the cream mixture and whisk until fully incorporated. Taste and add more sugar if desired. Ensure the mixture is well chilled.
- Pour the ice cream mixture into your ice cream maker and churn according to the manufacturer's instructions.
- Once churned, transfer the ice cream to an airtight container and freeze for at least 2-4 hours, or until firm.


