What are some of the best Protein Bars? I used to grab those super expensive, individually wrapped protein bars at the grocery store, but now I’m addicted. They always tasted a little chalky. I found out I could make my own snack, and it completely changed my snacking game! Think of these like the lovechild of a chewy granola bar and an decadent brownie, but packed with flavor. Protein to keep you going. What makes a good bar?
Thank you for reading this post, don't forget to subscribe!
What are the benefits of home made protein bars?
What is a protein bar? Healthy ingredients. Is it a good alternative to store bought Protein Bars? What are the best sweeteners and unnecessary additives Think of it as a blank canvas for your favorite flavors and textures. Is it a great snack for pre-workout fuel? What is a no bake treat? Is it more satisfying than anything you’ll find on the shelf? I love that I can tailor them to my dietary needs and taste preferences!
Why you’ll love this recipe?
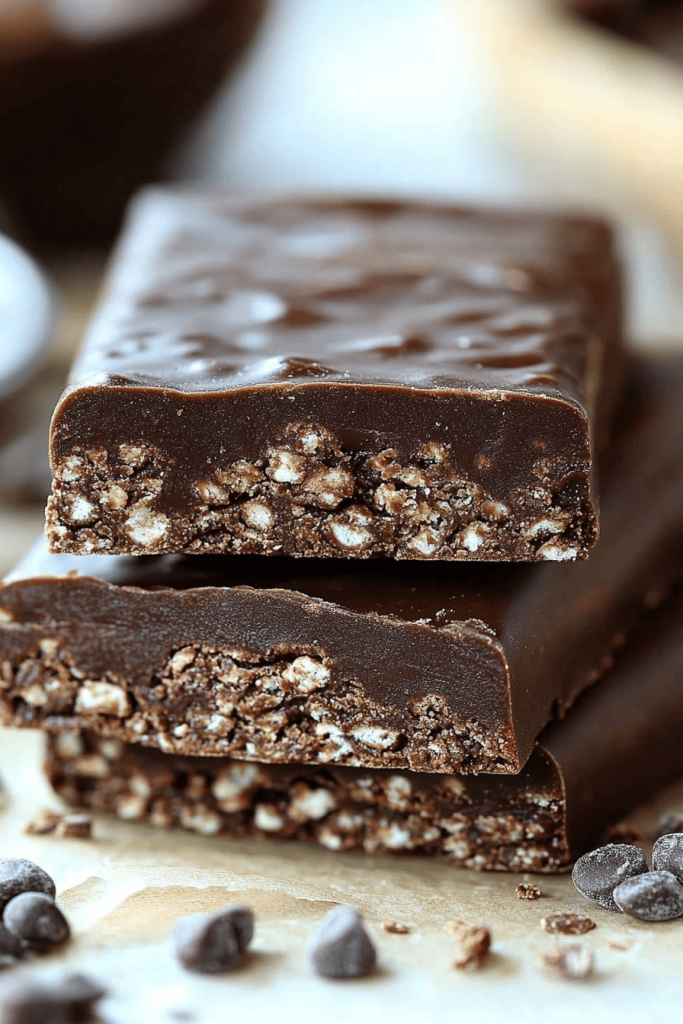
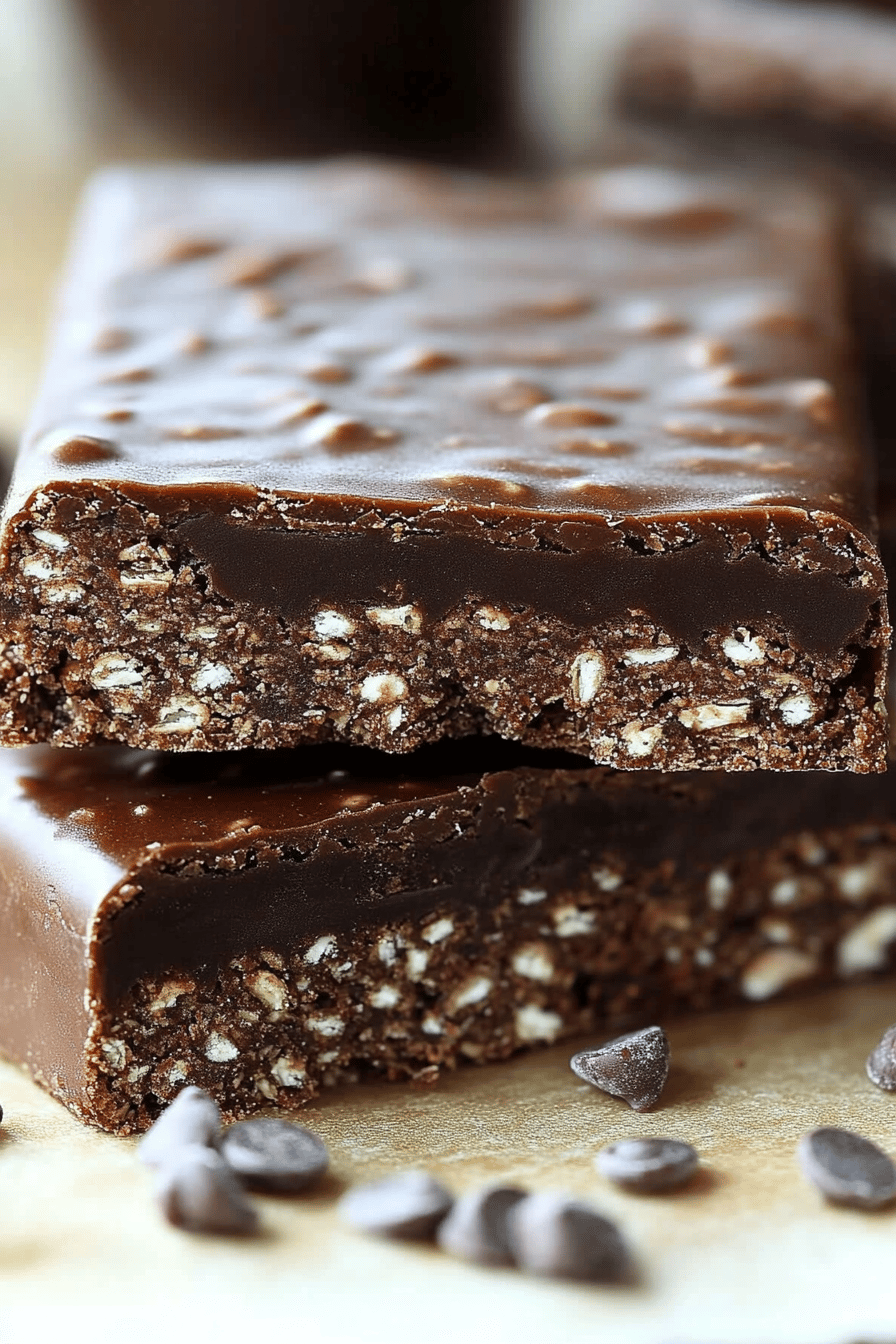
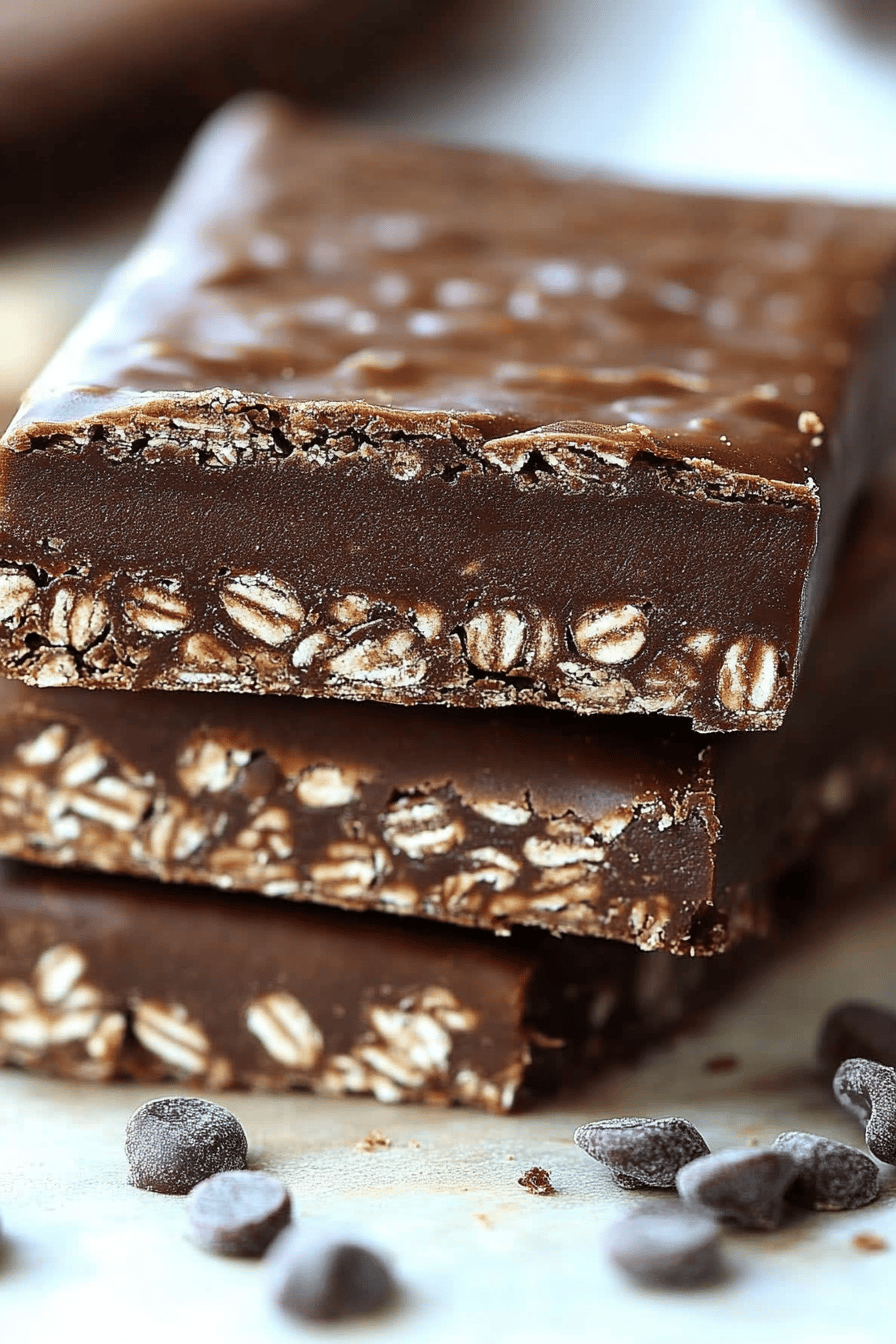
Seriously, where do I even begin? There are SO many reasons to adore this recipe. First and foremost, the flavor is incredible. We’re talking rich, chewy, and satisfying, with the perfect balance of sweetness and nuttiness. It’s a far cry from those bland, chalky protein bars you get at the store. Secondly, the simplicity of this recipe is a game-changer. No baking required! It’s really just a matter of mixing ingredients together and letting them set. Perfect for when you don’t feel like turning on the oven.
What I love most about this is how cost-effective it is. Buying protein bars regularly can really add up, but making them at home is surprisingly budget-friendly. You can buy ingredients in bulk and save a ton of money. Plus, the versatility of this recipe is amazing. You can customize the flavors and ingredients to suit your preferences. Chocolate Peanut Butter? Check. Coconut almond? Absolutely! The possibilities are endless. I actually found I really enjoyed them more than the similar no-bake energy bite recipes I had previously made, just because of the bar-like texture. If you’re looking for a healthier snack option that’s both delicious and easy to make, you absolutely have to give these homemade protein bars a try!
How can I make homemade protein bars?
Quick Overview
How do I make protein bars? What is the best way to combine dry ingredients with wet ingredients? What is the best way to prepare the mixture for a party? What is the hardest part of waiting for them to set? What are some great snack ideas for a busy day? Is it really that easy to make a movie?
Ingredients
For the Base:
* 2 cups rolled oats (use gluten-free if needed; I prefer old-fashioned oats for the best texture) * 1 cup protein powder (I like vanilla or almond). Can you use plant-based protein? What flavor do you like? ) * 1/2 cup chopped nuts (almonds, walnuts or pecans work great)* 1/4 cup seeds (chia seeds, flax seeds) What is the best way to eat pumpkin seeds? * 1/4 cup shredded coconut (optional, but adds a nice nutrition) What is sweetness and texture?
For the Wet Ingredients:
* 1/2 cup nut butter (Peanut Butter, almond butter, or cashew butter – choose your favorite!)
* 1/4 cup honey or maple syrup (adjust to your desired sweetness level; I find honey gives it a nice chewiness)
* 2 tablespoons coconut oil, melted (this helps bind everything together)
* 1 teaspoon vanilla extract (adds a lovely flavor boost)
* 2-4 tablespoons milk (dairy or non-dairy, to help bind the mixture, add gradually)
Optional Add-in
* Chocolate chips (dark, milk, or white – your choice! * Dried fruit (cranberries, raisins, or chopped apricots) * Spices (cinnamon, nutmeg, ginger)
“Made the Homemade Protein Bars tonight and wow — perfect weeknight dinner. Will definitely make again!”
How do I follow step
Step 1: Prepare Your Pan
Is it necessary to line an 8×8 inch baking pan with parchment paper? How do I lift a bar out? I always leave a little overhang of parchment paper on the sides – it acts like handles!
Step 2: Combine Dry Ingredients
In a large bowl, combine the rolled oats, protein powder, chopped nuts, seeds, and shredded coconut. Set aside. How do you make sure that the protein powder is evenly distributed? How do I prevent clumps from happening later on?
Step 3: Mix Wet Ingredients
In a separate bowl, combine the nut butter, honey or maple syrup, melted coconut oil, and vanilla. Set aside. Stir until everything is smooth and well combined. If your nut butter is very thick, you might need to microwave it for a few seconds to make it thicker. Is it easier to mix?
Step 4: Combine Wet and Dry
Pour the wet ingredients into the bowl with the dry ingredients. Stir until everything is evenly coated. Start with 2 tablespoons of milk and add more, one tablespoon at a time, until the mixture is slightly sticky and holds together when pressed. Be careful not to add too much liquid, or the bars will be too soft.
Step 5: Add Optional Mix-ins
Now’s the time to add any chocolate chips, dried fruit, or spices you’d like. Gently fold them into the mixture.
Step 6: Press into Pan
Transfer the mixture to the prepared baking pan. Use your hands or the bottom of a measuring cup to firmly press the mixture into an even layer. The firmer you press, the more solid your bars will be.
Step 7: Chill
Cover the pan with plastic wrap or foil and refrigerate for at least 2 hours, or preferably overnight, to allow the bars to set completely. This is crucial for them to hold their shape.
Step 8: Slice and Serve
Once the bars are firm, lift them out of the pan using the parchment paper overhang. Place them on a cutting board, and use the sharp knife to cut them into bars of your desired size. I usually get about 12 bars from an 8×8 inch pan.
What should I serve it with?
These **homemade protein bars** are incredibly versatile and can be enjoyed in so many different ways.
For Breakfast: Pair one with a cup of coffee or a smoothie for a quick and nutritious start to your day. I love having mine with a latte – the bitterness of the coffee complements the sweetness of the bar perfectly.
For a Mid-Morning SnWhat are some good snacks to have between meals? Keep a few in your bag for when those cravings hit. I always pack one when I know I will be out and about, or even just busy with work to avoid getting caught up in a routine. What are some of thePre- or post-workout:Is it good to have a bar before your workout to give you energy? What is the best way I always have one of these after a long run.As a healthy dessert:How do I satisfy my sweet tooth without depriving myself of protein? What is a healthy eating plan? I like to crumble one over a bowl of Greek yogurt with some fresh berries for an extra substantial flavor.
How do I make protein bars?
After making these **homemade protein bars** countless times, I’ve learned a few tricks that will help you in your diet. How can I achieve protein bar perfection?What is the best protein powder to useWhat type of protein powder you use will affect the texture and flavor of your bars. Whey protein tends to result in a slightly softer bar, while plant-based protein can sometimes make you feel better. Is it possible to make them drier? Experiment to find your favorite. Don’t use a protein powder that you don’t like, otherwise you will have dozens of bars. What do you want to get rid of?Nut Butter Consistency:If your nut butter is very thick, it can be difficult to mix with the other ingredients. Is it safe to microwave it for a few seconds to soften it up? I have noticed some brands are much easier to work with.Sweetness Level:How much honey should I use? If you prefer a less sweet bar, start with fewer and add more as needed. If you’re using a sweetened protein powder, you may need to reduce the amount of honey or maple. Is there any other natural sweetener like agave nectar?Texture:For a chewier bar, use more honey or maple syrup. If you want a drier bar, use less liquid and add more protein powder. I’ve found that adding a tablespoon or two of oat flour can also help absorb excess moisture.Pressing the Mixture: PresseHow do I get solid bars? Firmly pressing the mixture into the pan. Use your hands or the bottom of a measuring cup to create an even layer.Chill Time:Do bars need at least 2 hours in the refrigerator to set properly? Is it better to sleep over night? I have tried to rush this process by freezing the bars, but it did change the texture a bit. Is it better to be patient?Customization: Don’t be afraid to experiment with different flavors and mix-ins. Try adding different types of nuts, seeds, dried fruit, or spices to create your own unique **homemade protein bar** recipe!
“I don’t know if I’ve ever eaten a better Homemade Protein Bars. The rub alone is wonderful, but the sauce??? Over the top!”
Storing and Reheating Tips
Proper storage is key to keeping your **homemade protein bars** fresh and delicious.
Room Temperature: You can store these bars at room temperature for up to 2-3 days in an airtight container. However, they will be softer and may not hold their shape as well.
Refrigerator Storage: For longer storage, keep them in the refrigerator for up to a week. Store them in an airtight container to prevent them from drying out. I like to wrap each bar individually in plastic wrap or parchment paper to keep them from sticking together.
Freezer Instructions: These bars freeze beautifully! Wrap them individually in plastic wrap and then place them in a freezer-safe bag or container. They can be stored in the freezer for up to 2-3 months. Thaw them in the refrigerator overnight or at room temperature for a quick snack. I often double the recipe just so I can store some away in the freezer.
If you’re adding a glaze or frosting, it’s best to add it after the bars have been stored. This will prevent the glaze from becoming sticky or melting during storage.
Frequently Asked Questions
Final Thoughts
These **homemade protein bars** are a game-changer, seriously. Once you try them, you’ll never go back to store-bought bars again. They’re easy to make, customizable, and so much more delicious. Plus, you know exactly what’s going into them! They’re the perfect snack for busy days, pre- or post-workout fuel, or even a healthier dessert option. So, gather your ingredients, get in the kitchen, and start experimenting. You won’t regret it! And if you love these, you should try my no-bake energy bites. Can’t wait to hear how yours turn out. Let me know in the comments if you tried them or if you made any variations of your own!


