
The allure of perfectly crispy and gooey Grilled Cheese Bites is hard to resist. These mini morsels deliver all the nostalgia of the Classic Comfort Food with an elegant twist. Perfectly sized for entertaining or snacking, they’re the ultimate bite-sized cheesy indulgence.
Thank you for reading this post, don't forget to subscribe!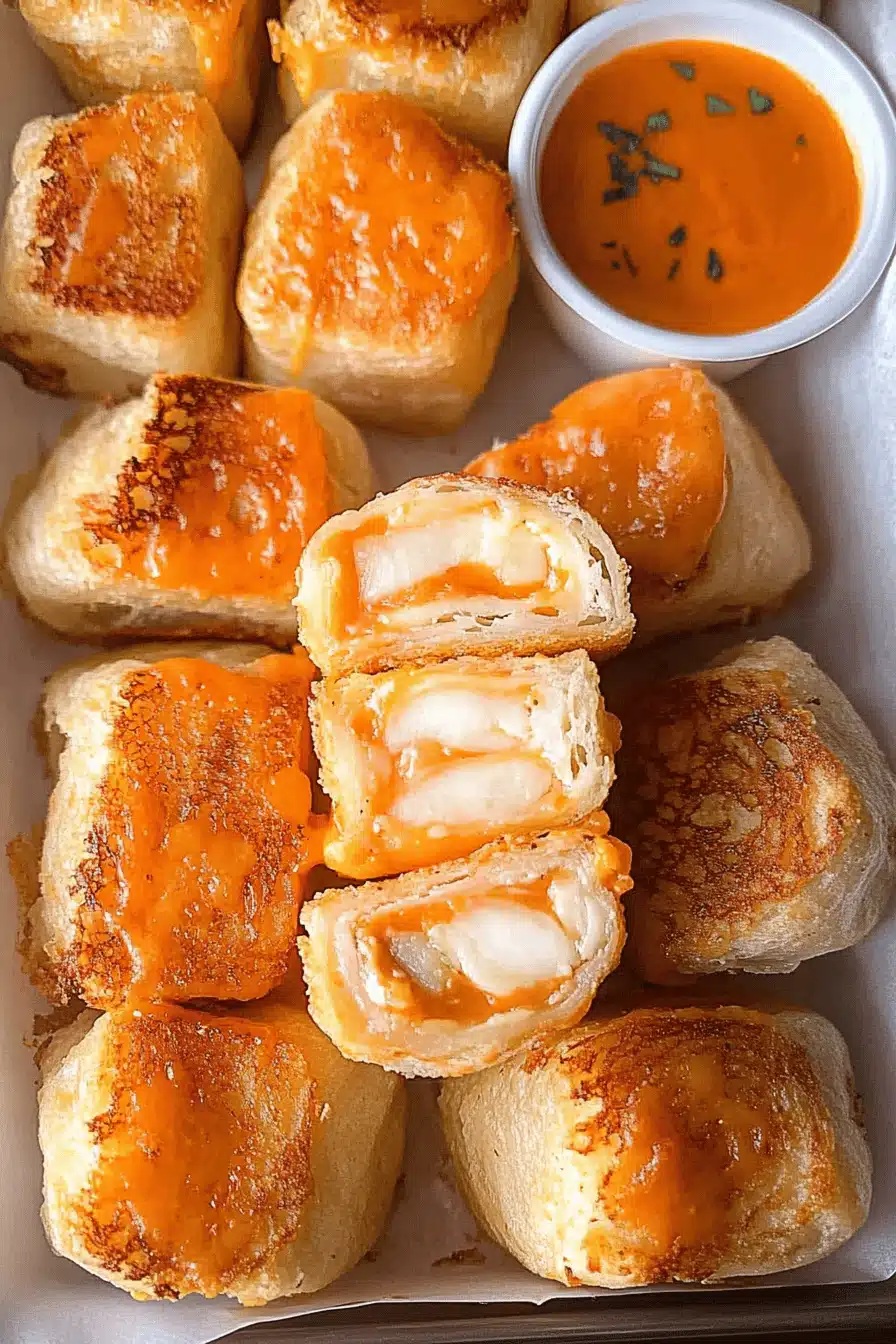
I remember the first time I made these Grilled Cheese Bites for a family gathering. My grandmother, who is usually reserved when it comes to food, couldn’t get enough of them. As she reached for her fourth bite, she playfully scolded herself, saying, “These are dangerously good!” It quickly became a family favorite, and now no gathering is complete without them.
Why You’ll Love This Recipe
These Grilled Cheese Bites are a game changer for any occasion. They offer all the great flavors of a traditional Grilled Cheese Sandwich but in a convenient, shareable format. The buttery, crisp exterior pairs perfectly with the molten cheese inside, offering a combination that’s as enjoyable to eat as it is easy to prepare. They also make for a quick appetizer that can be prepared ahead of time, making them practical for busy hosts.
Ingredients Notes
Your choice of cheese can elevate these bites to a gourmet level. Opt for a sharp cheddar or gouda for a pronounced flavor, or try a combination of mozzarella and parmesan for a gooey, savory mix. If purchasing bread, a fresh loaf of sourdough or a rustic baguette works best, but gluten-free options are available for those with dietary restrictions. Ensure the butter is at room temperature for easy spreading.

Recipe Steps
Step 1
Preheat your oven to 375°F (190°C). Slice your chosen bread into thin, even slices approximately 1-inch wide. This will ensure even cooking and a perfect bite-sized portion.
Step 2
Generously butter one side of each bread slice. Place the buttered sides down on a cutting board to prepare for filling.
“Packed with flavor and so simple. Exactly what I wanted from this Grilled Cheese Bites!”
Step 3
Add a slice of cheese to each bread slice. Feel free to mix and match your cheeses for a rich flavor profile.
Step 4
Top with another slice of bread, buttered side up. Press down lightly to secure the ingredients together.
Step 5
Place on a baking sheet and bake for 10-12 minutes or until golden brown and the cheese melts. Let cool slightly before serving.
Storage Options
To store leftovers, allow the bites to cool completely, then place them in an airtight container. Store in the refrigerator for up to three days. For longer storage, freeze on a baking sheet until solid, then transfer to a freezer bag. To reheat, place in a preheated oven at 350°F (175°C) until heated through.
Variations & Substitutions
For a gluten-free version, substitute with Gluten-Free Bread. Want to switch up the flavor? Add a slice of tomato or a sprinkle of chives. For added spice, mix in a pinch of chili flakes or a slice of jalapeño. Vegans can use dairy-free cheese and a plant-based spread for a delicious alternative.
Serving Suggestions
These bites are perfect for brunch, Game Day, or as a quick after-school snack. Pair them with a tangy tomato soup or a fresh green salad to complement their richness. They also make a fantastic addition to a wine and cheese platter.
Frequently Asked Questions
Can I make these Grilled Cheese Bites ahead of time? Yes, you can prepare the bites and store them covered in the refrigerator for up to a day before baking. This makes them an excellent choice for parties and events where you want to minimize last-minute preparation.
What is the best cheese to use for Grilled Cheese Bites? The best cheese depends on your personal preference. Cheddar, gouda, or mozzarella are common choices, but feel free to experiment with brie or blue cheese for a more luxurious option.
How can I ensure my Grilled Cheese Bites are crispy? To achieve optimal crispiness, make sure your oven is preheated to the correct temperature and do not overcrowd the baking sheet. Baking them on a wire rack on the baking sheet can also help circulate the heat evenly.
“I don’t know if I’ve ever eaten a better Grilled Cheese Bites. The rub alone is wonderful, but the sauce??? Over the top!”
Frequently Asked Questions

How to Make 7 Irresistible Grilled Cheese Bites - Perfect Snack!
Ingredients
Main Ingredients
- 12 slices whole wheat bread thick-sliced
- 4 tablespoons honey mustard butter softened
- 24 slices provolone cheese or your favorite melting cheese
- 12 pieces BBQ chicken tenders cooked and ready to eat
Zesty Ranch Sauce
- 0.5 cup ranch dressing creamy
- 3 tablespoons lime juice freshly squeezed
- 1 teaspoon cayenne pepper adjust to taste
Herb Garlic Spread
- 0.25 cup cream cheese softened
- 1 tablespoon garlic powder
- 2 tablespoons chopped parsley fresh
- 0.25 teaspoon black pepper freshly ground
Instructions
Preparation Steps
- Preheat your oven to 400°F (200°C) or use an air fryer as per instructions.
- Heat a skillet over medium-low heat. Spread honey mustard butter on one side of each bread slice.
- In the skillet, lay buttered bread slices, butter side down. Stack two slices of provolone on each and cover with a lid to melt.
- Make the sauces: Whisk together ranch dressing, lime juice, and cayenne pepper for Zesty Ranch. Mix cream cheese, garlic powder, parsley, and black pepper for Herb Garlic Spread.
- Place BBQ chicken tenders on one edge of each cheese-melted bread slice, roll tightly and let cool for easy handling.
- Slice each roll-up into three bite-sized pieces and serve with Zesty Ranch Sauce and Herb Garlic Spread.


