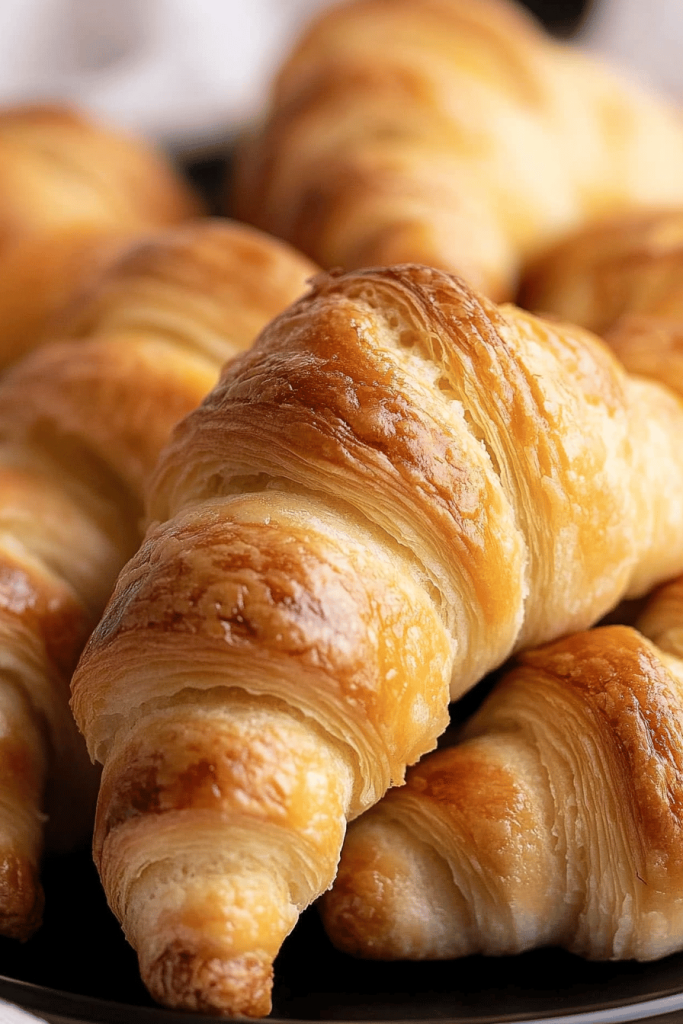
Okay, friends, let’s talk about something I thought I’d never achieve. Flaky, buttery, melt-Gluten-free croissantsFor years, the idea of gluten-free croissant felt like chasing a unicorn, something beautiful and delicious. Is mythical, but ultimately unattainable? Is sourdough bread as hard as a bread? I mean, we’ve all had those sad, dense, gluten-free attempts at bread. These? Is there anything like that? Imagine the texture of a perfect, traditional croissant, the kind you get from ya Parisian bakery. Is gluten free? This recipe is not just good “for gluten-free,” it’s just plain good, period. Think of it as the gluten-free cousin of the classic pain au chocolat, but with a whole lot more flavor. Flaky layers and buttery goodness. I know, it sounds too good to be true, but trust me on this one.
Thank you for reading this post, don't forget to subscribe!
What is a Croissant?
What is a croissant? What is the magic of butter and dough? What are the layers of dough and butter that are folded together to create those layers? Airy pockets of perfection. The name “croissant” comes from its crescent shape. It’s a staple in French bakeries and cafes worldwide, and now, thankfully, accessible to us. What are the best gluten What is essentially a buttery, flaky bread that’s perfect on its own or with different fillings? Both sweet and savory. What is better to have in your morning coffee?
Why you’ll love this recipe?
What do you love about this recipe?Gluten free croissants.What is the surprise on people’s faces when they find out they’re gluten free? Why do people just can’t believe it?
• Flavor:What are some of the best things about these cookies? The buttery flavor is pronounced, and the slight sweetness balances it perfectly. The flakiness adds a textural element that’s just heavenly. Seriously, close your eyes and imagine that first bite – that’s what you’re in for.
• Simplicity:What is laminated dough? It cuts out a few steps without sacrificing flavor or texture. If I can do it, you can too! I tested it on a Tuesday night when I was tired and distracted, and it *still* worked!
• Cost-I know gluten-free baking can be expensive, but I’m not against it. What are some good gluten-free flours to use in this recipe? Is it cheaper to make them at home than buying them pre-made?
• Versatility:What are croissants? Try filling them with chocolate (pain au chocolat! ), ham and cheese, or even almond paste. What are the possibilities? What is the best Gluten-Free Chocolate Chip cookie recipe?
How do I make gluten-free croissants?
Quick Overview
How do you make gluten-free croissants? Is it repeated to create those signature flaky layers? What is the best part of the process? How do you enjoy the aroma of freshly baked croissants in your kitchen? Is it therapeutic? Don’t be afraid to experiment with different fillings to make them your own!
Ingredients
For the Dough:
• 2 1/2 cups (300g) gluten-free all-purpose Flour Blend (I prefer one with xanthan gum already). • 1/4 cup (50g) granulated sugar • 1 teaspoon salt • 2 packets (2 1/4 teaspoons) active dry powder. • 3/4 cup (180ml) warm milk (dairy or non-daire – almond milk works great! ) • 1/4 cup (60ml) warm water • 2 large eggs, lightly beaten • 3 tablespoons (30g) unsalted butter, if desired. How do you melt and cool a
For the Butter Block:
• 1 cup (2 sticks, 226g) unsalted butter, cold
For the Egg Wash:
• 1 large egg, beaten with 1 tablespoon milk
How do I follow
Step 1: Activate the Yeast
In a small bowl, combine the warm milk, warm water, sugar, and yeast. Mix well. Cover and refrigerate for 5 minutes. Let it sit for 5-10 minutes, or until foamy. This means your yeast is alive and kicking!
Step 2: Combine Dry Ingredients
In a large bowl, whisk together the Gluten-Free Flour, sugar, and salt. Set aside. Make sure everything is evenly distributed for consistent flavor.
Step 3: Add Wet Ingredients
What is the best way to mix yeast and melted butter into the dry ingredients? What is the best way to make shaggy dough?
Step 4: Knead the Dough
How do I make a dough on my floured surface? What should I do if I want to make a dough that is smooth and elastic? It develops the gluten-free structure. My stand mixer does the trick too, if kneading is not your style.
“Made the gluten-free croissants tonight and wow — perfect weeknight dinner. Will definitely make again!”
Step 5: First Rise
Place the dough in a lightly oiled bowl, turning to coat. Cover and let rise in a warm place for 1-1.5 hours, or until doubled in size. Patience is key here! I sometimes stick it in the microwave with a cup of hot water to keep it warm.
Step 6: Prepare the Butter Block
While dough is rising, prepare the butter block. Place the cold butter between two sheets of parchment paper. Use a rolling pin to flatten the butter into an inch, about 6×6 inches. Is it cold but pliable?
Step 7: Laminate the Dough
On a lightly floured surface, roll the dough into an 18 inch rectangle. Place butter block in the center of dough. If you are folding a dough over butter, fold the other side over, like you’re folding an egg. Press the edges to seal the butter inside.
Step 8: First Turn
Gently roll the dough into a rectangle again. How do you fold dough into thirds like you’re folding a letter? ” Wrap the dough in plastic wrap and chill in the refrigerator for 30 minutes. This is super important – don’t skip the chilling!
Step 9: Second Turn
Repeat the rolling and folding process. Wrap the dough in plastic wrap and chill in the refrigerator for another 30 minutes.
Step 10: Third Turn
Repeat the rolling and folding process one last time. Wrap the dough in plastic wrap and chill in the refrigerator for at least 1 hour or overnight. I usually do it overnight for the Best Flavor.
Step 11: Shape the Croissants
On a lightly floured surface, roll the dough into an 8 x 12 inch rectangle. Use a pizza cutter or sharp knife to cut the dough into triangles. Gently stretch each triangle, and then roll it up from the base to the tip. Place the croissants on a baking sheet lined with parchment paper.
Step 12: Proof the Croissants
Cover the croissants with plastic wrap and let them proof in a warm place for 1-1. 5 hours, or until puffy. They should almost double in size.
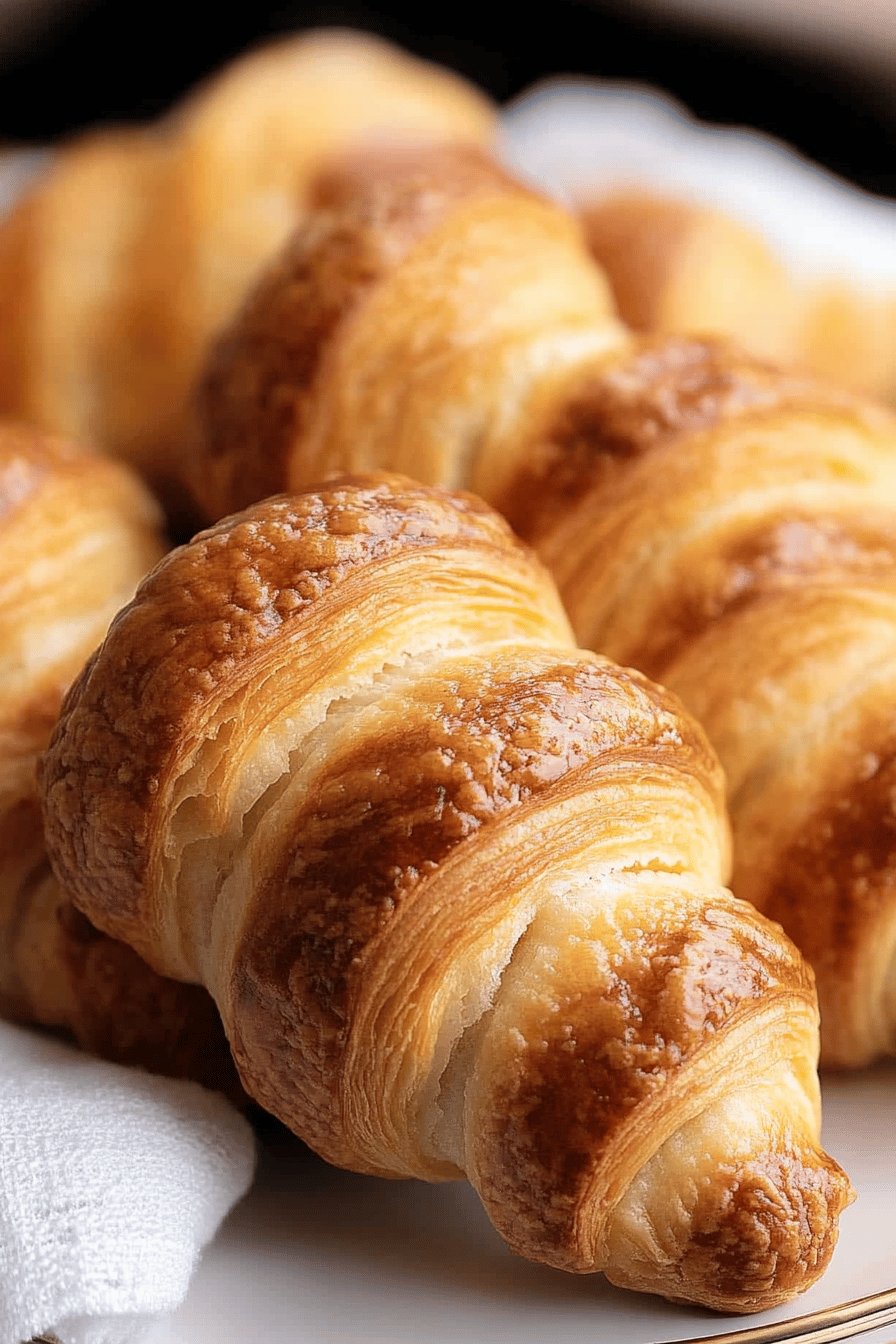
Step 13: Bake
Preheat oven to 375°F (190°C). Brush the croissants with egg wash. Bake for 18-20 minutes, or until golden brown. Do gluten-free baked goods burn easily?
Step 14: Cool & Enjoy
Let the croissants cool on a wire rack before serving. What are some good fillings to serve warm with butter and jam?
What to Serve It With
These gluten-free croissants are incredibly versatile. They’re perfect for so many occasions, and I’ve found the perfect accompaniments over the years.
For Breakfast: Pair them with a strong cup of coffee or a creamy latte. A side of fresh fruit, like berries or sliced peaches, adds a touch of sweetness.
For Brunch: Elevate your brunch spread with a basket of these croissants. Serve them with a variety of jams, honey, and flavored butters. A mimosa or a Bellini is the perfect brunch beverage.
As Dessert: Warm croissants with a scoop of vanilla Ice Cream and a drizzle of chocolate sauce make an indulgent dessert. A glass of dessert wine or a cup of herbal tea complements the flavors beautifully.
For Cozy Snacks: Enjoy them with a cup of Hot Chocolate or a cozy cup of tea on a chilly evening. They’re also great for a quick and satisfying afternoon snack.
My family tradition is to make these every Christmas morning. I usually fill them with Nutella for the kids and ham and cheese for the adults. It’s a tradition everyone looks forward to!
Top Tips for Perfecting Your Gluten-Free Croissants
Over the years, I’ve learned a few tricks that can make all the difference in perfecting these gluten-free croissants.
Gluten-Free Flour: Not all gluten-free flours are created equal. I recommend using a high-quality gluten-free all-purpose flour blend that contains xanthan gum. This helps provide structure and elasticity to the dough.
Butter Temperature: The butter needs to be cold but pliable. If it’s too cold, it will crack when you roll it out. If it’s too warm, it will melt and seep into the dough.
Chill Time: Don’t skip the chilling steps! This is crucial for keeping the butter cold and preventing it from melting. It also allows the gluten-free dough to relax and become easier to work with.
“Packed with flavor and so simple. Exactly what I wanted from this gluten-free croissants!”
Rolling Technique: Be gentle when rolling the dough. Avoid pressing down too hard, as this can flatten the layers and prevent them from puffing up properly.
Proofing: Make sure the croissants are properly proofed before baking. They should be puffy and almost double in size. If they’re under-proofed, they’ll be dense and heavy. If they’re over-proofed, they’ll collapse in the oven.
Oven Temperature: Bake the croissants at the correct temperature to ensure they’re golden brown and cooked through. If the oven is too hot, they’ll burn on the outside before the inside is cooked.
One thing I learned the hard way is to not overwork the dough. Gluten-free dough is more delicate than regular dough, so handle it with care. Trust me, these little tips will make a world of difference!
Storing and Reheating Tips
Proper storage and reheating can help maintain the quality and flavor of these gluten-free croissants.
Room Temperature: Store the croissants in an airtight container at room temperature for up to 2 days. To maintain freshness, ensure the container is tightly sealed to prevent them from drying out.
Refrigerator Storage: For longer storage, keep the croissants in the refrigerator in an airtight container for up to 5 days. This will help preserve their texture and flavor.
Freezer Instructions: To freeze the croissants, wrap them individually in plastic wrap and place them in a freezer-safe bag. They can be stored in the freezer for up to 2 months. When ready to eat, thaw them overnight in the refrigerator.
Reheating: To reheat, preheat the oven to 350°F (175°C). Place the croissants on a baking sheet and warm them for 5-7 minutes, or until heated through. This will restore their crispy texture and buttery flavor.
I always prefer to reheat them in the oven to get that freshly baked taste again!
Frequently Asked Questions
Final Thoughts

So there you have it – my recipe for absolutely delicious, flaky gluten-free croissants that will impress even the most discerning palates. What I love most about this recipe is that it proves that gluten-free baking can be just as satisfying and delicious as traditional baking. This recipe really captures the magic of croissants without the gluten. If you enjoy this recipe, you might also like my gluten-free cinnamon rolls or my Gluten-Free Banana Bread. Trust me, they’re just as amazing! I can’t wait to hear how yours turn out. Happy baking, friends!


