There’s something magical about the smell of peppermint and sugar wafting through the house during the holidays. I remember as a kid, biting into a crunchy Candy Cane and hearing that satisfying snap, feeling the minty kick on my tongue. Over the years, I’ve made countless batches of homemade candy canes, and honestly, there’s a special kind of joy in turning those classic red-and-white swirls into something entirely your own. This recipe? It’s a bit of a labor of love — but totally worth every step. It’s perfect for holiday gift-giving, decorating your cookie platter, or just sneaking a quick sweet moment when the house gets bustling. My kids ask for this all the time, and I’ve gotta admit, I get a little proud every time I see their eyes light up with that first crunch. Whether you’re a seasoned candy maker or a first-timer, I promise this one’s a lifesaver on busy nights or cozy weekends. So, grab your peppermint, and let’s make some magic happen!
Thank you for reading this post, don't forget to subscribe!What is candy cane?
Think of a candy cane as Christmas’s pepperminty, crunchy handshake. It’s essentially a striped, curved con**fection** that combines the sweet, cooling flavor of peppermint with the satisfying bite of hard candy. The name “candy cane” probably comes from its shape — a simple cane, or shepherd’s crook — originally meant to be a festive treat and a decorative staple on Christmas trees. Over time, it’s become one of the most beloved symbols of the holiday season, with those signature red and white swirls representing layers of peppermint goodness. The best part? You can find them everywhere during December, but I’ve discovered that nothing beats the joy of making your own. Homemade Candy canes let you customize flavors, add little twists, or even make mini versions as adorable gifts or party favors. Think of it as crafting your own edible holiday ornament — delicious, personal, and a little bit nostalgic.
Why you’ll love this recipe?
What I love most about making homemade candy canes is how incredibly simple the process is — even if you’ve never worked with sugar before. These treats are surprisingly forgiving and only require a handful of ingredients. Plus, the flavor? Absolutely divine. The peppermint hits just right, and the crunch is so satisfying that I always find myself nibbling on more than I should. Budget-wise, it’s pretty friendly — just sugar, corn syrup, a splash of water, and peppermint oil. And the fun part? You can get creative with colors, flavor extracts, or even sprinkle some edible glitter for extra sparkle (hello, holiday glam!). Kids love helping shape the canes, and I’ve even made mini versions for little stocking stuffers. This isn’t just a treat; it’s a little tradition in my holiday kitchen. Trust me, once you make these, you’ll be hooked — they disappear faster than you can say “Merry Christmas!”
How do you make candy canes?
Quick Overview
Making candy canes at home is easier than you’d think. It starts with cooking sugar, corn syrup, and water until it hits just the right temperature — around 300°F (hard crack stage). Then, it’s all about pouring, pulling, and shaping the candy into long ropes. Once cooled slightly but still pliable, you’ll cut and twist the ropes into that classic candy cane shape. The last step? Adding a peppermint glaze or even dusting them with edible shimmer. The trick is to work quickly but carefully, because hot sugar is no joke. But don’t worry, with a little patience and a sturdy work surface, you’ll be crafting professional-looking canes that look store-bought but taste even better because of that homemade touch. I always do this when I want a festive activity with the kids or to give a personalized gift that’s almost too pretty to eat — almost!
Ingredients
For the Main Candy:
– 2 cups granulated sugar (I always use organic if I can find it — nicer taste)
– ⅔ cup light corn syrup (trust me, it’s the glue that holds everything together)
– ½ cup water
– 1 teaspoon peppermint extract (or more if you like it super minty)
– 1-2 drops red gel food coloring (or any color you fancy)
– ½ teaspoon vanilla extract (for that extra warm note)
For the Glaze (Optional):
– 1 cup powdered sugar
– 1-2 tablespoons milk or cream
– ¼ teaspoon peppermint extract (or almond for a different twist)
– Edible glitter or crushed peppermint candies for decoration
Note:
I’ve tested this with almond milk and it actually made the glaze even creamier — give it a try if you’re dairy-free!
Step-by-Step Instructions
Step 1: Preheat & Prep Pan
First things first, line a baking sheet with parchment paper or a silicone mat. Have your silicone molds or straight-edged spatulas ready because once the sugar reaches temperature, things move FAST. Keep a wet cloth nearby — sugar gets real hot, and safety’s key. Set your oven-safe thermometer to monitor temperature, because precision is everything here.
Step 2: Mix Dry Ingredients
In a heavy-bottomed saucepan, combine the sugar and corn syrup. Stir briefly to blend, then add water. Turn the heat to medium — no stirring after this point — and cook until the mixture reaches 300°F (hard crack stage). Trust your candy thermometer on this; patience is key. The mixture will bubble up, turn golden, and then amber. That’s your signal to move on.
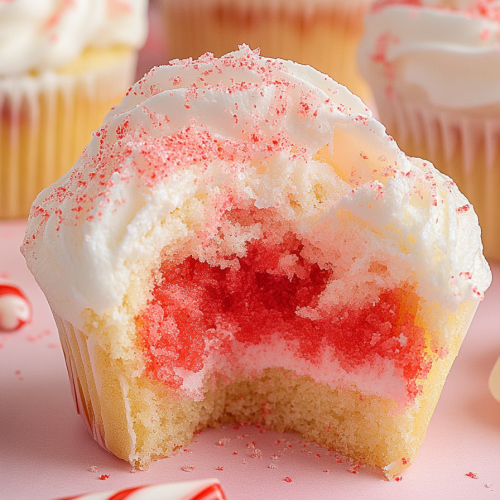
“Made the Festive peppermint cupcakes How easy are these? tonight and wow — perfect weeknight dinner. Will definitely make again!”
Step 3: Mix Wet Ingredients
While the sugar cooks, prepare your flavorings and coloring. Mix peppermint extract, vanilla, and food coloring in a small cup. When the syrup hits temperature, carefully remove it from the heat. Don’t lean in too close; the steam and hot syrup are fierce. Quickly stir in your flavoring and coloring and watch as your mixture turns vibrant.
Step 4: Combine
Pour the hot syrup onto your prepared work surface or silicone mold. It’ll be molten and bubbly. Let it sit for just a minute or two until it cools slightly so you can handle it without burning your fingers. Wearing heat-resistant gloves helps — safety first!
Step 5: Prepare Filling
If you want to make a layered or marbled effect, keep a small portion of plain white candy and a bit of red. I sometimes add tiny drops of food coloring here for a swirl — just a few twists of your spatula work magic. For a simple candy cane, skip this step, but for a fun marbled look, it’s super cute.
Step 6: Layer & Swirl
Divide your hot sugar into portions: one plain, one tinted red. Roll each into long ropes with your hands or a silicone spatula. For swirling, lay the ropes side by side and twist them together, then gently pull and shape into the classic cane shape. Use your fingers or a skewer to create the hook at the top.
Step 7: Bake
It’s more about cooling and setting than actual baking, but keep your shaped candies flat on the parchment. Let them sit at room temperature for about 20 minutes until hardening. If you want shiny canes, you can bake them at a very low temperature for a few minutes, but I prefer just cooling for that perfect crunch.
Step 8: Cool & Glaze
Once solid, transfer to a wire rack. Mix your powdered sugar with milk and peppermint extract until smooth. Drizzle or dip your candy canes, then sprinkle with edible glitter or crushed peppermint for some extra sparkle. Trust me, this part makes them look *amazing*!
Step 9: Slice & Serve
If you’ve made mini canes or broke off pieces, just serve on a pretty platter. Store in an airtight container for up to a week — if they last that long! They’re best enjoyed slightly at room temperature, so take them out 10 minutes before munching.
What to Serve It With
These candy canes are not just a treat — they’re a decoration and a conversation starter. For breakfast, slip a tiny one into your latte for a peppermint twist. During brunch, serve alongside cinnamon rolls or fruit salad and a hot cup of cocoa. As a dessert, they’re perfect on a holiday cookie platter, paired with gingerbread cookies, chocolate truffles, or even a scoop of vanilla Ice Cream for a fun contrast. I also love including them as a festive touch for my kids’ school parties — they look adorable tied to gift bags or placed in clear cups with holiday ribbons. And honestly, I’ve made a batch just to nibble on while wrapping presents — because who doesn’t need a minty pick-me-up during the chaos? They’re simple, charming, and so much fun to make. Your family will thank you (especially when they find a stash hidden away for themselves).
Top Tips for Perfecting Your Candy Cane
Here are a few tricks I’ve learned after doing this dance more times than I can count:
Temperature matters: Always use a reliable thermometer. Sugar can be tricky — a few degrees can make or break your candy’s texture. When it hits 300°F, pull it off immediately.
Work quickly: Once poured, the mixture cools fast. Have everything prepped so you can shape while still pliable.
“New family favorite! This Festive peppermint cupcakes How easy are these? was so flavorful and ridiculously easy. Crowd-pleaser for sure.”
Color swirl success: For pretty marbled canes, I like to do a quick twist just as I start shaping. Don’t overmix; the more you twirl, the more beautiful the swirl.
Flavor swaps: Feeling adventurous? Try adding a splash of orange extract or a drop of almond oil for a different flavor profile. Just be cautious with the amounts — a little goes a long way.
Storing: Keep canes in an airtight container for freshness or gently wrap individual pieces in cellophane. They can get sticky if exposed to humidity, so a dry place is best.
My biggest tip? Don’t stress if they’re not perfect on your first try. I’ve learned that even the most wonky-looking canes taste amazing, and the kids couldn’t care less about perfect symmetry. It’s all about that joyful, peppermint crunch in your hand. Trust me, this simple recipe turned my holiday kitchen into a candy wonderland — and I hope yours will become one too!
Storing and Reheating Tips
Once you’ve made your candy canes, they need a little love to stay fresh. Keep them in an airtight container at room temperature for about a week, and they’ll stay crisp and delicious. If it’s humid outside, pop them into a sealed plastic bag or container to prevent sticking or melting. Want to extend their life? These candies freeze beautifully! Wrap each piece in plastic wrap, then store in a freezer-safe bag for up to three months. When you’re ready to enjoy, let them thaw at room temperature for about 10-15 minutes — they’ll regain that crunchy perfection. If you’ve glazed your candies, wait until the glaze is fully set before storing. For best presentation, add additional glaze or decorations just before serving, as the cold can sometimes dull their shine. This way, you can prepare batches ahead of time and still serve that freshly-made look during your holiday gatherings. Remember, proper storage keeps those peppermint flavors lively and your candy canes looking their festive best.
Frequently Asked Questions
Final Thoughts
If you’re looking to add a bit of homemade magic to your holiday season, making candy canes is a wonderful adventure. It’s a sweet, crunchy craft that fills your house with peppermint aromatherapy and the kind of cozy nostalgia that makes every Christmas memorable. The best part? You control the flavors and decorations, turning simple sugar into edible holiday art. Whether you’re making a batch for family, friends, or just yourself (because honestly, you deserve it), these candies bring a smile — and maybe a few happy groans when they’re finally all gone! I recommend trying different colors, adding a hint of orange zest, or even experimenting with a chocolate drizzle. Each time I’ve done this, I think, ‘Why don’t I make these more often?’ So go ahead, gather your ingredients, and give it a try. I can’t wait to hear how your candy canes turn out! Happy baking, and may your holiday season be full of sweetness and cheer!
candy cane
Ingredients
Main Ingredients
- 0.5 cup unsalted butter
- 4 ounces full fat cream cheese
- 1 cup sugar
- 1 large egg
- 2 tsp vanilla extract
- 2.75 cups all-purpose unbleached flour
- 2 TBS cornstarch
- 0.5 tsp salt
- 50 drops red food coloring
- coarse decorating sugar or sprinkles optional garnish
Instructions
Preparation Steps
- Cream the softened butter and cream cheese together until smooth, then add the sugar and beat for three minutes or until light and fluffy.
- Add egg and vanilla and mix well.
- Mix in the flour, cornstarch, and salt until fully combined, then divide the dough in half.
- Add 50 drops of red food coloring to one half of the dough and knead until the color is evenly incorporated.
- Make cookie dough balls using about 1 tablespoon of dough for each from both the red and white dough. Refrigerate dough balls for at least 30 minutes.
- Preheat oven to 350°F and line cookie sheets with parchment paper.
- Remove dough balls from refrigerator. Roll each into a log about 7 inches long.
- Place one red log and one white log side by side, pressing the ends together to connect.
- Twist the logs together to create the striped effect, then bend the top into a hook to form the candy cane shape.
- Place cookies on prepared sheets and sprinkle with optional sugar or sprinkles. Bake for 8 minutes.
- Allow cookies to cool for 15-20 minutes before transferring to a cooling rack.


