
I remember the first time I truly fell in love with baking. It wasn’t some fancy tiered cake or an intricate pastry; it was a simple loaf of bread, warm from the oven, with a crust that yielded just the right amount of crunch. But sometimes, life gets so hectic, doesn’t it? You crave that homemade goodness, that comforting aroma filling your kitchen, but the thought of kneading dough for ages or waiting for multiple rises just feels… impossible. That’s where this recipe for easy yogurt bread comes in. It’s become my absolute go-to when I need a little baking magic without all the fuss. Honestly, it’s my secret weapon on busy weeknights, and my kids always ask for it by name. It’s like a magic trick: simple ingredients, minimal effort, and a loaf of pure deliciousness that rivals any bakery. If you’ve ever thought baking bread was too complicated, stick with me – this one’s a game-changer.
Thank you for reading this post, don't forget to subscribe!What is easy yogurt bread?
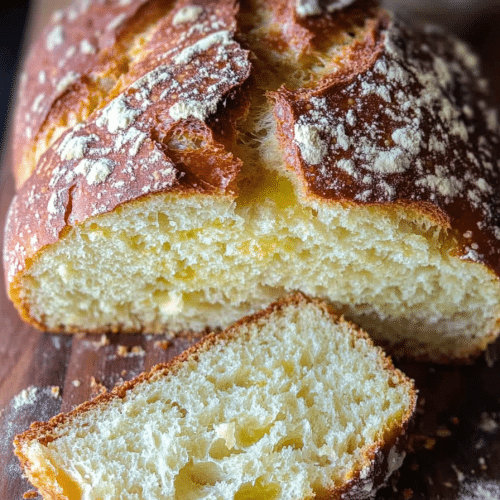
So, what exactly *is* this easy yogurt bread? Think of it as a wonderfully tender, slightly tangy quick bread that uses plain yogurt as its star ingredient. It’s not a yeasted bread, which is where the “easy” part really shines. Instead, it relies on baking powder and baking soda for its lift, making it incredibly forgiving and fast. The yogurt doesn’t just add moisture; it brings a subtle tanginess that balances the sweetness and contributes to an unbelievably soft, almost cake-like crumb. It’s essentially a fuss-free way to get that comforting bread experience, perfect for beginners or anyone who, like me, sometimes just needs a baking win without spending hours in the kitchen. The name itself, “easy yogurt bread,” really says it all – it’s straightforward, uses a common pantry staple (yogurt!), and delivers fantastic results every single time.
Why you’ll love this recipe?
Oh, where do I even begin with why this easy yogurt Bread Recipe is a keeper? First off, the *flavor*. It’s not overwhelmingly sweet, but just perfectly balanced. That gentle tang from the yogurt is like a little secret wink, making it feel sophisticated while still being utterly comforting. And the texture! It’s unbelievably moist and tender, with a slightly crisp crust that makes every slice a delight. What I love most about this is how incredibly simple it is. You can literally whisk it together in one bowl – no fancy stand mixer needed, no complicated kneading. It’s the kind of recipe that makes you feel like a baking pro even if you’ve never baked before. Plus, it’s remarkably cost-effective. Yogurt is usually pretty budget-friendly, and the rest of the ingredients are pantry staples. Beyond that, this bread is so versatile. I’ll get into all the ways to enjoy it later, but seriously, it’s good for breakfast, brunch, dessert, or just a comforting snack. It’s the kind of recipe that you’ll come back to again and again because it’s just so darn reliable and delicious. It’s a lifesaver when you want something homemade but are short on time.
How do I make easy Yogurt Bread?
Quick Overview
The beauty of this easy yogurt bread lies in its speed and simplicity. We’re talking about a method where you’ll mostly be stirring ingredients together in a bowl or two. The yogurt does all the heavy lifting in terms of creating that tender crumb, and the leavening agents make sure it gets a lovely rise without any fuss. You’ll mix your dry ingredients, then your wet ingredients (with the yogurt being key!), combine them gently, and then it’s off to the oven. No lengthy proofing, no complicated shaping. It’s the perfect candidate for a quick bake when that craving for something warm and homemade hits.
Ingredients
For the Main Batter:
All-Purpose Flour: 2 cups. Make sure it’s spooned and leveled, not scooped directly from the bag, to avoid a dense loaf. I’ve found that King Arthur or Bob’s Red Mill work wonderfully here.
Granulated Sugar: 3/4 cup. This provides sweetness and helps with browning. If you prefer a less sweet loaf, you can reduce this slightly, but I find this amount just perfect.
Baking Powder: 1 1/2 teaspoons. This is crucial for lift in quick breads. Make sure yours is fresh – stale baking powder is a common culprit for flat baked goods!
Baking Soda: 1/2 teaspoon. Works in tandem with the baking powder and the slight acidity of the yogurt for that extra puff.
Salt: 1/2 teaspoon. Enhances all the other flavors and balances the sweetness.
Plain Yogurt: 1 cup. Full-fat, unsweetened plain yogurt is my absolute favorite for this. Greek yogurt also works but might make it a touch denser, which is fine by me! I’ve tested this with almond milk yogurt and it actually made it even creamier!
Eggs: 2 large. These bind everything together and add richness. Make sure they’re at room temperature – they incorporate better.
Vegetable Oil or Melted Butter: 1/2 cup. Oil gives a Super Moist crumb that stays moist longer. Melted butter adds a lovely flavor. I often go with a neutral oil like canola or vegetable.
Vanilla Extract: 1 teaspoon. A classic for a reason, it just rounds out all the flavors.
“The Easy Yogurt Bread Simple Two Ingredient Magic turned out amazing. My kids asked for seconds. Saving this one!”
Optional: Zest of 1 Lemon or Orange: This adds a bright, fresh note that’s incredible, especially if you’re not adding a glaze later.
For the Swirl (Optional but Highly Recommended!):
Brown Sugar: 1/4 cup, packed. For that classic streusel-like swirl.
Cinnamon: 1 teaspoon. Or a little more if you’re a cinnamon lover like me!
Butter: 2 tablespoons, melted. To bind the sugar and cinnamon.
For the Simple Glaze (Optional):
Powdered Sugar: 1 cup. Sifted for the smoothest finish.
Milk or Yogurt: 1-2 tablespoons. Just enough to get a drizzly consistency. Using yogurt here adds another layer of tang!
Vanilla Extract: 1/2 teaspoon.
Step-by-Step Instructions
Step 1: Preheat & Prep Pan
First things first, get your oven preheated to 350°F (175°C). Grab a standard Loaf Pan – a 9×5 inch one is perfect. Grease it really well with butter or non-stick spray, and then dust it lightly with flour. Tapping out the excess flour is key, otherwise, you’ll end up with little white patches on your beautiful loaf. Alternatively, you can line it with parchment paper, leaving some overhang on the sides to easily lift the bread out later. This is my preferred method as it practically guarantees a clean release.
Step 2: Mix Dry Ingredients
In a large mixing bowl, whisk together the flour, granulated sugar, baking powder, baking soda, and salt. Give it a really good whisking for about 30 seconds. This ensures all the leavening agents are evenly distributed, which is super important for a uniform rise. You don’t want one side to be puffy and the other flat!
Step 3: Mix Wet Ingredients
In a separate medium bowl, whisk together the plain yogurt, eggs, vegetable oil (or melted butter), and vanilla extract. If you’re using citrus zest, stir it in here too. Whisk until everything is well combined and the mixture looks smooth and slightly pale. It’s important that your eggs and yogurt are at room temperature so they emulsify nicely with the oil/butter.
Step 4: Combine
Now, pour the wet ingredients into the bowl with the dry ingredients. Using a spatula or a wooden spoon, gently fold them together until *just* combined. Seriously, stop mixing as soon as you no longer see streaks of dry flour. Overmixing is the enemy of tender quick breads; it develops the gluten too much and can lead to a tough loaf. A few small lumps are perfectly fine and often a sign of a well-mixed batter.
Step 5: Prepare Filling
If you’re making the swirl, this is super quick. In a small bowl, combine the packed Brown Sugar and cinnamon. Pour in the melted butter and stir until it forms a slightly clumpy, paste-like mixture. This is what gives you those delightful pockets of cinnamon-sugar goodness throughout your bread.
Step 6: Layer & Swirl
Pour about half of the batter into your prepared Loaf Pan and spread it evenly. Sprinkle about half of the cinnamon-sugar mixture over the batter. Then, pour the remaining batter on top, spreading it gently. Sprinkle the rest of the cinnamon-sugar mixture over the top. Now, here’s where the magic happens: take a butter knife or a skewer and gently swirl it through the batter a few times. Don’t overdo it! Just a couple of passes to create pretty marbled patterns. You want distinct swirls, not a muddy mess.
Step 7: Bake
Pop the loaf pan into your preheated oven. Bake for 45-60 minutes. The exact time will depend on your oven, so start checking around the 45-minute mark. The bread is done when a wooden skewer or toothpick inserted into the center comes out clean, or with just a few moist crumbs attached. If the top is browning too quickly, you can loosely tent it with aluminum foil for the remainder of the baking time.
Step 8: Cool & Glaze
Once baked, remove the loaf pan from the oven and let the bread cool in the pan on a wire rack for about 10-15 minutes. This allows it to set up slightly. Then, carefully invert the pan to remove the loaf onto the wire rack to cool completely. If you’re adding the glaze, wait until the bread is mostly cool but still a little warm, or completely cool. In a small bowl, whisk together the sifted powdered sugar, 1 tablespoon of milk or yogurt, and vanilla until smooth. Add more liquid, a tiny bit at a time, if needed to reach a drizzly consistency. Drizzle generously over the top of the cooled loaf.
“New family favorite! This Easy Yogurt Bread Simple Two Ingredient Magic was so flavorful and ridiculously easy. Crowd-pleaser for sure.”
Step 9: Slice & Serve
Once the glaze has set a bit (or if you skipped it!), slice your beautiful easy yogurt bread. A serrated knife works best for a clean cut. I like to let it cool for at least an hour before slicing so it doesn’t crumble too much, but honestly, the smell is usually too tempting, and I end up slicing into a warm loaf more often than not! Serve it up and watch it disappear.
What to Serve It With
This easy yogurt bread is incredibly versatile, making it perfect for almost any occasion. For a quick and satisfying breakfast, I love a thick slice toasted and slathered with a bit of butter or Cream Cheese. It pairs beautifully with a hot cup of coffee or a steaming mug of tea. For a more elaborate brunch spread, I’ll often serve it alongside fresh fruit salad, maybe some scrambled eggs and crispy bacon. A drizzle of honey or a dollop of Greek yogurt on top makes it feel a bit more special. As a dessert, it’s fantastic served slightly warm with a scoop of vanilla ice cream or a drizzle of chocolate sauce. It’s simple, yet elegant enough for a casual get-together. And for those moments when you just need a comforting snack, a plain slice is pure bliss. My family loves it after school with a glass of milk, no additions needed. It’s also surprisingly good alongside a bowl of fruit soup or even a light savory dish when you want something a little sweet to round things out.
Top Tips for Perfecting Your Easy Yogurt Bread
Zucchini Prep: Wait, did I mention zucchini? Nope! That’s the beauty of this recipe – no zucchini needed, making it even easier! This is a pure yogurt loaf.
Mixing Advice: The absolute biggest tip I can give you is DON’T OVERMIX. Seriously. As soon as you see the last bit of flour disappear, stop. A few small lumps are a sign of success, not failure. Overmixing develops gluten, which leads to a tough, dense bread, and we’re aiming for tender and fluffy here!
Swirl Customization: The cinnamon-sugar swirl is totally optional, but I highly recommend it for extra flavor and visual appeal. Don’t go crazy with the swirling; just a couple of gentle passes with a knife will create beautiful marbling. You can also add a few chocolate chips to the batter before swirling for an extra treat!
Ingredient Swaps: If you don’t have plain yogurt, Sour Cream works well as a substitute, offering a similar tang and moisture. For a dairy-free version, unsweetened, full-fat coconut yogurt or almond milk yogurt are great options; I’ve found almond milk yogurt actually makes it extra creamy! You can also swap the vegetable oil for melted coconut oil or even unsalted butter for a slightly different flavor profile.
Baking Tips: Every oven is a little different, so trust your senses. If your loaf is browning too quickly on top but the center isn’t cooked, don’t be afraid to loosely tent it with aluminum foil. You can also insert a thermometer into the thickest part of the loaf; it should read around 200-210°F (93-99°C) when done. I always bake on the center rack to ensure even heat distribution.
Glaze Variations: The simple powdered sugar glaze is lovely, but you can get creative! Try adding a touch of lemon juice or orange juice for a citrusy glaze, or even a tablespoon of cocoa powder for a chocolate drizzle. If you prefer a less sweet topping, a simple dusting of powdered sugar after cooling is also beautiful. Or, skip the glaze entirely and enjoy the bread plain or with butter – it’s truly that good on its own.
Storing and Reheating Tips
This easy yogurt bread is best enjoyed fresh, but it stores remarkably well. At room temperature, keep it in an airtight container or tightly wrapped in plastic wrap or foil. It should stay fresh and moist for about 2-3 days. If you live in a warm, humid climate, or if it’s quite hot where you are, I’d recommend popping it in the refrigerator after the first day to prevent spoilage. In the fridge, it will last up to 5 days, though the crust might soften a bit. For longer storage, you can freeze it. Wrap the cooled loaf tightly in a double layer of plastic wrap, then a layer of aluminum foil or a freezer-safe bag. It will keep well in the freezer for up to 3 months. To reheat, you can simply let it thaw at room temperature, or pop slices in the toaster or oven for a few minutes to bring back some of that fresh-baked warmth. I love to gently warm a slice in a low oven for about 10 minutes.
Frequently Asked Questions
Final Thoughts
This easy yogurt bread recipe is more than just a way to use up some yogurt; it’s a little slice of comfort and joy that’s incredibly accessible. It’s proof that you don’t need to be a seasoned baker to create something truly delicious and impressive. The way it bakes up so tender, with that subtle tang and perfectly golden crust, always makes me happy. It’s a recipe that has truly earned its spot in my regular baking rotation, and I’m so excited for you to try it. If you love this easy yogurt bread, you might also enjoy my recipe for Moist Banana Bread or my quick Lemon Blueberry Muffins – they share that same spirit of simple, delicious baking. I hope this recipe brings as much warmth and deliciousness to your kitchen as it does to mine. Can’t wait to hear how yours turns out! Let me know in the comments below what you think, or if you have any fun variations you’ve tried!
easy yogurt bread recipe
Ingredients
Main Ingredients
- 4 cups self-rising flour
- 2.33 cups plain whole milk yogurt
- 1 tablespoon everything bagel seasoning for topping (optional)
Instructions
Preparation Steps
- In an extra-large bowl, sift in the self-rising flour. Add the yogurt and mix until incorporated, finishing by hand to form a shaggy dough. Transfer the dough to a lightly floured surface and knead for about 1 minute until it forms a mostly uniform ball. Return the dough to the bowl, cover with plastic wrap, and refrigerate for 2 hours.
- Preheat your oven to 425°F (220°C). Line a medium-rimmed baking sheet with parchment paper and place it into the preheating oven.
- Carefully remove the hot baking sheet from the oven. Sprinkle the parchment paper with a little cornmeal or flour. Shape the dough into an oval disc, about 3 inches high. Carefully place it onto the hot baking sheet and sprinkle the top with everything bagel seasoning or sesame seeds, if using. Bake for 40-50 minutes. If the bread browns too quickly, cover it loosely with an aluminum foil tent at the 35-minute mark. For doneness, the interior temperature should reach 195°F (90°C) using an instant-read thermometer. Transfer the bread to a wire rack to cool for 15-20 minutes before slicing.


