
You know those days when you’re craving something sweet, something comforting, but the idea of rolling out pie dough and fussing with a traditional pie feels like… well, a lot? That’s precisely when my mind wanders to this gorgeous, delightfully imperfect rustic apple galette. It’s like the best parts of an apple pie decided to relax, put on some comfy clothes, and just be wonderfully itself. I first stumbled upon a similar concept years ago, and it quickly became my go-to for everything from casual weeknight desserts to impressing last-minute guests. It’s got that cozy, homemade feel, but without all the pressure. Honestly, it’s probably one of the most-requested recipes in my kitchen, right up there with my super-easy Chocolate Chip Cookies. The simplicity is what truly won me over, but the flavor? Oh, the flavor is pure autumnal bliss, captured in every bite. If you love the taste of baked apples but dread the fuss, trust me, you’re going to fall head over heels for this rustic apple galette.
Thank you for reading this post, don't forget to subscribe!What is a Rustic Apple Galette?
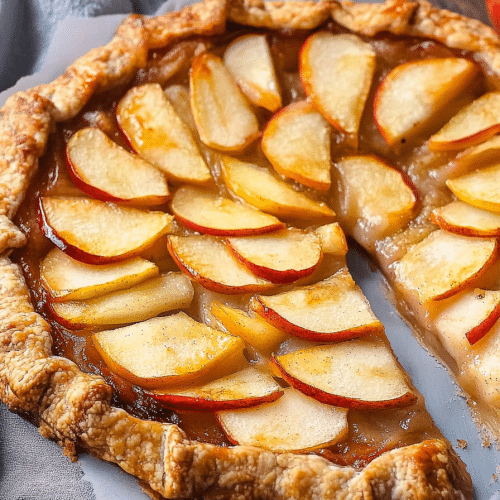
So, what exactly is a rustic apple galette? Think of it as a free-form pie, but with way less commitment! Instead of a fancy pie plate and a crimped edge, you simply spread your fruit filling onto a circle of dough, then fold the edges of the dough up and over the filling. It’s meant to look a little rough around the edges – that’s the beauty of it! The “rustic” in the name isn’t just for show; it means you don’t have to be a pastry chef to make it look stunning. It’s essentially a delicious, open-faced apple tart. There’s no bottom crust in the traditional sense, just a lovely, flaky pastry base that cradles the sweet, tender apples. It’s the kind of dessert that feels incredibly special but requires surprisingly little effort. It’s approachable, forgiving, and frankly, just downright delicious. This galette is more about celebrating the beautiful, natural flavors of the apples and a simple, buttery crust.
Why you’ll love this recipe?
There are so many reasons why this rustic apple galette has earned a permanent spot in my recipe repertoire, and I have a feeling it’ll do the same for you. First off, the FLAVOR is just out of this world. We’re talking tender, slightly tart apples, kissed with warm spices like cinnamon and a hint of nutmeg, all nestled in a golden, buttery crust that’s just perfectly crisp. It’s not overly sweet, letting the natural goodness of the apples shine through, which is something I really appreciate. Then there’s the SIMPLICITY. Seriously, this is where this galette truly shines. Forget chilling pie dough for hours or wrestling with a perfectly even crimp. You can literally have this prepped and in the oven in under 30 minutes if you’re feeling speedy. It’s a lifesaver on busy weeknights when a dessert craving strikes hard. And let’s talk COST-EFFICIENCY. Apples are usually pretty budget-friendly, and the rest of the ingredients are pantry staples. You get a truly impressive dessert without breaking the bank, which is always a win in my book. Plus, it’s incredibly VERSATILE. I love it warm right out of the oven with a scoop of vanilla Ice Cream, but it’s also fantastic at room temperature with a dollop of whipped cream or even a drizzle of caramel sauce. For a simpler touch, a dusting of powdered sugar is divine. What I love most about this rustic apple galette, though, is that it feels like a warm hug. It’s homey, comforting, and makes the whole house smell absolutely incredible while it’s baking. It’s a little bit country, a little bit elegant, and a whole lot delicious. If you’ve ever made my easy blueberry cobbler, you’ll appreciate the same spirit of simple, fruit-forward baking here.
How do I make a rustic apple galette?
Quick Overview
Making this rustic apple galette is surprisingly straightforward, even if you’ve never made a galette before. You’ll prepare a simple, flaky pastry dough, toss sliced apples with a touch of sugar and spice, arrange them on the dough, fold the edges up to create a rustic border, and bake until golden and bubbly. The beauty is in its imperfection; no need for precise measurements or fancy techniques. It’s all about embracing that wonderfully casual, homemade charm. This recipe is designed to be forgiving and yields fantastic results with minimal fuss.
Ingredients
For the Pastry Dough: What is the best way to make it?
You want a dough that’s tender and flaky, but sturdy enough to hold the fruit. I usually go for all-purpose flour because it’s readily available and works beautifully. For extra richness and a slightly more tender crumb, you can substitute about a quarter of the flour with cake flour if you have it on hand. Cold butter is your best friend here; it’s what creates those flaky layers. Make sure it’s really cold – I cut mine into small cubes and even pop it in the freezer for about 10 minutes before I start. A little pinch of salt enhances the flavor of the butter and flour, and ice water is key to keeping the dough cold and preventing the gluten from developing too much, which can make it tough. Some people swear by adding a teaspoon of sugar to the dough for a subtle hint of sweetness, and I agree, it’s a nice touch.
1 ½ cups all-purpose flour
½ teaspoon salt
½ cup (1 stick) cold unsalted butter, cut into ½-inch cubes
4-6 tablespoons ice water
For the Apple Filling:
This is where you can really play with flavors! I love using a mix of apples – some tart like Granny Smith for that lovely tang, and some sweeter ones like Honeycrisp or Fuji for a balanced flavor profile. You want apples that hold their shape when baked, so avoid mealy varieties. Slicing them about ¼-inch thick gives you a nice texture; too thin and they might turn to mush, too thick and they might not cook through evenly. The sugar not only sweetens but also helps draw out some of the juice, creating that delicious syrupy goodness. Cinnamon is a non-negotiable for me, and a tiny pinch of nutmeg adds a lovely warmth that just screams fall. A tablespoon of cornstarch or flour helps thicken any juices released during baking, preventing a soggy bottom. Lemon juice brightens everything up and keeps the apples from browning too quickly while you’re assembling. A little vanilla extract adds another layer of cozy flavor.
4-5 medium apples (about 2 lbs), a mix of tart and sweet varieties
¼ cup granulated sugar (or to taste)
1 tablespoon all-purpose flour or cornstarch
1 teaspoon ground cinnamon
¼ teaspoon ground nutmeg (optional, but lovely)
1 teaspoon vanilla extract
1 tablespoon lemon juice
“New family favorite! This Easy Rustic Apple Galette A Perfect Dessert was so flavorful and ridiculously easy. Crowd-pleaser for sure.”
For the Egg Wash & Finishing:
An egg wash is crucial for that beautiful golden-brown sheen and a slightly crispier crust. Just a simple egg beaten with a splash of water or milk does the trick. For a little extra sparkle and sweetness, a sprinkle of coarse sugar (like turbinado or sanding sugar) over the crust just before baking is a must for me. It adds a delightful crunch and a gorgeous finish. You can also finish with a drizzle of honey or a sprinkle of powdered sugar after baking, depending on how you like it.
1 large egg, beaten with 1 tablespoon water or milk
1-2 tablespoons coarse sugar, for sprinkling (optional)
Step-by-Step Instructions
Step 1: Preheat & Prep Pan
First things first, get that oven going! I like to preheat it to 400°F (200°C). This ensures the oven is nice and hot when the galette goes in, which helps the crust bake up beautifully and quickly. While the oven heats, grab a large baking sheet and line it with parchment paper. This is a lifesaver for easy cleanup, believe me! Parchment paper prevents any sticky filling from burning onto your pan and makes transferring the galette a breeze. You don’t need to grease the parchment; it’s non-stick enough on its own.
Step 2: Mix Dry Ingredients
In a large bowl, whisk together the flour and salt. This just ensures everything is evenly distributed before we add the wet ingredients. It’s a small step, but it makes a difference in creating a uniform dough. Some people like to add a tablespoon or two of sugar to the dry ingredients for a slightly sweeter crust, which is a great variation if you’re leaning towards a sweeter dessert.
Step 3: Mix Wet Ingredients
Now for the butter! Add your cold, cubed butter to the flour mixture. I find using my fingertips or a pastry blender works best to cut the butter into the flour. You want to work quickly so the butter stays cold. The goal is to get a texture that resembles coarse crumbs with some pea-sized pieces of butter still visible. These little butter pieces are what create the flaky layers as they melt in the oven. Once you have that crumbly texture, gradually add the ice water, one tablespoon at a time, and gently mix until the dough just starts to come together. Don’t overmix! It should look a little shaggy. If it feels too dry and won’t hold together, add another tablespoon of water. If it feels too wet, you can add a tiny bit more flour, but be cautious.
Step 4: Combine
Turn the dough out onto a lightly floured surface. Gently bring it together into a ball. Don’t knead it like bread; you just want to gather it. Flatten the ball into a disc about 1-inch thick. This shape is perfect for rolling out later. Wrap the disc tightly in plastic wrap and refrigerate for at least 30 minutes. This chilling time is crucial. It allows the gluten to relax, making the dough easier to roll, and it firms up the butter, which is essential for flakiness. You can even make this dough a day ahead and keep it chilled.
Step 5: Prepare Filling
While the dough is chilling, let’s get those apples ready. Peel, core, and slice your apples into about ¼-inch thick slices. Pop them into a large bowl. Add the granulated sugar, flour (or cornstarch), cinnamon, nutmeg (if using), vanilla extract, and lemon juice. Toss everything gently but thoroughly to coat the Apple Slices evenly. You want to see all those beautiful spices and sugar clinging to the apples. Let this mixture sit for about 10-15 minutes while you roll out the dough. This gives the sugar and spices time to start working their magic, drawing out some of the apple juices. This also helps prevent your galette from becoming watery.
Step 6: Layer & Swirl
Take your chilled dough disc out of the refrigerator. On a lightly floured surface, roll the dough out into a rough circle, about 12-14 inches in diameter and about ⅛-inch thick. Don’t worry if it’s not a perfect circle; that’s the charm of a rustic galette! Carefully transfer the rolled-out dough to your parchment-lined baking sheet. Now, spoon the prepared apple filling into the center of the dough, leaving about a 2-inch border all around. Arrange the Apple Slices decoratively; you can overlap them in concentric circles, or just pile them up nicely. Now, gently fold the dough border up and over the edges of the apple filling, pleating it as you go. It doesn’t need to be perfect – just create little folds to hold the apples in place. This is the “rustic” part! Press the folds gently to seal them slightly.
Step 7: Bake
Brush the folded-over crust generously with the egg wash. If you’re using coarse sugar, sprinkle it over the egg-washed crust now for that extra sparkle and crunch. Pop the baking sheet into your preheated oven. Bake for 35-45 minutes, or until the crust is a beautiful golden brown and the apple filling is bubbly and tender. If the crust starts to brown too quickly before the apples are fully cooked, you can loosely tent the galette with foil. You can test for doneness by gently piercing an apple slice with a knife; it should be tender. The juices bubbling up are a good sign too!
Step 8: Cool & Glaze
Once baked to perfection, carefully remove the galette from the oven. Let it cool on the baking sheet for at least 15-20 minutes before slicing. This is super important! It allows the juices to settle and thicken, and the galette to firm up so it doesn’t fall apart when you cut into it. If you want an extra glaze, you can warm up some apricot jam with a tablespoon of water and brush it over the warm apples. Or, simply dust with powdered sugar once it’s cooled a bit.
“The Easy Rustic Apple Galette A Perfect Dessert turned out amazing. My kids asked for seconds. Saving this one!”
Step 9: Slice & Serve
Your beautiful, rustic apple galette is ready! Slide it carefully off the parchment paper onto a serving platter or board. Slice into wedges, just like you would a pie. It’s absolutely divine served warm, especially with a scoop of your favorite vanilla Ice Cream or a dollop of freshly whipped cream. The contrast of the warm, spiced apples and the cool, creamy topping is pure bliss. You can also enjoy it at room temperature, making it perfect for picnics or afternoon tea.
What to Serve It With
This rustic apple galette is wonderfully versatile, making it a fantastic choice for any time of day or any occasion. For a simple, comforting BREAKFAST, I love a warm slice with a strong cup of black coffee. The spices in the galette are just the thing to wake you up, and it feels like such a treat to start the day that way. It’s far more elegant than just toast, but just as easy! For BRUNCH, it’s a showstopper. Serve it with a side of Greek yogurt and some fresh berries, or alongside some crispy bacon for a delightful sweet and savory combination. A mimosa or a sparkling cider pairs perfectly. As a simple DESSERT, it’s perfection on its own, but as I mentioned, a scoop of vanilla bean ice cream is non-negotiable for many in my family! A drizzle of salted caramel sauce takes it to another level of indulgence. For something a bit lighter, a dollop of crème fraîche or a swirl of homemade whipped cream works wonders. And for those COZY SNACKS, especially on a chilly evening, a slice of this galette, perhaps with a glass of warm apple cider or a chai tea, is pure comfort. My kids love it dunked in milk, which is exactly how I used to eat pie crust scraps when I was little! Honestly, it’s just as good for an afternoon pick-me-up with a cup of tea as it is as a formal dessert.
Top Tips for Perfecting Your Rustic Apple Galette
Over the years of making this galette (and trust me, there have been many!), I’ve picked up a few tricks that really elevate it from good to absolutely divine. For the apples, the key is choosing the right ones. My go-to blend is Granny Smith for tang and Honeycrisp or Fuji for sweetness and texture. If you can get your hands on some local orchard apples, even better! Make sure your slices are consistently about ¼-inch thick; this ensures they cook evenly and become tender without turning into applesauce. Regarding the dough, always use ICE-COLD butter and ice water. It sounds simple, but it’s the most critical step for achieving that flaky, buttery crust. Don’t overwork the dough; you want to handle it as little as possible. Overmixing develops gluten, which results in a tough crust. If your kitchen is warm, consider chilling the dough for an extra 15-20 minutes after bringing it together, before rolling. When it comes to assembling, don’t stress about perfection. The beauty of a rustic galette is its charmingly imperfect appearance. A good, even distribution of apples in the center is more important than perfectly uniform slices. For the swirl effect on the crust, just fold small sections of the dough up and over the apples, pleating as you go. It should look intentionally “messy.” For the baking, know your oven. Ovens can vary wildly! If you notice the crust browning too quickly, don’t hesitate to loosely tent the galette with foil. A good indicator that it’s done is when the apple filling is visibly bubbling and the crust is a deep golden brown. Some people like to add a little more sugar or spice to the filling if they’re using very tart apples, and that’s perfectly fine. Taste your apples! If you’re adventurous with ingredient swaps, try adding a pinch of cardamom or ginger to the Spice Mix for a different flavor profile. I’ve even experimented with a tiny splash of bourbon in the apple filling, which is amazing if you’re serving it as an adult dessert. For that stunning final glaze, warming apricot jam with a little water until it’s pourable and brushing it over the warm apples adds a beautiful sheen and a touch of extra sweetness that really finishes it off perfectly.
Storing and Reheating Tips
Keeping your rustic apple galette tasting its best is pretty simple, though its freshness is definitely best on day one or two. If you have any leftovers (which is rare in my house!), you can store them at ROOM TEMPERATURE for up to two days, provided it’s not too warm or humid. Just make sure to cover it loosely with plastic wrap or foil, or pop it into an airtight container. For longer storage, the REFRIGERATOR is your best bet. Wrap the galette tightly in plastic wrap, then place it in an airtight container. It should stay delicious for up to 4-5 days. I find that wrapping it well helps prevent the crust from getting too soggy from the apple filling over time. If you want to FREEZE your galette, it’s absolutely doable! Bake it completely, let it cool entirely, then wrap it very, very well in several layers of plastic wrap, followed by a layer of aluminum foil. It can be stored in the freezer for up to 2-3 months. To reheat, you can gently warm slices in a moderate oven (around 300°F or 150°C) for about 10-15 minutes until heated through and the crust is crisp again. If it’s frozen, thaw it overnight in the refrigerator first before reheating. I usually wait to add any final dusting of powdered sugar or a drizzle of caramel until *after* reheating, to keep everything looking its best. If you’ve used an apricot glaze, it holds up quite well through refrigeration and reheating.
Frequently Asked Questions
Final Thoughts
There you have it – my absolute favorite rustic apple galette recipe! I truly hope you give this one a try. It’s the kind of dessert that feels both incredibly impressive and wonderfully down-to-earth. It embodies everything I love about home baking: simple ingredients, minimal fuss, and maximum flavor. It’s the perfect way to capture the essence of fall, or any time you’re craving something warm, spiced, and utterly comforting. It’s a recipe that encourages you to embrace the beautiful imperfections of home cooking and to share something truly special with the people you care about. If you enjoy this, you might also love my recipe for spiced pear tartlets or my classic APPLE CRUMBLE – they share that same cozy, fruit-forward spirit. I can’t wait to hear how your rustic apple galette turns out! Please leave a comment below with your thoughts, any variations you tried, or simply to let me know you made it. Happy baking, and enjoy every single delicious bite!
rustic apple galette
Ingredients
Main Ingredients
- 1 recipe pie crust store-bought or homemade
- 1 pound Granny Smith apples about 3-4 apples, peeled, cored, and thinly sliced (approx. 1/16-inch thick)
- 0.5 teaspoon lemon juice
- 0.33 cup packed brown sugar
- 1 teaspoon ground cinnamon
- 0.25 teaspoon ground nutmeg
- 0.125 teaspoon ground allspice
- 1 large egg for egg wash, whisked with 1 tablespoon milk or water
Instructions
Preparation Steps
- Preheat your oven to 400°F (200°C). Line a large cookie sheet with parchment paper or a silicone baking mat.
- In a small bowl, stir together the brown sugar, cinnamon, nutmeg, and allspice. Set this sugar mixture aside.
- Place the thinly sliced apples in a large bowl. Toss them with the lemon juice, then add the reserved sugar mixture and toss again to evenly coat the apples.
- On a lightly floured surface, roll out your pie crust into a 12 to 13-inch circle. Carefully transfer the rolled crust to the prepared baking sheet.
- Arrange the apple slices (leaving any excess juices behind) in the center of the pie crust, leaving a 2-inch border around the edge.
- Gently fold up the edges of the pie crust over the apples, overlapping as necessary to form a rustic border. Brush the folded crust edges with the egg wash.
- Bake for 28-32 minutes, or until the crust is golden brown and the apples are tender. Let the galette cool to room temperature before slicing and serving.
- Serve the apple galette warm or at room temperature. It's delicious on its own or with a scoop of vanilla ice cream.


