
Oh, you guys, I am SO excited to share this recipe with you. This isn’t just any cake; this is *the* cake. The one that smells like heaven is baking in the oven, the one my kids demand for birthdays (and sometimes just because!), and the one that makes even the most chaotic weeknights feel a little bit special. It’s a chocolate zucchini layer cake, and if you’ve never baked with zucchini before, prepare to be amazed. It’s my go-to when I need a reliable, crowd-pleasing dessert that feels a little bit sophisticated but is honestly, surprisingly easy. Think of it like a super-moist, intensely chocolatey, melt-in-your-mouth dream. It’s a far cry from those dry, crumbly cakes you sometimes get, and I promise, the zucchini is our secret weapon for that incredible texture. It’s definitely a step up from a simple one-bowl brownie, but in the best way possible!
Thank you for reading this post, don't forget to subscribe!What is a Zucchini Layer Cake?
So, what exactly is this marvel we’re talking about? At its heart, it’s a wonderfully moist and deeply chocolatey cake, made extra special with the magic ingredient: grated zucchini. Don’t let that fool you! You won’t taste the zucchini itself, I promise. What it does, though, is act like a natural humidifier for the cake, keeping it incredibly tender and moist for days. The “layer cake” part just means we bake it in two (or more!) rounds and stack them up with a luscious filling and frosting. It’s essentially a more ambitious, decadent version of a simple Chocolate Cake, but the zucchini makes it so much more forgiving and frankly, more delicious. It’s the kind of cake that looks like you spent hours slaving away, but secretly, you know it was a breeze. It’s a comforting embrace in cake form, really.
Why you’ll love this recipe?
There are so many reasons why this chocolate zucchini layer cake has earned a permanent spot in my recipe binder, and I just know you’re going to fall in love with it too. First off, the FLAVOR! It’s intensely chocolatey, but not overwhelmingly sweet. The unsweetened cocoa powder gives it this rich, deep flavor that’s just divine. Then there’s the TEXTURE. This is where the zucchini truly shines. It creates a cake that is unbelievably moist and tender. Honestly, you can leave this on the counter for a couple of days (if it lasts that long!) and it will still be wonderfully soft. It’s the perfect antidote to those cakes that start to dry out after the first day. And SIMPLICITY? You wouldn’t believe me if I told you how easy it is. It uses pretty standard pantry staples, and the mixing is straightforward. I’ve even made this on busy weeknights when I’ve had a sudden craving for something sweet, and it’s genuinely achievable. Plus, it’s so BUDGET-FRIENDLY! Zucchini is usually inexpensive, especially when it’s in season, and most of the other ingredients are things you likely already have. And let’s talk VERSATILITY. While I love it with a classic chocolate buttercream, you could totally swap in a Cream Cheese Frosting, a simple ganache, or even just a dusting of powdered sugar. It’s also fantastic with a raspberry filling if you want a little fruity tang. What I love most about this recipe, though, is that it always feels like a treat, no matter the occasion. It’s my little slice of happiness, and I can’t wait for you to experience it too.
How do I make Zucchini Layer Cake?
Quick Overview
Making this cake is a wonderfully simple process that yields stunning results. You’ll start by whisking together your dry ingredients, then incorporating your wet ingredients, and finally, folding in the grated zucchini. We’ll bake two beautiful rounds, whip up a simple, luscious chocolate filling, and then bring it all together with a smooth, rich chocolate glaze. The zucchini does all the heavy lifting for moisture, so you don’t have to worry about overmixing or dry cake layers. It’s honestly one of the most forgiving layer cake recipes out there, making it perfect for both beginner bakers and seasoned pros looking for a reliable win.
Ingredients
For the Main Batter:
2 ½ cups all-purpose flour
1 cup unsweetened cocoa powder (use good quality, it makes a difference!)
1 ½ teaspoons baking soda
1 teaspoon baking powder
1 teaspoon salt
2 cups granulated sugar
2 large eggs, at room temperature
1 cup buttermilk, at room temperature (or 1 cup milk with 1 tablespoon lemon juice or vinegar, let sit for 5 minutes)
½ cup vegetable oil (or any neutral oil)
1 teaspoon vanilla extract
1 cup strongly brewed coffee, hot (this is key for deepening the chocolate flavor!)
For the Filling:
1 cup (2 sticks) unsalted butter, softened
3 ½ cups powdered sugar, sifted
½ cup unsweetened cocoa powder, sifted
¼ cup milk or heavy cream
1 teaspoon vanilla extract
Pinch of salt
For the Glaze:
1 cup (2 sticks) unsalted butter, melted
½ cup unsweetened cocoa powder, sifted
3 cups powdered sugar, sifted
⅓ cup milk or heavy cream
1 teaspoon vanilla extract
Step-by-Step Instructions
Step 1: Preheat & Prep Pan
First things first, let’s get our oven ready. Preheat it to 350°F (175°C). Now, grab two 8-inch or 9-inch round cake pans. I always like to grease them really well with butter or baking spray, and then dust them with a little cocoa powder instead of flour. This prevents any white residue on your beautiful Chocolate Cake layers and makes sure they release perfectly. You can also line the bottoms with parchment paper for extra insurance – never a bad idea! Give them a little tap to distribute the cocoa powder, then tap out any excess. Set them aside.
Step 2: Mix Dry Ingredients
In a large bowl, whisk together your flour, unsweetened cocoa powder, baking soda, baking powder, salt, and granulated sugar. Whisking them together really well ensures that everything is evenly distributed, which is super important for an even rise and texture. You don’t want pockets of baking soda or clumps of cocoa! I usually whisk them for about 30 seconds to a minute until everything looks uniformly blended. This is where that deep chocolate color starts to come to life!
Step 3: Mix Wet Ingredients
In a separate, medium-sized bowl, whisk together the eggs, buttermilk (or your homemade substitute!), vegetable oil, and vanilla extract. Just whisk them until they’re well combined. The buttermilk adds a lovely tenderness to the cake, and if you don’t have any on hand, the milk and acid trick works like a charm. Make sure your eggs and buttermilk are at room temperature; it helps everything emulsify better, leading to a smoother batter and a more consistent bake. I usually pull mine out about 30 minutes before I start baking.
“Made the Easy Layer Cake Baking Your Guide tonight and wow — perfect weeknight dinner. Will definitely make again!”
Step 4: Combine
Now, pour the wet ingredients into the bowl with the dry ingredients. Mix on low speed (if using a mixer) or with a whisk/spatula until *just* combined. This is where the crucial step happens: pour in the hot, strongly brewed coffee. This might seem a little odd, but trust me, it’s a game-changer for chocolate cakes! It blooms the cocoa powder, intensifying the chocolate flavor and adding even more moisture. The batter will be quite thin at this point, and that’s exactly what you want. Don’t overmix! Just mix until no dry streaks remain. A few little lumps are okay. Overmixing develops the gluten too much, which can lead to a tougher cake.
Step 5: Prepare Filling
While the Cake Batter rests for a moment, let’s make that dreamy filling. In a large bowl, beat the softened butter until it’s light and fluffy. This usually takes a few minutes with an electric mixer. Gradually add the sifted powdered sugar and sifted cocoa powder, alternating with the milk or cream, beating well after each addition. Start on low speed to avoid a powdered sugar cloud, then increase to medium-high speed. Add the vanilla extract and a pinch of salt. Beat until the frosting is smooth, creamy, and spreadable. If it’s too thick, add a tiny bit more milk; if it’s too thin, add a little more powdered sugar.
Step 6: Layer & Swirl
Okay, here’s where the cake starts to look truly special. Once your cake layers are completely cool (and I cannot stress this enough – warm cakes will melt the filling!), place one layer on your serving plate or cake stand. Spread a generous, even layer of the chocolate filling over the top, going almost to the edge. Carefully place the second cake layer on top of the filling. You might want to gently press down to make sure they’re nice and even. If any filling oozes out, don’t worry, we’ll clean that up with the glaze!
Step 7: Bake
Pour the cake batter evenly into your prepared pans. Bake for 30-35 minutes, or until a wooden skewer or toothpick inserted into the center of the cakes comes out clean, with just a few moist crumbs attached. Keep an eye on them, as oven temperatures can vary. If the tops start browning too quickly, you can loosely tent them with foil. Once they’re done, let the cakes cool in their pans on a wire rack for about 10-15 minutes before inverting them onto the rack to cool completely. Patience here is key!
Step 8: Cool & Glaze
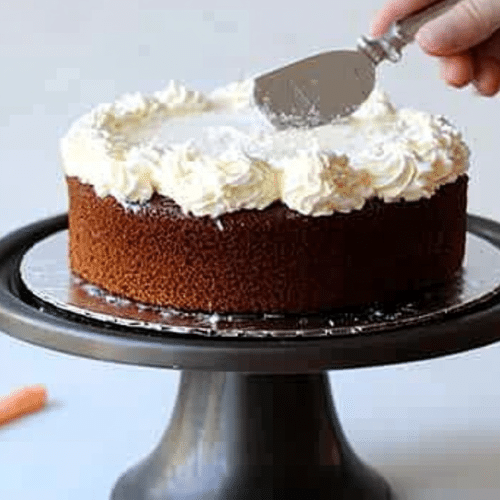
Once your cakes are completely cool, it’s time for the glaze. In a medium bowl, whisk together the melted butter and sifted cocoa powder until smooth. Gradually add the sifted powdered sugar, alternating with the milk or cream, beating until you have a smooth, pourable glaze. Stir in the vanilla extract. If the glaze is too thick, add a tiny bit more milk; if it’s too thin, add more powdered sugar. Pour the glaze over the top of your assembled cake, letting it drip down the sides naturally. You can use an offset spatula to help guide it if needed, but I often just let gravity do its thing for a more rustic look.
Step 9: Slice & Serve
Let the glaze set for about 15-20 minutes before slicing. This cake is best served at room temperature, or ever so slightly warm if you’re re-heating a slice. Use a sharp knife to cut clean slices – I find wiping the knife between cuts helps a lot! This cake is absolute perfection on its own, but it’s also wonderful served with a dollop of whipped cream or a scoop of vanilla Ice Cream. Enjoy every delicious bite!
What to Serve It With
This chocolate zucchini layer cake is so versatile, it fits perfectly into almost any occasion. For a cozy BREAKFAST, a thin slice with a hot cup of coffee is pure bliss. The rich chocolate is surprisingly grounding in the morning! If you’re hosting BRUNCH, I love to serve it with a scattering of fresh berries on the side – raspberries or strawberries really pop against the dark chocolate. A light dusting of powdered sugar makes it look extra elegant. As a DESSERT, it’s a showstopper. Serve it with a scoop of good quality vanilla bean ice cream, or a swirl of crème fraîche for a sophisticated contrast. For those moments when you just need a COZY SNACK, a warm slice with a glass of cold milk is unbeatable. Honestly, my kids will eat it any time of day, and it’s always gone in minutes. I’ve even paired it with a small glass of red wine for a grown-up treat, and the richness of the wine complements the chocolate beautifully. It’s truly a cake that can do it all!
Top Tips for Perfecting Your Chocolate Zucchini Layer Cake
Over the years, I’ve learned a few tricks that make this cake turn out perfectly every single time. Here are my absolute top tips:
Zucchini Prep: Don’t skip squeezing out the excess moisture from your grated zucchini! Use a fine-mesh sieve and your hands, or wrap the grated zucchini in a clean kitchen towel or cheesecloth and wring it out. This is CRUCIAL. Too much water will make your cake batter too thin and can lead to a gummy texture. A medium-sized zucchini usually yields about 1 to 1 ½ cups of grated zucchini, but you really want to focus on removing the liquid. I usually grate mine directly into a sieve placed over a bowl.
Mixing Advice: The golden rule for this cake is to NOT overmix the batter once the wet and dry ingredients are combined. Mix until *just* combined, and that’s it. The hot coffee will make the batter thin, but that’s normal. Overmixing develops the gluten in the flour, which can result in a tough, rubbery cake instead of a tender, moist one. I often finish mixing by hand with a spatula to ensure I’m not overdoing it.
Swirl Customization: While this recipe is written as a straightforward chocolate cake, you can absolutely add your own flair. For a marbled effect, you could reserve a small portion of the batter, add a tablespoon or two of extra cocoa powder and a tiny bit of liquid to it to make it thicker, then dollop spoonfuls of the darker batter into the lighter batter before folding gently a few times. Or, for a real treat, fold in ½ cup of chocolate chips into the batter before baking!
Ingredient Swaps: If you don’t have buttermilk, the milk and vinegar/lemon juice substitute is fantastic. For oil, you can use melted coconut oil (cooled) or even applesauce for a slightly different texture and reduced fat, though the oil gives the best moisture. I haven’t experimented much with gluten-free flours in this specific recipe, but a good 1:1 gluten-free baking blend *might* work, though you might need to adjust the liquid slightly. Always use good quality cocoa powder for the best flavor!
“The Easy Layer Cake Baking Your Guide turned out amazing. My kids asked for seconds. Saving this one!”
Baking Tips: Make sure your oven is accurately preheated. An oven thermometer is a great investment if you’re unsure about your oven’s calibration. Bake the cakes on the center rack. If your oven tends to bake unevenly, you can rotate the pans halfway through baking. To test for doneness, a toothpick inserted into the center should come out with moist crumbs, not wet batter. Overbaking is the enemy of a moist cake!
Glaze Variations: The glaze recipe is a fantastic base, but feel free to get creative! Add a tablespoon of instant espresso powder to the glaze for an even richer chocolate flavor. A pinch of cayenne pepper can give it a subtle kick. If you prefer a creamier frosting, you can easily turn the glaze ingredients into a buttercream by creaming butter first, then gradually adding the dry and wet ingredients. Or, if you want something lighter, a simple dusting of powdered sugar or a fruit coulis works beautifully.
Storing and Reheating Tips
This cake is wonderfully forgiving when it comes to storage, and thankfully, it stays moist for quite a while! At ROOM TEMPERATURE, it will keep well in an airtight container for up to 3 days. Just make sure it’s fully cooled before covering. The zucchini helps it retain its moisture, so it won’t dry out quickly. If your kitchen is particularly warm, storing it in the refrigerator might be a better option to prevent the filling from softening too much.
For REFRIGERATOR STORAGE, wrap the cake tightly in plastic wrap, then place it in an airtight container. It should stay delicious for up to 5 days. When you’re ready to serve a slice from the fridge, I always recommend letting it sit at room temperature for about 30 minutes to an hour to bring out the best flavor and texture. It’s never as good when it’s ice cold!
FREEZER INSTRUCTIONS are also a go! You can freeze the unfrosted cake layers. Wrap them very tightly in plastic wrap, then in a layer of aluminum foil. They’ll keep well in the freezer for up to 3 months. Thaw them overnight in the refrigerator, then let them come to room temperature before frosting and glazing. For frosted cake, freeze it until the frosting is firm, then wrap tightly in plastic wrap and foil. This prevents the frosting from getting damaged. Thaw as you would the unfrosted layers.
Glaze Timing Advice: For cakes stored at room temperature or in the fridge, the glaze is usually fine applied once the cake is fully cooled. If you plan to freeze a glazed cake, it’s sometimes better to freeze it plain and then glaze it after thawing for the freshest appearance. However, this glaze tends to hold up pretty well if applied before freezing.
Frequently Asked Questions
Final Thoughts
Honestly, this chocolate zucchini layer cake is more than just a dessert; it’s a hug in cake form. It’s a recipe that proves you can achieve incredible, moist, rich flavor with simple ingredients and a little bit of patience. The magic of the zucchini, combined with the deep cocoa and hot coffee, creates a cake that is consistently soft, tender, and utterly delicious. It’s the kind of recipe that makes you feel like a baking superhero, even if you’re just starting out. If you love this cake, you might also enjoy my Moist Vanilla Bean Bundt Cake or my Easy Chocolate Chip Cookie Bars, which also focus on great texture and flavor with minimal fuss. I truly hope you give this chocolate zucchini layer cake a try. It’s become a staple in my kitchen, and I have a feeling it might just become one in yours too. I can’t wait to hear how it turns out for you! Happy baking!
layer cake baking
Ingredients
For the Vanilla Cake
- 2.5 cups all-purpose flour
- 2 cups granulated sugar
- 1 tablespoon baking powder
- 0.5 teaspoon salt
- 1 cup unsalted butter softened
- 4 large eggs
- 2 teaspoons vanilla extract
- 1 cup whole milk
For the Vanilla Buttercream
- 1.5 cups unsalted butter softened
- 4 cups powdered sugar sifted
- 2 teaspoons vanilla extract
- 3 tablespoons heavy cream or milk
- 0.25 teaspoon salt
Instructions
Bake the Cake Layers
- Preheat your oven to 350°F (175°C). Grease and flour three 8-inch round cake pans, or line with parchment paper.
- In a large bowl, whisk together the all-purpose flour, granulated sugar, baking powder, and salt. Set aside.
- In a separate bowl, cream the softened unsalted butter until light and fluffy. Beat in the large eggs one at a time, then mix in the vanilla extract.
- Gradually add the dry ingredients to the wet ingredients, alternating with the whole milk, beginning and ending with the dry ingredients. Mix until just combined, being careful not to overmix.
- Divide the batter evenly among the prepared cake pans. Bake for 25-30 minutes, or until a wooden skewer inserted into the center comes out clean.
- Let the cake layers cool in the pans for 10 minutes, then invert them onto a wire rack to cool completely before frosting.
Prepare the Vanilla Buttercream
- In a large mixing bowl, beat the softened unsalted butter with an electric mixer until creamy and smooth, about 2-3 minutes.
- Gradually add the sifted powdered sugar, one cup at a time, mixing on low speed until incorporated, then increasing to medium-high until fluffy.
- Add the vanilla extract, heavy cream (or milk), and salt. Beat on high speed for another 2-3 minutes until the buttercream is light, fluffy, and smooth.
Assemble and Frost the Cake
- Once the cake layers are completely cool, use a serrated knife to level the tops of each cake layer if needed, creating a flat surface.
- Place one cake layer on your serving plate or cake stand. Spread about 0.5 cup of buttercream evenly over the top.
- Carefully place the second cake layer on top and spread another 0.5 cup of buttercream. Repeat with the third cake layer.
- Apply a thin layer of buttercream all over the entire cake (top and sides). This is called a crumb coat, and it helps to trap any loose crumbs. Chill the cake in the refrigerator for 15-20 minutes to set the crumb coat.
- Once the crumb coat is set, apply the remaining buttercream to the top and sides of the cake. Use an offset spatula or bench scraper to smooth the frosting for a neat finish.
- Decorate as desired, or simply enjoy your beautifully baked layer cake!


