Oh, I am SO excited to share this recipe with you today. Seriously, if there’s one thing that instantly transports me back to my grandmother’s kitchen, it’s the smell of these creamy cookies baking. They’re not just cookies; they’re pure comfort. They have this incredibly tender, almost cake-like texture that just melts in your mouth, and the flavor is perfectly sweet without being overwhelming. When I first started experimenting with them years ago, I was trying to replicate something similar my aunt used to make, but wanted a little more richness, a little more *oomph*. And I have to say, after a few tries (and a few slightly less-than-perfect batches, don’t worry!), I landed on this version. It’s my absolute favorite for a reason, and I think you’re going to fall in love with these creamy cookies just as much as I have.
Thank you for reading this post, don't forget to subscribe!What are Creamy Cookies?
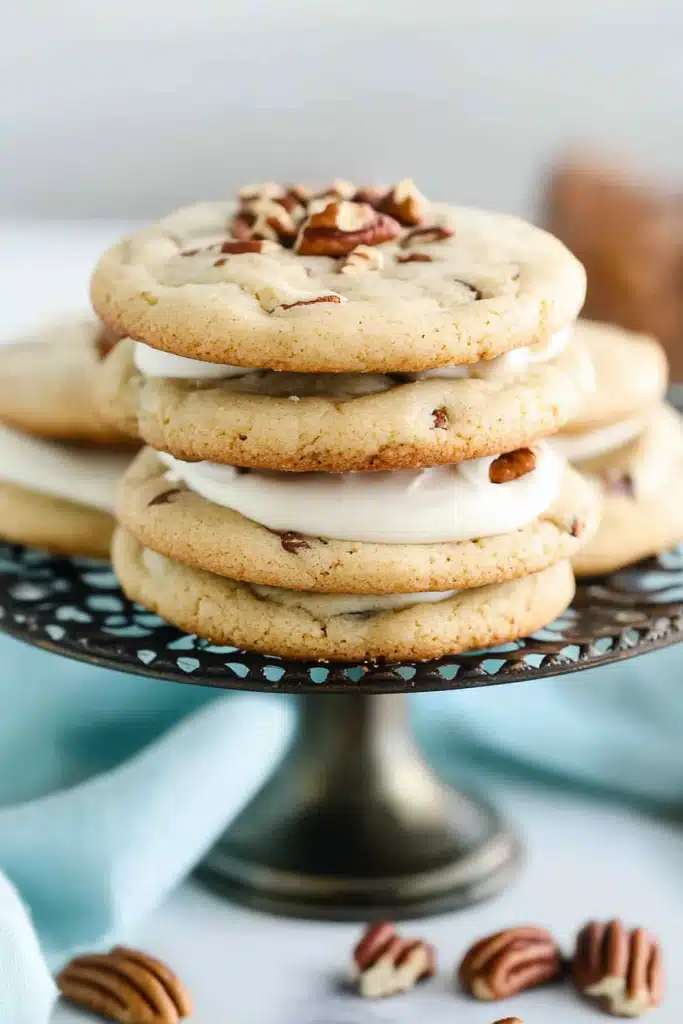
So, what exactly *are* these amazing things? Think of them as a super-soft, incredibly moist cookie that leans more towards a soft-baked brownie texture than a crisp, crunchy one. The “creamy” in their name really comes from the rich, tender crumb you get from a few key ingredients. They’re not overly fussy, and honestly, they’re the perfect sweet treat when you’re craving something truly satisfying but don’t have hours to spend in the kitchen. They’re essentially my shortcut to pure happiness, a delightful bite that feels both familiar and special all at once. It’s like a warm hug you can eat!
Why you’ll love this recipe?
Honestly, the list is pretty long! First and foremost, the flavor is just divine. They have a subtle vanilla sweetness that pairs beautifully with almost anything. What I love most about these creamy cookies is their unbelievable texture. They are just so wonderfully soft and chewy, with that melt-in-your-mouth quality that makes you reach for a second (or third!) one before you even realize it. And the simplicity! You don’t need any fancy equipment or a degree in pastry making. It’s a straightforward process that yields professional-level results. Plus, they are incredibly budget-friendly! You probably already have most of the ingredients in your pantry right now, which makes them a lifesaver for unexpected cravings or when you need a quick dessert for guests. I also find them so versatile. Serve them warm with a glass of milk, alongside a cup of coffee, or even as a simple dessert after dinner. They’re just as good the next day (if they even last that long!). Compared to a more traditional, crisp cookie, these offer a different kind of delight – a softer, more indulgent experience that truly satisfies.
How do I make Creamy Cookies?
Quick Overview
The whole process is really quite simple. We’ll start by whisking together our dry ingredients, then cream together the butter and sugar for that essential tenderness, add in the eggs and vanilla, and finally combine it all with the dry ingredients. The secret to their incredible texture really lies in not overmixing and using the right balance of ingredients. Then, it’s just a matter of scooping them onto a baking sheet and letting the oven do its magic. They bake up beautifully soft and slightly golden, ready to be devoured in mere minutes.
Ingredients
For the Main Batter:
- 2 ¼ cups all-purpose flour: This is your standard base. I’ve found that sifting it isn’t strictly necessary for this recipe, but if you want extra insurance against dense cookies, go for it!
- 1 teaspoon baking soda: This is what gives them that lovely lift and soft chewiness. Make sure it’s fresh!
- ½ teaspoon salt: Balances out the sweetness and really brings out all the other flavors.
- 1 cup (2 sticks) unsalted butter, softened: This is crucial for that creamy texture. Make sure it’s truly softened, not melted. Leave it on the counter for about an hour before you start.
- ¾ cup granulated sugar: For sweetness and structure.
- ¾ cup packed light brown sugar: This is a big player in the creamy, chewy factor. The molasses in it adds moisture and a deeper flavor.
- 2 large eggs: Room temperature eggs incorporate better. If you forget, just pop them in a bowl of warm water for 10 minutes.
- 1 teaspoon pure vanilla extract: Don’t skimp on this! The quality of your vanilla really shines through.
For the Optional Filling/Swirl (my favorite addition!):
- ½ cup cream cheese, softened: This is what takes them over the top to truly “creamy cookie” status.
- ¼ cup powdered sugar: To sweeten the cream cheese just a bit.
- ½ teaspoon vanilla extract: For an extra hint of vanilla goodness in the swirl.
For the Optional Glaze:
“I don’t know if I’ve ever eaten a better Easy Creamy Cookies So Good. The rub alone is wonderful, but the sauce??? Over the top!”
- 1 cup powdered sugar: Sifted, if you can, for a smoother glaze.
- 2-3 tablespoons milk or cream: You can use regular milk, almond milk, or even a bit of half-and-half for extra richness. Adjust the amount to get your desired drizzling consistency.
- ½ teaspoon vanilla extract: Again, for that lovely flavor.
Step-by-Step Instructions
Step 1: Preheat & Prep Pan
First things first, let’s get the oven preheated to 375°F (190°C). While that’s heating up, grab a couple of baking sheets and line them with parchment paper or silicone baking mats. This is my non-negotiable step to prevent any sticking and to ensure even baking. If you don’t have parchment, a lightly greased baking sheet will do, but parchment is definitely the way to go for easy cleanup!
Step 2: Mix Dry Ingredients
In a medium bowl, whisk together the all-purpose flour, baking soda, and salt. Give it a good whisk for about 30 seconds to make sure everything is evenly distributed. This ensures the leavening agent and salt are perfectly mixed into the flour, which helps the Cookies Bake up evenly. No one wants a bite that’s too salty or doesn’t rise properly!
Step 3: Mix Wet Ingredients
In a large bowl, cream together the softened unsalted butter, granulated sugar, and packed light Brown Sugar. You can use an electric mixer for this, or if you’re feeling ambitious (and want a good arm workout!), a sturdy whisk and some elbow grease will work too! Beat until the mixture is light and fluffy, about 2-3 minutes. This step is really important for incorporating air, which contributes to the cookie’s tender texture. Next, beat in the large eggs, one at a time, making sure each one is fully incorporated before adding the next. Then, stir in the pure vanilla extract. The mixture should look smooth and slightly pale.
Step 4: Combine
Now, gradually add the dry ingredients to the wet ingredients. Mix on low speed or stir with a wooden spoon until *just* combined. I cannot stress “just combined” enough! Overmixing is the enemy of tender cookies. You should still see a few streaks of flour, and that’s okay. We’ll finish mixing it in by hand. The dough should be soft and a little sticky.
Step 5: Prepare Filling
If you’re going for that extra creamy goodness (and you totally should!), whip up the Cream Cheese filling. In a small bowl, beat the softened cream cheese with the powdered sugar and vanilla extract until smooth and creamy. This usually takes about a minute. You want it to be spreadable and delicious.
Step 6: Layer & Swirl (Optional but Recommended!)
Okay, this is where the fun really happens if you’re using the Cream Cheese Swirl. Drop rounded tablespoons of cookie dough onto your prepared baking sheets, leaving about 2 inches between each cookie. Then, take small dollops of your cream cheese mixture and randomly place them on top of the cookie dough. Using a toothpick or the tip of a knife, gently swirl the cream cheese into the dough. Don’t over-swirl; you want to see distinct ribbons of cream cheese. It looks so pretty when baked!
Step 7: Bake
Bake for 9-12 minutes, or until the edges are lightly golden brown and the centers look just set. They might still look a little soft in the middle, and that’s exactly what you want for that signature creamy texture. They’ll continue to set up as they cool. Keep an eye on them; ovens can vary, so trust your eyes more than the clock!
Step 8: Cool & Glaze
Let the cookies cool on the baking sheets for about 5 minutes. This is important because they are quite delicate when they first come out of the oven. After 5 minutes, carefully transfer them to a wire rack to cool completely. If you’re adding the glaze, whisk together the sifted powdered sugar, milk (start with 2 tablespoons and add more if needed), and vanilla extract in a small bowl until smooth. Drizzle it over the cooled cookies. I like to do this while the cookies are still a little warm so the glaze slightly melts into them, but completely cool is fine too for a crisper glaze.
“The Easy Creamy Cookies So Good turned out amazing. My kids asked for seconds. Saving this one!”
Step 9: Slice & Serve
Once the glaze has set (or if you skipped it!), these beauties are ready to be enjoyed. They are absolutely phenomenal served warm, but they’re also fantastic at room temperature. Grab a glass of milk, a cup of coffee, or just eat them as is. You really can’t go wrong!
What to Serve It With
These creamy cookies are wonderfully adaptable! For breakfast, they’re fantastic with a strong cup of coffee or a creamy latte. I like to serve them plain, maybe with a sprinkle of a little extra powdered sugar if I’m feeling fancy. For a weekend brunch, they’re perfect alongside some fresh fruit salad and maybe some scrambled eggs. They add a touch of sweetness without being overly decadent. As a dessert, they truly shine. They’re amazing with a scoop of vanilla bean Ice Cream, or drizzled with a warm chocolate sauce. My family loves them after dinner with a glass of milk for the kids and a nice herbal tea for me. And for those late-night cravings or cozy afternoons, they are simply perfect on their own. I sometimes pair them with a small bowl of fresh berries – the tartness of the berries cuts through the sweetness of the cookie beautifully. My kids actually prefer them plain with milk, and honestly, who can blame them? They’re that good!
Top Tips for Perfecting Your Creamy Cookies
Over the years, I’ve picked up a few tricks that really make a difference in getting these creamy cookies just right. First, regarding the butter: make sure it’s *softened*, not melted. I’ve made the mistake of using slightly too-warm butter, and it just makes the dough spread too much. Softened is key for that perfect texture. When it comes to mixing, my biggest advice is to stop as soon as you don’t see dry flour streaks. Seriously, it’s better to have a few tiny bits of flour than to overmix. Overmixing develops the gluten in the flour, which will make your cookies tough instead of tender and creamy. Trust me, I learned that the hard way! For the optional Cream Cheese swirl, don’t go overboard with the swirling. You want visible ribbons, not a uniform pale pink color. It’s the marbling effect that makes them so visually appealing and adds bursts of cream cheese flavor throughout. If you’re tempted to add mix-ins like chocolate chips or nuts, I recommend keeping them relatively light. These cookies are all about that delicate, creamy texture, and too many heavy additions can weigh them down. A handful of white chocolate chips or some chopped pecans can be nice, though! For baking, always preheat your oven properly. A good bake starts with a good preheat. I also find that rotating my baking sheets halfway through baking can help ensure even browning, especially if your oven has hot spots. And when testing for doneness, look for the edges to be set and lightly golden. The centers should still look a little soft – they will firm up as they cool. Don’t overbake them, or you’ll lose that signature creamy texture. For the glaze, it’s all about consistency. If it’s too thick, add milk a teaspoon at a time. If it’s too thin, add a bit more powdered sugar. You want it thin enough to drizzle but thick enough to coat the cookies nicely. I’ve also experimented with adding a tiny drop of food coloring to the glaze for special occasions, which is always fun!
Storing and Reheating Tips
These creamy cookies are surprisingly good at holding their texture. For room temperature storage, I keep them in an airtight container for up to 3-4 days. They stay wonderfully soft and moist during this time. If you plan on keeping them longer or if your kitchen is particularly warm, popping them in the refrigerator is a good idea. Store them in an airtight container, and they should last for about a week. Just a heads-up, they might firm up a bit in the fridge, but they’ll soften back up at room temperature. If you want to freeze them, I highly recommend freezing them *before* glazing. Place them in a single layer on a baking sheet until firm, then transfer them to a freezer-safe bag or container. They’ll keep well in the freezer for up to 2-3 months. When you’re ready to enjoy them, just let them thaw at room temperature. For reheating, if they’ve become a little firm from refrigeration or freezing, you can pop them in a warm oven (around 300°F or 150°C) for just 2-3 minutes. It brings back that lovely soft texture. If you’ve already glazed them, reheating can sometimes make the glaze a bit sticky, so they’re often best enjoyed at room temperature after thawing or when they’re baked fresh. I always try to underbake them just slightly if I know I’ll be storing them, as they continue to cook on the hot pan.
Frequently Asked Questions
Final Thoughts
So there you have it – my absolute favorite recipe for creamy cookies. They’re more than just a dessert; they’re a little bit of happiness, a reminder of simple joys, and a guaranteed crowd-pleaser. I truly hope you give them a try and that they bring as much warmth and comfort to your kitchen as they do to mine. They’re proof that sometimes, the most incredible flavors come from the simplest ingredients and a little bit of love. If you love these soft, chewy cookies, you might also enjoy my classic chocolate chip cookies or my ridiculously easy No-Bake Peanut Butter cookies. Let me know in the comments how yours turn out, I’m always eager to hear about your baking adventures! Happy baking, my friends!

creamy cookies
Ingredients
Main Ingredients
- 1.5 cup unsalted butter softened to room temperature
- 8 oz cream cheese full-fat, softened
- 1.5 teaspoon vanilla extract
- 1.3333 cup granulated sugar
- 3 egg yolks from large eggs
- 0.5 teaspoon salt
- 2.6667 cup all-purpose flour spooned and leveled
- 0.25 teaspoon baking powder
- 0.5 cup powdered sugar for rolling cookies after baking
Instructions
Preparation Steps
- Preheat the oven to 350°F (175°C). Line baking sheets with parchment paper or leave them ungreased.
- In a large mixing bowl, beat the softened butter and cream cheese together with an electric mixer on medium speed until smooth and creamy, about 2 minutes.
- Add the granulated sugar, vanilla extract, and egg yolks. Beat on medium-high speed until light and fluffy, about 3 minutes.
- In a separate bowl, whisk together the salt, all-purpose flour, and baking powder. Gradually add the dry ingredients to the wet ingredients, mixing on low speed just until combined. Do not overmix.
- Using a tablespoon or small cookie scoop, drop rounded portions of dough onto the prepared baking sheet, spacing them about 2 inches apart.
- Bake in the preheated oven for 12 to 14 minutes, or until the cookies are set and the edges are very lightly golden. Do not overbake.
- Remove from the oven and let the cookies cool on the baking sheet for 5 minutes. Then transfer them to a wire rack to cool completely.
- Once cooled, roll each cookie gently in powdered sugar for a beautiful sweet crust. Store in an airtight container.


