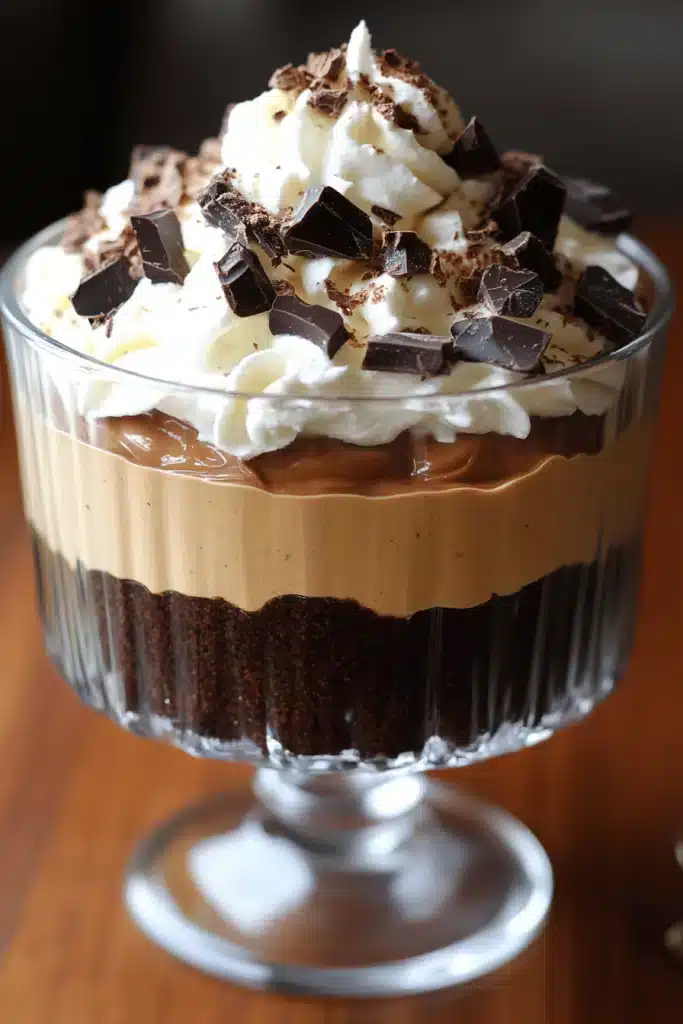
There are some recipes that just stick with you, aren’t there? They become the ones you pull out on a rainy Saturday afternoon, the ones you bring to potlucks where they inevitably disappear first, and the ones that make your house smell like pure magic. For me, that recipe is this Double Chocolate chunk cookie recipe. It’s not just a cookie; it’s a memory. I remember my grandma making these when I was little, the kitchen always filled with the most intoxicating aroma of baking chocolate. She’d let me help stir the batter, and I’d always sneak a lick of the spoon – a forbidden, yet delightful, thrill. These aren’t your average thin, crispy cookies, oh no. These are thick, chewy, decadent discs of pure joy, packed with pockets of gooey melted chocolate. If you’re a chocolate lover, seriously, you need this in your life. Forget those other cookies that promise greatness but deliver mediocrity; this chocolate cookie recipe is the real deal.
Thank you for reading this post, don't forget to subscribe!What is the recipe for chocolate cookie?
So, what exactly makes this chocolate Cookie Recipe so special? Think of it as the ultimate comfort food, disguised as a simple cookie. It’s essentially a rich, deeply chocolatey dough studded with generous chunks of both dark and milk chocolate. The secret to their incredible texture lies in a few key steps, but don’t worry, it’s nothing complicated. It’s that perfect balance between a slightly crisp edge and a wonderfully soft, chewy center that just melts in your mouth. It’s the kind of cookie that makes you close your eyes with the first bite and let out a contented sigh. It’s everything you dream a chocolate cookie should be, and then some. It’s not fancy, it’s not complicated, but it is, in my humble opinion, pretty darn perfect.
Why you’ll love this recipe?
Oh, where do I even begin with why you’ll absolutely adore these chocolate chunk cookies? Let’s start with the flavor, shall we? It’s a symphony of chocolate. We’re talking a deep, dark cocoa base that’s intensely chocolatey, then we amplify it with chunks of both semi-sweet and milk chocolate. As they bake, the chocolate chunks become these glorious, molten pools of deliciousness that are just irresistible. It’s a flavor explosion in every single bite. And the texture? Pure perfection. They’re wonderfully chewy, with just a hint of crispness around the edges, but the center stays soft and gooey, just like a freshly baked brownie. It’s the kind of chewiness that makes you want to eat the whole batch. What I love most about this recipe, aside from the taste, is its simplicity. You don’t need any fancy equipment or obscure ingredients. Everything is pretty standard pantry stuff, making it super accessible for any weeknight or weekend baking project. Plus, they’re incredibly cost-effective. You can whip up a huge batch for way less than you’d pay for a few fancy bakery cookies. And talk about versatile! These are perfect for pretty much any occasion. Need a quick dessert? Done. Want to impress guests? They’ll be begging for the recipe. Just craving something sweet to go with your afternoon coffee? You’ve found your match. Honestly, the only downside is that they disappear *way* too quickly!
How do I make chocolate cookie?
Quick Overview
Making these Chocolate Cookies is a straightforward process that yields incredibly rewarding results. You’ll start by creaming butter and sugars, then incorporating eggs and vanilla. Next, you’ll whisk together your dry ingredients and gradually combine them with the wet mixture, being careful not to overmix. The stars of the show – the chocolate chunks – are then folded in. We’ll scoop the dough onto baking sheets, giving them a little space to spread, and bake them until they’re just set. A short cooling period on the baking sheet is crucial for that perfect chewy texture, followed by a complete cool-down on a wire rack. Finally, a drizzle of chocolate glaze (optional, but highly recommended!) finishes them off beautifully. It’s truly a simple, step-by-step process that even novice bakers can master.
Ingredients
For the Main Cookie Dough: For the Main Cookie Dough: For the Main Cookie Dough: For the Main Cookie Dough: For the Main
You’ll need unsalted butter, softened to room temperature. This is key for proper creaming. I always use unsalted so I can control the saltiness. Then, we have granulated sugar and a good amount of packed light Brown Sugar. The brown sugar is what gives these cookies their signature chewiness and that lovely caramel undertone. You’ll also need a couple of large eggs and pure vanilla extract. Don’t skimp on the vanilla; it really makes a difference in the overall flavor. For the dry ingredients, it’s all-purpose flour, unsweetened cocoa powder (Dutch-processed works wonders for a deeper color and smoother flavor, but natural is fine too!), baking soda, and a good pinch of salt to balance all that sweetness. And of course, the chocolate! I like to use a mix of good quality semi-sweet chocolate chips or chunks and some milk chocolate chunks for variety. Chopping up a chocolate bar gives you those lovely irregular shapes that melt beautifully.
For the Optional Chocolate Glaze:
This is really what takes them over the top! You’ll need a little more unsweetened cocoa powder, some powdered sugar for sweetness and structure, a splash of milk (or even a bit of heavy cream for extra richness!), and a tiny bit of vanilla extract. A pinch of salt here helps too. This glaze is super forgiving and comes together in a minute.
Step-by-Step Instructions
Step 1: Preheat & Prep Pan
First things first, let’s get that oven preheated to 350 degrees Fahrenheit (175 degrees Celsius). This is a pretty standard baking temperature, and it’s crucial for even baking. While the oven is heating up, line your baking sheets with parchment paper. This is a lifesaver for easy cleanup and ensures your cookies won’t stick. I usually use two baking sheets so I can have one cooling while the other is baking, keeping the process moving.
Step 2: Mix Dry Ingredients
In a medium bowl, whisk together your all-purpose flour, unsweetened cocoa powder, baking soda, and salt. Whisking them together ensures that the leavening agent (baking soda) and salt are evenly distributed throughout the flour, which means your cookies will rise and taste balanced. You don’t want pockets of salty dough! Just a good, thorough whisk until everything is combined and there are no lumps of cocoa powder.
Step 3: Mix Wet Ingredients
In a large bowl, cream together your softened butter, granulated sugar, and packed light Brown Sugar. You can use an electric mixer for this, or if you’re feeling ambitious, a whisk and some elbow grease! Cream them until the mixture is light and fluffy. This usually takes about 3-5 minutes with a mixer. This step is important because it incorporates air into the dough, which helps with the cookies’ texture. Next, beat in the eggs one at a time, mixing well after each addition. Then, stir in the vanilla extract. The mixture should look smooth and emulsified.
Step 4: Combine
Now, it’s time to bring the wet and dry ingredients together. Gradually add the dry ingredients to the wet ingredients, mixing on low speed (or stirring with a sturdy spoon) until *just* combined. It’s really important not to overmix here! Overmixing can develop the gluten in the flour too much, leading to tough cookies. You want to stop mixing as soon as you no longer see streaks of flour. A few small lumps are okay. This is where that perfect chewy texture starts to form.
“The Easy Chocolate Cutouts Your New Favorite Treat turned out amazing. My kids asked for seconds. Saving this one!”
Step 5: Prepare Filling
This step is super simple, but oh-so-important! Fold in your chocolate chips and chunks. Use a spatula or wooden spoon and gently stir them into the dough until they’re evenly distributed. Again, don’t go crazy with the mixing. You want to see those lovely chunks of chocolate throughout the batter, ready to melt into glorious puddles. I like to reserve a few extra chunks to press into the tops of the cookies before baking for that extra visual appeal and chocolatey punch.
Step 6: Layer & Swirl
This isn’t really a layering or swirling step for the dough itself, but rather how you form the cookies. Use a cookie scoop (about 1.5 to 2 tablespoons) to portion out the dough. Roll each portion into a ball and place them on your prepared baking sheets, leaving about 2 inches of space between each cookie because they will spread. If you reserved some chocolate chunks, gently press a few into the tops of the dough balls now. This makes them look extra professional and ensures a gooey bite right on top.
Step 7: Bake
Bake in your preheated oven for 10-13 minutes. The exact time will depend on your oven and how large you made your cookies. You want the edges to look set and slightly firm, but the centers should still look a little soft and underbaked. They will continue to cook on the hot baking sheet after you take them out of the oven, which is how we achieve that perfect chewy center. If you like them extra gooey, err on the shorter side of the baking time. If you prefer them a little more set, go for the longer end.
Step 8: Cool & Glaze
Once they’re out of the oven, let the cookies cool on the baking sheets for about 5-10 minutes. This is a crucial step for texture! Resist the urge to move them immediately. They need this time to firm up just enough. After they’ve rested on the baking sheet, carefully transfer them to a wire rack to cool completely. While they’re cooling, you can whip up the optional glaze if you’re using it. In a small bowl, whisk together the cocoa powder, powdered sugar, a pinch of salt, and vanilla. Gradually whisk in the milk or cream, a tablespoon at a time, until you reach a smooth, drizzle-able consistency. It should be thick enough to coat a spoon but thin enough to drip. Once the cookies are completely cool, drizzle the glaze over them using a spoon or a piping bag. Let the glaze set for about 15-30 minutes before serving.
Step 9: Slice & Serve
Once the glaze is set (or if you skipped it!), your incredible chocolate chunk cookies are ready to be devoured! I love serving these slightly warm for ultimate gooeyness, but they’re also fantastic at room temperature. They make a stunning dessert on their own, or you can serve them with a tall glass of cold milk – a classic for a reason! For a more decadent dessert, a scoop of vanilla bean Ice Cream alongside is pure bliss. The contrast of the warm, rich cookie with cold, creamy ice cream is just heavenly.
What to Serve It With
These double chocolate chunk cookies are so versatile, they fit into any part of your day! For breakfast (yes, I said breakfast!), they’re surprisingly wonderful with a strong cup of coffee. The bitterness of the coffee cuts through the richness of the cookie beautifully. They’re also lovely served with a yogurt parfait – the cool, creamy yogurt balances the warm, chocolatey cookie. If you’re thinking brunch, these cookies are a guaranteed hit. Imagine them nestled on a platter alongside fresh fruit salad, maybe some mini quiches, and a mimosa. They add that perfect sweet note to a more savory spread. As a dessert, the possibilities are endless! Serve them warm with a scoop of vanilla bean Ice Cream, a dollop of whipped cream, or even a drizzle of caramel sauce. They’re also fantastic with a rich espresso or a dessert wine. For those cozy snack moments, which are my favorite, they’re perfect on their own with a glass of cold milk, or dunked into a hot chocolate. My kids always ask for seconds when I pull these out after school, usually with a glass of milk. It’s a simple, comforting treat that always makes them happy.
Top Tips for Perfecting Your Chocolate Cookie Recipe
Over the years of making these, I’ve picked up a few little tricks that I think really make a difference. So, let’s dive into some of my top tips for getting them absolutely perfect every single time.
Creaming is Key: Don’t rush the butter and sugar creaming step. You want it light and fluffy. This incorporates air, which gives the cookies structure and a tender crumb. If your butter isn’t soft enough, it won’t cream properly, and your cookies might be flatter or denser than you want. I learned this the hard way when I was in a hurry once!
Measure Flour Correctly: This is a big one for baking in general. Spoon your flour into your measuring cup and level it off with a straight edge. Don’t scoop directly from the bag, as this packs too much flour in, leading to dry, dense cookies. Too much flour is a common culprit for cookies that aren’t chewy.
Don’t Overmix the Dough: Once you add the dry ingredients to the wet, mix only until *just* combined. Overmixing develops the gluten in the flour, which can make your cookies tough and less chewy. A few streaks of flour are perfectly fine; they’ll disappear during baking.
Chill the Dough (Optional, but Recommended): For an even chewier cookie and to prevent excessive spreading, I often chill the dough for at least 30 minutes, or even overnight. This allows the flavors to meld and the dough to firm up. If you chill it, you might need to let the dough balls sit at room temperature for a few minutes before baking, or they might be too hard to scoop.
Chocolate Chunk Strategy: I’m a huge fan of using a mix of chocolate chips and chunks. Chopping up a good quality chocolate bar gives you those irregular shapes that create glorious pockets of melted chocolate. For extra visual appeal and a burst of chocolate on top, press a few extra chunks onto the tops of the Cookie Dough balls right before baking. Trust me on this one!
Baking Time is Crucial: Keep a close eye on your cookies during the last few minutes of baking. You want the edges to be set and lightly golden, but the centers should still look a little soft and underbaked. They will continue to cook on the hot baking sheet, which is how you get that perfect chewy texture. Pulling them out too late is the fastest way to dry cookies!
“I don’t know if I’ve ever eaten a better Easy Chocolate Cutouts Your New Favorite Treat. The rub alone is wonderful, but the sauce??? Over the top!”
Cooling Patience: Let the cookies cool on the baking sheet for at least 5-10 minutes before transferring them to a wire rack. They are delicate when hot and need this time to set up properly. Moving them too soon can result in them falling apart.
Glaze Consistency: If you’re making the glaze, don’t add all the liquid at once. Start with a tablespoon or two and add more only if needed to reach your desired drizzling consistency. It’s much easier to thin out a glaze than to thicken it up. If it gets too thin, you can whisk in a little more powdered sugar.
Storing and Reheating Tips
These Chocolate Cookies are so irresistible, you might not have any leftovers, but if you do, storing them properly will keep them delicious for days. For storing at room temperature, simply place the cooled cookies in an airtight container. They’ll stay wonderfully fresh and chewy for about 3-4 days. I usually put a piece of wax paper between layers if I’m stacking them to prevent them from sticking together, especially if the glaze is still a bit soft.
If you need them to last a bit longer, refrigerator storage is an option. Place them in an airtight container and they should keep well for up to a week. They might become slightly firmer in the fridge, but they’ll still be delicious, especially with a glass of milk!
And for the ultimate make-ahead situation, these cookies freeze beautifully! Once they are completely cooled, you can freeze them in a single layer on a baking sheet until solid. Then, transfer them to a freezer-safe airtight container or a heavy-duty freezer bag. They’ll keep well for up to 2-3 months. To thaw, simply leave them at room temperature for about 30 minutes, or gently warm them in a low oven (around 300°F or 150°C) for a few minutes to bring back that fresh-baked warmth and gooeyness.
Glaze Timing Advice: If you plan to store your cookies for more than a day or two, especially in the refrigerator or freezer, I recommend glazing them *after* they’ve thawed or just before serving. Glaze can sometimes become sticky or slightly less appealing when stored for extended periods, especially in the fridge. So, if freezing, it’s best to store un-glazed cookies and then glaze them once thawed and ready to eat!
Frequently Asked Questions
Final Thoughts
So there you have it – my absolute favorite chocolate cookie recipe. It’s a recipe that’s brought so much joy to my kitchen, and I truly hope it does the same for yours. It’s the perfect blend of rich chocolate flavor, wonderfully chewy texture, and that comforting, homemade goodness that just can’t be beaten. Whether you’re a seasoned baker or just starting out, this recipe is a reliable winner. It’s perfect for sharing, but I won’t judge if you decide to keep most of them to yourself! If you love this recipe, you might also enjoy my chewy blondies or my classic Chocolate Chip Cookies. Both have that same focus on texture and flavor that I adore. I can’t wait to hear how your double chocolate chunk cookies turn out! Let me know in the comments below if you try them, what your favorite chocolate additions are, or any fun variations you come up with. Happy baking, my friends!

chocolate cookie recipe
Ingredients
Chocolate Cookies
- 1 cup unsalted butter softened
- 1.25 cups granulated sugar
- 1 large egg
- 1 teaspoon vanilla extract
- 0.5 teaspoon salt
- 1 teaspoon baking powder
- 0.5 cup unsweetened cocoa powder or Dutch Process for a deeper flavor
- 2.5 cups all-purpose flour
Vanilla Buttercream Frosting
- 0.5 cup unsalted butter softened
- 4 cups powdered sugar
- 0.25 teaspoon salt
- 1 teaspoon vanilla extract
- 3 tablespoons milk plus more as needed
- Food coloring if desired
- Sprinkles if desired
Instructions
Cookie Dough Preparation
- Place softened butter and granulated sugar in a large mixing bowl (or a stand mixer fitted with the paddle attachment). Cream until light and fluffy, about 1-2 minutes.
- Add the egg, vanilla extract, salt, baking powder, and cocoa powder. Mix until just combined, then gradually mix in the all-purpose flour until the dough is smooth.
- Lay a sheet of wax or parchment paper on a work surface. Place half of the cookie dough in the center and press to form a disk. Cover with another sheet of paper and roll to between 0.25 to 0.5 inch thickness. Repeat with the second half of the dough.
- Chill the dough until firm, at least 30 minutes. This is crucial for cut-out cookies to hold their shape.
Baking the Cookies
- Preheat your oven to 350°F (175°C). Line cookie sheets with parchment paper or silicone baking mats.
- Remove half of the chilled dough from the refrigerator. Use cookie cutters to cut desired shapes. Place the cut-out shapes 2 inches apart on the prepared cookie sheets. Chill the cut cookies for another 15 minutes.
- Bake cookies for approximately 10-15 minutes, or until the edges are set and the cookies are no longer glossy (baking time will vary depending on thickness and size).
- Reroll any leftover dough scraps and chill while cutting shapes from the second half of the dough. Continue until all cookie dough is used.
- Once baked, transfer cookies to a wire rack to cool completely before frosting.
Making and Applying Frosting
- To make the frosting, beat softened butter and powdered sugar with a stand mixer until crumbly. Add salt and vanilla extract.
- Add 3 tablespoons of milk and mix until smooth. Add more milk, 1 teaspoon at a time, until you achieve a desired piping consistency. If desired, mix in food coloring.
- Frost cookies as desired. Add sprinkles while the frosting is wet, if using. Let the frosted cookies sit at room temperature to allow the frosting to set before stacking.


