There’s just something about that perfect combination of chocolate and mint that instantly transports me back to childhood. I remember sneaking bites of Thin Mint cookies straight from the cookie jar — and now, I get to recreate that magic in a cheesecake that’s rich, creamy, and packed with those irresistible flavors. Honestly, I wasn’t sure how well the two would work together in a cheesecake at first, but let me tell you — it’s a game-changer. This one’s a lifesaver on busy nights when you need a little chocolatey-menthol comfort, and it’s always a hit at family gatherings. Plus, with just a handful of ingredients and a few simple steps, you can whip this up in no time. Trust me, the smell alone when it’s baking will have everyone at the door begging for a slice. Believe me, once you try this, it’ll be your new go-to dessert — nobody can resist that creamy minty goodness. My kids ask for this all the time, and I always do this when I want to impress and indulge without spending hours in the kitchen. Let’s dive into how you can make your own Thin Mint Cheesecake — it’s easier than you think!
Thank you for reading this post, don't forget to subscribe!What is a thin mint cheesecake?
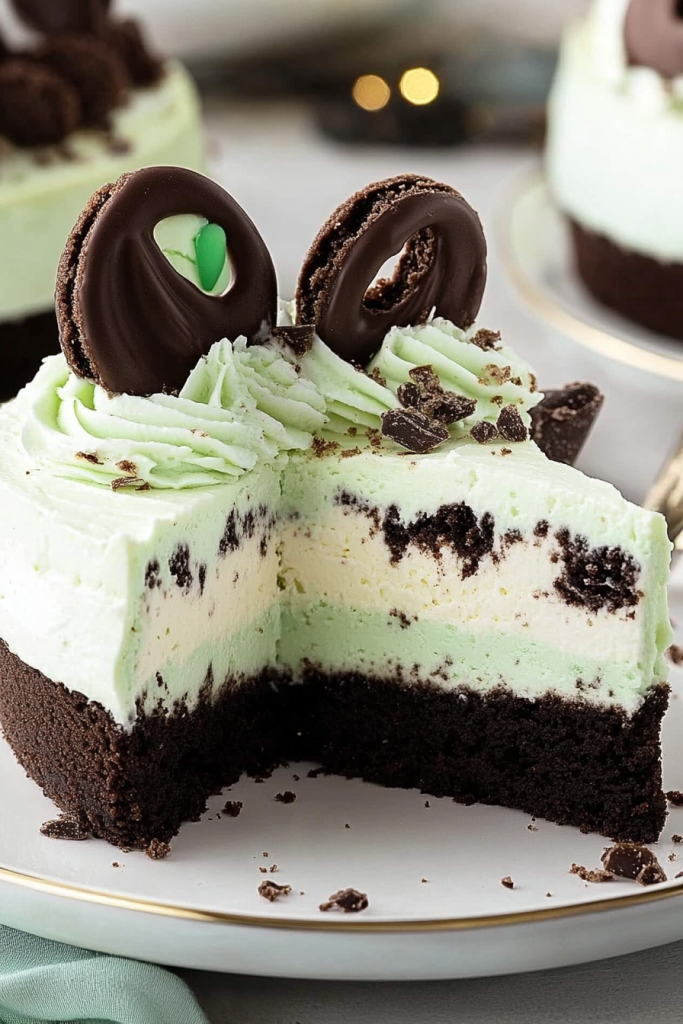
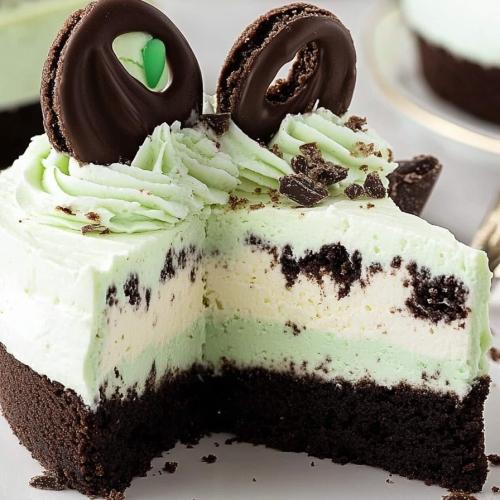
This Thin Mint Cheesecake is essentially a luscious, velvety dessert that combines the classic cookies’ vibrant mint-chocolate flavor with the smooth richness of a cheesecake. Think of it as a cross between your favorite thin mint cookie and a slice of creamy, chilled cheesecake — but better, because it’s all in one beautiful, decadent treat. The idea started from my love of those crispy, chocolate-coated mint cookies, and I thought, “Why not turn that into a dessert that’s as elegant as it is nostalgic?” It’s got layers — a crunchy cookie crust, a creamy minty filling, topped with a shiny, chocolate glaze. And the best part? You don’t need fancy techniques or hours of baking. It’s essentially a no-fuss treat that everyone will rave about. I’ve tested this with different chocolates and mint extracts, and each version gets better — it’s truly versatile. Whether you’re celebrating a special occasion or just craving something sweet after a long day, this cheesecake hits the spot like nothing else.
Why you’ll love this recipe?
What I love most about this Thin Mint Cheesecake is how it captures that iconic flavor in such a sophisticated way without requiring complicated baking skills. The flavor profile is simply divine — that perfect balance of cool mint and rich chocolate, complemented by the creamy texture of the filling. It’s like a thin mint cookie, but elevated into dessert royalty. And I promise, it’s surprisingly easy to make. The crust comes together with just crushed cookies and melted butter, and the filling needs only a quick mixing — no overworking here! This recipe is budget-friendly too because most ingredients are pantry staples or easily available at the grocery store. Plus, it’s incredibly versatile; you can serve it plain, add a sprinkle of crushed cookies on top, or even toss in a splash of peppermint extract for a more intense mint punch. What I’ve found is that this cheesecake is endlessly customizable. It’s perfect when you’re craving something sweet at 10 p.m. but don’t want to turn on the oven or bake a full cake. It’s a crowd-pleaser, your secret weapon for dinner parties, holiday desserts, or just a cozy night in. Honestly, I’ve made this countless times — and each batch disappears in minutes at my house!
How do I make a thin crust cheesecake?
Quick Overview
This cheesecake is all about layering flavors and textures with minimal fuss. You start by pressing a simple cookie crust into your pan — no fancy graham crackers here, just crushed Thin Mint cookies mixed with butter. Then, you blend together a creamy filling with cream cheese, sour cream, and mint flavoring. After pouring the filling over the crust, you add a luscious chocolate glaze as a finishing touch. Pop it into the fridge to set, and in just a few hours, you’ll have a show-stopping dessert that looks as gorgeous as it tastes. The best part? No-bake options are totally doable, making this a forgiving, accessible recipe for bakers of all levels. The layers come together seamlessly, and you can even prepare it a day ahead — it only gets better as the flavors meld.
Ingredients
For the Main Batter:
- 1 ½ cups crushed Thin Mint cookies (about 20 cookies), plus extra for garnish
- ½ cup unsalted butter, melted
For the Filling:
- 24 oz (three 8 oz packages) cream cheese, softened
- 1 cup sour cream
- ¾ cup powdered sugar
- 1 teaspoon vanilla extract
- ½ teaspoon peppermint extract (adjust based on your mint love)
For the Glaze:
- 1 cup semi-sweet or dark chocolate chips
- ½ cup heavy cream
- Optional: a pinch of peppermint extract or vanilla for extra flavor
Step-by-Step Instructions
Step 1: Preheat & Prep Pan
Preheat your oven to 350°F (if baking your crust) or have your refrigerator ready for a no-bake version. Line your 9-inch springform pan with parchment paper for easy removal. If baking the crust, lightly butter the sides of your pan.
“The Delightful Mint Cheesecake Recipe turned out amazing. My kids asked for seconds. Saving this one!”
Step 2: Mix Dry Ingredients
In a medium bowl, combine the crushed Thin Mint cookies with the melted butter. Mix until the crumbs are evenly coated and the mixture holds together when pressed. This becomes your crust. Trust me, pressing it into the pan firmly will help it stay sturdy once baked or chilled.
Step 3: Mix Wet Ingredients
In a large bowl, beat the softened cream cheese until smooth and fluffy — I always do this with a hand mixer on medium speed. Then, add in the sour cream, powdered sugar, vanilla, and peppermint extract. Mix just until combined; don’t overdo it or the filling might become too airy.
Step 4: Combine
Fold the cream cheese mixture into the cookie crust, spreading evenly. If you’re making a no-bake version, pop this into the fridge while you prepare the glaze. For baked versions, bake for about 15 minutes just until it sets — it might gently puff up but will settle once cooled.
Step 5: Prepare Filling
Till now, you’ve been mixing the filling; now, if you want to make it even more minty, sprinkle in chopped up Thin Mint cookies into the batter or add a few drops of mint extract. I like to fold in a handful of crushed cookies for texture. Just a little extra crunch never hurts!
Step 6: Layer & Swirl
Pour the filling over the crust, smoothing the top. If you’re feeling fancy, drizzle some melted chocolate over the surface and use a skewer to swirl it into the filling for a marbled look. It’s all about making it pretty — but honestly, the simplicity is what makes this so appealing.
Step 7: Bake
If you’re baking, place the pan on the center rack and bake for about 15-20 minutes. The edges should be set but the middle still slightly jiggle — it will firm up as it cools. If you prefer a no-bake version, just pop it in the fridge for at least 4 hours, or overnight for best results.
Step 8: Cool & Glaze
Once cooled, make your chocolate glaze by heating heavy cream and pouring it over chocolate chips. Let it sit a minute, then stir until smooth and glossy. Pour it over the cooled cheesecake, spreading evenly. If you want a thicker coat, refrigerate for 30 minutes before adding extra glaze. This glaze sets beautifully and adds that shiny, professional finish.
Step 9: Slice & Serve
Once the glaze is set, carefully remove the cheesecake from the springform pan. Slice with a warm knife (dip it in hot water first) for clean cuts. Serve chilled, maybe with a sprig of fresh mint or a few extra crushed cookies on top. And don’t forget to enjoy that first bite — the minty chocolate heaven is totally worth it!
What to Serve It With
This cheesecake is pure indulgence on its own, but I love pairing it with a hot cup of coffee or a glass of peppermint steamed milk on cozy mornings. For brunch, serve it alongside a fruit salad with fresh berries — the tartness balances out the richness. It’s lovely after dinner with a dollop of whipped cream or a drizzle of caramel for a more decadent touch. And honestly, it’s perfect for casual snacking, sliced into pieces and enjoyed with friends or a quiet night in. Sometimes I even crumble leftover cookies on top for an extra crunch. If you’re feeling extra festive, a sprinkle of crushed peppermint candies elevates the presentation. No matter how you serve it, this cheesecake is bound to be a hit, and I swear, it tastes even better the day after — if it lasts that long.
“I don’t know if I’ve ever eaten a better Delightful Mint Cheesecake Recipe. The rub alone is wonderful, but the sauce??? Over the top!”
Top Tips for Perfecting Your Thin Mint Cheesecake
Over the years, I’ve learned a few tricks that make this recipe even better. First, when crushing cookies, I toss them in a plastic bag and use a rolling pin — super satisfying, and you get an evenly fine crumb. If your crust feels too crumbly, just add a little more butter — trust me, it binds beautifully when pressed into your pan. When mixing the filling, ensure your cream cheese is softened and at room temperature — cold cheese won’t blend smoothly, and lumps drive me crazy!
For swirling the chocolate, try melting the chips with a little butter or coconut oil to make a pourable glaze that’s easy to spread and swirl through the filling. I’ve tested different chocolates, and I prefer semi-sweet or dark because they balance the mint without overpowering it. If you want an extra mint kick, add a few drops of peppermint extract to the glaze or even sprinkle some crushed Thin Mints on top before glazing for texture.
A small mistake I used to make was overbaking the crust — I learned that a quick bake only to set it is perfect; too long, and it gets tough. Also, when refrigerating your cheesecake, cover it tightly with plastic wrap — this keeps it from drying out and absorbing fridge odors. Patience is key: give it enough chill time so that it’s cold and firm before slicing — it makes all the difference in clean, beautiful cuts. And finally, never skip the glaze! That shiny chocolate top is what takes this from good to looking like it belongs in a bakery window.
Storing and Reheating Tips
This cheesecake keeps beautifully in the fridge for up to five days as long as it’s covered tightly with plastic wrap or stored in an airtight container. If you want to make it ahead of time, I’d suggest adding the glaze on the day you plan to serve it — it stays shiny and fresh that way. To store leftovers, use a cake dome or cover with a plate; avoiding air contact helps maintain that luscious texture. If you need to freeze, wrap the whole thing tightly in plastic wrap and then in foil — it’s good for up to a month. Thaw in the fridge overnight, and add the glaze fresh before serving. Just keep in mind, the texture might soften slightly after freezing, but the flavor stays just as wonderful. When reheating slices, I recommend serving cold or at room temperature because melting the glaze isn’t necessary, and it’s much more enjoyable that way. Trust me, this cheesecake is a keeper!
Frequently Asked Questions
Final Thoughts
Honestly, this Thin Mint Cheesecake has become one of my favorite go-to desserts. It’s decadent, fun to make, and always a crowd favorite — plus, it’s just so nostalgic. Every time I slice into it, I feel a little bit of that childhood magic come rushing back. I love how versatile it is; you can dress it up or keep it simple, and it always looks stunning. If you’re a fan of those minty chocolate treats, I promise this cheesecake will make your taste buds do a happy dance. Whether you’re baking it for a special celebration or just because you deserve a treat, don’t hesitate to give it a try. I can’t wait to hear how yours turns out! And if you experiment with flavors or add your own twist, drop a comment below — sharing recipes like this makes baking even more fun. Happy baking, friends — and enjoy every bite of this delightful Thin Mint Cheesecake!
Thin Mint Cheesecake
Ingredients
Main Ingredients
- 18.3 ounces Fudge Brownie mix
- 2 large eggs
- 0.666 cup vegetable oil
- 3 tablespoons water
- 16 ounces full-fat cream cheese softened to room temperature
- 1 cup powdered sugar sifted
- 0.75 teaspoon mint extract
- 0.5 teaspoon vanilla extract
- 7 drops liquid green food coloring
- 4 ounces frozen whipped topping
- 1 cup chopped Thin Mint cookies
- 1 cup semi-sweet chocolate chips
- 0.5 cup heavy cream
- 0.25 teaspoon mint extract
- 4 ounces frozen whipped topping thawed
- 8 whole Thin Mint cookies cut in half
- 1 cup green & white sprinkles
Instructions
Preparation Steps
- Preheat oven to 350°F. Line a 9-inch springform pan with parchment and spray with non-stick spray.
- Mix brownie ingredients until just combined and pour into the prepared pan. Bake for 30-32 minutes, then cool completely.
- Beat softened cream cheese until fluffy. Add powdered sugar, then mix in mint extract, vanilla, and green food coloring until evenly colored.
- Fold in whipped topping and chopped Thin Mint cookies. Spread over cooled brownie crust.
- Make ganache by microwaving chocolate chips and heavy cream until smooth. Pour over cheesecake layer and refrigerate for at least 4 hours.
- Before serving, pipe whipped topping around the edges, add halved Thin Mints, and sprinkle with colored sprinkles.


