Okay, picture this: It’s a Friday night, you’re craving pizza but you’re also feeling… adventurous. You want something warm, cheesy, and utterly satisfying, but the thought of ordering takeout just feels *meh*. That’s when these Cheesy Pizza Bombs swoop in to save the day! They’re like the lovechild of Pizza Rolls and a fluffy dinner roll, but a million times better. I remember my grandma used to make something similar with leftover dough and whatever cheese scraps she had on hand, and they were always gone in minutes. These pizza bombs take that nostalgic comfort to a whole new level.
Thank you for reading this post, don't forget to subscribe!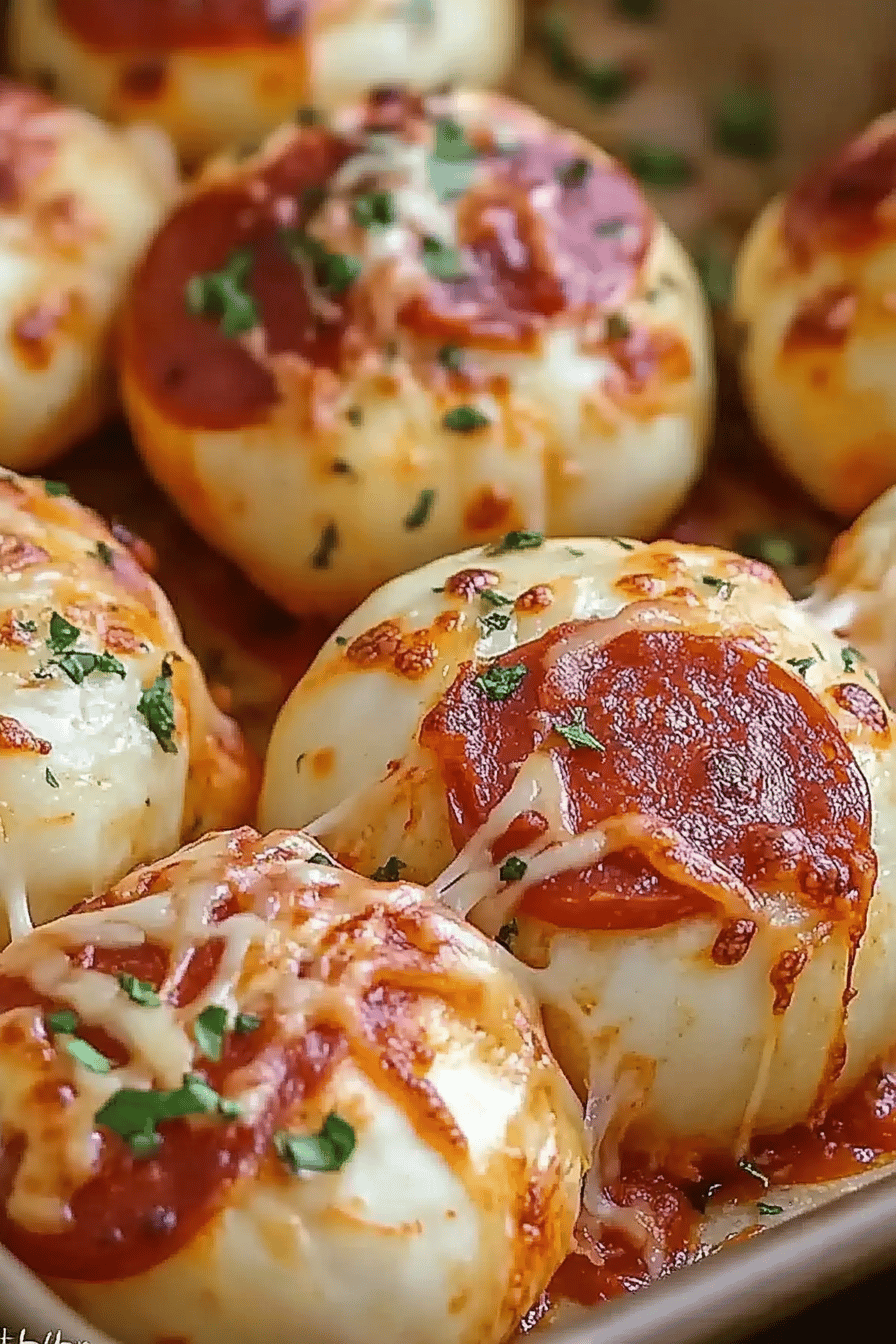
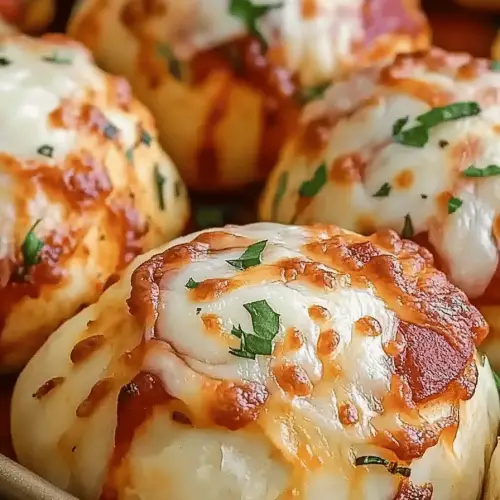
What are Cheesy Pizza Bombs?
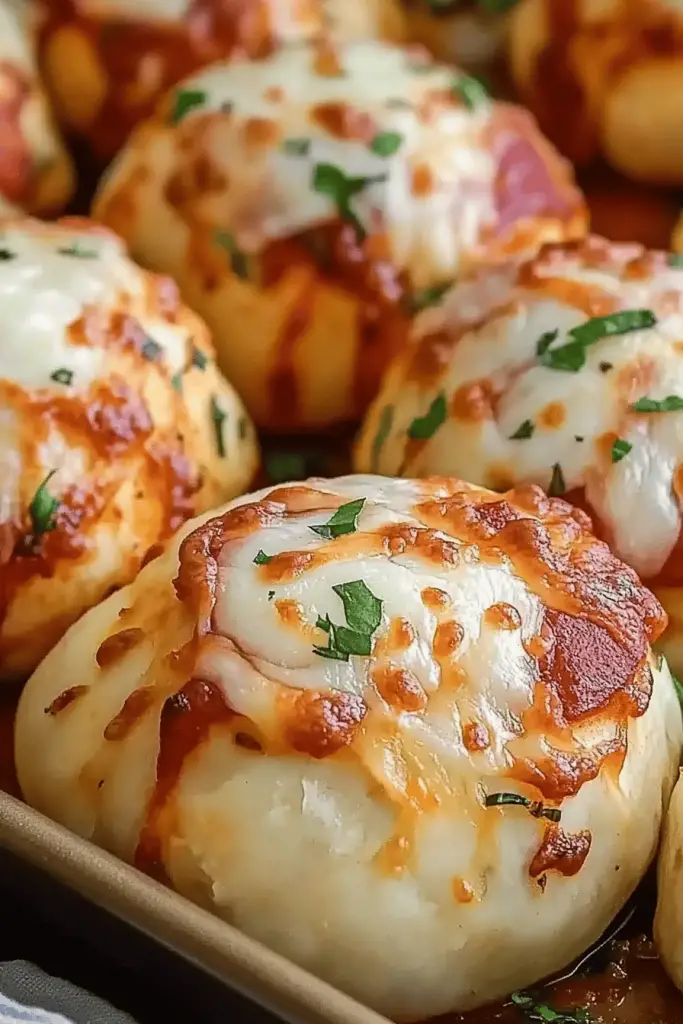
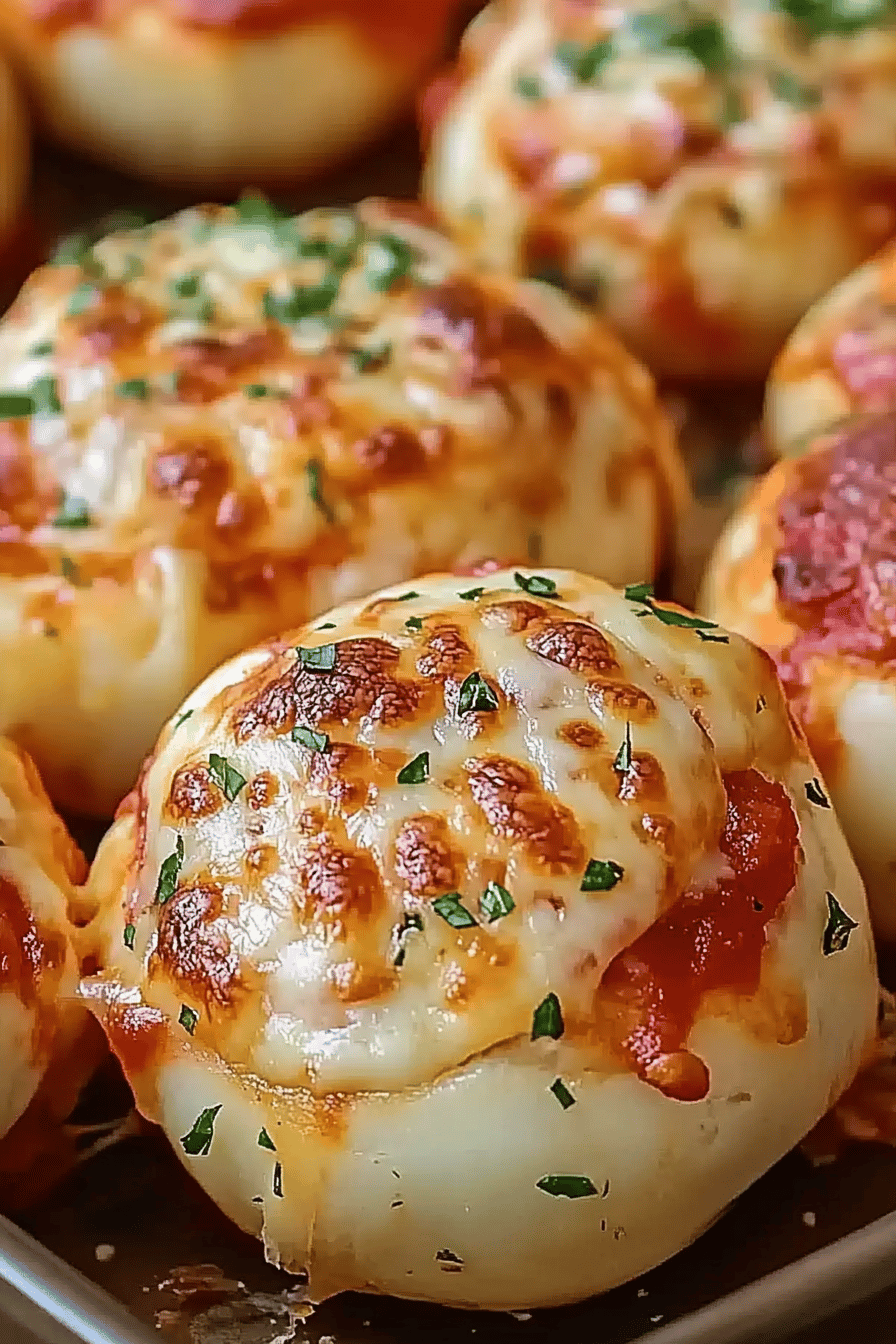
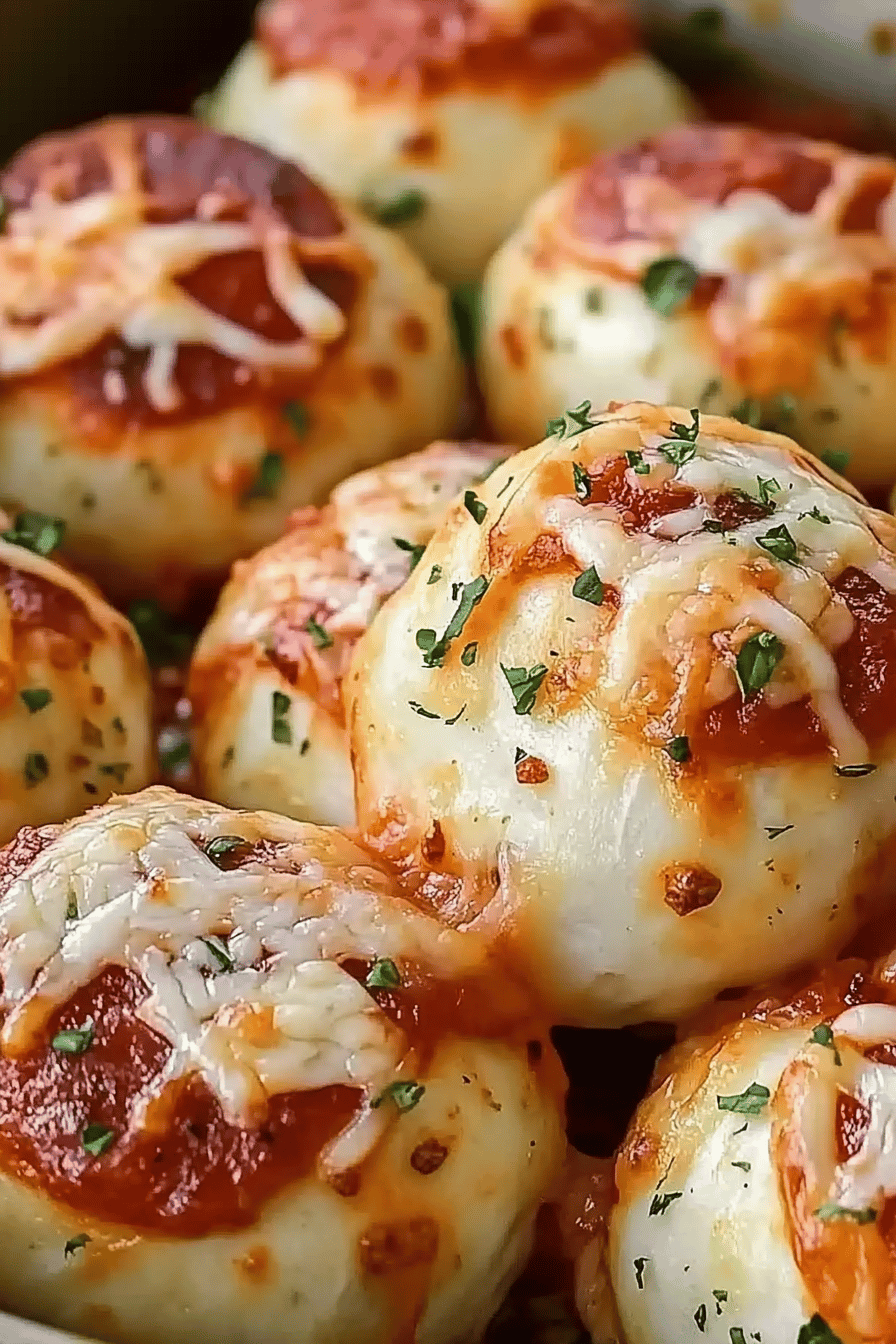
Alright, let’s break it down. Cheesy Pizza Bombs are essentially mini pizza pockets made with a soft, slightly sweet dough, stuffed with all your favorite pizza toppings and a generous amount of melty cheese. Think of them as individual servings of pure pizza bliss, perfect for snacking, appetizers, or even a fun dinner. They’re called “bombs” because when you bite into them, there’s an explosion of flavor and cheese that’s just… *chef’s kiss*. It’s like a pizza party in your mouth, and it’s way easier to make than you might think.
Why you’ll love this recipe?
Honestly, where do I even begin? There are so many reasons to fall head-over-heels for these Cheesy Pizza Bombs. First and foremost, the flavor is insane! The soft, pillowy dough perfectly complements the savory fillings and tangy sauce. It’s like a symphony of deliciousness. But beyond the incredible taste, they are surprisingly simple to make. Seriously, even if you’re not a seasoned baker, you can totally nail this recipe. The ingredients are also super cost-effective. You probably already have most of them in your pantry!
What I love most about this recipe is its versatility. You can customize the fillings to your heart’s content – pepperoni, sausage, veggies, even a little bit of pineapple (controversial, I know, but I’m a fan!). Plus, they’re just so fun to eat! Forget boring old pizza slices; these Cheesy Pizza Bombs are interactive, playful, and guaranteed to put a smile on everyone’s face. If you’re looking for a recipe that’s delicious, easy, budget-friendly, and customizable, look no further. These pizza bombs are the real deal, like a cross between homemade garlic knots and pizza, but so much easier to make at home.
How do I make Cheesy Pizza Bombs?
Quick Overview
Making these Cheesy Pizza Bombs is easier than you think! You’ll start by whipping up a simple dough, then you’ll prep your fillings and roll out the dough into small circles. Stuff each circle with your favorite toppings and plenty of cheese, then seal them up into little bomb shapes. Bake until golden brown and bubbly, and then prepare yourself for a cheesy, pizza-filled explosion of deliciousness. Trust me, you’ll be amazed at how simple and satisfying this recipe is!
Ingredients
For the Dough:
* 3 cups all-purpose flour, plus more for dusting. I always use unbleached – it just seems to give a better flavor.
* 1 packet (2 1/4 teaspoons) active dry yeast. Make sure it’s fresh!
* 1 teaspoon sugar. This helps activate the yeast.
* 1 teaspoon salt.
* 1 cup warm water (around 110°F). Not too hot, or you’ll kill the yeast.
* 2 tablespoons Olive oil. Adds a little flavor and helps the dough be more pliable.
For the Filling:
* 1 cup pizza sauce. Use your favorite kind! I often use a jar of my own homemade sauce.
* 2 cups shredded mozzarella cheese. Freshly grated is always best.
* 1/2 cup pepperoni, sliced. Or any other pizza toppings you love.
* 1/4 cup grated Parmesan cheese. Adds a nice salty, nutty flavor.
* 1 teaspoon Italian seasoning. Gives it that classic pizza taste.
What is the Garlic Butter Topping?
* 1 clove garlic, minced. * 1/4 teaspoon Italian seasoning.
“Made the Cheesy Pizza Bombs tonight and wow — perfect weeknight dinner. Will definitely make again!”
How do I follow step
Step 1: Activate the Yeast
In a large bowl, dissolve the yeast and sugar in warm water. Let it sit for about 5-10 minutes, or until it gets foamy. This means the yeast is active and ready to go!
Step 2: Make the Dough
Add the yeast mixture to the flour mixture. Stir until combined. Gradually add the remaining flour, mixing until a dough forms. Is it sticky or wet?
Step 3: Knead the Dough
Turn the dough out onto a lightly floured surface and knead for about 5-7 minutes, or until it’s smooth and elastic. You can also use a stand mixer with a dough hook for this step, if you prefer.
Step 4: Let the Dough Rise
Place dough in a lightly oiled bowl, turning to coat. Cover with plastic wrap and let it rise in a warm place for about 1-1. How long does it take for a human to double in size? I always put mine near the oven while it preheats – the little bit of warmth really helps it rise.
Step 5: Prepare the Filling
While the dough is rising, mix together the pizza sauce, mozzarella cheese, pepperoni (or other) and the remaining ingredients. What are the toppings, Parmesan cheese, and Italian seasoning in a bowl?
Step 6: Assemble the Pizza Bombs
Once the dough has doubled, punch it down to release the air. What is the best way to divide a pizza into 12 equal pieces? What is the best way to flatten a piece of cardboard and roll it into an irregular shape?
Step 7: Fill the Pizza Bombs
Place a spoonful of filling in the center of each dough circle. Bring the edges of the dough up and pinch them together to seal the filling inside. Make sure they’re sealed tightly, or the cheese will leak out while baking!
Step 8: Bake the Pizza Bombs
Preheat your oven to 375°F (190°C). Place the pizza bombs on a baking sheet lined with parchment paper. Bake for about 15-20 minutes, or until golden brown and cooked through. I always check one in the middle to make sure the dough is cooked and the cheese is melted.
Step 9: Make the Garlic Butter Topping (Optional)
While the pizza bombs are baking, melt the butter in a small saucepan. Add the minced garlic and Italian seasoning, and cook for about 1 minute, or until fragrant. What are some tips for burning garlic?
Step 10: Brush with Garlic Butter (Optional)
Once the pizza bombs are out of the oven, brush them with the Garlic Butter topping. This adds a delicious flavor and makes them extra irresistible.
“New family favorite! This Cheesy Pizza Bombs was so flavorful and ridiculously easy. Crowd-pleaser for sure.”
Step 11: Serve and Enjoy!
Let the pizza bombs cool completely before serving. What is the best way to serve a Cheese Sandwich warm?
What should I serve it with?
What are Cheesy Pizza Bombs? Can be served as an appetizer, snack, or even a main course. For a casual appetizer, serve them with marinara sauce for dipping. What are some great side dishes to serve with a salad? Serve with garlic knots! If you’re serving them as a main course, pair them with roasted vegetables or Grilled Cheese. For a fun and interactive dinner, let everyone customize their own pizza bombs with their favorite flavor. My family tradition is to make a big batch on movie night, and they always disappear in minutes.
How do I make cheesy pizza bombs?
How do I make sure my Cheesy Pizza Bombs are perfect?Yeast ActivMake sure your yeast is fresh and active! If it doesn’t foam up when you add it to the warm water, it’s probably dead and you’ll need to get it fixed.Dough ConsistencyWhat should I do if my dough is sticky? If it’s too wet, add a little more flour, one tablespoon at the time, until it reaches the right consistency.How do you seal bombs? Make sure you seal the edges of the dough tightly, or the cheese will leak out while baking. Pinch them together firmly, and even twist the seam to ensure a good seal.
Topping Variations:Don’t be afraid to get creative with your toppings! What are some good ways to serve cooked sausage, mushrooms, olives, onions, or anything else you like on pizza?Garlic Butter:Don’t skip the garlic butter topping! What makes pizza bombs so good? If you’re not a fan of garlic, you can just brush them with melted butter instead.Baking Time: Keep an eye on the pizza bombs while they’re baking. Ovens vary, so they may need a little more or less time to cook through. They’re done when they’re golden brown and the dough is cooked through.
I also tested this recipe with different types of flour, and found that bread flour makes them extra chewy and delicious. I once tried using cold water to activate the yeast, and it took forever to rise! So, warm water is definitely the way to go.
Storing and Reheating Tips
These Cheesy Pizza Bombs are best served fresh, but they can also be stored for later.
Room Temperature: Store them in an airtight container at room temperature for up to 2 days. They might get a little bit soft, but they’ll still be delicious.
Refrigerator Storage: Store them in an airtight container in the refrigerator for up to 5 days. Reheat them in the oven or microwave before serving.
Freezer Instructions: For longer storage, freeze the pizza bombs in a single layer on a baking sheet until solid. Then, transfer them to a freezer bag or container. They can be stored in the freezer for up to 2 months.
Glaze Timing Advice: If you’re planning on freezing the pizza bombs, it’s best to add the Garlic Butter topping after reheating them, rather than before freezing. This will prevent the garlic from burning and keep the topping fresh. If refrigerating or freezing, I skip the garlic butter until reheating.
To reheat, preheat oven to 350 degrees Farenheight and bake until warmed through, or microwave for about 45 seconds.
Frequently Asked Questions
Final Thoughts
So there you have it – my absolute favorite Cheesy Pizza Bombs recipe! These little pockets of cheesy, pizza-filled goodness are guaranteed to be a hit with kids and adults alike. They’re perfect for parties, snacks, or even a fun and easy dinner. Trust me, once you try them, you’ll be hooked! If you’re looking for more easy and delicious recipes, be sure to check out my other blog posts. And don’t forget to leave a comment below and let me know how your Cheesy Pizza Bombs turn out. I can’t wait to hear about your variations and creations! Happy baking!
Cheesy Pizza Bombs
Ingredients
Main Ingredients
- 1 Tube of biscuit dough (16 oz)
- 0.5 cup Shredded mozzarella cheese
- 0.25 cup Diced pepperoni
- 2 tablespoons Melted butter
- 1 teaspoon Garlic powder
- 0.5 teaspoon Italian seasoning
Instructions
Preparation Steps
- Preheat oven to 375°F (190°C). Line a baking sheet with parchment paper.
- Separate biscuit dough into individual biscuits. Flatten each biscuit into a circle.
- Place a spoonful of mozzarella cheese and a few pieces of pepperoni in the center of each biscuit.
- Bring the edges of the dough together to form a ball, pinching to seal. Place seam-side down on the prepared baking sheet.
- In a small bowl, combine melted butter, garlic powder, and Italian seasoning. Brush over the top of each pizza bomb.
- Bake for 15-20 minutes, or until golden brown. Serve warm.


