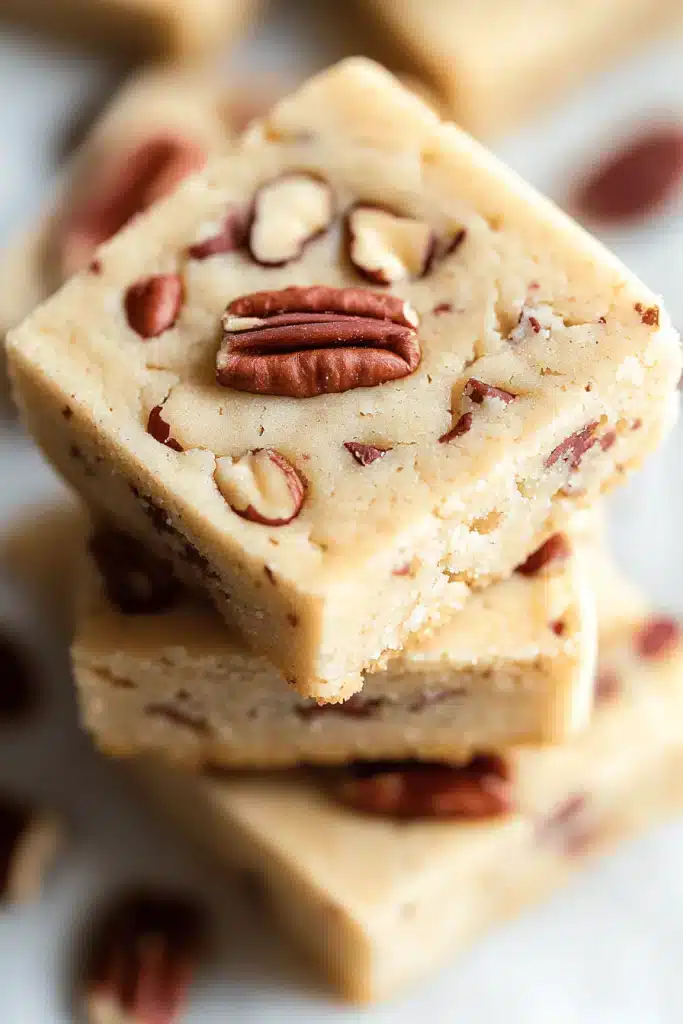
There are certain recipes that just feel like a warm hug, aren’t there? The kind you make when you need a little comfort, a little sweetness, or when you just want to make someone’s day a little brighter. For me, that recipe is these butterscotch shortbread bars. They’re not fancy, they don’t require a thousand obscure ingredients, but oh my goodness, the way they just melt in your mouth… it’s pure magic. I first stumbled upon a version of this years ago, and it quickly became a staple in my kitchen, especially around the holidays. But honestly, who needs a holiday for something this good? They’re ridiculously easy to whip up, and the sweet, toffee-like flavor of butterscotch combined with the buttery crumb of shortbread is just *chef’s kiss*. If you’ve ever loved those classic Shortbread Cookies but wanted something a little more substantial, or if you’re obsessed with butterscotch like I am, then you’re going to adore these butterscotch shortbread bars. They’re like a chewy, decadent hug in bar form.
Thank you for reading this post, don't forget to subscribe!What are Butterscotch Shortbread Bars?
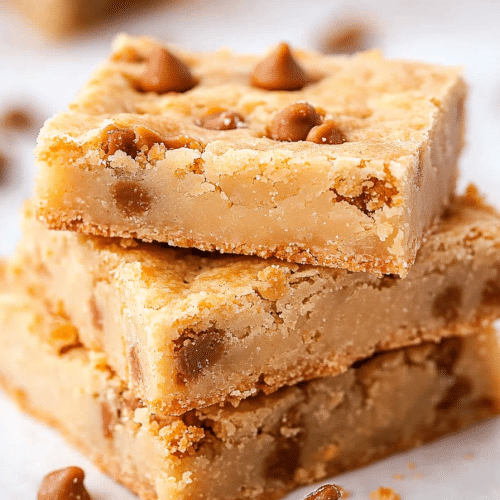
So, what exactly *are* butterscotch shortbread bars? Think of them as the ultimate mashup of two beloved baked goods. You’ve got the tender, melt-in-your-mouth texture of traditional shortbread – that lovely crumbly, buttery base that’s just perfectly sweet. But then, we elevate it with the rich, golden flavor of butterscotch! We’re talking Brown Sugar, butter, and a hint of vanilla that creates this incredible caramel-like taste that’s just a little more complex and satisfying than plain shortbread. It’s essentially a simple shortbread dough that’s infused with butterscotch goodness, baked into bars for easy slicing and sharing. No fussy shaping, no complicated techniques, just pure, unadulterated deliciousness in every bite. It’s like a sophisticated cookie that’s also incredibly humble and approachable. I like to think of it as the perfect “anytime” treat because it hits all the right notes without being overly decadent or difficult.
Why you’ll love this recipe?
Okay, let me count the ways you’re going to fall head-over-heels for these butterscotch shortbread bars. First off, the FLAVOR! Oh, that glorious, deep butterscotch flavor. It’s not just sweet; it’s got this wonderful caramel note that’s incredibly satisfying. It’s like sunshine and cozy evenings all rolled into one. Then there’s the TEXTURE. These bars are perfectly crumbly yet chewy, with a dense but tender bite that just makes you want another piece immediately. It’s not dry like some shortbread can be, and it’s not overly dense like a fudge; it’s that perfect sweet spot. And the SIMPLICITY! Seriously, this is a lifesaver on busy nights or when unexpected guests pop over. You probably have most of the ingredients in your pantry right now. It comes together so quickly, and the cleanup is minimal, which is always a win in my book. I’ve made these countless times for bake sales, potlucks, and just because, and they *always* disappear in minutes. What I love most is their VERSATILITY. While they’re incredible on their own, I’ll often serve them with a cup of coffee or tea, and they make a fantastic addition to any dessert platter. They’re also surprisingly budget-friendly, using simple, common ingredients that don’t break the bank. If you’re looking for something that feels special without all the fuss, these butterscotch shortbread bars are your answer. They’re a guaranteed crowd-pleaser and a recipe you’ll find yourself coming back to again and again.
How do I make Butterscotch Shortbread Bars?
Quick Overview
Making these butterscotch shortbread bars is surprisingly straightforward. You’ll start by creaming together butter and sugar until light and fluffy, then incorporate your dry ingredients to form a slightly crumbly dough. This dough is pressed into a baking pan, creating a delicious base. Once baked to a golden perfection, you’ll have these wonderfully tender, buttery bars bursting with butterscotch flavor. It’s a simple process that yields incredibly rewarding results, perfect for even novice bakers.
Ingredients
For the Main Batter:
2 cups all-purpose flour (I always use unbleached, it seems to give a better texture)
1 cup unsalted butter, softened (crucial for that smooth creaming process!)
3/4 cup packed light Brown Sugar (this is where our butterscotch magic starts!)
1 teaspoon vanilla extract (pure, if you can get it, makes a world of difference)
1/4 teaspoon salt (balances the sweetness beautifully)
For the Filling:
1/2 cup packed dark Brown Sugar (for a richer, deeper butterscotch note)
1/4 cup unsalted butter, melted
2 tablespoons milk (any kind works, whole milk gives a nice richness)
1 teaspoon vanilla extract
Pinch of salt
For the Glaze:
1 cup powdered sugar (sifted, for a smooth glaze)
2-3 tablespoons milk (start with 2, add more until you get the right consistency)
1/2 teaspoon vanilla extract
“New family favorite! This Butterscotch Goodness Easy Shortbread Bars was so flavorful and ridiculously easy. Crowd-pleaser for sure.”
Step-by-Step Instructions
Step 1: Preheat & Prep Pan
First things first, let’s get that oven ready. Preheat your oven to 350°F (175°C). Now, grab an 8×8 inch baking pan. You can grease it lightly, but I always prefer to line it with parchment paper, leaving some overhang on the sides. This makes lifting the bars out so much easier later on. Trust me, it’s a game-changer for cleanup!
Step 2: Mix Dry Ingredients
In a medium bowl, whisk together your flour, salt. Just give it a quick whisk to combine everything evenly. This simple step ensures your salt and flour are well distributed, so you don’t get pockets of saltiness. It’s not complicated, but it does help with the overall flavor balance.
Step 3: Mix Wet Ingredients
In a large bowl, cream together the softened butter and the light Brown Sugar. Use an electric mixer (a stand mixer or a hand mixer works great) on medium speed. Beat them together until the mixture is light, fluffy, and pale in color – this usually takes about 3-5 minutes. Then, beat in the vanilla extract. Make sure your butter is truly softened, not melted; it makes a huge difference in achieving that lovely, airy texture.
Step 4: Combine
Now, gradually add the dry ingredients to the wet ingredients. Mix on low speed until just combined. You don’t want to overmix this dough! It should start to come together and look a bit crumbly, but when you squeeze a bit in your hand, it should hold its shape. If it seems too dry and won’t hold together, add a teaspoon of milk at a time until it just comes together. Overmixing can lead to tough shortbread, and nobody wants that!
Step 5: Prepare Filling
While the dough is chilling (or just resting), let’s get the filling ready. In a small bowl, whisk together the dark Brown Sugar, melted butter, milk, vanilla extract, and a pinch of salt. You want this mixture to be smooth and pourable, like a thin caramel sauce. If it’s too thick, add another teaspoon of milk. This little swirl of extra flavor is what makes these bars extra special.
Step 6: Layer & Swirl
Press about two-thirds of the shortbread dough evenly into the bottom of your prepared baking pan. Don’t worry about making it perfectly smooth; a rustic press is fine. Now, pour the butterscotch filling evenly over the pressed dough. Take the remaining one-third of the dough and crumble it over the top of the filling. You can use your fingers to create little clumps or even dollop small pieces. For a pretty swirl effect, you can gently run a knife or a skewer through the dough and filling. Don’t go crazy with the swirling; just a few passes is enough to create a lovely marbled look.
Step 7: Bake
Pop the pan into your preheated oven. Bake for 25-30 minutes, or until the edges are golden brown and the top looks set. The center might still look a little soft, but it will firm up as it cools. Keep an eye on it, as ovens can vary! I usually start checking around the 25-minute mark.
Step 8: Cool & Glaze
Once baked, remove the pan from the oven and let it cool completely in the pan on a wire rack. This is important! Trying to cut them while warm will result in a crumbly mess. Once cooled, let’s make the glaze. In a small bowl, whisk together the powdered sugar, vanilla extract, and 2 tablespoons of milk. Add more milk, a teaspoon at a time, until you reach your desired drizzling consistency. It should be thick enough to coat but thin enough to drizzle easily. Drizzle the glaze over the cooled bars. You can use a spoon, a piping bag, or even just a fork for a rustic look.
“Made the Butterscotch Goodness Easy Shortbread Bars tonight and wow — perfect weeknight dinner. Will definitely make again!”
Step 9: Slice & Serve
Once the glaze has set slightly (this usually takes about 15-20 minutes), you can lift the bars out of the pan using the parchment paper overhang. Place them on a cutting board and slice them into squares or bars. I usually aim for about 16 bars. For the cleanest cuts, use a sharp knife and wipe it clean between slices if needed. These are delicious served at room temperature, but they’re also fantastic slightly chilled. Enjoy that perfect bite!
What to Serve It With
These butterscotch shortbread bars are truly a chameleon of the dessert world, fitting in perfectly wherever you need a little sweet magic. For a simple BREAKFAST treat, especially on a weekend, I love to pair a bar with a strong cup of coffee. The buttery sweetness cuts through the richness of the coffee so nicely. They’re not overly sweet for the morning, just a delightful little indulgence. For BRUNCH, they step up their game! Imagine them on a tiered stand alongside fresh fruit, quiches, and maybe some mini muffins. They add a touch of homemade charm and a sophisticated flavor profile without being too heavy. A glass of sparkling cider or a mimosa would be lovely with them. As a decadent DESSERT, these bars are absolute stars. They’re perfect after a hearty meal, especially when served with a scoop of good quality vanilla bean Ice Cream or a dollop of fresh whipped cream. The contrast in temperatures and textures is divine. And for COZY SNACKS, well, that’s where they truly shine for me. On a chilly evening, curled up with a good book and a mug of hot chocolate, a butterscotch shortbread bar is pure bliss. My kids beg for these when they get home from school, and they’re gone in a flash with a glass of cold milk!
Top Tips for Perfecting Your Butterscotch Shortbread Bars
I’ve made these butterscotch shortbread bars more times than I can count, and over the years, I’ve picked up a few tricks that really help ensure they turn out perfectly every single time. First, about the BUTTER: always use unsalted butter, and make sure it’s softened to room temperature but not melted. You want it spreadable but still holding its shape. This is key for getting that light and fluffy creamed butter and sugar mixture, which is the foundation of good shortbread. If your butter is too cold, it won’t cream properly, and if it’s too warm, your bars can end up greasy. When it comes to MIXING THE DOUGH, resist the urge to overmix! Once the flour is added, mix until *just* combined. A few streaks of flour are fine; they’ll disappear in the oven. Overmixing develops the gluten too much, leading to tough, chewy bars instead of tender, crumbly ones. For the FILLING, don’t be afraid to adjust the milk slightly. You want it to be pourable but not watery. It should create a beautiful swirl that bakes up with a slightly chewy, caramel-like texture. For the SWIRL effect, I’ve found that less is more. Just a few gentle passes with a knife or skewer is enough to create a pretty pattern without disrupting the layers too much. If you swirl too much, the distinct layers can get muddy. When it comes to BAKING, pay attention to your oven. Ovens can be quirky! I usually bake mine until the edges are a lovely golden brown and the center looks set. A toothpick inserted into the center should come out with moist crumbs attached, not wet batter. If your oven tends to bake hot, you might want to reduce the temperature by 10-15 degrees and bake for a few minutes longer. For the GLAZE, the consistency is everything. Start with the lower amount of milk and add more *slowly* until you get a drizzly consistency that’s not too thin. If you add too much milk and it’s too runny, you can always whisk in a little more powdered sugar to thicken it up. And one final tip: let them COOL COMPLETELY before slicing! This is probably the most important step for clean cuts. Trying to slice warm bars will lead to a crumbly disaster. Patience is a virtue here, and it will be rewarded!
Storing and Reheating Tips
These butterscotch shortbread bars are wonderfully forgiving when it comes to storage, which is another reason I love them so much. For ROOM TEMPERATURE storage, once they’ve cooled completely and the glaze has set, I usually cut them and store them in an airtight container. They’ll stay delicious for about 3-4 days this way. Just make sure the container is truly airtight to keep them from drying out or picking up any unwanted fridge smells if you store other things nearby. If you’ve glazed them, it’s best to let the glaze set for at least an hour or two before stacking or tightly packing them, to avoid smudging. If you’re not going to eat them within a few days, REFRIGERATOR STORAGE is a great option. Wrap them well (individually or in stacks) in plastic wrap, then place them in an airtight container or a freezer bag. They’ll keep well in the fridge for up to a week, maintaining their freshness and texture. When you want to serve them from the fridge, just let them sit at room temperature for about 15-20 minutes to soften slightly; they can be a bit firm straight out of the cold. For FREEZER INSTRUCTIONS, these bars freeze like a dream. After they’ve cooled and the glaze is set, wrap them tightly in plastic wrap, then in aluminum foil, or place them in a freezer-safe container. They can be frozen for up to 2-3 months. To thaw, simply transfer them from the freezer to the refrigerator overnight. This gradual thawing helps prevent condensation from making them soggy. Once thawed in the fridge, let them sit at room temperature for a bit before enjoying. For the glaze, I usually prefer to apply it *after* the bars have been baked and cooled, and then let the glaze set before any long-term storage. If I’m freezing un-glazed bars, I’ll thaw them and then glaze them just before serving for the freshest look and taste.
Frequently Asked Questions
Final Thoughts
So there you have it – my beloved butterscotch shortbread bars! I really hope you give these a try. They’re one of those recipes that just brings so much joy, both in the making and in the eating. The combination of that buttery, crumbly shortbread with the rich, toffee-like butterscotch is simply divine. They’re perfect for sharing, but I won’t judge if you keep them all to yourself – they’re that good! Whether you’re looking for a simple treat to brighten your day, a showstopper for a potluck, or just something comforting to bake, these bars deliver every single time. If you love this recipe, you might also enjoy my [Link to another relevant recipe, e.g., chewy oatmeal cookies or classic Chocolate Chip Cookies]. I can’t wait to hear what you think! Please leave a comment below and let me know how your butterscotch shortbread bars turned out. Did you add any fun variations? I love hearing your baking adventures! Happy baking, and enjoy every single delicious bite!
butterscotch shortbread bars
Ingredients
Main Ingredients
- 1 cup unsalted butter
- 1 cup powdered sugar
- 2 cups all purpose flour
- 0.5 teaspoon kosher salt
- 1 large egg
- 1 cup butterscotch morsels
Instructions
Preparation Steps
- In a small saucepan on medium-low heat, melt butter. Bring to a boil and allow to brown for 1-2 minutes. Remove from heat, allow to cool for a few minutes.
- In a large mixing bowl, add melted butter with powdered sugar, mix completely. Add flour and salt. Mix together (will be crumbly). Add in egg and butterscotch, mix until completely combined.
- Line a 15x10x1 baking sheet with parchment paper. Place dough on baking sheet and press (with palms of hand) to about 0.25 inch thick. Shape into a rectangle (doesn't have to touch side of pan). Mine was about 12x10.
- Bake in a 350 degree oven for 20-25 minutes, until lightly browned. Remove from oven and cool about 5 minutes. Using a sharp knife, make slices into cookies about 3-inch x 1-inch. Don't separate, allow to cool completely.
- When cooled, separate cookie bars (using knife if necessary). Store in air tight container for one week. ENJOY!


