I still remember the first bite of a Biscoff cheesecake I tasted after a long day. The cookies’ caramel-spiced aroma wrapped around the creamy filling, and the crust was just crunchy enough to provide a perfect bite. Since then, this little dessert has become my reliable friend—the one I pull out when life feels busy, when friends pop by unannounced, or when I want to treat my family without pulling out a full-bore cake project. This Biscoff cheesecake is the cozy answer to “what should we have for dessert tonight?” It’s not fussy, it’s deeply comforting, and yes, it comes together with a smile. If you’re used to classic cheesecakes, you’ll notice the cookies bring a warm, holiday-meets-coffee-shop vibe, and the filling stays supremely creamy. It’s a lot like a familiar favorite with a gentle, caramel-kissed twist—think of it as cheesecake with a hug from a cookie jar. I always do a quick butter-to-crust pinch of salt, and that tiny balance makes all the difference in the end. This one’s a lifesaver on busy nights, and my kids actually ask for seconds every single time.
Thank you for reading this post, don't forget to subscribe!What is Biscoff cheesecake?
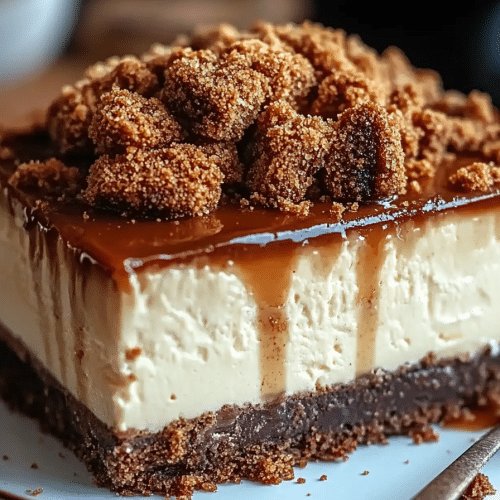
Think of Biscoff cheesecake as a creamy, tangy cheesecake that wears a cozy, cookie-based crust made from crushed speculoos cookies—the Biscoff cookies you find in the European aisles and in specialty shops. It’s essentially a classic cheesecake with a flavor upgrade: the crust brings toasty spice and caramel notes, while the filling stays luxuriously smooth. The name comes from the star ingredient, Biscoff cookies, which are lightly spiced with cinnamon and ginger. When you blend those cookies into a crust and fold a touch of Biscoff spread into the topping or glaze, you get a dessert that’s familiar enough to please a crowd, but special enough to feel like a little celebration. It’s the kind of dessert that travels well to potlucks, but it’s rich enough to stand on its own as a cozy weeknight treat. If you’ve got a sweet tooth that leans toward caramel, you’ll be hooked from the first bite.

Why you’ll love this recipe?
What I love most about this Biscoff cheesecake is how approachable it feels. It’s the kind of dessert you can assemble with basic pantry staples, yet the results look and taste like you spent hours artistry-ing in the kitchen. The flavor is a crowd-pleaser: the crust brings that warm speculoos vibe, the filling arrives silky and creamy with a hint of tang, and the glaze adds a glossy, irresistible finish. It’s also wonderfully versatile: you can serve it plain for a purist experience, or branch out with toppings and swirls that echo the cookie butter theme. For budget-conscious cooks, this recipe stretches a few simple ingredients into something wow-worthy. If you’ve got a sweet tooth that craves something a little different from a standard cheesecake, this is the one to reach for. The way the cookie crust crunch contrasts with the creamy center is something I dream about during busy weeks—the dessert that forgives a busy schedule and forgives a few imperfect swirls on top. I’ve tested this with almond milk in the filling (in place of dairy or mixed with dairy) and it actually made the texture even creamier—trust me on this one for dairy-free friends or guests. This version is also perfect when you’re craving something sweet at 10pm but don’t want to bake a whole cake.
- Flavor: The caramel-spice of Biscoff shines through the creamy cheesecake, offering a sophisticated, comforting profile.
- Simplicity: A straightforward crust, a smooth filling, and a glossy glaze—no special equipment required.
- Cost-efficiency: Pantry staples come together to deliver a dessert that feels fancy without breaking the budget.
- Versatility: Top with berries, a dollop of whipped cream, or extra cookie butter drizzle for different occasions.
How to Make Biscoff cheesecake
Quick Overview
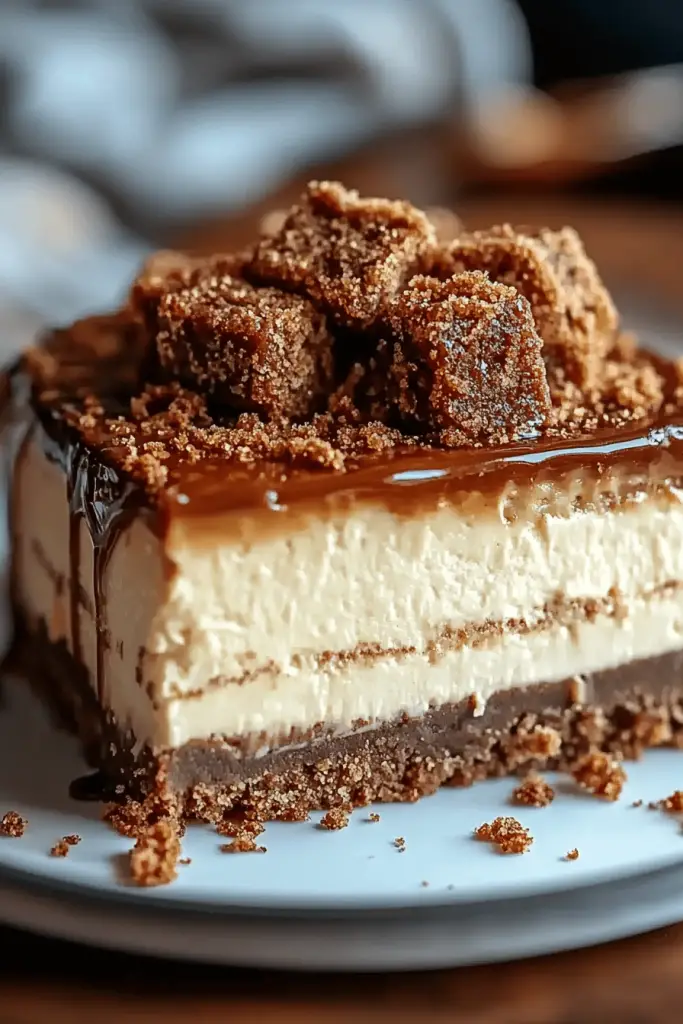
This Biscoff cheesecake comes together in three simple layers: a crisp, spiced crust, a luxuriously creamy filling, and a glossy, coffee-kieled glaze that echoes the cookies’ warmth. It’s forgiving enough for a weekday bake yet impressive enough for a dinner party. The crust is pressed into a 9-inch springform pan, the filling is whipped to airiness, and the glaze ties everything together with a smooth finish. The key is cooling time—let it set properly in the fridge, or you’ll miss that clean slice you’re craving. If you’re short on time, you can speed things up by chilling the crust while you mix the filling, but the end result will still be worth the wait.
Ingredients
For the Crust (Biscoff crust):
– 2 cups (about 200 g) finely crushed Biscoff cookies
– 5 tablespoons unsalted butter, melted
– Pinch of salt
For the Filling:
– 24 oz (680 g) Cream Cheese, softened
– 3/4 cup (150 g) granulated sugar
– 3 large eggs plus 1 extra yolk (for extra creaminess)
– 2 teaspoons vanilla extract
– 1/2 cup sour cream
– 1/4 cup heavy cream
For the Glaze:
– 3 tablespoons Biscoff spread, warmed
– 2 tablespoons heavy cream
– Optional: a pinch of Sea Salt
Step-by-Step Instructions
Step 1: Preheat & Prep Pan
Preheat your oven to 325°F (163°C). Lightly butter a 9-inch springform pan and line the bottom with parchment. This helps the crust release cleanly and gives you neat slices. If your springform leaks a bit, wrap the outside in foil to prevent any water from seeping in during a water bath—yep, we’re going classic cheesecake style here.
Step 2: Mix Dry Ingredients
In a small bowl, whisk the crust ingredients: crushed Biscoff cookies and a pinch of salt. The texture should resemble wet sand. The salt helps balance the cookies’ natural sweetness and brings out that warm spice aroma you want in every bite.
Step 3: Mix Wet Ingredients
Beat the Cream Cheese until smooth and creamy. Scrape down the sides, then beat in the sugar until fully incorporated and light. Add the eggs and yolk one at a time, then mix in the vanilla, sour cream, and heavy cream. The goal is a satin-smooth mixture with no lumps—this is where your cheesecake gets its signature melt-in-your-mouth texture.
Step 4: Combine
Fold a small amount of the dry crust mixture into the filling if you peek at it and think it needs more structure. But generally, you’ll pour the filling over the prepared crust in the pan. Don’t overmix here; a few tiny air pockets are fine and give a lighter texture.
Step 5: Prepare Filling
Pour the filling onto the crust and smooth the top with a spatula. If you want extra flavor, you can add a few ribbons of Biscoff spread swirled into the middle using a skewer before baking.
Step 6: Layer & Swirl
Swirl in a little more Biscoff spread if you love the color and taste payoff. A gentle swirl with a toothpick can create a pretty marbled look that hints at the cookies’ spice without overpowering the filling.
“I don’t know if I’ve ever eaten a better Biscoff cheesecake. The rub alone is wonderful, but the sauce??? Over the top!”
Step 7: Bake
Bake the cheesecake in a water bath (place the pan in a larger baking dish with about 1 inch of hot water) for 60-70 minutes, or until the center barely wobbles. Do not overbake—the residual heat will continue to set the cheesecake as it cools. You’ll know it’s ready when the edges are set and the center has a slight jiggle.
Step 8: Cool & Glaze
Turn off the oven and crack the door slightly to let the cheesecake rest for about an hour. Then remove from the water bath and chill in the fridge for at least 4 hours or overnight. For the glaze, whisk warmed Biscoff spread with heavy cream until smooth, then drizzle over the chilled cheesecake. A light pinch of sea salt on top is a lovely finishing touch if you like a little contrast.
Step 9: Slice & Serve
To slice cleanly, wipe the knife between cuts and wipe away any crumbs. Let the slices sit at room temperature for 10-15 minutes before serving to let the filling loosen just enough for a perfect, creamy bite. Garnish with a dollop of Whipped Cream, a few cookie crumbs, or a tiny drizzle of extra glaze for an elegant finish.
What to Serve It With
This Biscoff cheesecake shines on its own, but it’s equally at home with a few complementary extras that elevate the moment.
For Breakfast: A warm coffee or a vanilla latte, plus a small slice with a spoonful of yogurt and fresh berries. The contrast between tangy dairy and the cookie-spice sweetness feels like a comforting morning hug.
For Brunch: Layered presentation on a cake stand with berries, whipped cream, and a light dusting of cinnamon. A glass of cold-brew or an orange-blossom punch makes it feel extra special without being over-the-top.
As Dessert: Serve with a caramel sauce drizzle, roasted nuts for crunch, and a scoop of lightly whipped cream. The glaze from the top catches the light and makes the whole plate look indulgent.
For Cozy Snacks: Pair with a mug of strong coffee or a chai latte. A small wedge with a bite of dark chocolate on the side is a perfect late-evening treat that won’t derail a quiet night.
In our house, a plate of Biscoff cheesecake often signals a family movie night. I’ve found that cold slices retain the crisp crust better, while a slightly warmer slice feels incredibly lush—the perfect balance for different kitchens and schedules. My sister swears by a tiny squeeze of lemon zest in the glaze to brighten the flavors, and I’ve secretly started adding a pinch of flaky salt to the crust to amplify the caramel notes. These little tweaks are what keep this recipe alive in my kitchen—every batch feels a little like us, in the best possible way.
Top Tips for Perfecting Your Biscoff cheesecake
Here are a few tricks I’ve learned after making this countless times. They’re simple, but they make a big difference.
Crust Prep: Use fine cookie crumbs for a smoother crust. If your crumbs feel a little dry, spoon in a touch more melted butter—you want it to cling together when pressed, not crumble away. A pinch of salt helps balance the sweetness and the spice of the cookies.
Mixing Advice: Beat the cream cheese on medium speed until fluffy, then gradually add sugar. Overmixing after the eggs is a no-go, or you risk a crackly top and a denser center. If you see small air bubbles, tap the filled pan gently on the counter to release them before baking.
Swirl Customization: For presentation, alternate dollops of Biscoff spread into the filling and swirl with a toothpick in a spiral pattern. You can also drop a few spoonfuls of cookie butter into the center for an ultra-decadent appearance.
Ingredient Swaps: If you need a lighter filling, use part-skim cream cheese with a touch more sour cream to maintain the tang. For dairy-free friends, use full-fat coconut cream and a dairy-free cream cheese substitute; the texture stays creamy if you chill it longer.
Baking Tips: If your oven runs hot or cold, consider using an oven thermometer to calibrate. A water bath helps prevent cracks and keeps the center moist. If the top starts to brown too quickly, tent with foil for the last 15 minutes.
“The Biscoff cheesecake turned out amazing. My kids asked for seconds. Saving this one!”
Glaze Variations: A simple glaze is delicious, but you can swap in a dark chocolate drizzle or a caramel-bourbon glaze for a grown-up twist. If you want a glossy sheen without extra sugar, brush a thin layer of warmed cookie butter on top while the cheesecake is still warm and let it set as it cools.
My best lessons come from small missteps—like realizing I left the cheesecake in the oven a touch too long once, and then the center cracked after cooling. I learned to trust the jiggle test: if it wobbles just a bit in the middle when you shake the pan, it will set perfectly as it cools. And yes, I’ve burned the crust a few times while multitasking, so I now pre-measure everything and set timers for each step. Little changes, big results—that’s the magic of this Biscoff cheesecake.
Storing and Reheating Tips
Storing this cheesecake properly keeps that creamy texture and the cookie crumb crust intact. Here’s how I do it so the slice tastes like the first bite, even days later.
Room Temperature: Cheesecake is best stored chilled. If you plan to serve soon, you can leave individual slices at room temp for up to 30 minutes, but it’s ideal to keep the whole cake refrigerated until just before serving.
Refrigerator Storage: Cover the whole springform pan with plastic wrap or transfer slices to an airtight container. It will keep for up to 4 days with minimal loss of texture.
Freezer Instructions: You can freeze baked cheesecake for up to 2-3 months. Wrap slices tightly in plastic wrap, then slide into a freezer-safe bag or container. Thaw overnight in the fridge for best texture, then bring to room temperature for about 20 minutes before serving to regain that creamy bite.
Glaze Timing Advice: If you’re freezing, consider keeping the glaze separate and applying just before serving. The glaze holds up well when the cake is chilled, but it’s nicer to brush it on fresh if you’re serving soon after slicing.
Quality indicators: a crack-free surface, a filling that holds its shape when sliced, and that signature silky texture that melts on your tongue. If your crust stays too crumbly after refrigerating, you probably pressed it too hard in the pan—that’s easy to fix next time by gently pressing more firmly with your fingers, then chilling for a bit before pouring in the filling.
Frequently Asked Questions
Final Thoughts
There’s something about the ritual of making this Biscoff cheesecake that feels like a warm conversation with a dear friend. You grind cookies, you whisk until the filling is velvety, you drizzle the glaze and see it gleam, and then you wait—because patience rewards you with a slice that’s deeply satisfying. The aroma alone—the toasty spice of the cookies, the tang of cream cheese, the soft sweetness of the glaze—is a memory maker in our kitchen. If you’re new to cheesecake, this is a gentler introduction: no dramatic water bath drama, no nerve-wracking cracking, just a smooth, creamy center and a cookie-kissed crust that steals the show. If you’ve got leftovers, you’ll find the flavor only deepens as it sits, which makes this perfect for a weekend treat or a make-ahead dessert. I hope you’ll try it, and I’d love to hear about your twists—more Biscoff spread swirls, a touch of espresso in the glaze, or a berry compote to cut through the richness. Happy baking! And please, drop a comment, rate the recipe, and share your own variations. I can’t wait to hear how yours turns out!
Biscoff cheesecake
Ingredients
Crust
- 10 ounces Biscoff cookies (about 1.5 packages), finely crushed
- 0.5 cup Unsalted butter melted
Filling
- 24 ounces Cream cheese full-fat, softened
- 0.75 cup Granulated sugar
- 0.5 cup Biscoff cookie butter smooth, slightly melted
- 1.5 cups Heavy cream cold
- 1 teaspoon Vanilla extract
Topping & Garnish
- 0.25 cup Biscoff cookie butter melted for drizzle
- 2 tablespoons Crushed Biscoff cookies for garnish
Instructions
Preparation Steps
- Prepare the Crust: In a medium bowl, combine the finely crushed Biscoff cookies and melted butter. Press the mixture firmly into the bottom of a 9-inch springform pan. Chill in the refrigerator for at least 15 minutes while you prepare the filling.
- Make the Filling: In a large mixing bowl, beat the softened cream cheese and granulated sugar with an electric mixer until smooth and creamy, about 2-3 minutes. Scrape down the sides of the bowl as needed.
- Add the Biscoff: Stir in the slightly melted Biscoff cookie butter and vanilla extract into the cream cheese mixture. Beat until well combined and smooth.
- Whip the Cream: In a separate cold bowl, using clean beaters, whip the cold heavy cream until stiff peaks form. Be careful not to overbeat.
- Combine & Assemble: Gently fold the whipped cream into the cream cheese mixture until no streaks of cream remain. Pour the cheesecake filling over the chilled cookie crust in the springform pan and spread evenly with a spatula.
- Chill: Refrigerate the cheesecake for at least 4-6 hours, or preferably overnight, until it is firm and set.
- Decorate and Serve: Before serving, gently warm the additional Biscoff cookie butter until it's pourable. Drizzle it over the top of the cheesecake. Sprinkle with extra crushed Biscoff cookies for garnish. Carefully remove the cheesecake from the springform pan and serve chilled.


